manuals.online logo
Brands
  1. Home
  2. •
  3. Brands
  4. •
  5. Little Tikes
  6. •
  7. Play Set & Playground Equipment
  8. •
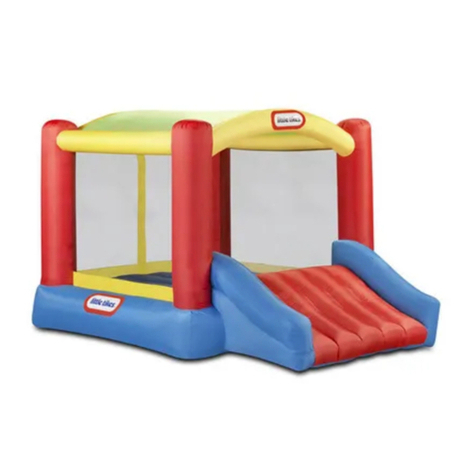
  9. Little Tikes Super Slam 'n Dunk User guide

Little Tikes Super Slam 'n Dunk User guide

645655C
Super Slam ‘n Dunk™
Instructions for Installation and Operation
Ages: 3-8 years
Do not use extension cords with this product. Outdoor use only.
Read all instructions before assembling this inflatable device. Keep instructions for future use.
WARNING: FAILURE TO FOLLOW THESE INSTRUCTIONS
COULD RESULT IN SERIOUS INJURY OR DEATH.
WARNING
ELECTROCUTION RISK:
- KEEP ALL ELECTRICAL LINES, RADIOS, SPEAKERS AND OTHER ELECTRICAL DEVICES AWAY
FROM THE CONSTANT AIR INFLATABLE.
- DO NOT PLACE THE CONSTANT AIR INFLATABLE NEAR OR UNDER OVERHEAD ELECTRICAL LINES.
CAUTION - ELECTRICALLY OPERATED PRODUCT.
OPERATION OF BLOWER FAN UNIT NOT RECOMMENDED FOR
CHILDREN UNDER 8 YEARS OF AGE. AS WITH ALL ELECTRONIC
PRODUCTS, PRECAUTIONS SHOULD BE OBSERVED DURING HANDLING
AND USE TO PREVENT ELECTRIC SHOCK.
Please keep this manual as it contains important information.
MGA Entertainment UK Ltd
50 Presley Way
Crownhill
Milton Keynes
MK8 0ES
Bucks, UK
0800 521 558
www.littletikes.com
www.littletikes.co.uk
© The Little Tikes Company,
an MGA Entertainment company.
LITTLE TIKES® is a trademark of Little Tikes in
the U.S. and other countries. All logos, names,
characters, likenesses, images, slogans, and
packaging appearance are the property of
Little Tikes.
Little Tikes Consumer Service
2180 Barlow Road Hudson, Ohio 44236 U.S.A.
1-800-321-0183
Printed in China
0817-0-C
12
‘Let’s care for the environment!’
The wheelie bin symbol indicates that the product must not be disposed of with other household waste. Please use designated collection points or
recycling facilities when disposing of the item. Do not treat old batteries as household waste. Take them to a designated recycling facility.
Visit our website at
www.littletikes.com
to register your product and
to enter our sweepstakes.
(No purchase necessary)
Limited Warranty
The Little Tikes Company makes fun, high quality toys. We warrant to the original purchaser that this product is free of defects in materials or workmanship
for one year * from the date of purchase (dated sales receipt is required for proof of purchase). At the sole election of The Little Tikes Company, the only
remedies available under this warranty will be either replacement of the defective part or replacement of the product. This warranty is valid only if the
product has been assembled and maintained per the instructions. This warranty does not cover abuse, accident, cosmetic issues such as fading or
scratches from normal wear, or any other cause not arising from defects in material and workmanship.
U.S.A and Canada: For warranty service or replacement part information, please visit our website at www.littletikes.com, call 1-800-321-0183 or write
to: Consumer Service, The Little Tikes Company, 2180 Barlow Road, Hudson OH 44236, U.S.A. Some replacement parts may be available for purchase
after warranty expires—contact us for details.
Wet and Dry Inflatable Bouncers Warranty: We warrant to the original purchaser that the fabric in this product is free of defects in materials or
workmanship for 90 days from the date of purchase, and the blower is free of defects in material or workmanship for one year from the date of purchase
(dated sales receipt is required for proof of purchase) Outside U.S.A and Canada: Contact place of purchase for warranty service.
This warranty gives you specific legal rights, and you may also have other rights, which vary from state to state. Some states do not allow the exclusion or
limitation of incidental or consequential damages, so the above limitation or exclusion may not apply to you. *The warranty period is three months for
daycare or commercial purchasers.
1
ENG
Contents
ATTENTION: Please DO NOT return to the store. If you encounter problems, or have
questions, please call our qualied customer service technicians at 1-800-321-0183.
112
Instructions for
Bouncer Maintenance
Instructions for
Blower Maintenance
Disposal
• As an outdoor product, the bouncer is subject to wear and
deterioration. Inspect for signs of fabric failure; weak or torn
surfaces must be repaired promptly.
• To keep the product clean: wipe the bouncer or blower using a
dry cloth or a cloth dampened with a neutral, non-ammable,
non-toxic cleaning and sanitizing solution or pure water.
• Product should never be stored wet. Allow to dry before rolling up.
• Disassemble and dispose of the equipment in such a manner
that no hazardous conditions at the time equipment is
discarded.
• Blower should be returned to a collection center capable of
processing electrical/electronic waste.
• Blower must be unplugged before servicing.
• Product should be periodically examined for potentially unsafe
conditions such as damaged cord, plug, housing, or parts, and
that in the event such damage is found, the product should not
be used until properly repaired. If these checks are not carried
out, the product could overturn or otherwise become a hazard.
• The blower does not require any lubrication and has no user
serviceable parts. Do not attempt to service the blower.
• Do not immerse the fan in water. To clean, wipe with a damp
cloth.
• Regularly check the intake and output openings and keep free of
dirt, leaves, etc.
• When not in use, store the blower indoors in a dry place.
• Store the blower upright on a stable surface.
• Loosely coil the cord and place it beside the blower.
• When in use, do not place the cord across trac areas, water or
damp areas.
• The blower is a high volume blower, and is capable of moving
large volumes of air very quickly. Place the blower in an area
where it will not draw in dirt or leaves.
• Do not operate any fan with a damaged cord or plug. Discard fan
or return to an authorized service facility for examination and/or
repair.
• Do not run cord under carpeting. Do not cover cord with throw
rugs, runners, or similar coverings. Do not route cord under
furniture or appliances. Arrange cord away from trac area and
where it will not be tripped over.
• The product should be periodically examined for potentially unsafe
conditions such as: damaged cord, plug, housing, or parts, and that
in the event such damage is found, the product should not be used
until properly repaired. Never leave the fan outside in the rain or
elements when not in use. Minor repairs can be made using the
enclosed repair patches.
(A) 1 Super Slam ’n Dunk™
(B) 10 bouncer stakes
(C) 1 ball
(F) 1 basketball
(D) 1 air plug removal tool (E) 1 measuring ruler
(G) 1 blower with GFCI plug
(H) 2 blower stakes
(I) 1 deation cone
(K) 4 repair patches
(L) 1 storage bag
(J ) 1 hand pump
10 3
Safety Warnings: ELECTRICAL BLOWER
GROUNDING METHODS
Grounding
pin
DANGER
WARNING
Electrocution Hazard- DO NOT USE
EXTENSION CORDS WITH THIS PRODUCT.
INSTRUCTIONS FOR BLOWER CLEANING AND STORAGE
Do not immerse the blower in water. Unplug the blower before cleaning. To clean: wipe with a damp cloth. The blower does not require
any lubrication and has no user serviceable parts. Do not attempt to service the blower. When not in use, store the blower indoors in a dry
place.
INSTRUCTIONS FOR BLOWER INSTALLATION
NOTE: Set up as close to power source as possible. The product
should be periodically examined for potentially unsafe conditions
such as: damaged cord, plug, housing or parts, and that in the
event such damage is found, the product should not be used until
properly repaired. Never leave the blower outside in the rain or
exposed to the elements when not in use. When in use, do not
place the cord across trac areas, water or damp areas. The blower
should be placed on a stable surface. The power cord of the blower
is equipped with a Ground Faulty Circuit Interrupter (GFCI) plug.
1) Make sure that the blower switch is in the “OFF” position. Plug
the blower into a properly grounded 110-120V GFCI outlet.
2) If the GFCI has been tripped. press the“RESET”button to restore
power to the blower.
3) Set the power switch of the blower to“ON”to inate. After use,
turn the power to“OFF”.
4) To disconnect, have an adult grip it tightly and pull the plug
from the wall outlet.
CAUTION: The blower is a high volume blower, and is capable of moving lots of air very quickly.
Place the blower in an area where it will not suck in dirt or leaves. Keep away from water and trac.
Keep children away from the blower. Only the blower supplied should be used for ination.
MODEL: 590120030 (LT-1)
BLOWER SPECIFICATIONS:
115V (AC), 60 HZ, 2.8A, 322W
SPECIFICATIONS MAY CHANGE WITHOUT NOTICE.
CAUTION: ELECTRICALLY
OPERATED PRODUCT
DANGER - TO PREVENT ELECTRIC SHOCK, DO NOT IMMERSE
IN WATER. WIPE CLEAN WITH A DAMP CLOTH.
WARNING: FAILURE TO FOLLOW THESE INSTRUCTIONS COULD
RESULT IN SERIOUS INJURY OR DEATH. ADULT SET-UP AND
SUPERVISION REQUIRED.
• Cautionary statements which should be read before beginning
assembly.
• ADULT SET-UP AND SUPERVISION REQUIRED.
• Use only with Ground Fault Circuit Interrupt (GFCI) receptacle.
• This blower is for residential use only. It is not intended to be used in
commercial or industrial settings.
• Never insert ngers, pencils or any other object through the grill at
ANY time.
• Do not operate blower with a damaged cord or plug, after the
appliance malfunctions or has been dropped or damaged in any
manner.
• Do not operate in the presence of explosive and/or ammable
fumes.
• Never connect the blower to any solid - state speed control device.
• To reduce the risk of re or electric shock, do not use this blower
with any solid-state speed control device.
• Always unplug the blower before servicing.
• Outdoor use only.
WARNING: Failure to follow these instructions
could result in serious injury or death.
This blower is not a toy. Use under the direct supervision of a competent adult. Keep away from children.
READ AND SAVE THESE INSTRUCTIONS.
USE ONLY ON GFCI PROTECTED RECEPTACLES
GROUNDING INSTRUCTIONS FOR ALL GROUNDED, CORD-CONNECTED PRODUCTS
This product should be grounded. In the event of an electrical short circuit, grounding reduces the risk of electric shock
by providing an escape wire for the electrical circuit. This product is equipped with a cord having a grounding wire with
an appropriate grounding plug. DANGER - Improper installation of the grounding plug can result in a risk of electric
shock. If repair or replacement of the cord or plug is necessary, do not connect the grounding wire to either at blade
terminal. The wire with insulation having an outer surface that is green, with or without yellow stripes, is the grounding
wire. Check with a qualied electrician or serviceman if the grounding instructions are not completely understood, or if in
doubt as to whether the product is properly grounded. Do not modify the plug provided; if it will not t the outlet, have
the proper outlet installed by a qualied electrician. For a grounded, cord-connected product, rated less than 15 amperes
and intended for use on a nominal 110-120 volt supply circuit, these instructions should be followed. This product is for
use on a nominal 110-120 volt supply circuit, and has a grounding plug that looks like the plug illustrated in sketch A.
Temporary adapters should not be used. Do not use product until a properly grounded outlet (sketch A) can be installed
by a qualied electrician.
CAUTION
WARNING: Repair patched must be applied by an adult only. KEEP OUT OF REACH OF CHILDREN.
REPAIR PATCH INSTRUCTION
1. Deate the item, clean the area and allow to dry thoroughly.
2. Cut a portion of the patch to the size needed and round the corners. (See Fig. 1 & 2).
3. Remove the adhesive backing from the patch material, position the patch over the damaged area and smooth out any bubbles.
4. Allow to sit for 30 minutes before re-inating.
Repair Patch Instructions
WARNING: NOT A TOY. ADULT USE ONLY.
Repair Patch. Keep away from children.
1 2
incorrect
correct
or
Deflation & Storage
6
5
34
Roll tightly. Wrap tubes
around inatable.
Fold in thirds. Roll up.
4 9
Deflation & Storage
Place DEFLATE tube over cone. Wrap drawstring around the cone
and end of blower once, and tie tightly in place.
TURN BLOWER ON TO DEFLATE.
FOLDING THE INFLATABLE
HINT: It is helpful to smooth and atten inatable as you fold.
Safety Warnings: FAILURE TO FOLLOW THESE INSTRUCTIONS COULD RESULT IN SERIOUS INJURY OR DEATH.
Safety Warnings: SET UP
No sharp objects. No shoes, no glasses.
5 Ft.
152 cm
Maximum individual
height: 5feet (152 cm)
Age
3-8
years
Total weight limit:
120 lbs. (54 kg.)
120lbs.
(54 kg.)
No ipping.
Maximum number
of children: 1
No wrestling. No hands or feet on net. Do not leave
out in rain.
Do not use in
windy conditions.
Must be anchored
using stakes.
Do not allow children to
touch fan or electrical cord.
Adult supervision
required. Donotleave
childrenunattended.
• Constant, competent adult supervision of children and other young
users is required at all times in front of the device where all parts of
play areas can be seen.
• Keep the area around the product clean, and clear of objects, to prevent
slips and falls.
• Do not allow children to play in the product until it is fully inated.
• The Critical fall height of inatable device is 24 inches (61 cm).
• This is not an aquatic toy. It is not to be used in water.
• Instruct children on proper use of this product:
- Children should not wear loose or baggy clothing, scarves, hoods or
clothing with drawstrings or long cords while playing in this product.
- Children must remove helmets, loose clothing, scarves, headgear, shoes
and glasses, as well as any sharp or hard objects from their pockets, as
they may puncture the bounding surface.
- Toys and other objects should never be allowed inside the bouncer.
- Instruct children not to attach items to the product that are not
specically designed for use with the equipment, such as but not limited
to, jump ropes, clothesline, pet leashes, cables and chains as they may
cause a strangulation hazard.
- Keep pets away from product.
- Children should bounce away from others and stay away from openings
and side walls.
- Children should not jump onto or o the product.
• Do not allow users to climb or hang on containment walls.
• Do not allow users to do somersaults or rough play.
• Do not allow food, drink or gum inside unit.
- Total weight of children must not exceed 120 lbs. (54 kg). No more
than 1 child should play on the Super Slam‘n Dunk™ Bouncer at the
same time.
- Do not allow children to play together who are unevenly matched in
weight and height.
- Children must not slide down head rst on their stomach.
• Before and during use, check for air loss. Check blower is properly
connected.
• Always check the product and all its anchorage points before and
during use, and to re-secure as appropriate.
• If applicable, remove water and debris from pocket steps after each play
cycle.
• After ination, the blower should run continuously while children are
playing.
• Prior to deating, remove all children.
• To be used on soft ground only, the impact absorbing material (eg.
Rubber mulch, engineered wood ber (EWF) etc) shall be at least 2 m
(6.6 ft) from opening in all directions away from the inatable device.
• Users must be discouraged from attempting any unauthorized
modication.
• The storage bag, deate cone, blower, stakes and repair patches
are not toys. KEEP AWAY FROM CHILDREN.
ADULT SUPERVISION AND SET UP REQUIRED. This product should be
inated or deated only by a competent adult. Follow all instructions
provided.
WARNING! Falls onto hard surfaces can result in head or other serious
injuries. Never place on concrete, asphalt, wood, packed earth, grass
or other hard surfaces. Carpet over oors may not prevent injury.
• WARNING! Only for domestic use. Intended for outdoor domestic family use
only. Not for use in public areas or as a rental.
• Product is heavy. Use caution when lifting.
• Product should never be dragged across concrete, pavement or other rough
surfaces.
• WARNING! Keep away from re. Keep fabric clear of all ame and ignition
sources.
• Do not set up in windy or rainy conditions: sudden gust of wind may lift the
product o of the ground.
• Product can be installed in any orientation in relation to the sun, since there
are no metal components or surfaces that can absorb excessive solar
radiation.
• Set-up in outdoor location only that meets the following criteria:
- Place on level ground and rm grass or soil to allow proper use of stakes.
- Placing on slanted or uneven surfaces may cause the product to tip.
- Stakes should be placed at an angle for better anchorage, should be driven
under the ground to prevent tripping.
- Minimum clearance zones 6.6 ft. (2 m) in any direction: Place at least
other objects. Objects to be avoided include but are not limited to
fences, buildings, trees. overhead branches, laundry lines, electrical
wires, walls, or bodies or sources of water.
- Make sure the area around the product is secure by adding safety
barriers, if necessary, to keep young children and pets from gaining
access.
- Electrical cord must not be passed under the air lled devices
(inatable bouncer) and interfere with its operation.
• The bouncer uses a main powered blower (air pump) to maintain
pressure, only to be used by an adult.
• Only the blower supplied should be used for ination.
• Do not use extension cords with this product. Set up as close to power
sources as possible. The blower should be securely anchored to the
ground before use.
• CAUTION: the blower is capable of moving large volumes of air very
quickly. Place the blower in an area where it will not draw in dirt or
leaves. Keep blower and power cord away from children, water and
trac.
• ATTENTION: Blower should remain on and continuously inate bouncer
during use. Airow through seams is normal. Do not try to seal or repair
seams.
• Do not use the product if wind speed exceeds 20 mph.
• Keep power cord away from water.
Turn o the blower.
Untie
drawstring
around
short tube.
Unstrap long tube and remove from blower.
3
Fit DEFLATE cone onto
blower as shown.
Remove air plug. DEFLATE ball.
Replace air plug into ball for storage.
21
4
Fold over slide. Fold in half.
1 2
8 5
Minimum Clearance Zones
Set-up: PLACE BLOWER ON LEVEL, FIRM GROUND AWAY FROM WATER.
MINIMUM CLEARANCE ZONES
INFLATABLE SIZE:
6.6 ft. (2 m)
Make sure that there is a 6.6 feet (2 m) obstacle-free zone
around the product, including the slide and overhead.
6.0W x 8.2D x 7.0H feet (1.82 x 2.48 x 2.1 m)
6.6 ft. (2 m)
7 ft.
(2.1 m)
6.6 ft. (2 m)
8.2 ft.
(2.48 m)
6.6 ft. (2 m)
6.0 ft. (1.82 m)
6.6 ft.
(2 m)
6.6 ft.
(2 m)
1 2
Be sure INFLATE tube is not twisted during ination.
CAUTION: Heed all signs and warning labels on the blower motor.
BLOWER CAUTIONS:
• Do not open or try to service the blower. If blower needs servicing, take it to a
reputable dealer.
• Clearly mark the path of the power cord to avoid tripping and/or damage by yard
equipment such as lawn mowers, etc.
• Do not leave blower unattended.
• Do not allow blower to be used or played with by children.
• Do cover the air intakes when blower is being used and do not insert small objects
into any part of the blower.
• WARNING - Electrical Hazard - DO NOT USE EXTENSION CORDS WITH THIS PRODUCT.
• Disconnect the blower from the power source when moving the slide.
• WARNING - To reduce the risk of re or electric shock, do not use this blower with any
solid - state speed control device.
CAUTION CAUTION
electrical hazard Do not touch
Inflation & Staking
2
3
Switch power ON. If blower does not operate
when switched on, press the reset button on the
GFCI adapter.
Blower should remain on and
continuously inate bouncer during use.
Airow through seams is normal. Do not
try to seal or repair seams.
6.6 ft. (2 m)
6.6 ft.
(2 m)
6.6 ft. (2 m)
6.6 ft. (2 m)
6.6 ft.
(2 m)6.6 ft.
(2 m)
8
1
2
34
NOTE: Dispose of tissue paper packed
inside bouncer after ination.
1
34
9
10
5
Secure the blower to
the ground with the (2)
stakes (H) provided.
6
7
Secure the bouncer to the ground with the (10) stakes (B) provided.
6 7
Set-upSet-up - ball inflation
Spread out inatable with underside facing upward.
Using the air plug removal tool (D)
remove the air plug from the ball.
5
1
T E S T
RESET
GFCI
only
Test the blower AC adapter:
1. Plug GFCI into receptacle.
2. Press reset button.
3. Press test button.
4. Press reset button to use product.
Do not use if the button fails fan.
WARNING:
If the blower remains ON when the “test”
button is pushed, the unit is NOT working
properly.
DO NOT USE THE UNIT. Take the unit to a
certied electrician immediately.
6
Set-up
5
Set-up - blower
6.6 ft. (2 m)
6.6 ft. (2 m)
6.6 ft.
(2 m)6.6 ft.
(2 m)
6.6 ft. (2 m)
6.6 ft.
(2 m)
Place long tube over blower.
Wrap strap around blower and through
each loop located on each side of tube
(as shown).
Thread strap through buckle and pull
tight. Secure velcro strap around
blower.
Tightly tie o the short tube.
Loop
Loop
Locate long tube Locate short tube
Re-measure clearance zone
prior to ination.
34
2
Insert ball into bouncer opening located
on the underside of the inatable.
Adjust so air hole faces opening.
2
3
Insert hand pump into air hole and inate.
Inate basketball. Push in plug.
4
To check for full ination; use the ruler (E)
(included), align the “0” and “3” on the ruler to
match the“ 0” and “3” printed on the ball.
(D)
BALL WARNINGS
• This is not a lifesaving device.
• Do not leave child unattended while in use.
• This is not an aquatic toy. It is not to be
used in water.
• Inate to 0.7PSI maximum or 66”(168 cm)
maximum circumference.
• Max. weight limit 120 lbs (54 kg).
Flip inatable over and spread out.
1
HINT: adjust ball position as
you are inating.
Basketball inflation
5
Assembly hint: as bouncer is inating,
press rmly around ball for a snug t.
WARNING.
Choking Hazard.
Keep out of reach
of children.

This manual suits for next models

1

Other Little Tikes Play Set & Playground Equipment manuals

Little Tikes LT0943 User manual

Little Tikes

Little Tikes LT0943 User manual

Little Tikes 663048M8X1 User manual

Little Tikes

Little Tikes 663048M8X1 User manual

Little Tikes 620089X2CP Operating instructions

Little Tikes

Little Tikes 620089X2CP Operating instructions

Little Tikes CLIMBING TOWERS Owner's manual

Little Tikes

Little Tikes CLIMBING TOWERS Owner's manual

Little Tikes Play Home 656927MX1 User manual

Little Tikes

Little Tikes Play Home 656927MX1 User manual

Little Tikes Learn & Play Roll Around 658402 User manual

Little Tikes

Little Tikes Learn & Play Roll Around 658402 User manual

Little Tikes Dino Bouncer User manual

Little Tikes

Little Tikes Dino Bouncer User manual

Little Tikes Easy Store Jr User manual

Little Tikes

Little Tikes Easy Store Jr User manual

Little Tikes Adventure Rocket User manual

Little Tikes

Little Tikes Adventure Rocket User manual

Little Tikes 483325P User manual

Little Tikes

Little Tikes 483325P User manual

Little Tikes Totally Huge Sports Football User manual

Little Tikes

Little Tikes Totally Huge Sports Football User manual

Little Tikes 633072M User manual

Little Tikes

Little Tikes 633072M User manual

Little Tikes LOL SURPRISE WINTER DISCO PLAYHOUSE User manual

Little Tikes

Little Tikes LOL SURPRISE WINTER DISCO PLAYHOUSE User manual

Little Tikes First Slide 483325 User manual

Little Tikes

Little Tikes First Slide 483325 User manual

Little Tikes 660573C3 User manual

Little Tikes

Little Tikes 660573C3 User manual

Little Tikes First Bathroom Sink User manual

Little Tikes

Little Tikes First Bathroom Sink User manual

Little Tikes My Real Jam User manual

Little Tikes

Little Tikes My Real Jam User manual

Little Tikes First Slide 483325 User manual

Little Tikes

Little Tikes First Slide 483325 User manual

Little Tikes STAY AT HOME 656828MX1 User manual

Little Tikes

Little Tikes STAY AT HOME 656828MX1 User manual

Little Tikes 630293 User manual

Little Tikes

Little Tikes 630293 User manual

Little Tikes 650666M User manual

Little Tikes

Little Tikes 650666M User manual

Little Tikes CAPE COTTAGE PLAYHOUSE 637902M User manual

Little Tikes

Little Tikes CAPE COTTAGE PLAYHOUSE 637902M User manual

Little Tikes My Real JAM User manual

Little Tikes

Little Tikes My Real JAM User manual

Little Tikes Totally Huge Sports User manual

Little Tikes

Little Tikes Totally Huge Sports User manual

Popular Play Set & Playground Equipment manuals by other brands

NOVUM 3311MP manual

NOVUM

NOVUM 3311MP manual

berchet MAISON DUPLEX manual

berchet

berchet MAISON DUPLEX manual

Quadro mdb A0282 Construction manual

Quadro mdb

Quadro mdb A0282 Construction manual

Europlay F004 Assembling manual

Europlay

Europlay F004 Assembling manual

Sove 24-100-000 Assembly instructions

Sove

Sove 24-100-000 Assembly instructions

Discovery Centers DC-5XLG-P Assembly instructions

Discovery Centers

Discovery Centers DC-5XLG-P Assembly instructions

stilum pila 2 Maintenance instructions

stilum

stilum pila 2 Maintenance instructions

BOERPLAY BBI.203.CUR installation instructions

BOERPLAY

BOERPLAY BBI.203.CUR installation instructions

HUCK Seiltechnik Spider Assembly instructions

HUCK Seiltechnik

HUCK Seiltechnik Spider Assembly instructions

BOERPLAY Multi-play equipment Kalcit 1,5m installation instructions

BOERPLAY

BOERPLAY Multi-play equipment Kalcit 1,5m installation instructions

Discovery Centers DC-2MDR Assembly instructions and user guide

Discovery Centers

Discovery Centers DC-2MDR Assembly instructions and user guide

Gorilla Empire manual

Gorilla

Gorilla Empire manual

Crane 6510 user guide

Crane

Crane 6510 user guide

Legnolandia Camelot Castello Graal Assembly instructions

Legnolandia

Legnolandia Camelot Castello Graal Assembly instructions

BOERPLAY BBI.113.CUP installation instructions

BOERPLAY

BOERPLAY BBI.113.CUP installation instructions

Quadro Starter Kit Construction manual

Quadro

Quadro Starter Kit Construction manual

Ledon Explore Yaki Assembly instructions

Ledon

Ledon Explore Yaki Assembly instructions

stilum agito 750 Mounting instructions

stilum

stilum agito 750 Mounting instructions

manuals.online logo
manuals.online logoBrands
  • About & Mission
  • Contact us
  • Privacy Policy
  • Terms and Conditions

Copyright 2025 Manuals.Online. All Rights Reserved.