Living Earth Crafts N2468 User manual

Warming Drawer
USER MANUAL
1-400-0003 • Rev B • 5/13/16
© Living Earth Crafts 2016, All Rights Reserved

© Copyright 2016
Living Earth Cras®
All rights reserved. is document or any
portion thereof may not be reproduced
in any way, including photocopying or
translation to another language without
the prior written permission from Living
Earth Cras.
Living Earth Cras® is a registered trade-
mark of Earthlite Massage Tables, Inc.
Legal Notice
e information provided in this document is intended
for informational purposes only and is subject to change
without notice. e information provided in this docu-
ment should not be construed as a commitment by
Living Earth Cras®.
Living Earth Cras® assumes no responsibility for the
accuracy or suitability of the information contained in
this document. is document may contain technical
inaccuracies or errors. Living Earth Cras® makes no
expressed or implied warranties of any kind concerning
the information contained in this document, including,
but not limited to, the implied warranties of merchant-
ability and tness for purpose.
Living Earth Cras® shall not be liable for incidental or
consequential damages in connection with or arising out
of the product, performance, or use of this document
and the information and material it describes.
Introduction
The Living Earth Cras Warming Drawer has been built directly into your treatment table or
trolley to provide you with convenient, discreet access to perfectly heated towels and stones
while helping you maintain the smallest possible footprint in an environmentally conscious age.
This warming drawer is designed for licensed therapists and is intended to be used in a
professional spa, massage studio, or similar commercial environment. While no special training
is needed to operate the warming drawer, for safety reasons it is important that the instrucons
contained in this manual are reviewed in detail before the rst use of the warming drawer. This
manual should be read in its enrety by each professional who will be operang the warming
drawer to ensure the safety of both operator and client. This manual should be saved for future
reference.
The warming drawer should not be used in any other manner than described in this manual.
Please read, understand, and follow all safety warnings, labels, and instrucons. Misuse, use of
unnecessary force, or using the warming drawer for unintended or unauthorized procedures can
result in injury to operator, client, and/or equipment.
Detailed instrucons for use and maintenance can be found in this user manual. If you have
further quesons, please contact us at (800) 872-0560 for US customers, or (760) 597-2155 for
internaonal customers. We can also be reached via e-mail at info@livingearthcras.com
Table of Contents
Section 1: Safety Instructions
Warnings
General Precautions
Section 2: Product Overview
Product Diagram
Basic Specications
Section 3: Operating Instructions
Warming Drawer Operation
Heat Guidelines
Section 4: Care & Maintenance
Cleaning/Ongoing Maintenance
Removing the Drawer
Re-installing the Drawer
Troubleshooting
Warranty Information
Section 5: Installation
Installation Planning
Installation Instructions
Contact Us
2
3
4
4
5
5
6
7
8
9
9
10-12
13
back cover

SECTION 1: SAFETY INFORMATION
Safety Symbols ALERT
Indicates a potentially hazardous
situation which could result in
equipment damage and/or injury.
Familiarize yourself with the following Safety &
Warning symbols. They are designed to prevent
damage and injury to you, your clients, and your
new Living Earth Crafts product.
ATTENTION
Consult accompanying documents
CAUTION
Indicates a potentially hazardous
situation which may result in minor or
moderate injury.
DANGER
Indicates an imminently hazardous
situation which will result in serious or
fatal injury - used in extreme conditions.
WARNING
Indicates a potentially hazardous
situation which could result in serious
injury.
Important Information About Safety Instructions
The important safety instructions and warnings in this manual cannot cover all possible problems and conditions
that can occur. Use common sense and caution when installing, operating, or maintaining this appliance.
DANGER: RISK OF ELECTRIC SHOCK, FIRE, AND EXPLOSION
Do not store or use ammable or explosive vapors and liquids inside or in the vicinity of this
or any other appliance. Keep items that could explode, such as aerosol cans, away from the
warming drawer. Do not store ammable or explosive materials in adjacent cabinets or areas.
Always unplug the table/trolley the warming drawer is embedded into from the electrical outlet
before cleaning.
READ AND SAVE THESE INSTRUCTIONS
SECTION 1: SAFETY INFORMATION
GENERAL SAFETY PRECAUTIONS
WARNING: To reduce risk of re, electric shock, serious injury, or death when
using this appliance, follow basic precautions, including:
READ AND SAVE THESE INSTRUCTIONS
23
WARNING: NEVER use this warming drawer as a space heater to heat or warm a room.
WARNING: DO NOT use water on a grease or electrical re - smother re or ame or use dry
chemical or foam-type extinguisher.
IMPORTANT: GROUNDING INSTRUCTIONS
• Make sure that the warming drawer has been properly installed and grounded by a quali ed installer
according to the accompanying installation instructions. Have the installer show you the location of the
electrical outlet so that you know where to disconnect power to the warming drawer.
• This appliance is equipped with a three prong grounding electric plug. It must be plugged into an
appropriate outlet that is properly installed and grounded in accordance with all local codes.
• Improper connection of the equipment-grounding conductor can result in electric shock. Check with
quali ed electrician if you are in doubt as to whether the product is properly grounded. Do not modify
the plug provided with the product - if it will not t the wall outlet, have a proper outlet installed.
• To disconnect, turn all controls to the off position, then remove plug from outlet.
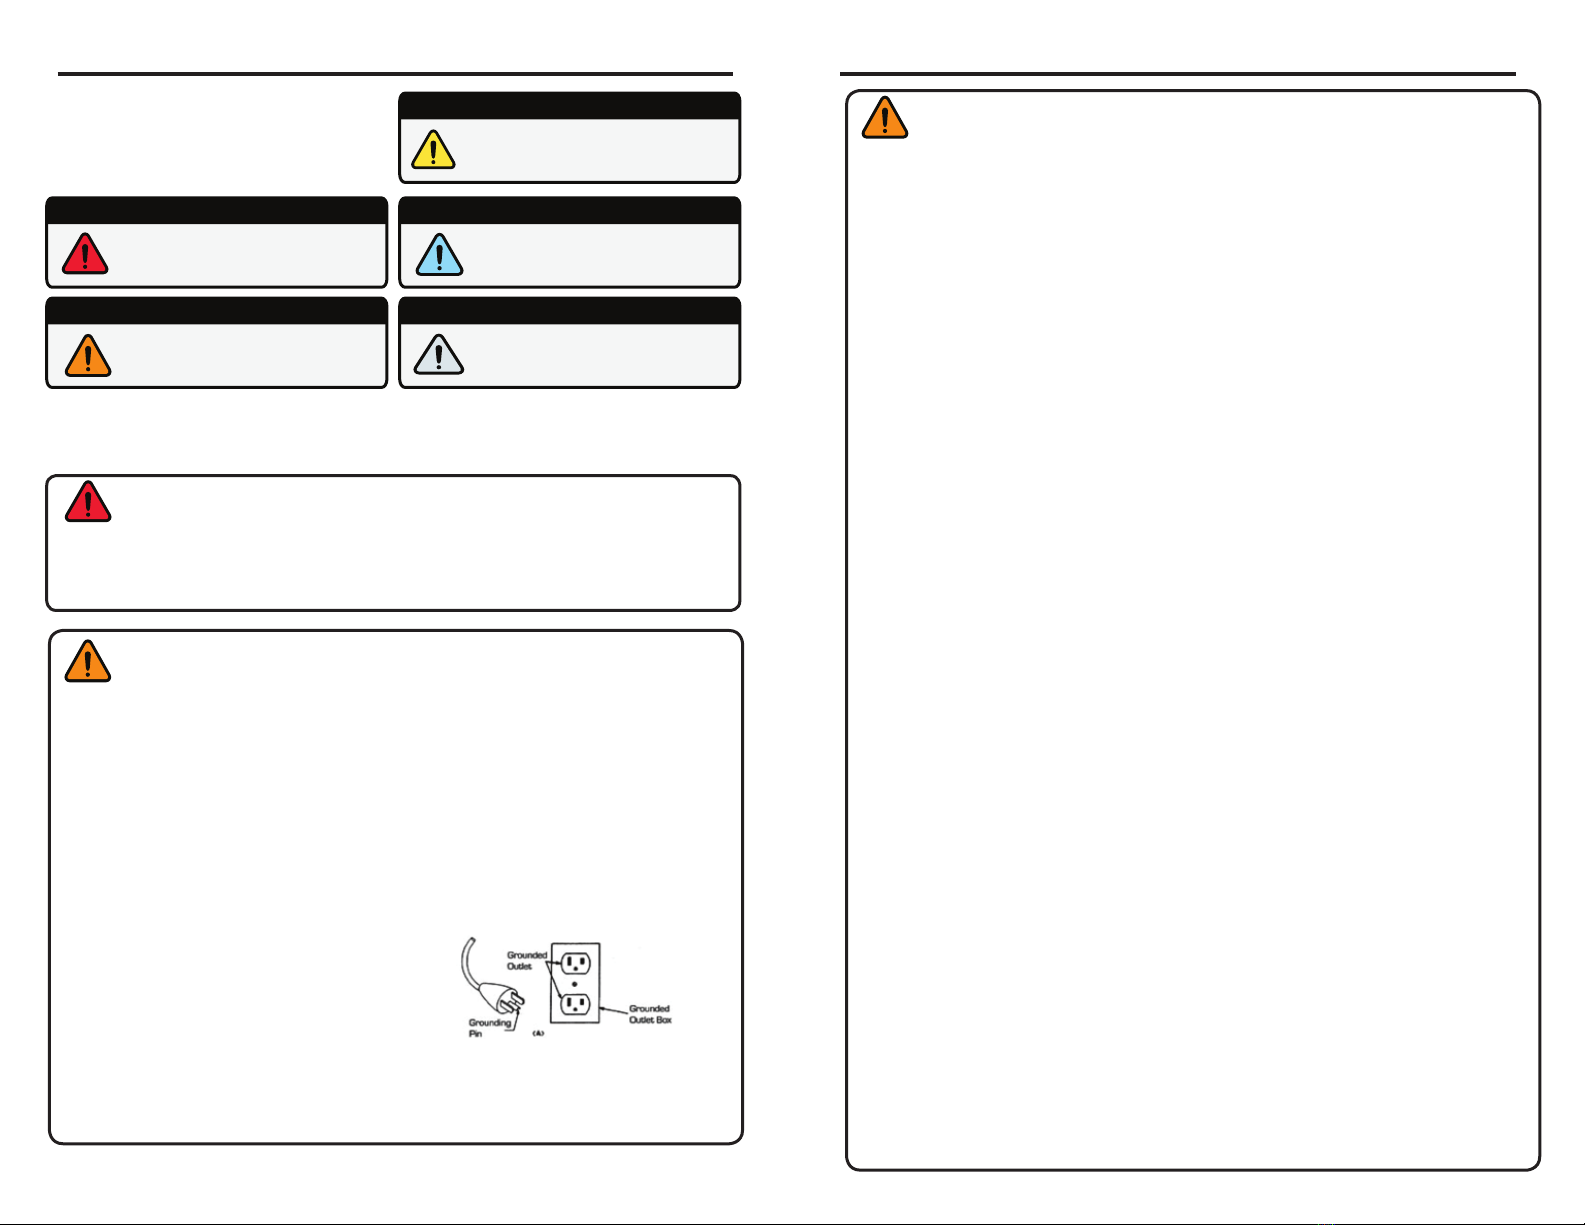
North America Version Only
• This product is for use on a nominal 120-volt circuit and
has a grounding plug that looks like the plug illustrated
in sketch (A). Product must be connected in this
con guration - no adapter should be used.
International Versions Only
• This product is for use on a nominal 220V-240V circuit and has a grounding plug (plug type varies by
country). Make sure that the product is connected to an outlet having the same con guration as the plug.
No adapter should be used with this product.
• Read this manual completely before operating this appliance.
• Use this appliance only for its intended use as described in this manual. Use it only to warm robes, dry
linens, moist towels, and/or stones for massage and/or other spa treatments.
• Ensure the recommended heat settings are followed when warming different materials and/or objects.
(See Operating Instructions)
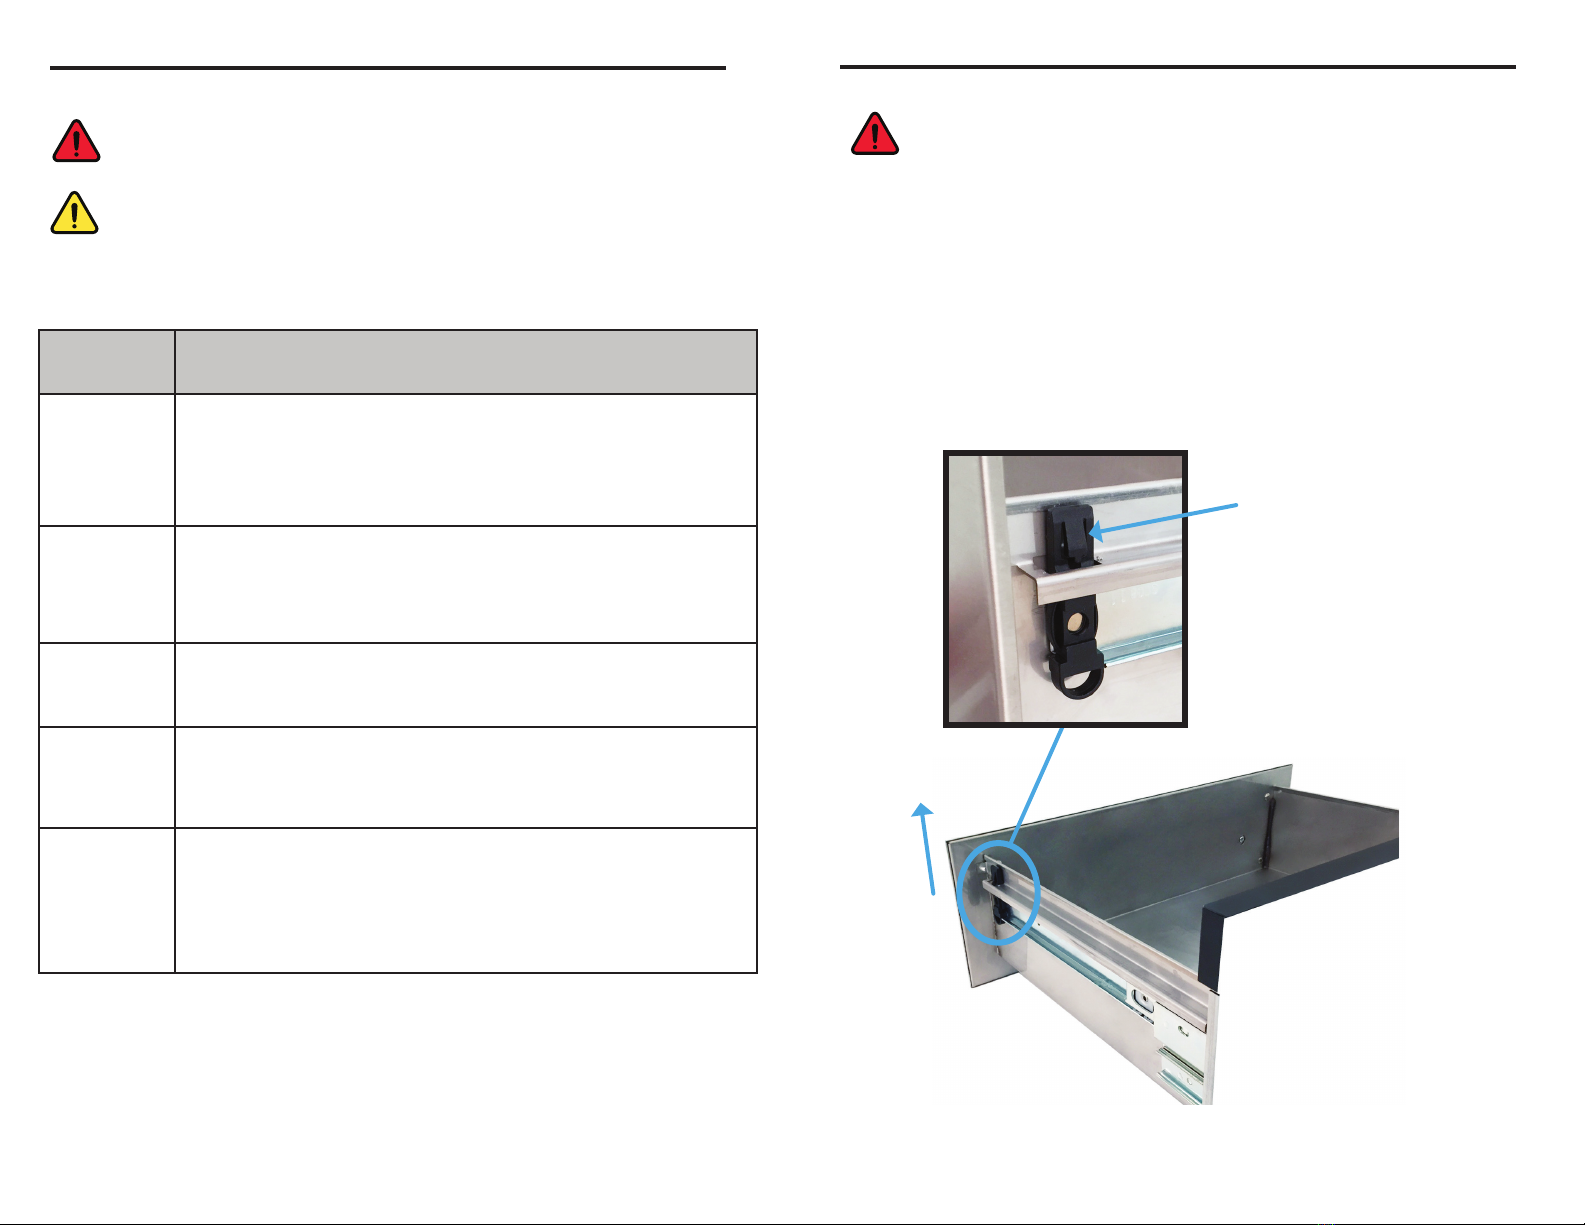
• When warming towels, robes, and/or linens, the warming drawer must have the supplied wire rack
installed in the drawer.
• Do not install or operate a product that is damaged, has a damaged power cord or plug, or is malfunc-
tioning in any way. Call customer service immediately for evaluation.
• If the warming drawer has not been pre-installed, ensure that the installation is properly performed by
a quali ed installer according to the installation instructions included in this manual.
• Do not repair or replace any part of the warming drawer unless speci cally recommended in this user
manual. All other service should be done by a quali ed technician.
• Use of accessory attachments not recommended by the manufacturer may cause injuries.
• Before cleaning or performing any type of service, ensure that the table or trolley is disconnected from
the electrical outlet, and the warming drawer is completely cool.
• Keep the electrical cord away from heated surfaces.
• DO NOT TOUCH ANY HOT SURFACES IN OR ON THE WARMING DRAWER DURING OR IMME-
DIATELY AFTER USE. Always use the attached handle. After use, allow suf cient time for the sur-
faces to cool before touching them. Heating elements may be hot, even though they are dark in color.
• To avoid the possibility of re or burns, do not allow clothing or other material to come into contact
with any part of the warming drawer during and immediately after use. Use caution if wearing loose or
hanging apparel while using this appliance.
• Never use a power cord that is frayed or damaged.
• Ensure the power cord does not create a tripping hazard.
• Never immerse the power cord or plug in water or other liquid.
• If materials inside the warming drawer ignite, keep the drawer closed and shut off the power at the
circuit breaker panel or fuse box.
• Exercise caution when opening the drawer - allow hot air and/or steam to escape before looking or
reaching into the drawer.
• Do not put any sealed containers inside the drawer - they may explode when heated, causing injury.
• Do not place more than 18 pounds in the drawer. If installed in a trolley, ensure weight is distributed
in the back half of the drawer to ensure trolley does not tip over.
• Properly clean and maintain the unit regularly as instructed in this manual. Clean only those parts
listed in this manual, in the manner speci ed.
• Do not use abrasive scrubbers or abrasive/caustic cleaners or detergents. They may permanently
damage the nishes. Do not use aerosol cleaners, because they may be ammable or cause corro-
sion of metal parts.
• Make sure the warming drawer is used only by trained and capable individuals.
• Do not tamper with the controls.
• Preheat the warming drawer before use.
• Never allow anyone, including children, to sit, stand or climb on any part of the warming drawer unit,
including the drawer when open. Do so may cause tipping, damage, serious injury, or death.
• Do not leave children alone or unattended in the area around the warming drawer. Do not allow chil-
dren to operate it, play with the controls, pull on the handle, or touch other parts.
• Do not store items of interest to children above the warming drawer. Children could be burned or
injured if climbing on the appliance.
• Do not overstuff the warming drawer with an oversized robe or dry linens.
• The supply cord cannot be replaced. If the cord is damaged the warming drawer must be scrapped.
• The appliance is not to be used by persons (including children) with reduced physical, sensory, or
mental capabilities, or lack of experience and knowledge, unless they have been given supervision
or instruction.

Drawer Face
Drawer
Handle
Drawer
Glide
Electronic
Control Panel
Drawer
Gasket
SECTION 2: PRODUCT OVERVIEW
4 5
Wire Basket
To hold moist towels and dry linens
Silicone Pad
To protect the drawer when warming stones
Basic Specifi ca ons Features
Drawer
Dimensions 4.5” H x 17” W x 15.5” D Construction Sturdy and attractive stainless steel
Basket
Dimensions 3.75” H x 15” W x 13.8” D Control Panel
Fully electronic control and thermoswitch
automatically adjust and maintain
temperatures
Drawer
Capacity 18 lbs maximum Drawer Glides Heavy duty glides for quiet and smooth
operation
Included
Accessories Wire basket and silicone pad Timer Silent auto-shutoff after the chosen
length of time
Electronic Control Panel
Power Button
Heat Settings
Timer Button
SECTION 3: OPERATING INSTRUCTIONS
Follow recommended heat settings below. Overheating stones and dry linens may cause
re and/or injury. Ensure wire basket is used for moist towels and dry linens/robe.Failure
to do so may lead to scorching and/or re. Ensure silicone pad is used for stones. Failure
to do so may result in damage to your drawer.
For best results, preheat the empty warming drawer for at least 20 minutes before use.
1. Turn on the warming drawer by pushing the Power bu on.
2. Set the desired heat se ng by pushing either the Low, Med, or High bu on. (See Heat Guidelines)
3. Set the mer by pushing the Timer bu on un l the desired number of hours lights up.
4. Ensure the drawer is closed completely to heat quickly and maintain temperature once heated.
5. When ready to place items in the drawer, ensure you use the correct drawer insert:
• Use the wire basket if hea ng moist towels, dry linens, or a robe.
• Use the silicone pad if hea ng stones.
Warming Drawer Operation
Setting Recommended
Item(s)
Temperature
Ranges* Heating Tips
Low Robe, Dry Linens 80°F - 100°F
Do not overstuff - robes and/or dry linens
should fi t loosely in the basket to heat evenly
and avoid scorching.
Medium Stones 100°F - 120°F
Stones are for dry heat - no water needed. Do
not stack stones in the drawer. Place larger
stones in the back of the drawer. Use silicone
pad.
High Moist Towels ONLY 120°F - 145°F
For best results, pre-moisten towels with hot
water.
Do not overstuff .
* Temperature ranges are approximate
Heat Guidelines

SECTION 4: CARE & MAINTENANCE SECTION 4: CARE & MAINTENANCE
CAUTION
- To prevent permanent damage to the warming drawer surfaces, do not use abrasive
cleaners or scrubbers.
- Do not allow acids or acidic products to remain on the warming drawer’s surfaces.
The nish may stain.
- Always wipe stainless steel surfaces in the direcon of the grain.
DANGER: RISK OF ELECTRIC SHOCK
Always unplug this furnishing from the electrical outlet before cleaning.
Cleaning & Ongoing Maintenance
6 7
Category Cleaning Recommendation
Electronics/
Control Panel
An-stac electronic aerosol dusters can be used to keep the surfaces of
electronic components, power cables, and plugs free of dust. Exercise cauon
to avoid introducon of liquids into the area behind the control panel. Do not
use abrasive cleaners or scrubbers. They may permanently damage the nish
or damage the leers and/or graphics.
Drawer Face/
Drawer Handle
Clean the drawer face/handle with a soluon of mild detergent and hot wa-
ter. Rinse and dry with a so cloth. You may also use a stainless steel cleaner.
Use stainless steel cleaner according to the direcons on the package. Always
wipe stainless steel surfaces in the direcon of the grain.
Drawer Interior
Clean the drawer interior with a soluon of mild detergent and hot water.
Rinse and dry with a so cloth. Do not use any ammable cleaners inside the
warming drawer.
Painted
surfaces
Clean any painted surfaces with a soluon of mild detergent and hot water.
Rinse and dry with a so cloth. Do not use abrasive cleaners or scrubbers.
They may permanently damage the nish.
Gasket
The gasket is located around the edge of the drawer opening, below the
control panel. Gently clean the gasket with a soluon of mild detergent and
hot water. Rinse and dry with a so cloth. The gasket material is so, so be
careful not to crush or damage it. Damaging the gasket will cause a poor heat
seal and result in poor warming drawer performance.
When heang moist towels, condensaon can build up inside the drawer. If not regularly wiped
down, this can lead to small amounts of water dripping from the warming drawer when opened.
To minimize any water dripping, ensure you perform the following maintenance tasks as needed
throughout the day:
1) Ensure any condensaon and/or moisture (inside and outside the drawer) is wiped dry with a
so cloth as needed.
2) Ensure any condensaon and/or moisture on the surrounding wood and/or laminate is wiped
dry with a so cloth as needed.
Push in locking tab
(on both sides of drawer)
Pull up on
drawer face
1. Pull the drawer out to the fully open posion.
2. Push in the locking tab on one side, and pull up on the drawer face.
3. Once the drawer is loose, repeat process on the opposite side.
4. Grip the drawer on both sides and pull it up and out from the glides.
5. For safety reasons, push both drawer glides back into the drawer unl ready to re-
install the drawer.
Allow the warmer to cool for a minimum of 30 minutes before at-
tempng to remove it the drawer.
Always unplug the table/trolley the warming drawer is embedded into
from the electrical outlet before cleaning.
Removing the Drawer

SECTION 4: CARE & MAINTENANCE
8 9
SECTION 4: CARE & MAINTENANCE
Re-installing the Drawer
1. Pull the drawer glides out to the fully open posion.
2. Gently lower the drawer between the extended glides, unl it is resng on the glides.
3. Push the drawer towards the back of the glides, unl it fully engages the stopping tab (on
both sides).
4. Push down the front end of the drawer, engaging the locking tabs.
5. Gently close and open the drawer to make sure it is properly installed.
Ensure the drawer fully en-
gages the stopping tab
(on both sides of drawer)
Problem Solution
Nothing works
1. Plug into a grounded and dedicated electrical outlet.
2. Select me duraon according to the Operang Instrucons.
3. Check the circuit breaker panel or fuse box for a tripped breaker
or blown fuse.
4. Unplug the warming drawer (or the table/trolley it is embedded
into) from the electrical outlet, and plug back in.
Drawer does not slide
smoothly or drags
1. Drawer may be incorrectly mounted into drawer glides - reinstall
drawer into drawer glides, per instrucons on page 7.
2. Drawer may be overloaded or unbalanced - reduce the weight
to less than 18 pounds and/or redistribute drawer contents.
Excessive
condensaon
1. Preheat the warming drawer before each use.
2. Pre-moisten the towels with hot water for best results.
One or more of the
indicator lights on the
control panel blink
Try reseng the computer. Disconnect the power cord, wait 20
seconds, then reconnect it. Check the control panel. If the indica-
tor light sll ashes, call for service (see number above).
Troubleshooting
This helpful troubleshoong guide will provide you with informaon about how to recognize a
problem with the warming drawer, determine possible causes, and nd a soluon. In the event
your specic situaon is not covered in this guide, please contact Living Earth Cras so our
technical support department can assist you. Beyond the troubleshoong guide below, do not
aempt to repair the warming drawer yourself. This can void your warranty.
Unauthorized service will not be covered. Please be sure to contact LIving Earth Cras Customer
Service rst. Living Earth Cras Customer Service: (800) 358-8292, (760) 597-2155 Int’l
CAUTION
The warming drawer incorporates a non self-reseng thermal cut out. This means if
the unit overheats and triggers the thermal cut out, the warming drawer can only be
reset by unplugging the warming drawer (or the table/trolley the warming drawer is
embedded into).
Warranty Information
Living Earth Cras (LEC) oers an industry best warranty against defects in materials, design,
and workmanship, to the original owner, for two (2) years.
LEC may repair or replace defecve components at our discreon. LEC will return the warranted
product, standard shipping pre-paid, to customers in the connental US. Internaonal customers
are responsible for any applicable dues and taxes, as well as all shipping charges inbound and
outbound. Normal wear and tear, and costs associated with maintenance procedures, and
damage caused by accident, misuse, improper maintenance, harsh operang environments
or neglect (which includes damage caused by harsh chemical-based cleaners) are not covered
under this warranty. All warranes are limited to repair or replacement, at LEC’s discreon,
unless otherwise stated.

SECTION 5: INSTALLATION
10
SECTION 5: INSTALLATION
General Notes & Requirements
• A qualied technician must complete the installation of this built-in appliance. Proper
installation is the customer’s responsibility.
• Cabinet cutout dimensions must be used as indicated. All contact surfaces between the
warming drawer and the cabinet must be solid and level.
• Carefully check the location where the drawer is to be installed. The drawer should be
placed for convenient access. Ensure you will have enough room to open the drawer fully,
and that it will not be blocked by any other permanently installed furniture or appliance.
• The installation dimensions create a fully ush installation with the drawer face.
• Ensure you have everthing necessary to ensure proper installation before proceeding.
Electrical & Environmental Specications
• Important: See “Grounding Instructions” on Page 2.
• CAUTION: The warming drawer incorporates a non self-resetting thermal cut out. This
means if the unit overheats and triggers the thermal cut out, the warming drawer will be
reset by unplugging the unit from the supply mains. Therefore the plug must be acces-
sible to allow the customer to easily unplug the appliance when needed.
• The correct voltage, frequency, and amperage must be supplied to the electrical outlet
from a grounded, single phase circuit that is protected by a properly sized circuit breaker
or time-delay fuse.
• It is the owner’s responsibility to ensure that the electrical outlet is installed by a qualied
electrician. The electrical installation must comply with the latest revision of the National
Electric Code ANSI/NFPA 70 and local codes and ordinances.
• If the electrical service provided does not meet the product specication, or does not con-
form to the NEC or local standards, do not proceed with the installation. Call a licensed
electrician to correct the electrical service before proceeding.
• Keep the electrical cord away from hot surfaces.
• The power supply requirements shown below are for reference only. If they do not agree
with those listed on the product data label, use the requirements on the product data
label.
Nominal Electrical Supply Requirements - 120V
120 VAC, 60 Hz, 15 Amp., dedicated circuit
The warming drawer is supplied with a 60” (152.4 cm) power cord
with a thre prong grounded plug.
Total Connected Load 2 Amp
Nominal Electrical Supply Requirements - 220V
220 VAC, 50 Hz, 15 Amp., dedicated circuit
The warming drawer is supplied with a 60” (152.4 cm) power cord
with a grounded plug (type varies by country).
Total Connected Load 0.6 Amp
Overall Dimensions - Top View with Open Drawer
Chassis
Open Drawer
19.895” (50.53 cm)
18.295” (46.47 cm)
16.156”
(41.04 cm)
.675”
(1.7 cm)
14.16”
(35.97 cm)
7/8”
(2.2 cm)
Overall Dimensions - Drawer Front
19.9”
(50.55 cm)
6.58”
(16.7 cm)
8.5”
(21.59 cm)
These installaon instrucons are for customers that are planning to install the warming drawer
into custom mill work or cabinetry.
Installer: In the interest of safety and to minimize problems, read these installaon instrucons
completely and carefully before you begin the installaon process. Leave these installaon
instrucons with the customer.
Customer: Keep these installaon instrucons for future reference and the local electrical
inspector’s use.
11

Warming Drawer Cabinet Opening
• Cabinet Opening Width: 20.13” (51.13 cm)
• Cabinet Opening Height: 9.31” (23.7 cm)
• Minimum Depth: 18.5” (47 cm)
• The cabinet opening must have a platform (100 lb. load capacity) to support the weight
of the warming drawer. The platform must be installed level and straight. There are no
provisions to level the warming drawer after it has been installed. 3/4” (1.9 cm) thick ply-
wood is recommended. (Ensure the platform has a hole to allow for cord routing.)
• NOTE: If the drawer is not installed in a level fashion, the drawer may slide open on its
own or may not seal tightly, resulting in poor warming drawer performance.
• NOTE: The warming drawer requires a 0.75” (1.9 cm) air gap. The air gap is built in using
the wood cleats and blocks in the diagrams shown below.
Additional Pieces Needed for Installation
Cut these pieces out of 0.75” plywood:
• (A) 2 wood cleats: 9.31” L x 0.75” W (23.65 cm L x 1.9 cm W)
• (B) 1 wood cleat: 20.13” L x 0.75” W (51.13 cm L x 1.9 cm W)
• (C) 4 wood blocks: 3.0” L x 3.0” W (7.62 cm L x 7.62 cm W)
cabinet opening
20.13”
(50.55 cm)
min 18.5”
(47 cm)
5.88”
(14.9 cm)
13.88”
(35.26 cm)
10.81”
(27.46 cm)
2” (5 cm)
hole size
C C
C C
B
Cabinet Opening Top View
20.13”
(50.55 cm)
9.31”
(23.7 cm)
Cabinet Opening Front View
AA
AA
Cabinet Opening 3D Model
B
SECTION 5: INSTALLATION SECTION 5: INSTALLATION
WARNING
To avoid injury caused by the warming drawer falling forward when the drawer is
opened, secure the chassis to the cabinet as instructed.
Ensure the power plug is disconnected from the electrical outlet before installaon
Verify the electrical supply matches the rangs found on the product label and
installaon specicaons before proceeding.
1. Remove the drawer (see page 7).
2. Carefully push the warming drawer chassis into the cabinet opening.
3. Secure the warming drawer to the vercal cleats with four stainless 3/4” wood screws.
The screw hole locaons are marked in the image below:
4. Secure the warming drawer to the wooden blocks with four stainless 3/4” wood screws.
The screw hole locaons are marked in the image below:
5. Re-install the drawer (see page 8).
6. Plug the warming drawer into the electrical outlet.
7. Verify warming drawer is working by going through the Warming Drawer Operaon
instrucons on page 5.
8. If the warming drawer does not work, see Troubleshoong on page 9.
9. If the warming drawer sll does not work, contact Living Earth Cras customer service. Do
not aempt to repair the warming drawer yourself. Living Earth Cras is not responsible
for the cost of correcng problems resulng from a faulty installaon.
12 13

Contact Us
Living Earth Crafts
3210 Executive Ridge
Vista, CA. 92081
(800) 358-8292
(760) 597-2155 Int’l
(866) 449-8872 fax
Hours of operation:
Monday - Friday
8:00 a.m. to 5 p.m. PST
Saturday - Sunday
Closed
Visit us online at: livingearthcrafts.com
Read our blog at: livingearthcrafts.com/blog
Join us on Facebook®
Manual Reference Number
1-400-0003
Rev B - 5/13/16
Table of contents
Popular Warming Drawer manuals by other brands

GE
GE Monogram ZKD910 installation instructions

Gaggenau
Gaggenau WS482710 installation instructions

Fisher & Paykel
Fisher & Paykel DishDrawer DD24ST Series installation instructions

Wells
Wells RW series Operation manual

Fulgor Milano
Fulgor Milano F6PWD30 Series Instructions for installation and use

NEFF
NEFF N13HA01 0 Series User manual and installation instructions

Electrolux
Electrolux 318 201 016 Use & care guide

GE
GE Monogram ZKD910 installation instructions

montpellier
montpellier WD14SS Installation and operating instructions

Linea 2000
Linea 2000 DOMO DO9202WP Instruction booklet

Fisher & Paykel
Fisher & Paykel 9 Series Quick reference guide

TECHYIDCO
TECHYIDCO Shabbos Safe TYCSS11 owner's manual