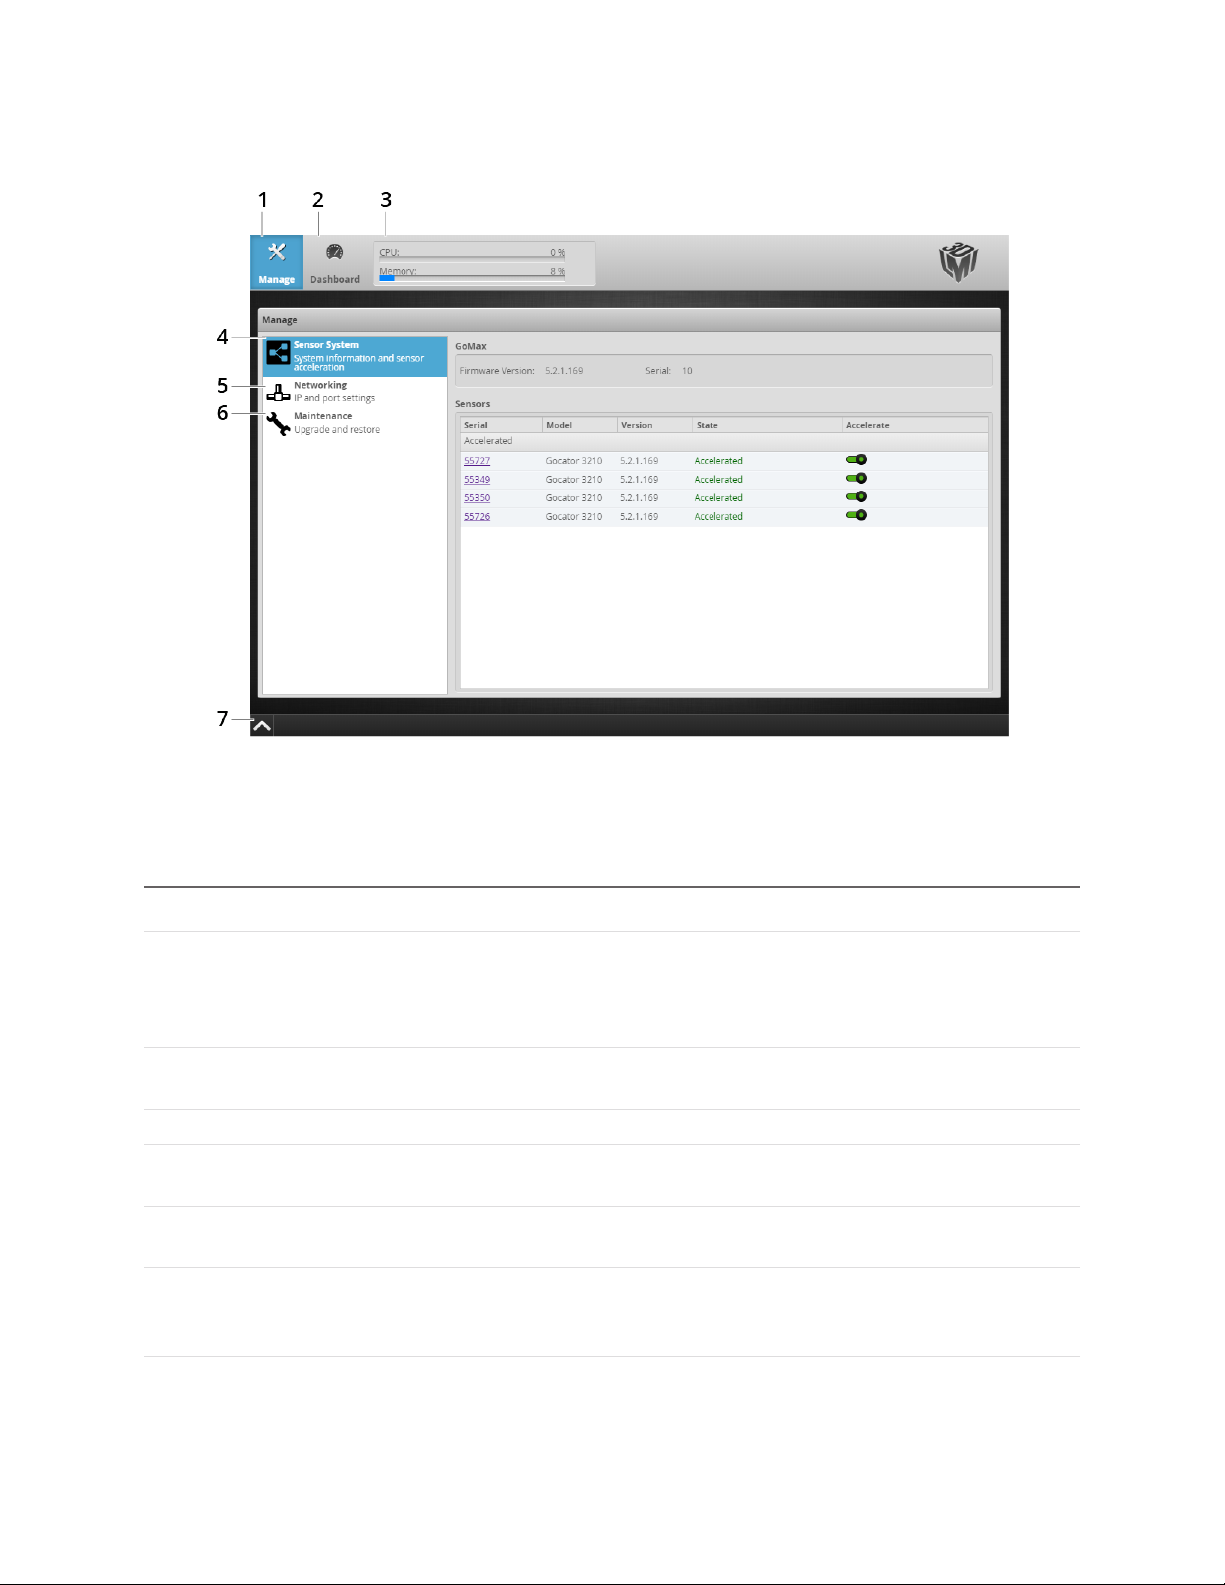
GoMax Smart Vision Accelerator:User Manual 8
Safety and Maintenance
The following sections describe the safe use and maintenance of GoMax vision accelerators.
Electrical Safety
Failure to follow the guidelines described in this section may result in electrical shock or equipment
damage.
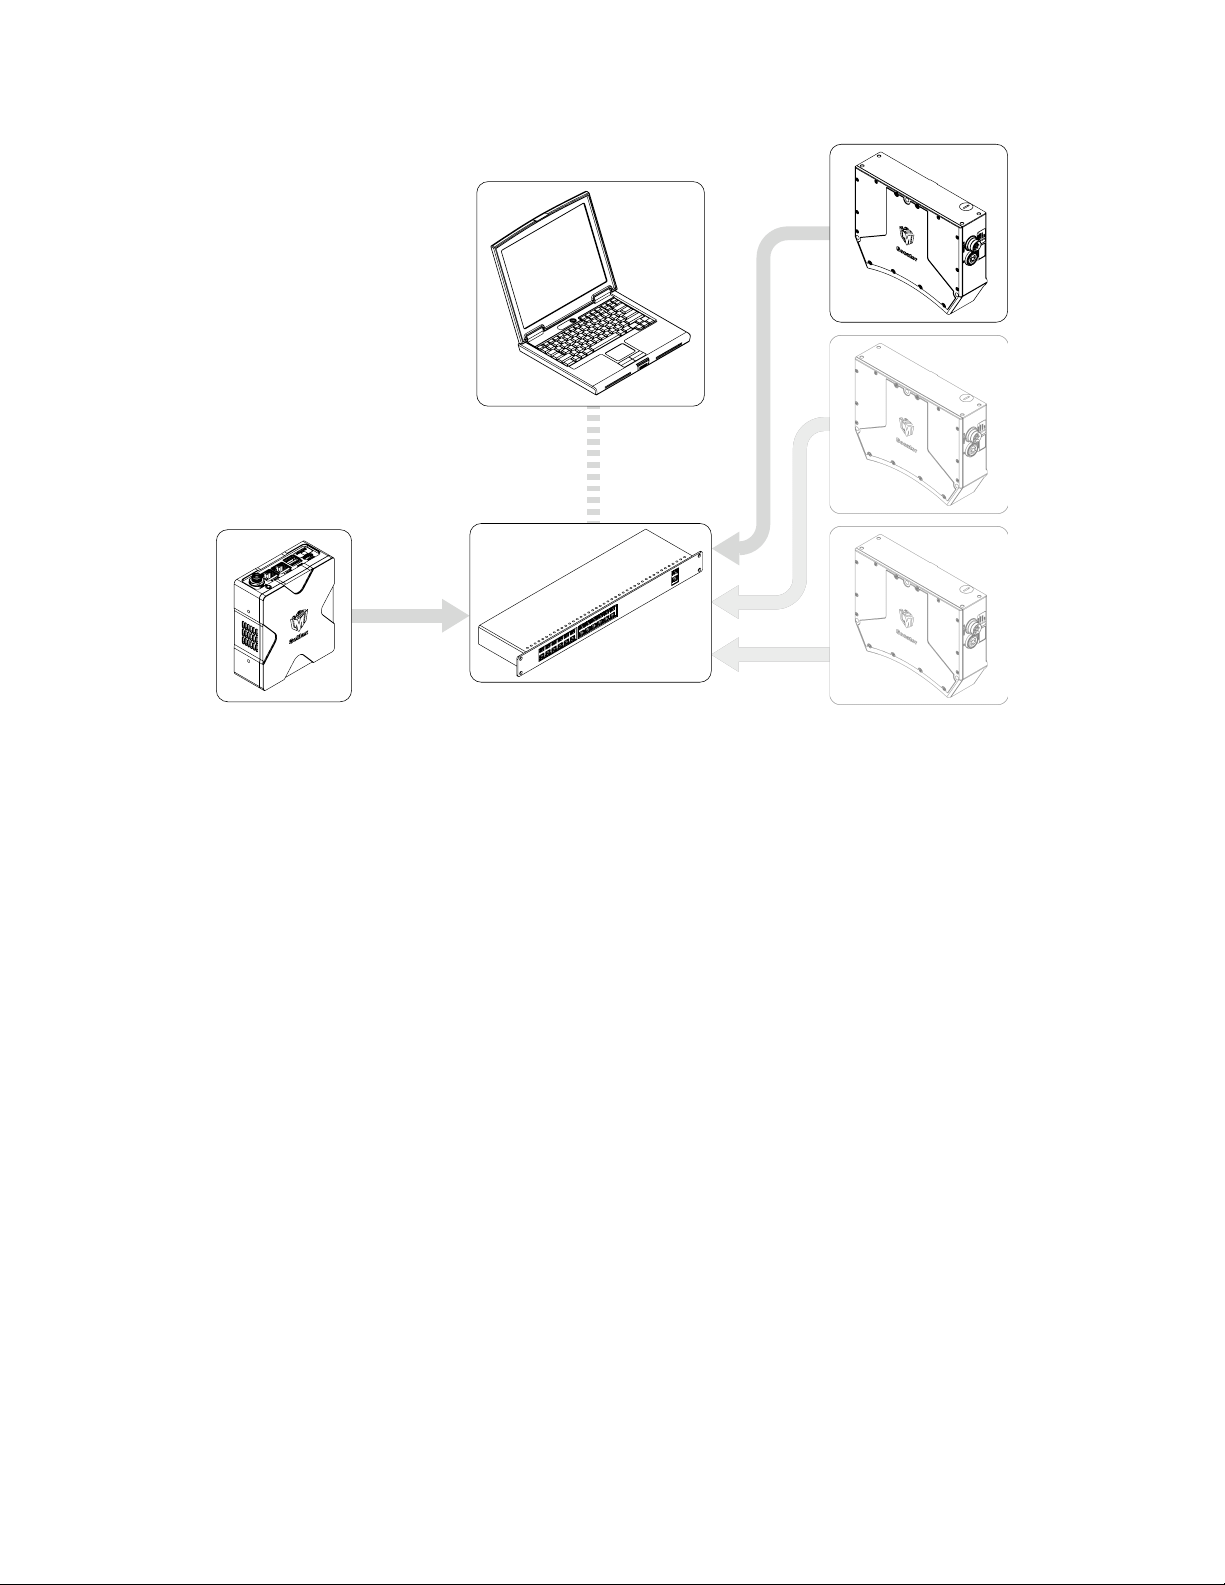
Sensor systems GoMax are connected to should be connected to earth ground
All sensors in the system should be connected to earth ground through their housing. All sensors should
be mounted on an earth grounded frame using electrically conductive hardware to ensure the housing
of the sensor is connected to earth ground. Use a multi-meter to check the continuity between the
sensor connector and earth ground to ensure a proper connection.
Minimize voltage potential between system ground and sensor ground
Care should be taken to minimize the voltage potential between system ground (ground reference for
I/O signals) and sensor ground. This voltage potential can be determined by measuring the voltage
between Analog_out- and system ground. The maximum permissible voltage potential is 12 V but should
be kept below 10 V to avoid damage to the serial and encoder connections.
Use the power supply provided with the unit
If the power supply or cords get damaged, contact LMI Technologies for a replacement.
Use care when handling powered devices
Wires connecting to the GoMax unit should not be handled while the unit is powered. Doing so may
cause electrical shock to the user or damage to the equipment.
Cleaning and Maintenance
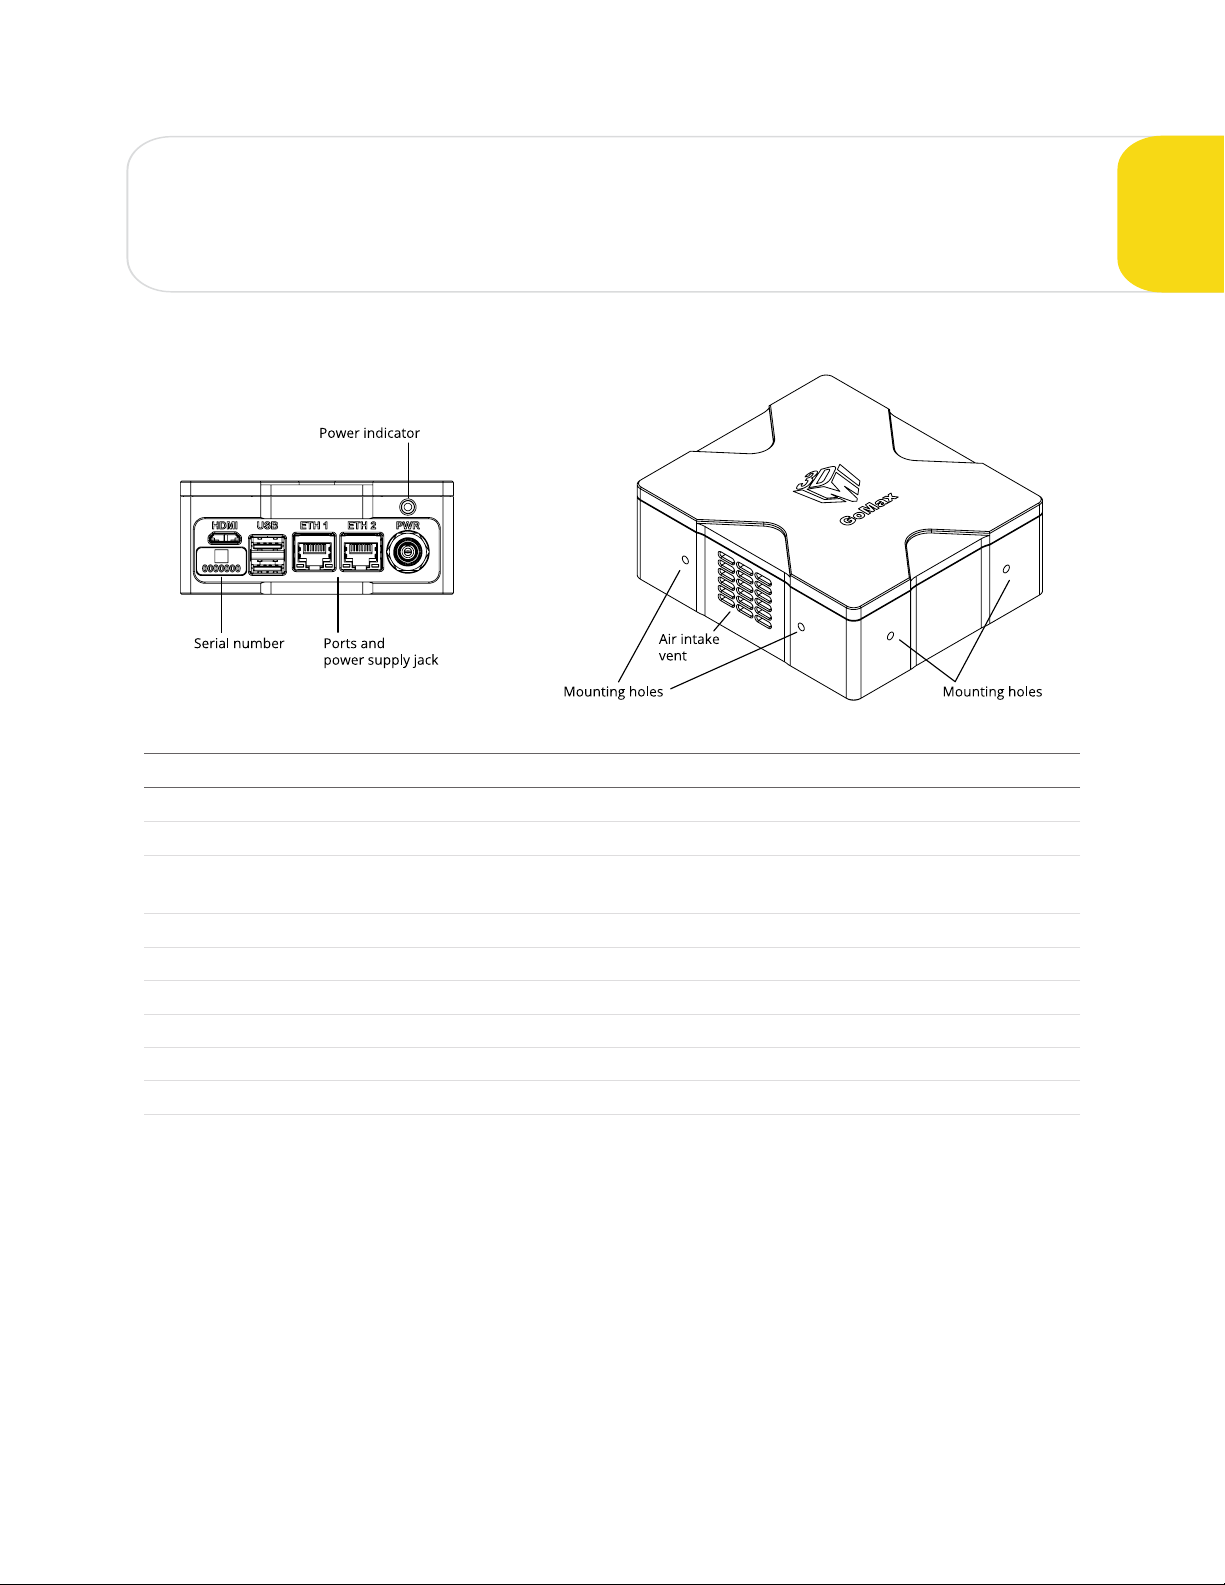
Keep vents clean
To avoid overheating of the GoMax unit, make sure the unit's vents are clean.
Environment
Avoid installing the GoMax unit in hazardous environments
To ensure reliable operation and to prevent damage to the GoMax unit, avoid installing the unit in
locations
lthat are humid, dusty, or poorly ventilated;
lwith a high temperature, such as places exposed to direct sunlight;
lwhere there are flammable or corrosive gases;
lwhere the unit may be directly subjected to harsh vibration or impact;