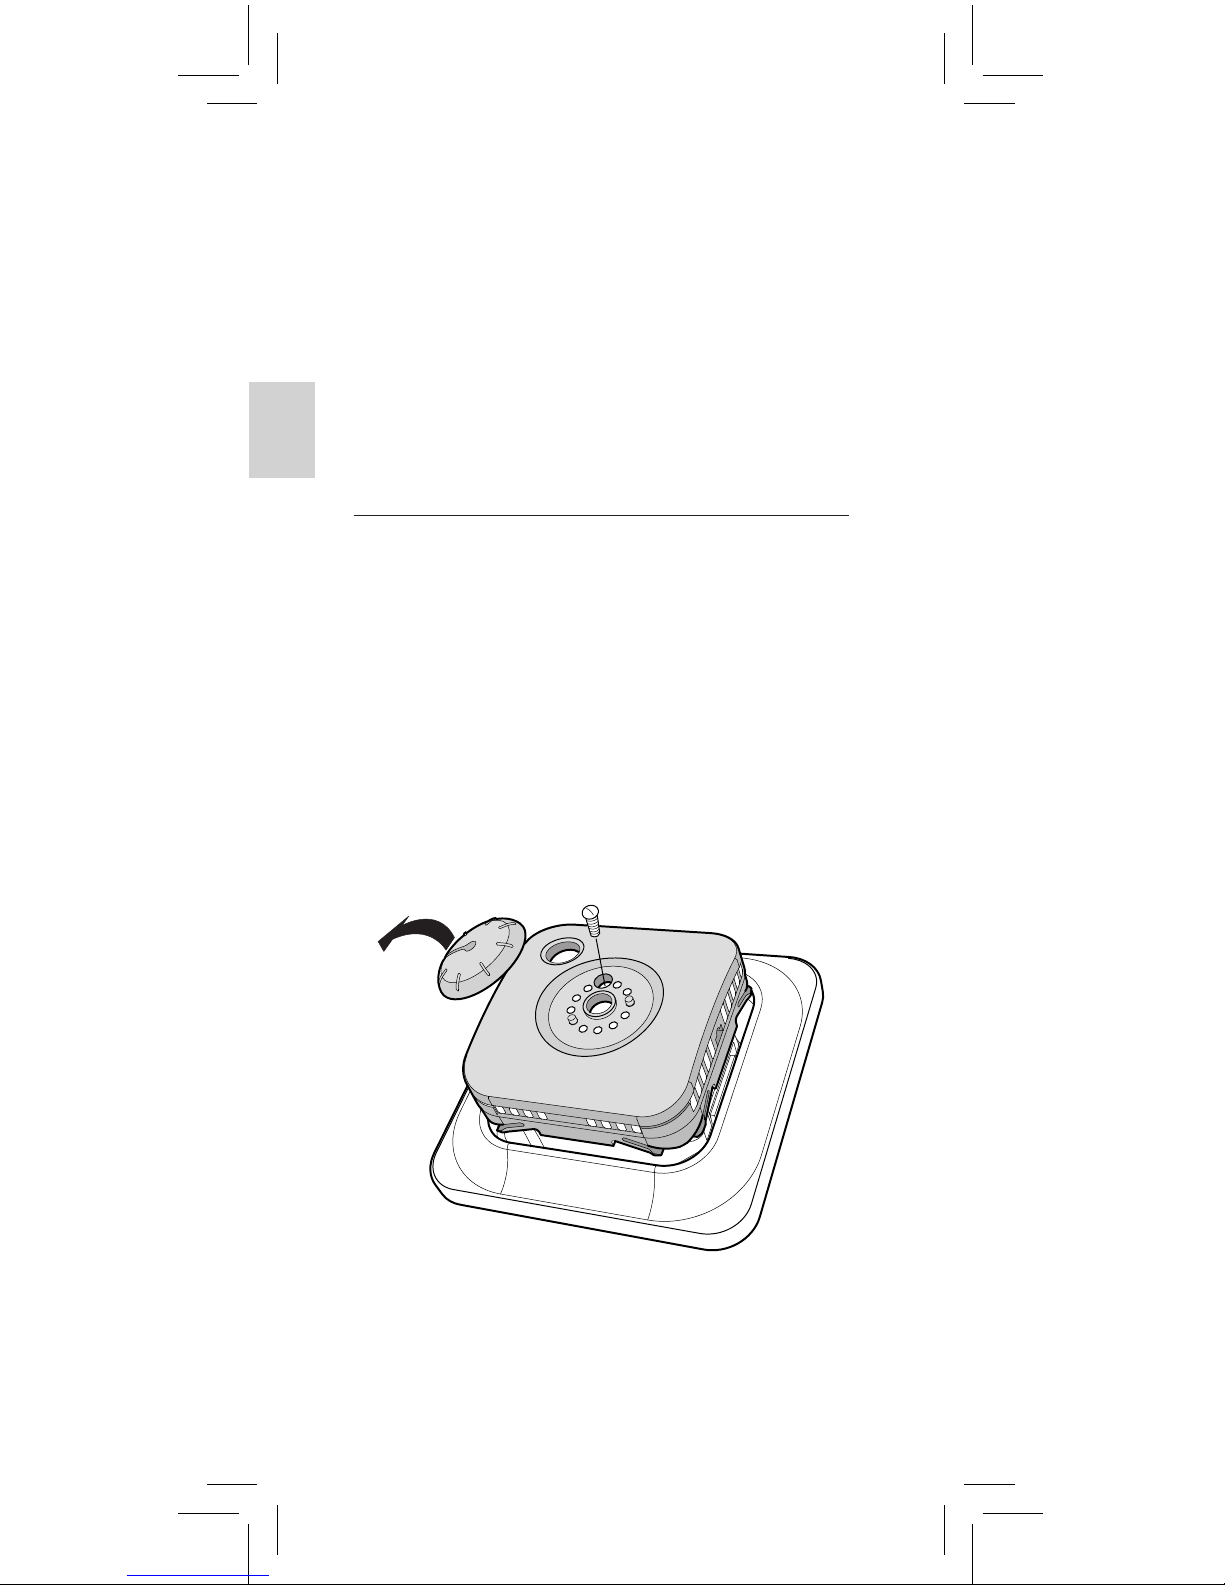
Lorenzoni Lor-therm 105 User manual

!
!
!
!
INSTRUCTION MANUAL
LOR-THERM 105
Cod. 523.0000.102

18
For the guarantee to be valid, the
product must be installed and operated
as indicated in this manual. This means
it is extremely important that you read
the manual. This applies both to the
person installing the thermostat and
the person who is going to use it. You
will also nd technical specications
and information on troubleshooting.
Important The underoor heating system
is an electrical power installation and must
therefore be installed in accordance with the
current regulations and under the supervision
of a qualied electrician.

19
EN
Introduction
In the pack
Installing the thermostat
How the thermostat works
Troubleshooting
Technical specications
............................................. 20
................................................. 21
..................... 22
................. 26
..................................... 31
...................... 32

20
Introduction
This is a microprocessor-controlled
thermostat for optimum regulation of
underoor heating systems. The front
is tted with a lockable knob for regu-
lating temperature, as well as an on/o
switch that shows whether the under-
oor heating is in operation.
Temperature control is carried out by
means of an algorithm that uses fuzzy
technology. The technology entails the
termostat testing and collecting data
from start-up, and based on this, cal-
culating when to turn on and o. This
technology reduces temperature vari-
ations and thus provides a more con-
stant temperature and lower energy
consumption. The oor temperature
varies less than +/- 0.3 degrees.
Thermostat with fuzzy-
technology
Thermostat without fuzzy-
technology
TIME
TEMP.

21
EN
In the pack
1
1. Front for Elko RS, Elko Plus and Gira
2. Adapter for Strömfors frame system
3. Front for Eljo Trend, Merten, Jussi/
Busch-Jäger
4. Frame
5. Thermostat
6. Floor sensor
7. Connection clip
Manual
23
45
6
7

22
Installing the thermostat
The oor sensor should be mounted in
a spiral hose laid in the oor. The hose
endings should be sealed so that the
oor sensor can easily be replaced.
Installation
Mount the thermostat in a 65mm
standard appliance box.
1. Make sure the box is level with the
wall.
2. Remove the knob and undo the
screw as in the illustration. Lift o front
and frame.

23
EN
3. Connect power, voltage 230 VAC,
load and oor sensor cable.
Any extension to the oor sensor cable
must be by means of high-voltage
current. Protective conductor for
incoming feed and for heating cable
is connected with a connection clip in
the box. See wiring diagram below.
4. Insert the thermostat into the ap-
pliance box and screw tight with the
existing screws.
5. Mount frame, front and knob.
6. If the thermostat is mounted in a
multi-compartment frame, the internal
corners of this frame must be removed.
LOAD LOAD
N
L
SENSOR
SENSOR
DO NOT USE
230 V

25
EN
Getting started
After installation, wait 2-4 weeks
before starting the underoor heating.
Precisely how long you wait depends
on the type of oor you have and the
instructions for the oor putty. Then
increase the heat gradually.
In order to adapt the underoor
heating system to your own heating
requirements as much as possible, it
is important that you read the entire
manual.

26
On/o switch
How the thermostat works
This section describes all you need to
know about how the thermostat works
and how you set it.
Temp. control
Turning o and on
The heating is not controlled in stand-
by mode. Depress the on/o switch
for a second to access stand by mode.
Return to normal mode by once again
depressing the button for a second.

27
EN
Control functions
The thermostat
can regulate the tempera-
ture in three dierent ways.This enables
the comfort temperature and any ooring
temperature requirements to be combined.
How the settings are adjusted is descri-
bed on the next page
.
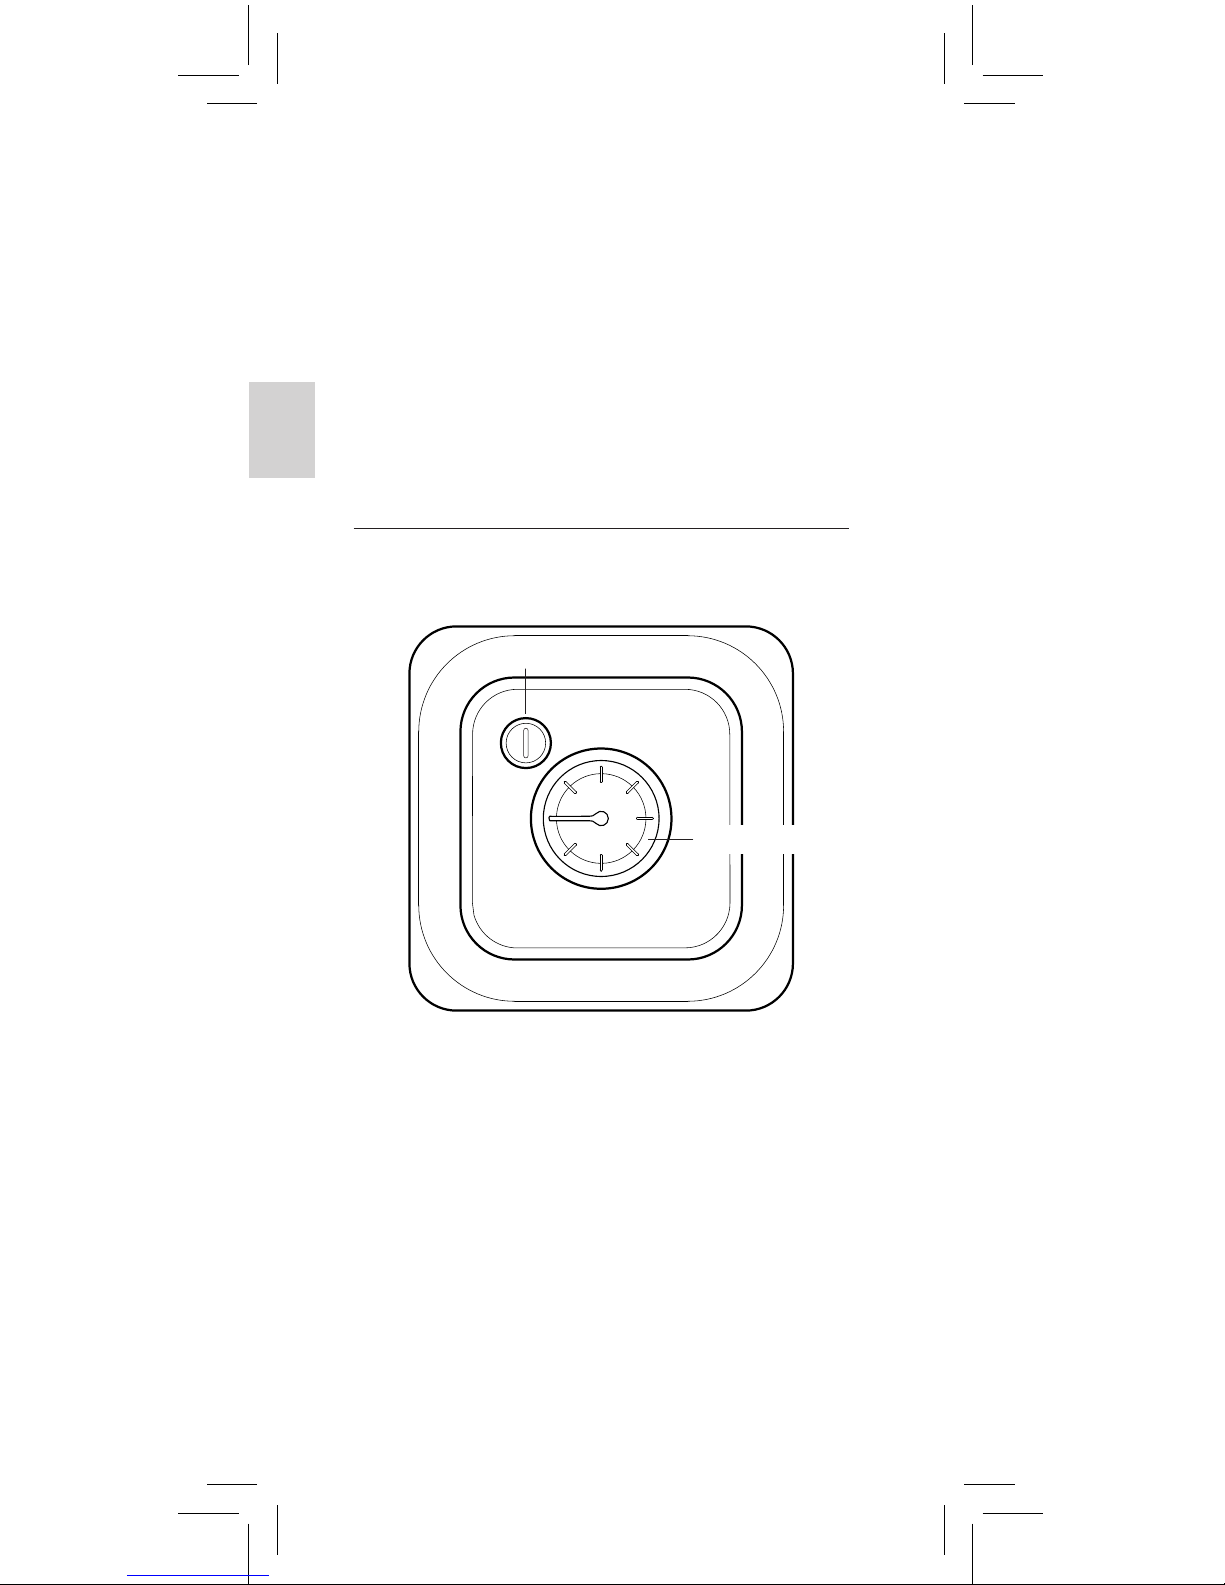
Floor thermostat (F) - A sensor in the oor
measures the temperature and then regu-
lates the heating accordingly.
This is the
factory setting.
Room thermostat (R) -The thermostat
has built-in sensors for measuring the
room’s temperature and controlling the
heating.
Room and oor thermostat (R&F) - The
built-in sensor regulates the room tem-
perature and the sensor in the oor func-
tions as a oor temperature limiter. The
limitation can be set to between 25°C
and 45°C.The factory setting is 35 °C.
Important
In rooms with large windows that are ex-
posed to solar insolation, we recommend
the Room and oor thermostat function.
In rooms with wooden ooring, the
Room and oor thermostat function
must always be used.

28
The overheating protection is adjusted here.
The adjustment of the regulating
function, must be done by a qualied
electrician. The knob and the front rst
have to be removed. Disconnect from
power supply before removing.
Then slide the control to the required
position using a small screwdriver.
The regulating function is adjusted here.
F- Floor thermostat R- Room thermostat
R&F - Room and oor thermostat

29
EN
Temperature
Regulating function
The thermostat regulates the
temperature via a sensor in the oor
that measures the temperature and
regulates the heating accordingly.
Set the temperature required
Change the oor temperature by turn-
ing the knob. Min. position on the con-
trol corresponds to 10 °C, max. position
corresponds to 45°C. An appropriate
setting is usually between 2 and 3.
The temperature does not stabilise
until the underoor heating system has
been on for a few days. It might then
be necessary to adjust the thermostat’s
setting.
Indication
The colours on the on/o switch show
the current status for the thermostat.
Red light - the thermostat is on and the
underoor heating is activated.
Green light- the thermostat is on and
the underoor heating is switched o.

30
Key lock button
When you have found a suitable set-
ting for the temperature you can lock
the knob. This prevents the control
being changed accidentally.
See illustration below. First remove
the knob. Then move the two plastic
parts so that they dene the interval
required. Replace the knob.

31
EN
Troubleshooting
Important The underoor heating
system is an electrical power installa-
tion and any faults must therefore be
remedied by a qualied electrician.
Fault indication
In the event of damage or breakdown
of the oor sensor the thermostat
switches o and the light starts to ash
alternately green and red.
If the floor sensor should be defective
it can be replaced, provided that it is
installed in a spiral hose laid in the oor
as per instructions.
Test values for oor sensor
The following values apply when
the oor sensor’s measurements are
checked.
Temperature Resistance
10oC 18,0 kΩ
15oC 14,7 kΩ
20oC 12,1 kΩ
25oC 10,0 kΩ
30oC 8,3 kΩ

32
Technical specications
Voltage 230 VAC-50 Hz
Floor temp. range 10-45°C
Breaking capacity 16A/230 VAC/Single-
pole
Connection cable max 2.5 mm2
Load cos φ = 1
Hysteresis +- 0.3°C
Protection class IP21
Max. length sensor
cable 50 m, 2x1.5 mm2
Approvals:
Table of contents
Other Lorenzoni Thermostat manuals