LTC VP60 User manual

MINI LED PROJECTOR
Ref.: VP60
USER
MANUAL
MANUEL D’UTILISATION
BEDIENUNGSANLEITUNG
MANUAL DE UTILIZARE
NAVODILA ZA UPORABO
HANDLEIDING
MANUAL DE INSTRUCCIONES
WICHTIGER HINWEIS: Elektrogeräte gehören nicht in den Hausmüll. Sie müssen in speziellen Betrieben recycelt werden. Bringen Sie sie zu einer
speziellen Entsorgungsstelle für Elektrokleingeräte (Wertstoffhof)!
BELANGRIJK: De elektrische producten mogen niet naast het huisvuil geplaatst worden. Gelieve deze te laten recycleren daar waar er centra’s
hiervoor voorzien is. Raadpleeg de plaatselijke autoriteiten of uw verkoper ivm de manier van recycleren.
NOTA IMPORTANTE: Produtos eléctricos não deverão ser postos em contentores de lixo caseiros. Por favor, deposite-os em contentores para
reciclagem. Questione as autoridades locais ou onde adquiriu o produto sobre como deverá proceder.
NOTA IMPORTANTE: Produtos eléctricos não deverão ser postos em contentores de lixo caseiros. Por favor, deposite-os em contentores para reciclagem.
Questione as autoridades locais ou onde adquiriu o produto sobre como deverá proceder.
WAŻNA UWAGA: Elektryczne produkty nie mogą być wyrzucane wraz z odpadami domowymi. Prosimy o przyniesienie ich do centrum recyklingu. Zapytaj
sprzedawcę o sposób postępowania.
NOTA IMPORTANTA: Deseurile care provin de la produsele electrice si electronice nu se vor pune la gunoiul menajer. Dezafectarea acestora trebuie sa se faca la
centrele de colectare special amenajate. Contactati autoritatile locale pentru informatii privind procedura de dezafectare a deseurilor electrice si electronice.
Imported from China by:
LOTRONIC SA
Avenue Zénobe Gramme 11
1480 Saintes
Belgium
1

1. BEFORE YOU BEGIN
Contents of the carton:
•1 x Mini LED Projector
•1x Mains adaptor
•1x 3-in-1 AV lead
•1x remote control
Unpacking Instructions
Immediately upon receiving a fixture, carefully unpack the carton, check the contents to ensure that all parts are
present and have been received in good condition. Notify the freight company immediately and retain packing
material for inspection if any parts appear to be damaged from shipping or the carton itself shows signs of
mishandling. Keep the carton and all packing materials. In the event that a fixture must be returned to the factory, it
is important that the fixture be returned in the original factory box and packing.
Safety Instructions
Please read these instructions carefully, they include important information about the installation, usage and
maintenance of this product.
• Please keep this User Guide for future reference. If you sell the unit to another user, be sure that he also receives
this instruction booklet.
• Always make sure that you are connecting to the proper voltage, and that the line voltage you are connecting to is
not higher than that stated on the decal or rear panel of the fixture.
• This product is intended for indoor use only!
• To prevent risk of fire or shock, do not expose fixture to rain or moisture. Make sure there are no flammable
materials close to the unit while operating.
• The unit must be installed in a location with adequate ventilation, at least 20in (50cm) from adjacent surfaces. Be
sure that no ventilation slots are blocked.
• Always disconnect from power source before servicing or replacing fuse and be sure to replace with same fuse size
and type.
• Maximum ambient temperature (Ta) is 104° F (40°C). Do not operate the fixture at temperatures higher than this.
• In the event of a serious operating problem, stop using the unit immediately. Never try to repair the unit by
yourself. Repairs carried out by unskilled people can lead to damage or malfunction. Please contact the nearest
authorized technical assistance center. Always use the same type of spare parts.
•Make sure the power cord is never crimped or damaged.
•Never disconnect the power cord by pulling or tugging on the cord.
• Avoid direct eye exposure to the light source while it is on.
.
DISCONNECT DEVICE: Where the MAINS plug or an appliance coupler is used as the disconnect device, the
disconnect device shall remain readily operable.
Features
•Use of long-life RGB LEDs for colorful, sharp pictures
•Compact and lightweight
•Easy switch between 16:9 & 4:3 format
•Low noise
•Low power consumption of less than 24W
GB
2

•Multiple input interface: AV-VGA, USB, SD, HDMI
•Can be powered by 12Vdc via the cigar lighter socket
•Headphone output socket
Supported Multimedia files
Audio files:
WMA – MP3 – MP4
Image files:
JPEG – BMP – PNG
Video files:
MPEG1 – MPEG4 – RM – RMV3 – H264 – MOV – MJPEG – FLV – VC1 – DIVX
Description
Functions of the buttons
1. Left
2. Indicator
3. Power button
4. Up
5. Right
6. Menu
7. Down
8. Source
1. Left: Move left / Volume down
3. Power: Switch the unit on and off
4. Up: Move upwards / Confirm the multimedia item
5. Right: Move towards the right / Volume up
6. Menu: OSD menu (Select your language)
7. Down: Move downwards / Repeat the multimedia item
8. Source: Select the input source/ Confirm your choice
Remote Control
1. Power on/off
2. Menu
3. Mute
4. Source button
5. Play/Pause
6. OK
7. Toggle between 4:3 / 16:9 format
8. Exit
9. UP / DOWN / LEFT / RIGHT
10. Next
11. Forwards
12. Backwards
13. Previous
3

Operation
Plug the DC plug into the 12V DC IN socket on the rear panel of the unit and the mains adaptor into a suitable mains
outlet. Note: Please plug the 12Vdc in first and then make the connection to the mains.
1. Switch on/off: Press the Power button on the unit (3) or on the remote control (1).
To switch the unit off, press again the same button on the unit or the remote control.
2. Focus
Place the projector on a stable surface facing the projection screen. Turn the lens until you get a sharp picture.
3. Menu
To leave a menu, press again MENU button.
To select a menu item, press OK on the remote control or SOURCE on the unit and change the settings via the
LEFT/RIGHT buttons. Browse through the items in the sub-menu via the UP/DOWN buttons.
Confirm your choice via the SOURCE button on the unit or the OK button on the remote control.
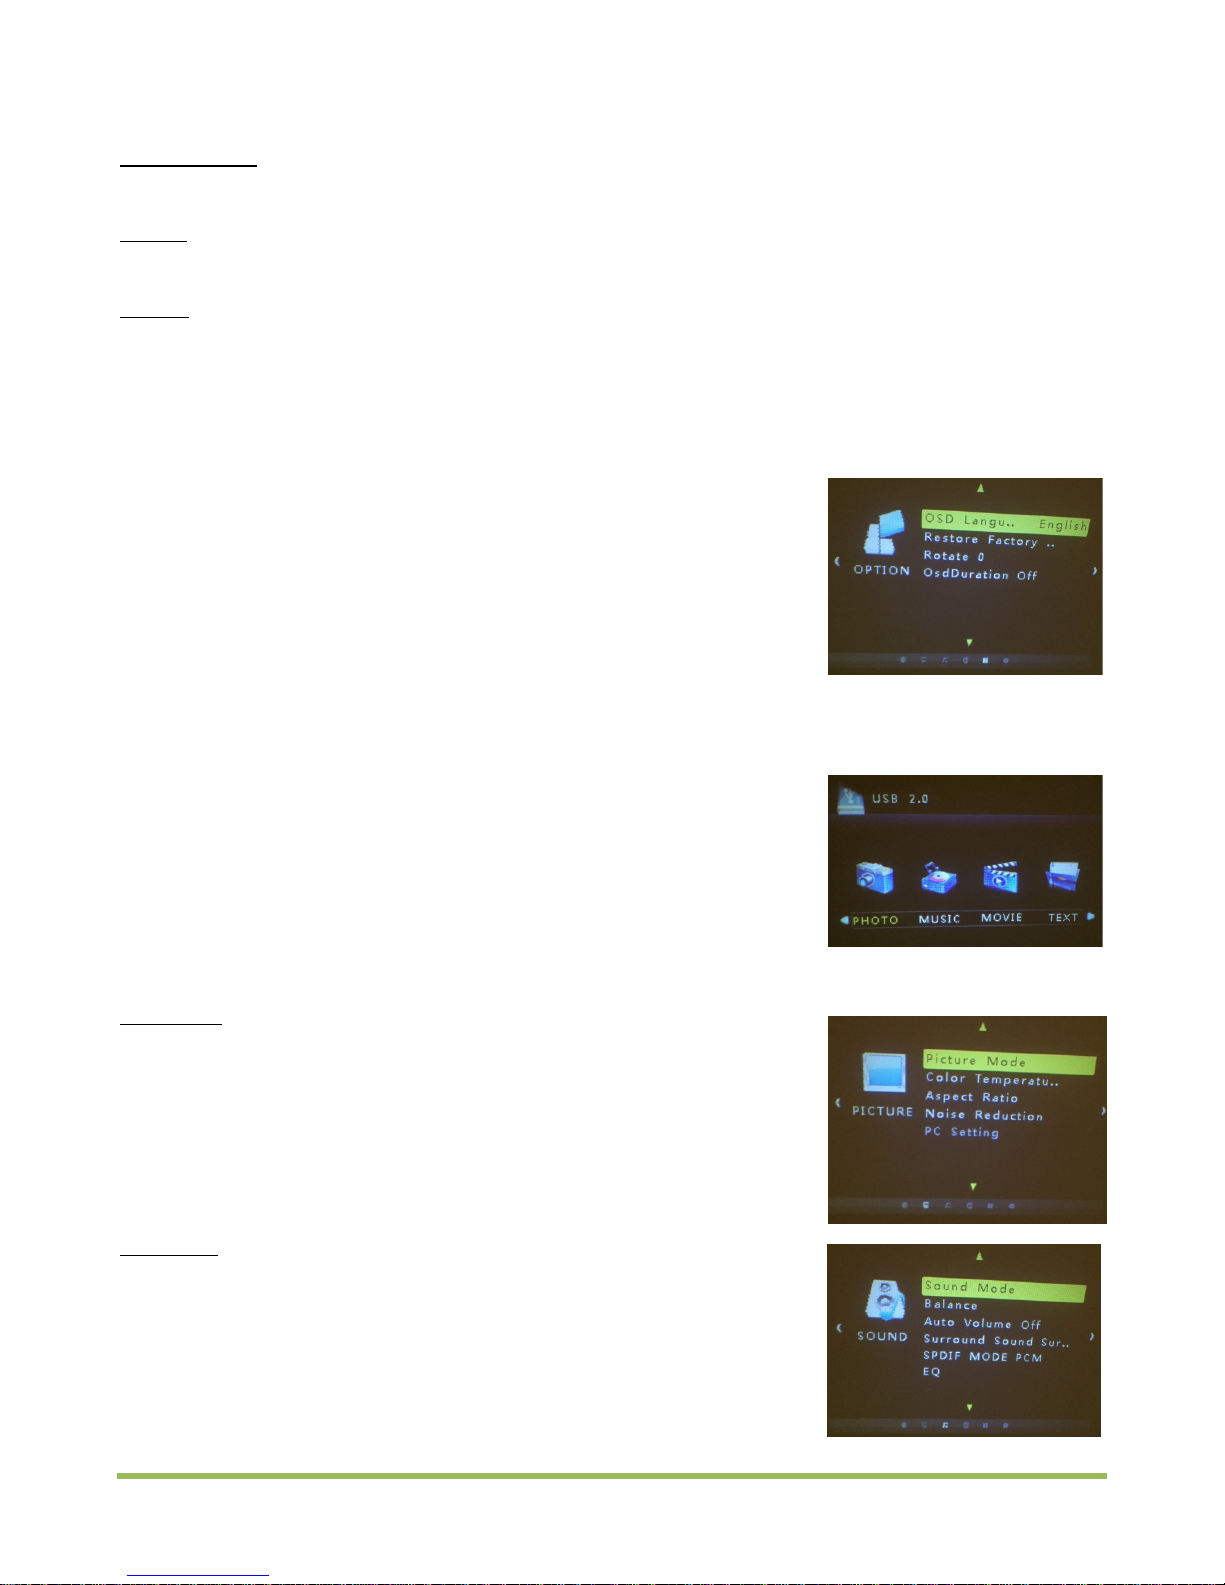
3.1 OSD Settings
Press MENU and browse through the various functions via the LEFT/RIGHT arrow
buttons until the OSD menu is displayed. Then press SOURCE to enter into the
language selection.
Select the display language of the menu via the LEFT/RIGHT arrow buttons and
confirm via the SOURCE button on the unit or OK on the remote control. Press
MENU to go back to the initial OPTION menu.
The second menu item restores the factory values.
The third menu item rotates the picture horizontally or vertically.
3.2 Select the input source
Insert a USB stick or an SD card. Press SOURCE on the unit (8) or on the remote
control (4).
A screen showing the various file types is displayed. This menu allows you to
watch videos, view pictures or listen to music depending on your selection.
Select the icon that matches your file type via the LEFT/RIGHT buttons and press
OK (or SOURCE) to confirm.
Select the file that you want to play via the LEFT/RIGHT buttons and press the
PLAY button (5) on the remote control to start play.
3.3 PICTURE
Press MENU (6) on the unit or on the remote (2) to display the OSD menu. Select
the sub-menu PICTURE via the UP/DOWN & LEFT/RIGHT buttons.
Press OK or SOURCE to select the first menu item in the PICTURE menu.
Here you can set the brightness, contrast, color, etc.
•Color temperature (warm, medium or cold colors or user settings)
•Aspect ratio : Select the picture format (16/9 or 4 :3)
•Noise reduction (stop + 3 reduction level + default settings)
3.4 SOUND:
You can set following functions:
•Audio mode
•Balance
•Auto volume
•SPDIF Mode
•Equalizer
4

3.5 TIME
The possible settings are :
•Clock (setting of date and time)
•Automatic stop time
•Automatic on time
3.3 Multimedia menu
Insert the USB or SD media first. Press the source button and select Media. Choose the icon of your file type and
press OK to confirm.
This menu allows you to play videos, show photos or listen to music according to your selection.
Please note:
You can only insert one USB or SD media at a time, otherwise the projector will not recognize any of them.
The unit can only read the type of file that matches the selected format, i.e. if you have selected a video source,
it will only read video file formats (e.g. MPEG4) but no JPG or MP3 files, etc. For these file formats, you have to
select the PHOTO or MUSIC folder. To go back to the selection screen, press MENU.
Specifications
Image system .................................................................................................................................................LCD
Lamp............................................................................................................................................................... LED
Resolution .............................................................................................................................................640 x 480
Brightness............................................................................................................................................ 80 lumens
Image size.....................................................................................................................20-100 inches/50-250cm
Contrast....................................................................................................................................................... 400:1
Lens ............................................................................................................................................................ F=125
Colors ......................................................................................................................................................... 1677K
Consumption.................................................................................................................................................24W
Projection distance ...............................................................................................................................1.1 to 4m
Speaker ..................................................................................................................................................... 2 x 1W
Control mode ................................................................................................................ Manual, remote control
Input voltage .............................................................................................................................................. 12Vdc
Weight......................................................................................................................................................... 0.4kg
Dimensions..............................................................................................................................137 x 126 x 57mm
IMPORTANT NOTE: Electric products must not be put into household waste. Please bring them to a recycling
centre. Ask your local authorities or your dealer about the way to proceed.
5

1. PREPARATIFS
Contenu de l’emballage:
•1 Mini projecteur à LED
•1 adaptateur secteur
•1 cordon A/V 3-en-1
•1 télécommande
Déballage
Dès réception de l’appareil, ouvrez le carton et vérifiez que le contenu est complet et en bon état. Sinon, prévenez
immédiatement le transporteur et conservez l’emballage s’il montre des signes de mauvais traitements. Conservez le
carton et tous les matériaux d’emballage afin de pouvoir transporter l’appareil en toute sécurité.
Consignes de sécurité
Lisez attentivement ce manuel qui contient des informations importantes sur l’installation, l’utilisation et l’entretien
de cet appareil.
• Conservez le manuel pour référence ultérieure. Si l’appareil change un jour de propriétaire, assurez-vous que le
nouvel utilisateur est en possession du manuel.
• Assurez-vous que la tension secteur convient à cet appareil et qu’elle ne dépasse pas la tension d’alimentation
indiqué sur la plaque signalétique de l’appareil.
• Uniquement pour utilisation à l’intérieur!
• Afin d’éviter tout risque d’incendie ou de choc électrique, ne pas exposer cet appareil à la pluie ou à l’humidité.
Assurez-vous qu’aucun objet inflammable ne se trouve à proximité de l’appareil pendant son fonctionnement.
• Installez l’appareil à un endroit bien ventilé à une distance minimum de 50cm de toute surface. Assurez-vous que
les fentes de ventilation ne sont pas bloquées.
• Débranchez l’appareil du secteur avant toute manipulation ou entretien. Lorsque vous remplacez le fusible, utilisez
uniquement un fusible qui présente exactement les mêmes caractéristiques que l’ancien.
• La température ambiante ne doit pas dépasser 40°C. Ne pas faire fonctionner l’appareil à des températures
supérieures.
• En cas de dysfonctionnement, arrêtez immédiatement l’appareil. N’essayez jamais de réparer l’appareil par vous-
même. Une réparation mal faite peut entraîner des dommages et des dysfonctionnements. Contactez un service
technique agréé. Utilisez uniquement des pièces détachées identiques aux pièces d’origine.
•Assurez-vous que le cordon d’alimentation n’est jamais écrasé ni endommagé.
•Ne jamais débrancher l’appareil en tirant sur le cordon.
• Ne pas exposer vos yeux à la source lumineuse.
•Lorsque le cordon d'alimentation ou un coupleur d'appareil est utilisé comme dispositif de déconnexion, ce
dispositif doit rester facilement accessible;
Si un interrupteur omnipolaire est utilisé comme dispositif de déconnexion, l'emplacement sur l'appareil et la
fonction de l'interrupteur doit être décrite, et le commutateur doit rester facilement accessible
Caractéristiques
•LED RGB longue durée pour de belles couleurs et des images nettes
•Compact et léger
•Commutation facile entre les formats 16:9 & 4:3
•Silencieux
F
6

•Faible consommation de courant de moins que 24W
•Multiples sources d’entrée: AV-VGA, USB, SD, HDMI
•Peut être alimenté par une fiche allume-cigare
•Fiche de sortie casque
Fichiers Multimédia acceptés
Fichiers Audio:
WMA – MP3 – MP4
Fichiers d’Image:
JPEG – BMP – PNG
Fichiers Vidéo:
MPEG1 – MPEG4 – RM – RMV3 – H264 – MOV – MJPEG – FLV – VC1 – DIVX
Description
Fonctions des boutons
1. Gauche
2. Indicateur
3. Bouton M/A
4. Up (vers le haut)
5. Droite
6. Menu
7. Down (vers le bas)
8. Source
1. Gauche: Déplacement vers la gauche / Baisse du volume
3. Power: Mise sous tension & arrêt de l’appareil
4. Up: Déplacement vers le haut / Confirmation du point de menu multimédia
5. Right: Déplacement vers le droite / Augmentation du volume
6. Menu: Menu OSD (choisissez votre langue)
7. Down: Déplacement vers le bas / Répétition du point de menu multimédia
8. Source: Sélection de la source d’entrée/Confirmation de la sélection
Télécommande
1. Mise sous tension/arrêt
2. Menu
3. Coupure du son
4. Source
5. Lecture/Pause
6. OK
7. Bascule entre le format 4:3 et 16:9
8. Quitter
9. HAUT / BAS / GAUCHE / DROITE
10. Suivant
11. Vers l’avant
12. Vers l’arrière
13. Précédent
7

Fonctionnement
Branchez la fiche DC sur la fiche 12V DC IN à l’arrière de l’appareil et l’autre extrémité sur une prise secteur
appropriée. Note: Commencez par brancher d’abord la fiche 12V et ensuite la fiche secteur.
1. Interrupteur M/A: Appuyez sur la touche Power sur l’appareil (3) ou sur la télécommande (1) pour mettre le
projecteur sous ou hors tension.
2. Mise au point
Placez le projecteur sur une surface stable face à l’écran de projection. Tournez la lentille jusqu’à ce que vous
obteniez une image nette.
3. Menus
Pour quitter un menu, appuyez à nouveau sur MENU.
Pour rentrer dans un point de menu, appuyez sur la touche OK sur la télécommande ou sur la touche SOURCE
sur l’appareil et changez les réglages au moyen des touches GAUCHE/DROITE. Passez d’un point à l’autre dans
le sous-menu au moyen des touches HAUT/BAS.
Pour valider votre sélection, appuyez sur la touche SOURCE sur l’appareil ou sur la touche OK de la
télécommande.
3.1 Réglages OSD
Appuyez sur la touche MENU et parcourez les différentes fonctions avec les
flèches GAUCHE / DROITE jusqu’à ce que le menu des réglages OSD s’affiche. Puis
appuyer sur SOURCE pour rentrer dans la sélection des langues.
Sélectionnez la langue d’affichage du menu avec les flèches GAUCHE/DROITE et
confirmez avec la touche SOURCE sur l’appareil ou OK sur la télécommande.
Appuyez ensuite sur MENU pour revenir au Menu initial OPTION.
Le deuxième point de ce menu restaure les réglages d’usine
Le troisième point retourne l’image horizontalement ou verticalement.
3.2 Sélection de la source d’entrée
Insérez d’abord une clé USB ou une carte SD. Appuyez sur la touche SOURCE sur
l’appareil (8) ou sur la télécommande (4).
Un écran avec les différents types de fichiers s’affiche. Ce menu vous permet de
passer des vidéos, d’afficher des photos ou d’écouter de la musique en fonction
de votre sélection.
Choisissez l’icône qui correspond au type de votre fichier au moyen des touches
GAUCHE/DROITE et appuyez sur OK (ou SOURCE) pour confirmer.
Sélectionnez le fichier que vous souhaitez passer en lecture avec les touches GAUCHE/DROITE et appuyez sur la
touche de lecture (5) sur la télécommande pour lancer la lecture.
Attention:
Vous devez brancher soit une clé USB, soit une carte SD mais pas les deux à la fois sinon le projecteur ne
reconnaîtra ni l’une ni l’autre.
Le projecteur ne peut lire que le type de fichier qui correspond au format sélectionné, c’est-à-dire que si vous
avez sélectionné la vidéo, il ne lit que les fichiers vidéo (p.ex. MPEG4) mais pas de fichiers JPG ou MP3 etc. Pour
cela, vous devez sélectionner le dossier PHOTO ou MUSIC. Pour revenir à l’écran de sélection des types de
fichiers, appuyez sur MENU.
3.3 IMAGE
Appuyez sur la touche MENU sur l’appareil (6) ou sur la télécommande (2) pour
afficher le menu à l’écran (OSD). Sélectionnez le sous-menu IMAGE au moyen des
touches HAUT/BAS et GAUCHE/DROITE.
Appuyez sur OK ou SOURCE pour aller dans le premier point du menu IMAGE.
Vous pouvez y régler la luminosité, le contraste, la couleur, etc.
•Température de couleur (couleurs chaudes, moyennes ou froides ou
8

utilisateur).
•Format d’image (16 :9 ou 4 :3)
•Réduction de bruit (arrêt + 3 niveaux de réduction + par défaut)
3.4 SON:
Les fonctions réglables sont:
•Mode audio
•Balance
•Volume automatique
•Mode SPDIF
•Egaliseur
3.5 HORLOGE
Les fonctions réglables sont:
•Horloge (réglage de la date et de l’heure)
•Heure d’arrêt automatique
•Heure de mise en marche automatique
Caractéristiques techniques
Système d’image............................................................................................................................................LCD
Lampe............................................................................................................................................................. LED
Résolution d’origine..............................................................................................................................640 x 480
Luminosité........................................................................................................................................... 80 lumens
Dimensions de l’image ...................................................................................................................... 50 à 250cm
Contraste..................................................................................................................................................... 400:1
Lentille........................................................................................................................................................ F=125
Couleurs ..................................................................................................................................................... 1677K
Consommation..............................................................................................................................................24W
Distance de projection........................................................................................................................... 1.1 à 4m
Haut-parleur.............................................................................................................................................. 2 x 1W
Modes de contrôle........................................................................................................Manuel, Télécommande
Tension d’entrée ........................................................................................................................................ 12Vdc
Poids............................................................................................................................................................ 0.4kg
Dimensions..............................................................................................................................137 x 126 x 57mm
NOTE IMPORTANTE : Les produits électriques ne doivent pas être mis au rebut avec les ordures ménagères.
Veuillez les faire recycler là où il existe des centres pour cela. Consultez les autorités locales ou votre
revendeur sur la façon de les recycler.
9

1. VORBEREITUNGEN
Verpackungsinhalt:
•1 x Mini LED Projector
•1x Mains adaptor
•1x 3-in-1 AV lead
•1x remote control
Auspacken
Sofort nach Empfang vorsichtig den Karton auspacken und den Inhalt überprüfen. Alle Teile müssen vollzählig und in
einwandfreiem Zustand sein. Sofort die Transportfirma benachrichtigen und das Verpackungsmaterial aufbewahren,
wenn Teile Transportschäden aufweisen. Verpackungsmaterial auch für späteren Transport des Geräts aufbewahren.
Sicherheitshinweise
Diese Anleitung sorgfältig vor der ersten Inbetriebnahme lesen. Sie enthält wichtige Informationen über Installation,
Gebrauch und Instandhaltung des Geräts.
• Die Anleitung für spätere Bezugnahme aufbewahren und an den nächsten Bediener weitergeben.
• Stets die Netzspannung vor Anschluss des Geräts überprüfen Sie muss mit der auf der Rückseite des Geräts
angegebenen Spannung übereinstimmen und darf auf keinen Fall höher sein.
• Dieses Gerät ist nur für Innengebrauch!
• Um Brand und Stromschlag zu vermeiden, das Gerät vor Regen und Feuchtigkeit schützen. Keine brennbaren
Materialien während des Betriebs in der Nähe des Geräts lassen.
• Das Gerät muss an einem gut belüfteten Ort und in mindestens 50cm Entfernung zur nächsten Fläche angebracht
werden. Darauf achten, dass die Belüftungsschlitze nicht blockiert oder verstopft sind.
• Immer erst das Gerät vom Netz trennen, bevor es gewartet oder die Sicherung ersetzt wird. Die Sicherung nur
durch eine identische ersetzen.
• Die Raumtemperatur darf 40°C nicht überschreiten. Das Gerät niemals bei höheren Temperaturen betreiben.
• Bei Betriebsstörungen das Gerät sofort ausschalten. Das Gerät niemals selbst reparieren. Reparaturen dürfen nur
von einem Fachmann vorgenommen werden. Alle verwendeten Ersatzteile müssen mit den Originalteilen identisch
sein.
•Vergewissern Sie sich, dass das Netzkabel nicht zerquetscht oder beschädigt werden kann.
• Beim Abziehen des Netzsteckers nur am Stecker ziehen, niemals am Kabel.
• Niemals direkt in die Lichtquelle blicken.
•Netztrennungsvorrichtungen
a) Wenn das Gerät über den Netzstecker ausgeschaltet wird, muss die Steckdose jederzeit leicht zugänglich
bleiben
b) Wenn das Gerät über einen Schalter ausgeschaltet wird, muss dieser klar gekennzeichnet und leicht zugänglich
sein.
Features
•Einsatz von besonders langlebigen RGB LEDs für farbenfrohe, scharfe Bilder
•Kompakt und leicht
•Einfaches Umschalten zwischen 16:9 & 4:3 Format
•Geräuscharm
•Geringer Energieverbrauch von weniger als 24W
D
10

•Zahlreiche Eingangsschnittstellen: AV-VGA, USB, SD, HDMI
•Versorgung auch über den 12VDC Autostecker möglich
•Kopfhörerausgang
Unterstützte Multimedia Dateien
Audio Dateien:
WMA – MP3 – MP4
Bilddateien:
JPEG – BMP – PNG
Videodateien:
MPEG1 – MPEG4 – RM – RMV3 – H264 – MOV – MJPEG – FLV – VC1 – DIVX
Beschreibung
Funktionen der Bedienelemente
1. Links
2. Betriebs-LED
3. Ein/Aus Schalter
4. Aufwärts
5. Rechts
6. Menü
7. Abwärts
8. Source
1. Links: Bewegung nach links / Lautstärke mindern
3. Power: Ein- und Ausschalten des Geräts
4. Aufwärtsbewegung/ Bestätigen
5. Rechts: Bewegung nach rechts / Lautstärke erhöhen
6. Menü: OSD Menü (Sprachwahl)
7. Abwärtsbewgung / Wiederholen
8. Source: Wahl der Eingangsquelle/ Wahl bestätigen
Fernbedienung
1. Ein/Aus
2. Menü
3. Tonstopp
4. Source Taste
5. Play/Pause
6. OK
7. Umschalten zwischen 4:3 / 16:9 Format
8. Verlassen
9. Pfeiltasten
10. Nächster
11. Weiter
12. Zurück
13. Voriger
11

Bedienung
Den DC Stecker in die 12V DC IN Buchse auf der Rückseite stecken und das andere Ende des Netzteils in eine
geeignete Netzsteckdose. Hinweis: Bitte ZUERST den 12V DC Stecker einstecken und dann erst den Netzanschluss
vornehmen.
1. Ein/Ausschalten:Die POWER Taste (3) auf dem Gerät oder auf der Fernbedienung (1) drücken.
Zum Ausschalten erneut dieselbe Taste auf dem Gerät oder der Fernbedienung drücken.
2. Scharfeinstellung
Den Projektor auf eine stabile Fläche gegenüber der Leinwand stellen. Die Linse drehen, bis Sie ein scharfes Bild
bekommen.
3. Menü
Um das Menü zu verlassen, erneut auf MENU drücken.
Um einen Menüpunkt zu wählen, die OK Taste auf der Fernbedienung oder die SOURCE Taste auf dem Gerät
drücken und die Werte mit den LINKS/RECHTS Tasten einstellen. Mit den AUF/AB Tasten durch das Menü
gehen.
Die Wahl mit der SOURCE Taste auf dem Gerät oder der OK Taste auf der Fernbedienung bestätigen.
3.1 OSD Einstellungen
Die MENU Taste drücken und mit den RECHTS/LINKS Tasten durch die
verschiedenen Funktionen gehen bis das OSD Menü erscheint. SOURCE Taste
drücken, um die Sprache einzustellen.
Die Displaysprache des Menüs mit den LINKS/RECHTS Tasten wählen und mit der
SOURCE Taste auf dem Gerät bzw. der OK Taste auf der Fernbedienung bestätigen.
Erneut die MENU Taste drücken, um ins OPTION Menü zurück zu gehen.
Der 2. Menüpunkt stellt das Gerät zurück auf die Werkseinstellungen.
Im 3. Menüpunkt kann man das Bild horizontal oder vertikal spiegelverkehrt anzeigen.
3.2 Wahl der Eingangsquelle
Einen USB Stick oder eine SD Karte einstecken. Die SOURCE Taste auf dem Gerät
(8) oder auf der Fernbedienung (4) drücken.
Es erscheint ein Bildschirm mit den verschiedenen Dateitypen. In diesem Menü
können Sie wählen, ob Sie Videos sehen, Bilder betrachten oder Musik hören
möchten.
Wählen Sie mit den RECHTS/LINKS Tasten die Icon, die Ihrem Dateiformat
entspricht und bestätigen Sie mit OK (oder SOURCE).
Wählen Sie die Datei, die Sie abspielen möchten, mit den RECHTS/LINKS Tasten
und drücken Sie die PLAY Taste (5) auf der Fernbedienung.
3.3 BILD
Die MENU (6) Taste auf dem Gerät oder auf der Fernbedienung (2) drücken, um
das OSD Menü anzuzeigen. Mit den AUF/AB & RECHTS/LINKS Tasten durch die
Menü punkte gehen.
Auf OK oder SOURCE drücken, um den ersten Menüpunkt zu wählen.
Hier können Sie die Helligkeit, den Kontrast, die Farbe usw. einstellen.
•Farbtemperatur (warm, mittel, kalte Farben oder Bedienereinstellung)
•Bildformat : Wählen sie zwischen 16:9 oder 4 :3
•Geräuschreduzierung (Stopp + 3 Einstellpegel + Werkeinstellung)
12

3.4 TON:
Sie können folgende Funktionen einstellen:
•Audio Betrieb
•Balance
•Automatische Lautstärke
•SPDIF Modus
•Equalizer
3.5 UHRZEIT
Die Einstellmöglichkeiten sind :
•Uhrzeit (Einstellung von Datum und Uhrzeit (Hinweis: Sie können das
Datum bei der Einstellung nicht sehen, erst wenn die Einstellung bestätigt
wurde, erscheint das Datum)
•Automatische Ausschaltzeit
•Automatische Einschaltzeit
3.3 Multimedia Menü
Als erstes einen USB Stick oder eine SD Karte anschließen. Die SOURCE Taste drücken und MEDIA wählen. Wählen
Sie die Icon, die Ihrem Dateiformat entspricht und drücken Sie auf OK.
In diesem Menü können Sie Videos abspielen, Fotos zeigen oder Musik hören, je nachdem was Sie gewählt haben.
Wichtiger Hinweis:
Sie dürfen nur entweder einen USB Stick oder eine SD Karte einstecken, aber nicht beides zugleich, sonst erkennt
das Gerät keins von beiden.
Das Gerät kann nur das Dateiformat abspielen, das Sie vorher gewählt haben. Wenn Sie z.B. ein Videoformat
gewählt haben, können Sie nur Videoformat wie MPEG4 abspielen, nicht aber JPG oder MP3 Dateien. Hierzu
müssen Sie den entsprechenden Bild- oder Musikordner wählen. Auf MENU drücken, um in den Wahlbildschirm
zurück zu schalten.
Technische Daten
Bildsystem......................................................................................................................................................LCD
Leuchtmittel................................................................................................................................................... LED
Auflösung ..............................................................................................................................................640 x 480
Helligkeit .............................................................................................................................................. 80 Lumen
Bildgröße.......................................................................................................................... 20-100 Zoll/50-250cm
Kontrast....................................................................................................................................................... 400:1
Linse ........................................................................................................................................................... F=125
Farben ........................................................................................................................................................ 1677K
Verbrauch......................................................................................................................................................24W
Projektionsentfernung .........................................................................................................................1.1 bis 4m
Lautsprecher ............................................................................................................................................. 2 x 1W
Steuerung............................................................................................................. Manuell, über Fernbedienung
Eingangsspannung ..................................................................................................................................... 12Vdc
Gewicht ....................................................................................................................................................... 0.4kg
Abmessungen..........................................................................................................................137 x 126 x 57mm
WICHTIGER HINWEIS: Elektrogeräte gehören nicht in den Hausmüll. Sie müssen in speziellen Betrieben
recycelt werden. Bringen Sie sie zu einer speziellen Entsorgungsstelle für Elektrokleingeräte (Wertstoffhof)!
13

1. INTRODUCERE
Continut colet:
•1 x Mini LED proiector
•1x adaptor principal
•1x cablu A/V 3-in-1
•1x telecomanda
Despachetarea produsului
Imediat ce ati primit dispozitivul, despachetati cu atentie si verificati continutul coletului pentru a va asigura ca toate
componentele sunt in cutie si ca au fost receptionate in stare buna. Anuntati compania de transport si pastrati
ambalajul pentru a fi verificat, in cazul in care o componenta s-a deteriorat in urma transportului sau daca cutia de
carton prezinta semne de manipulare necorespunzatoare. Pastrati cutia de carton si toate ambalajele. In cazul in care
dispozitivul trebuie returnat, este important ca acesta sa fie returnat in cutia si ambalajul original.
Instructiuni generale privind siguranta
Va rugam sa cititi instructiunile cu atentie, deoarece acestea cuprind informatii importante privind instalarea,
utilizarea si intretinerea produsului.
• Va rugam sa pastrati acest Ghid de Utilizare pentru referinte ulterioare. Daca vindeți aparatul unui alt utilizator,
asigurati-va ca si acesta primește manualul de instrucțiuni.
• Asigurati-va intotdeauna ca ati conectat aparatul la tensiunea corecta, si ca tensiunea de la retea la care veti
conecta aparatul nu este mai mare decat cea inscrisa pe partea de jos a dispozitivului de fixare.
• Acest produs este destinat doar pentru utilizare in interior!
• Pentru a preveni riscul de incendiu sau de electrocutare, nu expuneți dispozitivul in ploaie sau umezeala.
Asigurati-va ca nu exista materiale inflamabile in apropierea aparatului in timpul functionarii.
• Unitatea trebuie sa fie instalata intr-o locatie cu ventilatie adecvata, cel puțin 20 inch (50cm) de suprafetele
adiacente. Asigurati-va ca fantele de aerisire nu sunt blocate.
• Intotdeauna deconectați de la sursa de alimentare inainte de a repara sau inlocui siguranța si asigurați-va ca o
inlocuiti cu o siguranta de aceeasi dimensiune si acelasi tip.
• Temperatura maxima ambianta (Ta) este de 104 ° F (40 ° C). Nu folositi dispozitivul la temperaturi mai mari decat
aceasta.
• In cazul unei probleme grave de functionare, nu mai utilizati unitatea. Nu incercati niciodata sa reparati unitatea de
unul singur. Reparatiile efectuate de persoane necalificate pot duce la deteriorari sau o funcționare defectuoasa. Va
rugam sa contactați cel mai apropiat centru autorizat de asistenta tehnica. Utilizați intotdeauna acelasi tip de piese
de schimb.
• Asigurati-va ca, cablul de alimentare nu este niciodata ondulat sau deteriorat.
• Nu deconectați cablul de alimentare tragandu-l sau smucindu-l.
•Evitati expunerea directa a ochilor la sursa de lumina in timp ce aceasta este pornita.
.
DECONECTAREA APARATULUI: In cazul in care aparatul se deconecteaza de la priza in caz de urgenta, aceasta
operatie trebuie sa se poata efectua cu usurinta.
Caracteristici
•Leduri colorate RGB pentru imagine mai clara
•Compact si usor
•Schimbare usoara intre formatele 16:9 si 4:3
•Zgomot redus
RO
14

•Consum redus, mai putin de 24W
•Interfata multipla de intrare: AV-VGA, USB, SD, HDMI
•Poate fi alimentat de la o tensiune de 12 VDC prin mufa
•Mufă de ieșire pentru căști
Fisiere multimedia suportate
Fisier Audio:
WMA – MP3 – MP4
Fisier Imagine:
JPEG – BMP – PNG
Fisier Video :
MPEG1 – MPEG4 – RM – RMV3 – H264 – MOV – MJPEG – FLV – VC1 – DIVX
Descriere
Butoane
1. Stang
2. Indicator
3. Buton pornire
4. Sus
5. Drept
6. Meniu
7. Jos
8. Sursa
1. Stang: Apasati Stanga / Volum in jos
3. Pornire: Oprire sau pornire aparat
4. Sus: Mutare in sus / Confirmare element multimedia
5. Dreapta: Mutare in drept/ Volumul in sus
6. Meniu: meniu OSD menu (Selectare limba)
7. Jos: Mutare in jos / Repetare element multimedia
8. Source/Sursa: Selectati sursa de intrare / Confirmati alegerea
Telecomanda
1. Power on/off Pornire/Oprire
2. Meniu
3. Mute/ Mutare
4. Source
5. Play/Pause Redare/Pauza
6. OK
7. Comutati intre formatul 4:3 / 16:9
8. Exit/Iesire
9. UP/DOWN (SUS/JOS)/
LEFT/RIGHT (STANGA/DREAPTA)
10. Next/Urmator
11. Forward/Inainte
12. Backwards/Inapoi
13. Previous/Anterior
15

Operare
Introduceti mufa de alimentare DC in soclul din spatele aparatului iar apoi conectati adaptorul la sursa de alimentare
– respectati aceasta ordine de conectare, iar la deconectare procvedati invers.
1. Pornire/Oprire: Apasati butonul de Ponire de pe unitate (3) sau de pe telecomanda (1).
Pentru a opri aparatul, apasati din nou butonul de pe unitate sau de pe telecomanda.
2. Focalizare
Montati intotdeauna aparatul pe o suprafata sigura si stabila. Rotiți obiectivul până când veți obține o imagine clară.
3. Meniu
Pentru a intra in meniu, apasati butonul Meniu.
Pentru a selecta un element din meniu, apasati butonul OK de pe telecomanda sau SOURCE de pe aparat si
schimbati setarile cu butoanele STANG/DREPT. Pentru a alege apasati butoanele SUS/JOS.
Pentru a confirma ceea ce ati selectat apasati butonul SOURCE pe aparat sau OK pe telecomanda.
3.1 Setari OSD
Apasati Meniu si selectati din functii cu butoanele STANG/DREPT pana cand
meniul OSD este afisat. Apoi apasati SOURCE pentru a intra in setarile de limba.
Alegeti limba meniului cu butoanele STANG/DREPT si confirmati apasand butonul
SOURCE pe aparat sau OK pe telecomanda.
Apasati butonul Meniu pentru a reveni la meniul Optiuni.
Daca alegeti al doilea element din meniu, puteti reveni la setarile din fabrica.
Daca alegeti al treilea element din meniu, puteti roti imaginea orizontal sau
vertical.
3.2 Selectati sursa de intrare
Introduceti stick-ul USB sau cardul SD. Apasati SOURCE pe aparat (8) sau ON pe
telecomanda (4).
Ecranul va afisa diferite tipuri de fisiere. Acest meniu va permite sa vizionati fisiere
video, vizualiza imagini sau asculta muzică.
Selectați pictograma care corespunde tipului de fișier prin butoanele
STANG/DREPT si apasati OK (sau SOURCE) pentru a confirma.
Selectati fisierul cu butoanele STANG/DREPT si apasati PLAY (5) pe telecomanda
pentru a a porni redarea.
3.3 IMAGINE
Apasati butonul MENIU (6) pe aparat si pe telecomanda (2) pentru a afisa meniul
OSD. Selectati sub-meniul Picture prin butoanele SUS/JOS si STANG/DREPT.
Apasati OK sau SOURCE pentru a selecta primul element din meniul PICTURE.
Setare luminozitate, contrast, culoare etc.
•Aspect ratio : Selectati formatul imagini (16/9 or 4 :3)
•Reducerea zgomotului (stop + 3 reduction level + default settings)
•Color temperature (cald, mediu, culori reci sau setari utilizator)
16

3.4 SUNET:
Puteți seta următoarele funcții:
•Audio mode
•Balance
•Auto volume
•SPDIF Mode
•Egalizator
3.5 TIMP
Setările posibile sunt:
•Ceas(setare de data sau timp)
•Automatic stop time
•Automatic on time
3.3 Meniu Multimedia
Introduceti stick-ul USB sau cardul SD. Apasati butonul SOURCE si alegeti Media. Selectați pictograma fisierului si
apasati OK pentru a confirma. Acest meniu va permite sa vizionati fisiere video, vizualiza imagini sau asculta muzică.
Nota:
Introduceti doar stick-ul USB sau cardul SD, în caz contrar, proiectorul nu va recunoaște nici una dintre ele.
Unitatea poate citi numai tipul de fișier care se potrivește cu formatul selectat, de exemplu dacă ați selectat o
sursă video, se va citi doar formatele de fișiere video (de exemplu MPEG4), dar nu și JPG sau fișiere MP3 etc.
Pentru aceste formate de fișier, trebuie să selectați folderul PHOTO sau MUSIC. Pentru a reveni la ecranul de
selectare, apăsați MENU.
Specificatii
Imagine...........................................................................................................................................................LCD
Lampa............................................................................................................................................................. LED
Rezolutie ...............................................................................................................................................640 x 480
Luminozitate ..........................................................................................................................................80 leduri
Dimensiuni imagine .....................................................................................................20-100 inches/50-250cm
Contrast....................................................................................................................................................... 400:1
Lens ............................................................................................................................................................ F=125
Culori.......................................................................................................................................................... 1677K
Putere consumata.........................................................................................................................................24W
Distanta de proiecție…………………………………………………………………………………………………………..1.1 to 4m
Difuzor....................................................................................................................................................... 2 x 1W
Mod de control ................................................................................................................Manual, telecomanda
Tensiune de intare .................................................................................................................................... 12Vdc
Greutate...................................................................................................................................................... 0.4kg
Dimensiuni ..............................................................................................................................137 x 126 x 57mm
NOTA IMPORTANTA: Produsele electrice nu trebuie reciclate impreuna cu gunoiul menajer. Va rugam sa le
transportati la un centru de reciclare. Adresati-va autoritatilor locale cu privire la procedura de dezafectare a
deseurilor electrice si electronice.
17

1. PREDEN ZAČNETE
Vsebina škatle:
•1 x Mini LED Projector
•1x Mains adaptor
•1x 3-in-1 AV lead
•1x remote control
Navodila za razpakiranje
Takoj po prejemu paketa, pazljivo razpakirajte škatlo, preverite vsebino, da seprepričate, da je vsebina kompletna in
da je naprava v dobrem stanju.V primeru če ugotovite poškodbena škatli, ali pomanjkljivosti glede vsebine
škatle,takoj obvestite dostavitelja. Hranite škatlo za primer da se naprava mora vrniti proizvajalcu, pomembno je da
se vrne v originalni embalaži.
Varnostna navodila
Prosimo, da skrbno preberete ta navodila, ki vsebujejo pomembne informacije o namestitvi, uporabi in vzdrževanju
tega izdelka.
•Prosimo, hranite navodila za nadaljnjo uporabo. Če prodajate napravo drugemu uporabniku, se prepričajte, da
prejme tudi navodila za uporabo.
•Pred prvo uporabo se prepričajte, da napetost in frekvenca oskrbe z električno energijo ustrezajo porabi energije
enote.
•Naprava je samo za notranjo uporabo v suhem prostoru.
•Da bi preprečili nevarnost požara ali električnega udara, ne izpostavljajte naprave dežju ali vlagi. Prepričajte se,
da ni nobenih vnetljivih snovi v bližini enote, medtem ko deluje.
•Naprava mora biti postavljena v prostor z ustreznim prezračevanjem, vsaj 50 cm od sosednjih površin.
Prepričajte se da niso blokirani zračniki.
• Vedno izključite iz električnega omrežja pred servisiranjem ali zamenjavo varovalke in se prepričajte,
da nadomestite z varovalko enake velikosti in tip.
• Maksimalna temperatura (Ta) je 104 ° F (40 ° C). Ne uporabljajte naprave pri temperaturah, višjih od tega.
• V primeru resnega problema delovanja, prenehajte z uporabo naprave takoj. Nikoli ne poskušajte popravljati
sami. Popravila, ki jih izvajajo nekvalificiranih ljudi, lahko povzroči poškodbe ali okvare. Prosimo, da se
obrnite na najbližji pooblaščeni tehnični center za pomoč. Vedno uporabite isto vrsto rezervnih delov.
• Prepričajte se, da je napajalni kabel nikoli zavihnjen ali poškodovan. • Pri izklopu napajalnega kabla nikoli ne
vlecite za kabel, ampak za vtikač.
• Izogibajte se neposrednemu izpostavljanju oči svetlobnega vira, medtem ko je vklopljen.
•ODKLOP NAPRAVE: Če uporabljate omrežni vtikač ali sponke za odklop naprave, odklop naprave mora biti
enostavno dostopen.
Lastnosti
•Uporaba dolgo življenjsko dobo LED RGB za barvito, ostre slike
•Kompakten in lahek
•Enostaven preklop med 16: 9 in 4: 3 formatom
•Tiho delovanje
•Nizka poraba energije, manj kot 24W
•Večkratni vhodni vmesnik: AV-VGA, USB, SD, HDMI
•Lahko se napaja z 12V DC preko vtičnice za vžigalnik
•Izhod za slušalke
SLO
18

Podprte Multimedijske datoteke
Audio:
WMA – MP3 – MP4
Slike:
JPEG – BMP – PNG
Video:
MPEG1 – MPEG4 – RM – RMV3 – H264 – MOV – MJPEG – FLV – VC1 – DIVX
Opis
Funkcijski gumbi
1. Levo
2. Indikator
3. Gumb za vklop
4. Gor
5. Desno
6. Meni
7. Dol
8. Vir
1. Levo: Premik levo / Zmanjšanje glasnosti
3. Vklop / izklop enote
4. Gor: Premik navzgor / Potrditev postavke multimedia
5. Desno: Premik desno / Povečanje glasnosti
6. Meni: Meni OSD (Izberite svoj jezik)
7. Dol: Premikanje navzdol / Ponavljanje postavke multimedia
8. Vir: Izberite vhodni vir / Potrdite svojo izbiro
Daljinski upravljalec
1. Vklop/izklop
2. Meni
3. Vtišanje
4. Vir gumb
5. Predvajanje/Pavza
6. OK
7. Preklapljanje med 4:3/ 16:9 format
8. Izhod
9. GOR/ DOL/ LEVO/DESNO
10. Naslednja
11. Naprej
12. Nazaj
13. Prejšnja
19

Delovanje
Priključite DC vtikač v 12V DC vtičnico na hrbtni strani enote in napajalnika v ustrezno omrežno vtičnico. Opomba:
Prosimo, vključite prvo 12V DC nato priključite na omrežje.
1. Stikalo za vklop / izklop: Pritisnite gumb za vklop na enoti (3) ali na daljinskem upravljalniku (1).
Za izklop enote, ponovno pritisnite isti gumb na napravi ali daljinskem upravljalniku.
2. Ostrenje
Postavite projektor na stabilno podlago s pogledom na projekcijski zaslon. Zavrtite objektiv, dokler ne dobite ostro
sliko.
3. Meni
Če želite zapustiti meni, ponovno pritisnite gumb MENU.
Če želite izbrati element menija, pritisnite OK na daljinskem upravljalniku ali VIR na enoti in spreminjajte
nastavitev s pomočjo gumbov LEVO/DESNO. Brskanje po postavkah v podmeniju prek gumbov GOR/DOL.
Potrdite svojo izbiro s gumbom VIR na enoti ali tipko OK na daljinskem upravljalnikul.
3.1 OSD Nastavitve
Pritisnite MENI in brskanje po različnih funkcijah preko gumbov s puščicami
LEVO/DESNO, dokler se ne prikaže meni OSD. Nato pritisnite VIR za vstop v izbiro
jezika.
Izberite jezik prikaza menija preko gumbov s puščicami LEVO/DESNO, in potrdite s
tipko VIR na enoto ali OK na daljinskem upravljalniku. Pritisnite MENI, da se vrnete
v zečetnoi meni.
Druga točka menija obnovi tovarniške vrednosti.
Tretja meni vrti sliko horizontalno ali vertikalno.
3.2 Izbira vhodnega vira
Vstavite USB ključ ali SD kartico. Pritisnite VIR na enoti (8), ali na daljinskem
upravljalniku (4).
Prikaže se zaslon, ki prikazuje različne vrste datotek. Ta meni vam omogoča, da
gledate video posnetke, si ogledate fotografije ali poslušate glasbo, odvisno od
vaše izbire.
Izberite ikono, ki ustreza vrsti datoteke s pomočjo gumbov LEVO/DESNO in
pritisnite OK (ali VIR) za potrditev.
Izberite datoteko, ki jo želite predvajati preko gumbov LEVO/DESNO na levi strani in pritisnite gumb PREDVAJAJ (5) na
daljinskem upravljalniku, da začnete predvajanje.
3.3 SLIKE
Pritisnite MENI (6) na enoti ali (2) na daljinskem upravljalniku, da se prikaže OSD
meni. Izberite SLIKA podmeni preko gumbov GOR/DOL in LEVO/DESNO.
Pritisnite OK ali VIR, da izberete prvo točko menija v meniju SLIKA.
Tu lahko nastavite svetilnost, kontrast, barvo, itd.
•Temperatura barve (topla, srednje ali hladne barve ali uporabniške
nastavitve)
•Razmerje: Izberite format slike (16/9 ali 4: 3)
•Zmanjšanje hrupa (stop + 3 ravni zmanjšanje + privzete nastavitve)
20
Table of contents
Languages:
Other LTC Projector manuals