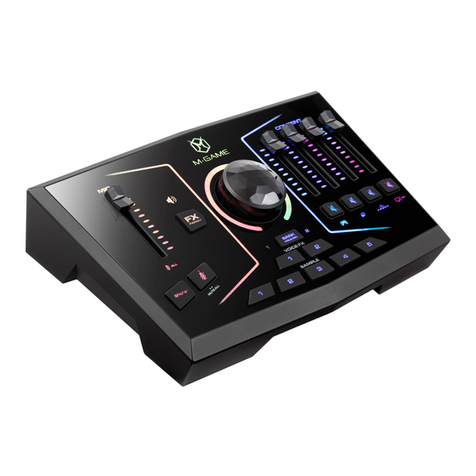
M-Audio M-Game Solo User manual

M-Game Solo
User Guide
v1.2

2
Table of Contents
Introduction.......................................................................................................5
Information & Support................................................................................................. 5
About This User Guide ................................................................................................5
Software Download and Installation..........................................................................5
Hardware Setup ..............................................................................................................6
Software Setup..................................................................................................7
Windows.......................................................................................................................7
macOS ..........................................................................................................................9
Operation ........................................................................................................11
Home Menu................................................................................................................11
Setup........................................................................................................................... 13
Microphone Settings .................................................................................................................... 13
Mute Button ................................................................................................................................. 13
"$%^#*" (CENSOR) Button.......................................................................................................... 14
Hardware Control Settings........................................................................................................... 14
Footswitches................................................................................................................................ 14
Routings .....................................................................................................................15

3
Sampler ......................................................................................................................16
Sample List .................................................................................................................................. 17
Sample Control ............................................................................................................................ 17
LED Control.................................................................................................................................. 18
Menu Bar...................................................................................................................................... 18
Sample Editor............................................................................................................................... 19
Effects ........................................................................................................................20
Button Control.............................................................................................................................. 21
Menu Bar...................................................................................................................................... 21
LED Control.................................................................................................................................. 21
Button Type.................................................................................................................................. 22
Individual Effects .......................................................................................................23
Reverb & Echo ............................................................................................................................. 23
Chorus Modulation....................................................................................................................... 23
Distortion...................................................................................................................................... 24
LEDs ...........................................................................................................................25
Color Frame ................................................................................................................................. 27
Features ..........................................................................................................28
Top Panel ...................................................................................................................28
Headphone/Main Level Control ................................................................................................... 28
Mic ............................................................................................................................................... 28
Stream.......................................................................................................................................... 29
Voice FX ....................................................................................................................................... 29
Samples ....................................................................................................................................... 29
Rear Panel.................................................................................................................. 30

4
Appendix .........................................................................................................31
LEDs ...........................................................................................................................31
Voice Effects .............................................................................................................. 32
Technical Specifications...........................................................................................33
Trademarks and Licenses ........................................................................................33

5
Introduction
Thank you for choosing M-Game Solo powered by M-Audio! The M-Game Solo is a powerful audio interface/mixer/sampler/
voice effects box designed for the streaming gamer. Preview samples and voice effects before you stream. Capture, create,
edit, save, and assign samples and voice effects and customize audio routing.
Information & Support
For the latest information about this product (documentation, technical specifications, system requirements, compatibility
information, etc.) and product registration, visit m-game.com.
About This User Guide
This manual should help you get familiar with using your M-Game Solo. For consistency, the terminology throughout is
based on M-Game nomenclature. We also used specific formatting to indicate particular topics of significance:
Important/Note/Tip: Important or helpful information on a given topic.
Names of buttons, controls, parameters, settings, and other options are written in bold characters throughout the manual.
Examples: Input gain is controlled using the mic Gain knob.
Connect speakers to the M-Game Solo’s Main Out.
Connect media player to the M-Game Solo’s Aux In.
Some parts of this manual refer to other relevant chapters or sections, which are cited in bold, italic blue characters. Click
the text to skip immediately to that section.
Examples: See the connection diagrams in the Hardware Setup section for more details.
Use the M-Game software to change the LED behavior of this button seen in the Microphone Settings
section.
Software Download and Installation
1. Before connecting M-Game Solo to your computer, first download and install the M-Game software (Windows 10, 64 bit
minimum supported, and macOS 10.15 minimum supported) to the computer that will be connected to
M-Game Solo using the link on the software download card. For the latest driver compatibility details and app support,
please visit m-game.com.
2. Open the files you downloaded and double-click the installer file.
3. Follow the on-screen instructions to install the M-Game software, and connect M-Game Solo's USB port to your
computer.
IMPORTANT: The M-Game software installer package installs the M-Game audio driver to your PC/macOS.

6
Hardware Setup
Note: Connect an 1/8" (3.5 mm) stereo cable into the Main Out if you wish to route a stereo copy of your livestream to
other devices. In a dual-PC setup, connect the Main Out on M-Game Solo to the LINE IN input on your streaming PC.
3. (Optional) Connect a single
(TS) or dual (TRS) footswitch
(optional) to M-Game Solo’s
Footswitch Input to activate an
effect or to trigger samples.
7. Connect M-Game Solo to
power and turn it on.
1. Connect your microphone and
headphones, or headset to the rear
panel of the M-Game.
4. (Optional) Connect
media player (optional) to
M-Game Solo’s Aux In.
5. (Optional) Connect a
gaming console’s or
television’s Audio Out to the
M-Game Solo’s Console
Input using Optical Digital
Audio (PCM) cable. Connect
the console’s HDMI output
to a video capture interface.
2. (Optional) Connect speakers to
the M-Game Solo’s Main Out.
6. Connect streaming/gaming computer
to M-Game Solo’s USB port.

7
Software Setup
Windows
1. Download and install the latest M-Game software (with embedded audio driver) from
m-game.com.
2. Connect the power and USB cable to the M-Game Solo and press the power button.
3. Connect your separate headphones and microphone, or combined headset, to the rear panel of
the M-Game Solo.
4. Open the M-Game software and select either the SET MIC from the HOME tab and follow the
on-screen instructions or go to the SETUP tab and select the HW METER button so its lit red.
a. Under Microphone, turn Phantom Power on or off depending on whether you’re using a
condenser microphone (Phantom Power on) or a dynamic microphone (Phantom Power off).
Note: Headset microphones do not require phantom power.
b. Speak into your mic at the loudest level you expect to speak in your stream and begin turning up the Gain knob on
the rear panel of M-Game Solo. You'll notice that the Mic Fader LEDs on M-Game Solo will light up when you
speak, showing the incoming signal. Continue speaking into the mic and turning up the Gain knob until you see the
Mic Fader LEDs flash red 3 times. If you see the Mic Fader LEDs flash red 3 times, this means M-Game Solo's
Mic Gain knob is set too high. Turn down the Mic Gain knob until you no longer see the LED flash red 3 times.
You’ll want to get the Mic Fader LEDs as close to the top LED without the LEDs all flashing.
Note: If you are using a low gain mic (like a SHURE SM7B or
ElectroVoice RE20) you will need to use the M-Game software's BOOST
function. You can find BOOST in the Setup tab under Basic Microphone
Settings. Simply speak into your mic at the loudest volume you expect to
speak in your stream and turn up the Boost knob until the Mic fader’s
meter in the M-Game software shows the top LED lit red. Slowly turn
the Boost knob back down until the Mic fader’s meter in the software no
longer shows red. You can change the BOOST level from Off to +24 dB.
Note: Now that you’ve setup your mic you can turn off the HW Meter
button in the M-Game software to return the Mic fader to its default LED
behavior.
c. Adjust the EQ, Compressor, Noise Gate, High Pass Filter (HPF), and Deesser settings to
get the best sound from your mic.
Note: You can also use one of the Mic presets in the M-Game software to automatically
configure your mic’s settings. These mic presets are found in File > Setup > Load
Microphone Settings.
5. In the SETUP tab's HARDWARE section select what source your Game audio is coming
from.
6. Open your game, chat, M-Game software, streaming software, and any other programs you
will be running in your stream and ensure that their audio is playing.
7. Press the Windows key and then type Sound Settings into the search bar. Alternatively, right
click the speaker icon in the taskbar and select Open Sound Settings.
8. On Windows 10, in Sound Settings, under Sound Output select System. This will ensure any audio that you're not
routing specifically to the M-Game Solo's Game, Chat, or Sampler fader will default to be controlled by the System
fader. Under Input select Stream. This will set your broadcast/stream mix as your default output source. In Sound
Settings under Advanced Sound Options, select App Volume and Device Preferences. This window shows every
audio source running and where that audio is being sent to and from (its Routing). This allows you to send audio from
different programs to the M-Game.
On Windows 11, in Sound Settings under Sound Output select System. This will ensure any audio that you're not
routing specifically to the M-Game Solo's Game, Chat, or Sampler fader will default to be controlled by the System
fader. Under Input select Stream, this will set your broadcast/stream mix as your default output source. In Sound
Settings select Volume mixer. This window shows every audio source running. You will also be able to select where
that audio is being sent to and from (its Routing) by pressing the down arrow next to the app's volume slider. This
allows you to send audio from different programs to the M-Game.

8
9. App Volume and Device Preferences (Windows 10), and Sound and Volume mixer (Windows 11), next to the game
that you are running, select the Output dropdown and select Game (M-Audio M-Game Solo). Once this has been
selected, your game's audio level will be controlled by the Game fader on your M-Game.
10. Select these additional routing options from the Output dropdown in the App Volume and Device Preferences:
a. Chat app (Discord, etc.): Select CHAT (M-Audio M-Game Solo) to route Chat’s audio to the Chat fader.
Important: If you're using a Chat application like Discord, set the Audio Input to Chat and Output to Chat. This will
ensure that your Chat audio is sent to the M-Game Solo's Chat fader, and that your Mic is only sent to the Chat.
b. Music: Select SYSTEM (M-Audio M-Game Solo) to route music program audio to the System/Aux fader.
Note: You can route additional computer audio sources to the SYSTEM channel if you would like to control
additional streams of software audio.
11. Open your streaming/broadcast software, such as OBS used in the example below.
12. OBS, in the File > Settings menu, select the Audio tab.
a. Under Global Audio Devices set Desktop Audio to Disabled, set Desktop Audio 2 to Disabled.
b. Set Mic/Auxiliary Audio to STREAM L/R (M-Audio M-Game Solo Stream). Make sure that Mic/Auxiliary 2, 3, and 4
are all set to Disabled.
c. In Advanced, set Monitoring Device to Default. Click Apply and OK.
13. Check OBS or other software you're using to record to make sure that your individual signals (Mic, Game, Chat,
Sampler, and System) signals aren't clipping (going into the red) and are balanced. An easy way to check this is by
pressing all of the Mute buttons on the M-Game hardware and turning up the fader levels one at a time, first checking
the mic level, as that's what you want your viewers to hear loudest, then proceed with the other M-Game faders.
Note: The optimal level in OBS is in the yellow area (between -15 dB and -10 dB).
14. Start your stream and have fun!

9
macOS
Download and install the latest M-Game software (and Audio Output Director) from m-game.com.
1. Connect the power and USB cable to the M-Game Solo and press the power button.
2. Connect your separate headphones and microphone, or combined headset, to the rear panel of the
M-Game Solo.
3. To use all of the features of the M-Game Solo on macOS certain settings must be enabled in
Security & Privacy settings.
To ensure full functionality of the M-Game Solo, you will need to navigate to System Preferences
> Security & Privacy > Privacy and select the lock icon in the bottom left corner of the GUI. You
will then be prompted to enter your System Password to make changes. The following items
should be set to allow for M-Game Software access:
Microphone: Allow access to the M-Game Solo by checking the box.
Accessibility: Allow access to the M-Game Solo by checking the box.
Full Disk Access: Allow access to the M-Game Solo by checking the box.
Note: If the M-Game Solo or M-Game Software is not listed as an available option, you can manually add them by
selecting the + icon directly beneath the App list.
4. In the M-Game software and select either the SET MIC from the HOME tab and follow the on-screen instructions or go
to the SETUP tab and select the HW METER button so its lit red.
a. Under Microphone, turn Phantom Power on or off depending on whether you’re using a condenser microphone
(Phantom Power on) or a dynamic microphone (Phantom Power off).
Note: Headset microphones do not require phantom power.
b. Speak into your mic at the loudest level you expect to speak in your stream and begin turning up the Gain knob on
the rear panel of M-Game Solo. You'll notice that the Mic Fader LEDs on M-Game Solo will light up when you
speak, showing the incoming signal. Continue speaking into the mic and turning up the Gain knob until you see the
Mic Fader LEDs flash red 3 times. This means M-Game Solo's Mic Gain knob is set too high. Turn down the Mic
Gain knob until you no longer see the LED flash red 3 times. You’ll want to get the Mic Fader LEDs as close to the
top LED without the LEDs all flashing.
Note: If you are using a low gain mic (like a SHURE SM7B or
ElectroVoice RE20) you will need to use the M-Game software's
BOOST function. You can find BOOST in the Setup tab under
Basic Microphone Settings. Simply speak into your mic at the
loudest volume you expect to speak in your stream and turn up
the Boost knob until the Mic fader’s meter in the M-Game
software shows the top LED lit red. Slowly turn the Boost knob
back down until the Mic fader’s meter in the software no longer
shows red. You can change the BOOST level from Off to +24 dB.
Note: Now that you’ve setup your mic you can turn off the HW
Meter button in the M-Game software to return the Mic fader to
its default LED behavior.
d. Adjust the EQ, Compressor, Noise Gate, High Pass Filter and De-esser settings to get the best sound from your
mic.
Note: You can also use one of the Mic presets in the M-Game software to automatically
configure your mic’s settings. These mic presets are found in File > Setup > Load
Microphone Settings.
5. In the SETUP tab's HARDWARE section select what source your Game audio is coming from.
6. Open your game, chat, M-Game software, streaming software, and any other programs you
will be running in your stream and ensure that their audio is playing.
7. In the M-Game Solo software go to Options > Redirect Output.

10
8. In the M-Game Solo software's Output Redirection you will see every audio source running in the Application column
and where that audio can be sent to (its Routing) in the Output Pair column. This enables you to send audio from
different programs/applications to the M-Game.
9. In the M-Game Solo Output Redirection's Application column you will see the game that you are currently running. In
the Output Pair column select Game Out. Once this has been selected, your game's audio level will be controlled by
the Game fader on your M-Game.
10. Select these additional routing options from the M-Game Solo Output Redirection:
a. Chat app (Discord, etc.): Select CHAT OUT to route Chat application’s audio to the Chat fader.
Important: If you're using a Chat application like Discord, set the Audio Input to Chat and Output to Chat. This will
ensure that your Chat audio is sent to the M-Game Solo's Chat fader, and that your Mic is only sent to the Chat.
b. Music: Select SYSTEM OUT to route music program audio to the System/AUX fader.
Note: You can route additional computer audio sources to the SYSTEM/AUX channel if you would like to control
additional streams of software audio.
10. Open your streaming/broadcast software, such as OBS used in the example below.
11. OBS, in the OBS > Preferences menu, select the Audio tab.
a. Under Global Audio Devices set Desktop Audio to Disabled, set Desktop Audio 2 to Disabled.
b. Set Mic/Auxiliary Audio to STREAM L/R (M-Audio M-Game Solo Stream). Make sure that Mic/Auxiliary 2, 3, and 4
are all set to Disabled.
c. In Advanced, set Monitoring Device to Default. Click Apply and OK.
12. Check OBS or other software you're using to record to make sure that your individual signals (Mic, Game, Chat,
Sampler, and System) signals aren't clipping (going into the red) and are balanced. An easy way to check this is by
pressing all of the Mute buttons on the M-Game hardware and turning up the fader levels one at a time, first checking
the mic level, as that's what you want your viewers to hear loudest, then proceed with the other M-Game faders.
Note: The optimal level in OBS is in the yellow area (between -15 dB and -10 dB).
13. Start your stream and have fun!

11
Operation
Home Menu
The home page shows the hardware in its current state. This gives a visual reference of the M-Game Solo hardware when in
use, and is usually the page that will be open when actively streaming.
The software toolbar at the top of the main window is used to access the File, Options, and Help dropdown menus listed
below.
File
• Load Preset: Select to load an existing profile, which is a saved snapshot of the app.
• Save Preset: Select to save the current app snapshot to the existing profile.
• Setup:Select to load or save Microphone assignment settings.
• Routing:Select to load or save virtual fader (where applicable), and active audio channels settings.
• Sampler: Select to load or save sample button assignment settings, including button types.
• Effects:Select to load or save effect button assignments.
• LED:Select to load or save all LED settings.
Options
• Global:Select to either show or hide tooltips when hovering near various controls.
• Effects:Select from the options to show the unsaved effects warning dialog box, discard unsaved effects without a
dialog box prompt, or overwrite unsaved effects without a dialog box prompt.
• Sampler:Select from the options to show the unsaved samples warning dialog box, discard unsaved samples without
a dialog box prompt, or overwrite unsaved samples without a dialog box prompt.

12
Help
• Open User Guide: Opens the User Guide.
• Support: Select to register your product and download M-Game software.
• Setup: Select here for articles and videos on how to setup software and connect your computer and devices to the
M-Game Solo.
• About: Opens the About software dialog box.
Top Bar
AUD indicator will be lit when the app is in Audition to Headphones mode. For additional info on Audition Mode,
please see the Sampler and Effects sections.
The REC indicator will be lit when the app is in Record mode. For additional info on Record Mode, please see
the Sampler section.
Vertical Navigation Bar
The vertical navigation bar allows quick access to these various sections.
• Home (default)
• Setup
• Routing
• Sampler
• Effects
• LEDs
Navigating via the graphic representation of the hardware on the home
page
Click on the various areas to navigate to these corresponding pages:
The SET MIC button in the top left section opens the SETUP page and walks
you through setting up your mic.
The buttons in the VOICE FX section open the EFFECTS page.
The buttons in the SAMPLES section open the SAMPLER page.
Home Page Quick-View Details
The VOICE FX area shows the assigned effect in the currently selected bank
(the current bank selected shown by the SAMPLE BANK indicator), and the
SAMPLES area shows the three assigned samples in the currently selected
bank.

13
Setup
Microphone Settings
1. HW Meter: This button changes the Mic LED/fader on the hardware to show what the mic gain is to aid in setting the
optimal gain level. Unticking this button or exiting the setup page will toggle back to normal mic fader mode and turn off
the mic LED at the top of the page.
2. Phantom Power: This toggles phantom power on or off, providing power to condenser microphones. Condenser
microphones require phantom power. Dynamic microphones and headsets do not require phantom power.
3. Boost: This knob adjusts the amount of digital gain applied to the incoming mic signal. If you are using a low gain mic
(like a SHURE SM7B or ElectroVoice RE20) you will need to use the Boost knob. You can change the BOOST level from
Off to +24 dB. Check OBS or other software you're using to make sure that your mic signal isn’t clipping.
4. EQ (On/Off): This turns on or off the EQ settings for the incoming mic signal.
5. EQ: This three-band equalizer helps to adjust the low, mid (with a sweepable mid frequency to boost/cut the signal to
find the “sweet spot”), and hi frequencies to achieve a good sound mix.
6. Compressor (On/Off): This turns on or off the Compressor effect for the incoming mic signal.
7. Compressor: This knob reduces the loudest parts of the audio signal and makes the quieter parts sound louder. It
actively changes the dynamic range of the mic signal by automatically reducing its level if it exceeds a certain level.
8. Noise Gate (On/Off): This turns on or off the Noise Gate effect for the incoming mic signal.
9. Noise Gate: This knob can be used to reduce hum or unwanted background noise from the incoming mic signal.
10. De-esser: This knob can be used to reduce the amount of sibilance (S, F, X, SH, and soft C’s sounds) common in
vocals.
11. HPF: This (High-Pass Filter) knob can be used to remove unwanted low-end rumbles. This knob is useful for removing
the keyboard and desk impact noises.
Mute Button
The Stream, Chat, Alt, Main Out, Phones, and Sampler outputs each have an icon which
can be toggled on or off. Toggling them on indicates that the MUTE will mute the
microphone's signal to that output when engaged.
1
2
3
4
5
6
7
8
9
10 11

14
"$%^#*" (CENSOR) Button
This selection enables you to select and set the sample that will be triggered when the
"$%^#*" (CENSOR) button is pressed. When the "$%^#*" (CENSOR) button is
pressed the selected sample will play as a one-shot and the microphone signal will be
muted for as long as the button is pressed and held.
Hardware Control Settings
This section shows from what source the Game Audio will be received from.
Game Audio Source: Stream PC, Game PC or Console/Television (Optical)
Footswitches
These can be independently set to one of two modes, M-Game or Hot Keys.
In M-Game mode, a footswitch can be set to trigger any button on the hardware. A list of all potential hardware buttons will
be shown.
In Hot Key mode, a footswitch can trigger a hot key (macro/keyboard shortcut) combo. A dropdown list will be seen to
select the key and modifier key.

15
Routings
When the Routings tab is selected you will see what audio input signals are being sent to the different audio outputs. From
here you can choose how the inputs and outputs are mapped. Select what audio channels you want sent to your STREAM,
CHAT, ALT (additional USB output), SAMPLER, MAIN OUTS and HEADPHONES.
1. Input Icons: Each “input icon” can exist in two different modes, toggle mode and virtual fader mode. Right clicking
(Windows) or secondary clicking (macOS) on each icon brings up a menu that can switch between the two modes.
Secondary clicking can be changed in macOS System Preferences.
2. Basic Mode (default): In this mode, clicking on an icon will toggle it on or off. Off icons will appear grayed out, which
will mute that input to the corresponding output (at the end of the row).
3. Virtual Fader Mode: In this mode, a smaller version of the icon will be shown along with a virtual fader and numeric
level indicator. When in Virtual Fader Mode, the input ignores the physical fader for that output and allows you to make
a completely virtual mix to the output (at the end of the row). Using virtual faders is helpful if you would like to hear a
different volume mix in your headphones than what is being sent to the stream.
4. Output Icons: The Output Icons are used to represent the various USB audio outputs and hardware outputs on the
M-Game Solo. Right clicking (Windows) or secondary clicking (macOS) on each icon brings up a menu that can activate
the following options. Secondary clicking can be changed in macOS System Preferences.
5. Headphones: Activating this will send that outputs audio to the headphones.
6. Basic Mode: Selecting this will change all of the icons from Virtual Mode to Basic Mode.
7. Virtual Mode: Selecting this will change all of the icons from Basic Mode to Virtual Mode.
8. Set All Muted: Selecting this will mute audio inputs being sent to the output.
9. Set All Unmuted: Selecting this will unmute audio inputs being sent to the output.
10. Copy Mixer To: Selecting this will enable you to copy and paste the audio input settings being sent to the currently
selected output to another output.
1
2 3
4
5
6
78
9
10

16
Sampler
Samples (1-6) This menu accesses the sample button functions. The sampler page is broken into four sections: The
Sample List, the Sample Button Control, the Menu Bar, and the Sample Editor.

17
Sample List
This is a list of the current available samples.
Sample Control
This gives a visual display of the hardware
where you can configure the sample
buttons.
1. Bank Toggle: This shows a bank
selection toggle to determine which
bank you are affecting.
2. Frame: When a sample has been
assigned, these frame areas will show
a sample’s corresponding image and
Button Type (Play Mode).
3. Name and Clear: Below each floating
frame is the name of the sample. You
can drag samples from the sample list
onto a button or into the image frame,
and it will associate that button with
the sample. The image will fill the
empty frame, the name of the sample
will appear below, and the button type
will appear in the small frame at the
bottom right of the image. Right-click
(Windows) or secondary click (macOS)
on a button to bring up an option to
clear the button.
Note: If dragging a sample into the frame or onto the button, the sample will replace all of the samples in the current
Stack.
4. Selecting a button: When a new sample is dropped onto a button, it will also select that button. Click on a button to
also select that button. When a button is selected, its settings appear in the Button Control panel.
• To assign a sample to a button: Drag the sample from the sample list to either the frame or the representation of
the button. This will clear all current contents for the button (except LED settings) and assign that sample to that
button. While dragging a sample, if the mouse is over a button, you can visually see the contents of the button
underneath before releasing the mouse and affecting a change to that button. To cancel, move the mouse off the
button and stack areas and release to cancel the potential change.
5. Stack: In addition to dragging samples directly onto buttons, a sample can be dragged onto the Stack list for a selected
button. Samples can be rearranged inside of a stack by clicking and dragging. Right click on a sample in the stack list
to pull up a menu with move up, move down, and remove options. Double click on a sample in a stack to select it in the
editor and auto-select it in the sample list.
6. Button Types: The sample button types are:
• One Shot: Plays the sample one time all the way through.
• Tap Loop / Tap Stop: Plays the sample and loops it until pressed again.
• Tap Play / Tap Fade: Plays the sample and loops it. When tapped again it will begin to fade out.
• Hold Play / Release Stop: Plays the sample and loops it until released, at which time it abruptly stops.
• Hold Play / Release Fade: Plays a sample until released, at which time it begins to fade out.
• Hold Loop / Release Stop: Plays a sample and loops it until released.
1
2
3
4
56

18
LED Control
Click to select what the button’s LED color and effect will be.
• Solid: Keeps the LED as the selected solid color. One color can be selected from the list of colors.
• Pulse:Activates the pulsing effect, which will brighten the LEDs and then dim the LEDs. When
Pulse is active, the LEDs will pulse uniformly. You can select up to a maximum of 4 LED colors to
pulse between. These colors will go in order from 1-4, and then repeat starting at 1.
Menu Bar
The menu bar has basic functions that allow you to interact with
samples. It contains basic save, save as, open, new, and delete
functions.
1. Update Current Sample: This works like a standard save
function, where changes to the active sample are updated.
2. Save As New Sample: This works like a standard save-as function, showing the sample and changing the name.
3. Import Sample: This enables you to import .wav, .mp3 .wma, and .aif files into the sample editor.
4. Record New Sample: This allows you to record a new file for editing. When recording a new sample, the record
indicator at the top of the app will turn on. The RECORD NEW SAMPLE button will become a STOP RECORDING
button.
5. Delete Sample:This removes the currently active sample from the sample list. This does not delete the sample from
your hard drive.
5
1 2 3 4

19
Sample Editor
1. Sample Transport: The sample editor
includes standard play and stop
controls. The Play button will play the
sample from the start flag to the end
flag. Adjust the flags to adjust the play
start and end area.
2. Sample Visualizer: A visual
representation of the sample file's
audio.
3. Selection area: A selection area in
between the start and stop flag
allowing for zoom in/out controls.
4. Zoom: These + and - magnifying glass
icons zoom in or out with focus (not
between the beginning and ending
flag), zooming to the middle of a
selection, unless modifying zoom
clicks by pressing the shift key.
• Shift + clicking zoom in: This zooms in to the current selection (between the beginning and ending flag).
• Shift + clicking zoom out: This zooms out to the current selection (between the beginning and ending flag).
• CTRL + clicking zoom in and out:This returns the sample waveform editor to the current selection (between the
beginning and ending flag).
5. Normalize Button: This adjusts the level of the sample's gain to its maximum non-clipping level.
6. Fader:This adjusts the level of the sample's gain. A red clip text will illuminate next to the gain fader when too much
gain has been applied to a sample. If this occurs, lower the gain fader.
7. Sample Frame: This image picker allows you to select an associated image. You can load .png, .jpg, .jpeg, .gif, .tif, .tiff
images with a size of 86x86 (standard res) or 172/172 (high-res displays). Images not formatted to the listed sizes will be
resized to fit in the frame.
8. Sample Title Bar: This naming field enables you to edit the name of the current sample.
9. Audition Privately: This button will remove the sample from every output except the headphones for mid-stream
editing purposes. When the app is in audition in phones mode, the AUD indicator at the top of the app will be
lit. Navigating away from the page will turn off audition mode.
1 2
3
4
7
8
5
6
9

20
Effects
Access this menu to view, assign and customize the vocal effects. The effects page is broken into four sections: The Effect
List (Multi-Effect List), the Effect Button Control, the Menu Bar, and the Individual Effects Editor.
Table of contents
Other M-Audio Music Mixer manuals

M-Audio
M-Audio Mulitmixer 6 User manual

M-Audio
M-Audio NRV10 User guide

M-Audio
M-Audio MicroMixer 18 User manual

M-Audio
M-Audio NRV10 User manual

M-Audio
M-Audio Multi Mixer 10 User manual

M-Audio
M-Audio M-Game RGB Dual User manual

M-Audio
M-Audio Mixim 10 User manual

M-Audio
M-Audio ProjectMix I/O Instructions for use

M-Audio
M-Audio NVR10 User manual