Mad Catz 4704 User manual

Wireless Gaming Adapter Manual
You must have at least the following equipment before you begin setup:
• A Wireless Access Point (AP) or wireless Router (with Broadband Internet
Connection)
• A Computer with an Ethernet Adapter and CD-ROM drive
• An Ethernet Cable (included)
• A CD-ROM (with Manual and quick installation guide)
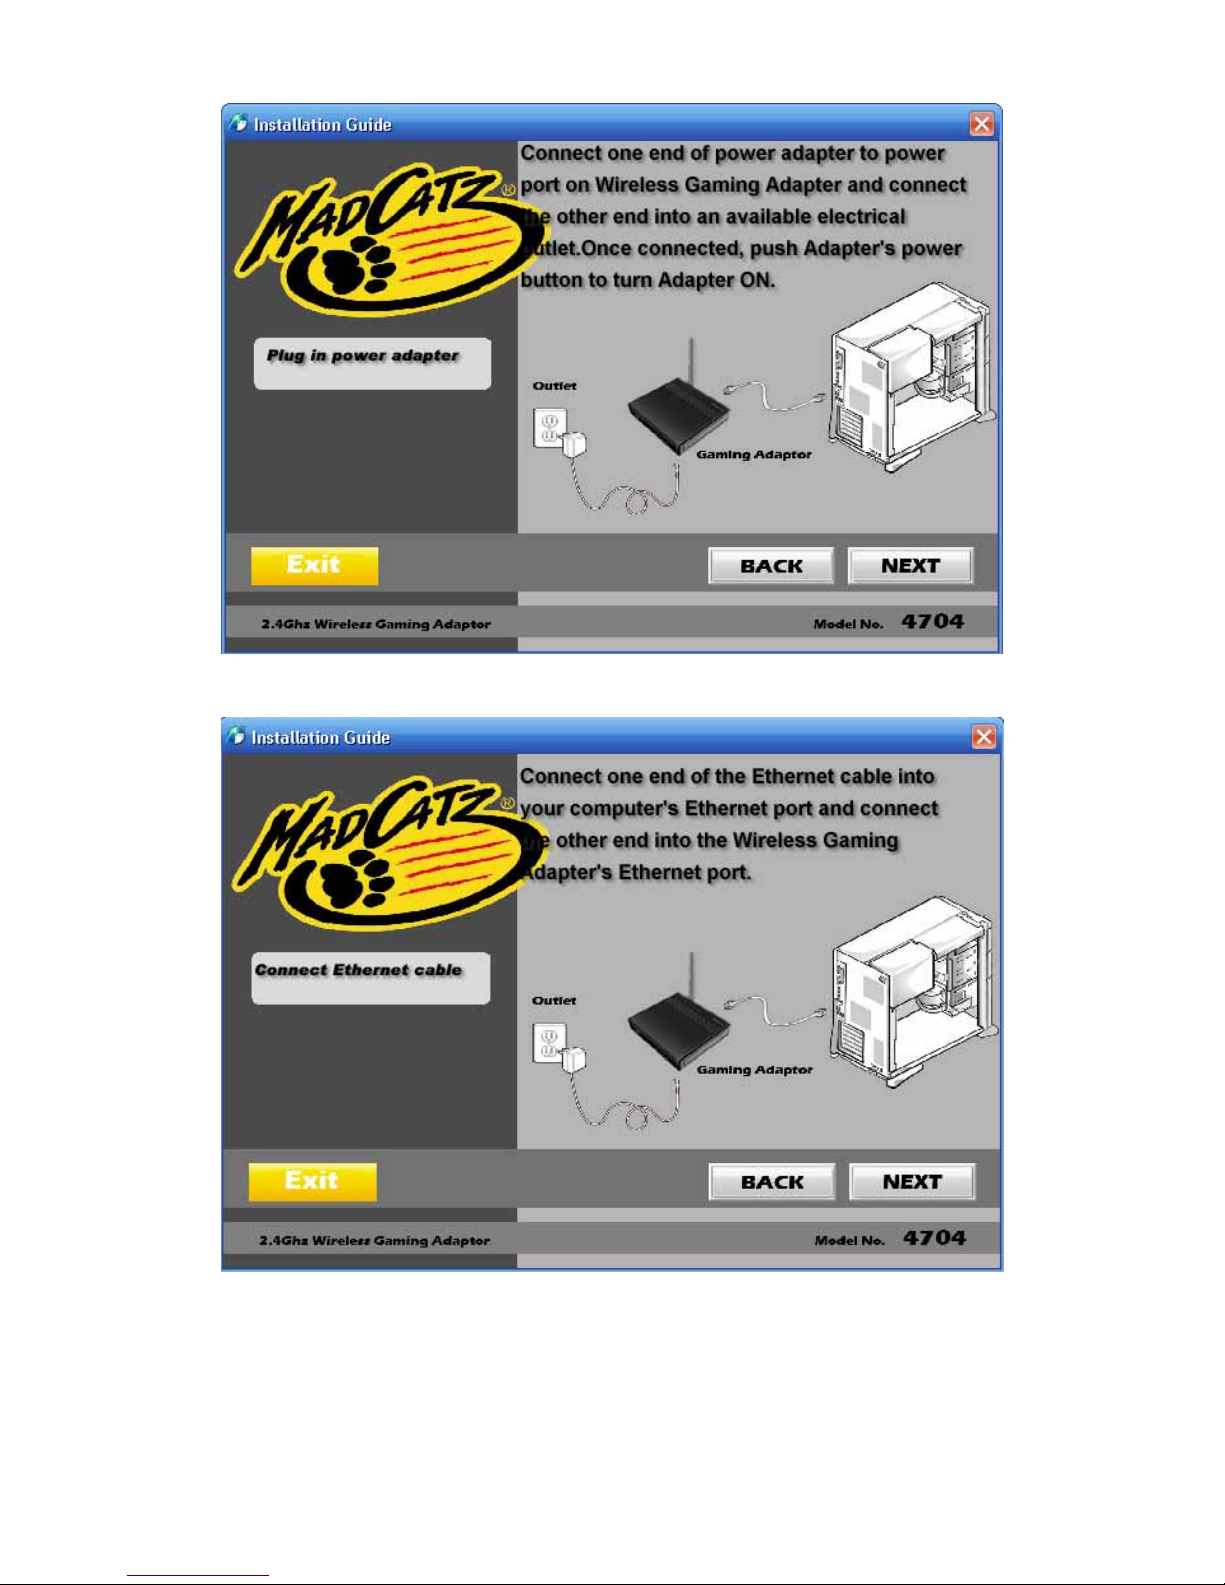
1. Hardware installation:
1-1 Connect one end of power adapter to power port on Wireless Gaming Adapter
and connect the other end into an available electrical outlet. Once connected,
push Adapter's power button to turn Adapter ON.
1-2 Connect Ethernet cable between computer and Gaming Adapter’s Ethernet port.
2. Software installation:
2-1 IP address setting
You must assign your computer a static IP address within the same range as the IP
address of the Gaming Adapter. The Gaming Adapter’s default IP address is 10.10.10.254
with a Subnet mask of 255.255.255.0. Please see the detailed information below:
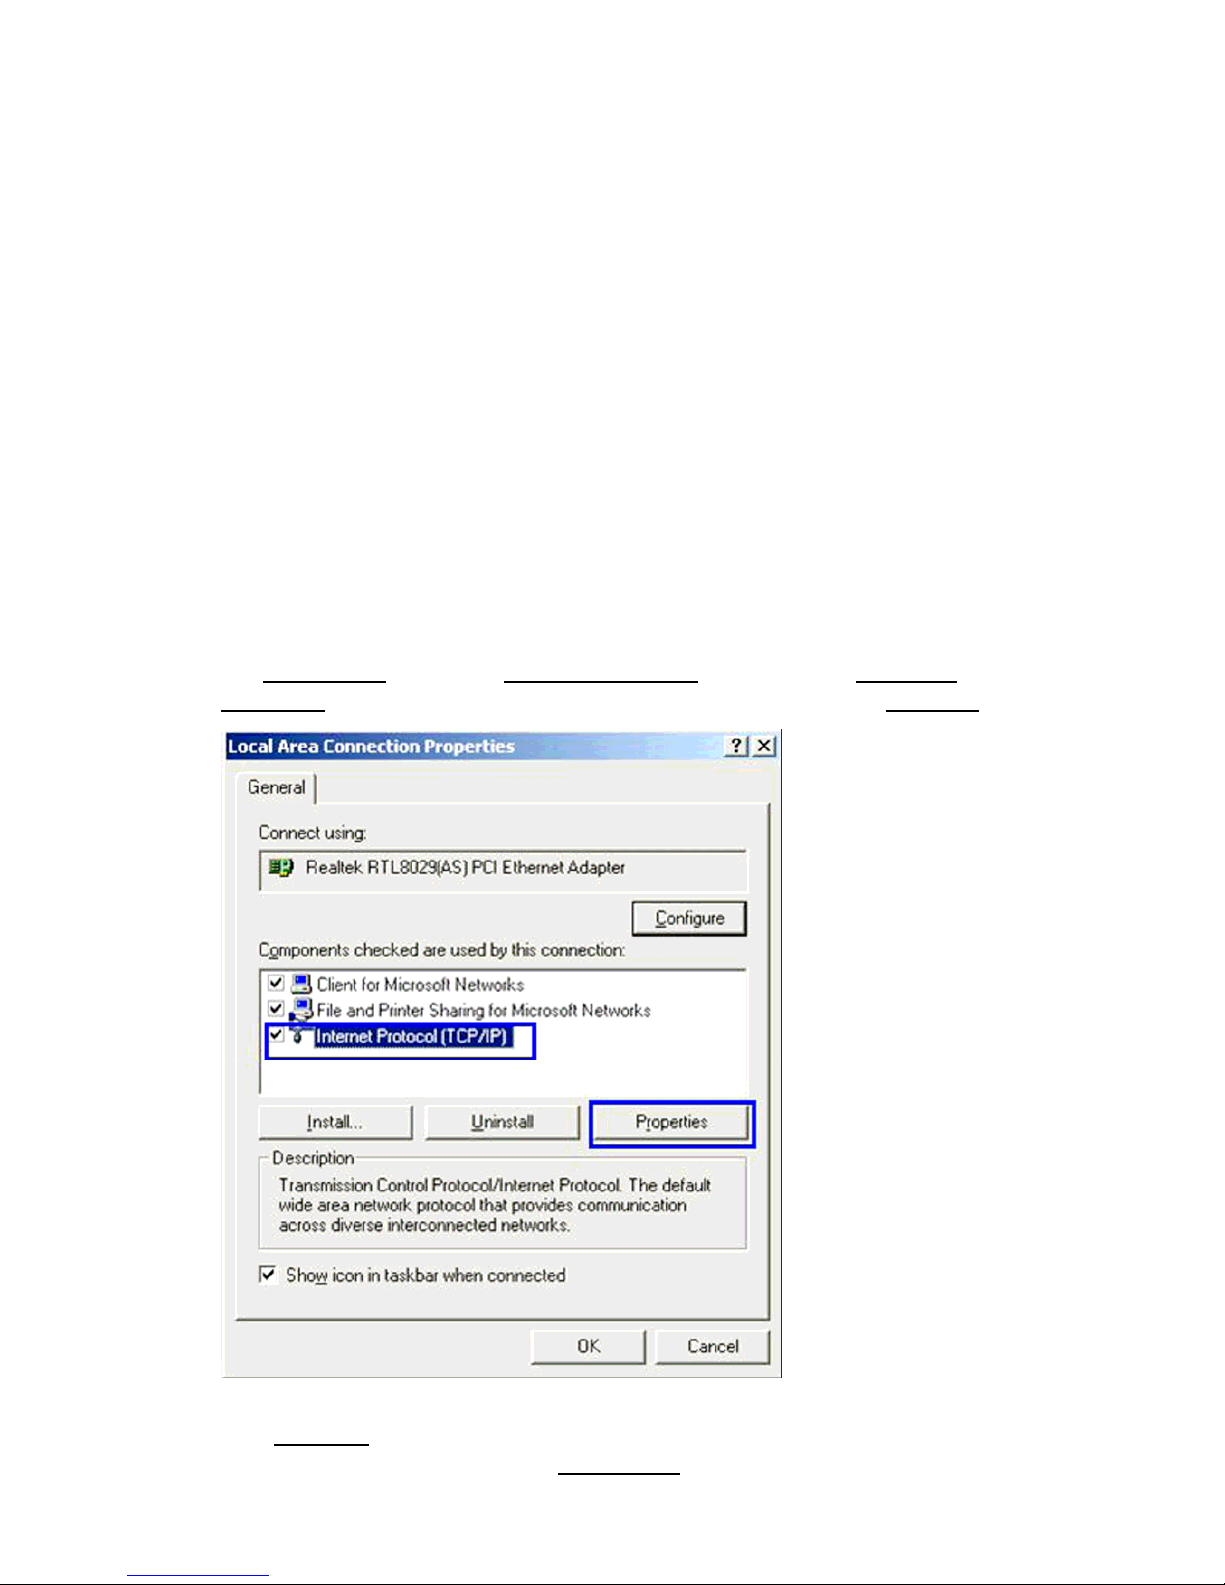
2-1-1 Click the Start button (it should be located at the lower-left corner of your monitor), then
click Control Panel. Double-click Network Connections, then double-click Local Area
Connection, Local Area Connection Status window will appear, and then click “Properties”
2-1-2 Set the IP address of your Ethernet adapter to a specific IP address.
In the IP address field, enter the address 10.10.10.x(x should be replaced by a number
between 2 and 253,such as 101). In the Subnet mask field, enter 255.255.255.0.

NOTE: If numbers are already present in the IP address, Subnet Mask and/or
Default gateway fields, be sure to write them down as you will need to re-enter them
so your PC can access the Internet once WGA configuration is complete.
2-2 Gaming Adapter setting
You have two ways to connect the Gaming Adapter to your WAP/Router:
(1). If you have WiFi Protected Setup (WPS) feature on your router, you can use it to
connect your Gaming Adapter to your network easily and automatically.
(2). If you don't have the WPS feature on your router, or you would like to setup
your wireless settings manually, you may login to the Gaming Adapter's web-based
utility through your web browser to do so.
2-2-1 Put the setup CD into your computer, the auto-run interface will appear as
pictured below:
2-2-2 Click 'Start,' you will be prompted to plug in the power adapter as pictured
below:

Click 'NEXT,' you will be prompted to connect the included Ethernet cable as
pictured below:
Click 'NEXT,' you will be prompted to assign a static IP address to your computer
as pictured below:"

Click 'NEXT,' you will be prompted to check the Wireless Gaming Adapter's LED
status as outlined below:
Click NEXT to view the two ways you can connect your Wireless Gaming Adapter to
a wireless AP/Router as outlined below:

2-2-3 Connect the Wireless Gaming Adapter to a wireless AP/Router.
2-2-3-1 Wi-Fi Protected Setup (WPS) method
Click the WPS button to use the WPS method.
There are two WPS methods for connecting the Wireless Gaming Adapter to
a wireless AP/Router as outlined below:
2-2-3-1-1 Push Button (Recommended)
A. Press the WPS button on your wireless AP/Router:

B. Within 2 minutes of pressing the WPS button on your wireless AP/Router, press
and release the Wireless Gaming Adapter's WPS button as pictured below:
2-2-3-1-2 PIN Number
Select PIN Number, then follow the instructions outlined below:

Obtain your Wiress Gaming Adapter's PIN number from the web-based utility
as outlined below:
2-2-3-2 Web Setup
To perform the Web Setup connection method, click the 'Web Setup' button.
You will then be prompted for a username and password, both of which are: admin

After entering the Username and Password, click 'NEXT' and follow the instructions
below:


The Wireless Gaming Adapter should now be successfully connected to a
wireless AP/Router. The next step is to connect the Wireless Gaming Adapter to
your gaming console. Once 'FINISH' is clicked, the Congratulations! window will
appear as shown below:
OPTIONAL: If you want to use the Wireless Gaming Adapter to connect to a
wireless AP/ Router for a computer's Internet connection, you must set that
computer's Ethernet adapter to 'Obtain an IP address automatically.' Follow the
steps outlined below to complete this task:


Changes or modifications not expressly approved by the party responsible for
compliance could void the user's authority to operate the equipment.
This equipment has been tested and found to comply with the limits for a Class
B digital device, pursuant to Part 15 of the FCC Rules. These limits are
designed to provide reasonable protection against harmful interference in a
residential installation. This equipment generates uses and can radiate radio
frequency energy and, if not installed and used in accordance with the
instructions, may cause harmful interference to radio communications.
However, there is no guarantee that interference will not occur in a particular
installation. If this equipment does cause harmful interference to radio or
television reception, which can be determined by turning the equipment off and
on, the user is encouraged to try to correct the interference by one or more of
the following measures:
-- Reorient or relocate the receiving antenna.
-- Increase the separation between the equipment and receiver.
-- Connect the equipment into an outlet on a circuit different from that to which
the receiver is connected.
-- Consult the dealer or an experienced radio/TV technician for help
FCC Radiation Exposure Statement The antennas used for this transmitter must
be installed to provide a separation distance of at least 20 cm from all persons and
must not be collocated or operating in conjunction with any other antenna or transmitter.
Popular Adapter manuals by other brands

Lenovo
Lenovo ThinkSystem RAID 930-24i Installation and user guide

NexusLink
NexusLink GPL-1200WN user manual

Muncie
Muncie DT12 PTO installation instructions

Cisco
Cisco LINKSYS USB1000 user guide

US Robotics
US Robotics USR5420 troubleshooting guide

iBall Baton
iBall Baton iB-WPA300N Quick installation guide

NComputing
NComputing N500 user manual

Gigaset
Gigaset Gigaset PCI Card 54 owner's manual

Ableconn
Ableconn USB 3.0 TO HDMI AND LAN COMBO user manual

B+B SmartWorx
B+B SmartWorx ABDN-ER-DP551 quick start guide

Internatonal Resources
Internatonal Resources 2416 Owner's instruction manual

Linksys
Linksys WUSB12 Specifications