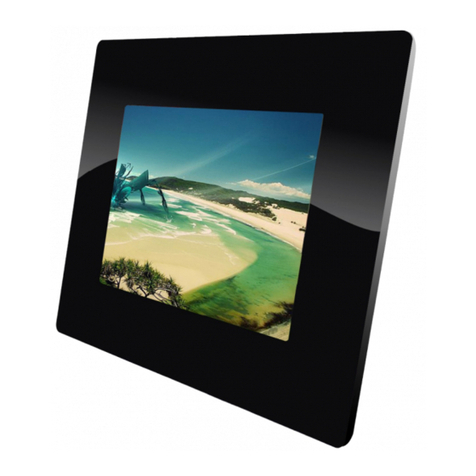
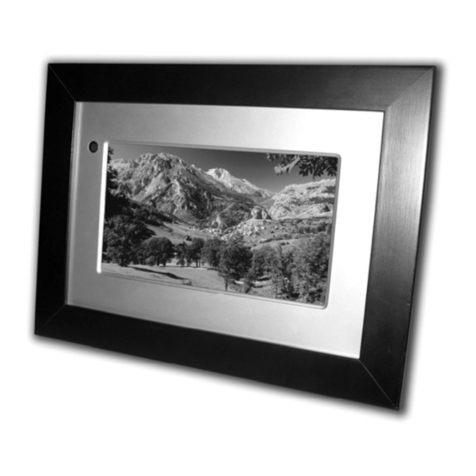
MAGINON DPF-8 User manual


1
Key Features
• SupportsJPEGFileFormats
• ReadsthemostpopularmemorycardsSD/SDHC,MMC
• FastUSB2.0connection
• Calendarandclockfunction
• Slideshowandpreviewfunction
• Automaticplaybackofpicturesafterinsertingastoragemedium
• Selectableslideshowintervalandtransitions
• Swivelstand
• Germanmenu
Package Contents
Inthepackagecontainsthefollowingcomponents:
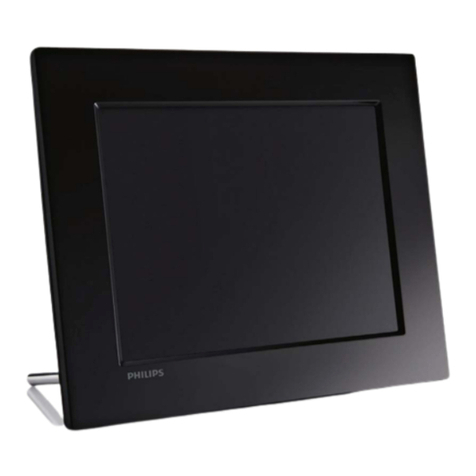
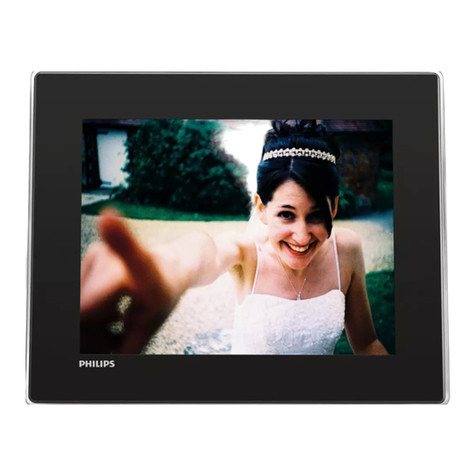
1. MAGINON®DPF-8SuperSlim
2. Remotecontrol
3. ACadapterwithcable
4. Operatinginstructions
5. Warrantyandservicedocuments
DearCustomer,
congratulationsonyourpurchaseofahighqualityMAGINON®product.
Youhavedecidedtoownamodernpictureframethatistechnicallywellequipped,
oerstheproperaccessories,andcanbeoperatedveryeasily.Pleaseread
allinstructionscarefullyandattentively.Especiallyobserveallthesafetyinstructions.
Thedevicehasathreeyearwarranty.Ifthepictureframeshouldencounteradefect,
youmustpresenttheenclosedwarrantycardandyourpurchasereceipt.Pleasestorethis
togetherwiththeoperatinginstructionsinasafeplace.
Makesuretoincludetheinstructionmanualiftheproductispassedontothirdparties.
Note:
• OnlyusethepictureframefortheintendedpurposesIfitisusedforotherpurposes,and
thereisadamagetotheunitthewarrantywillbevoid.Moreover,onlyifusedproperlycan
damagetopeopleandtheenvironmentbeavoided.

2
Table of contents
Introduction 1
Key features 1
Package contents 1
Table of contents 1
Safety instructions 4
1. Quick Guide 6
1.1. Mains connection 6
1.2. Installing the stand 6
1.3. Wall mounting 6
1.4. Inserting the memory card or USB ash drive 7
1.5. Switching on the Digital Picture Frame 7
1.6. Control buttons 8
1.7. Remote control functions 9
1.8. Changing the battery of the remote control 9
2. Functions 10
2.1. Slide show 10
2.2. Selection of the storage medium 10
2.3. Main menu 10
2.4. Photo 11
2.4.1. Single picture mode 11
2.4.1.1. Rotate picture 11
2.4.1.2. Enlarge picture 11
2.4.1.3. Save picture 12
2.4.2. Delete picture 12
2.5. File 12
2.6. Calendar 13

3
2.7. Settings 13
2.7.1. Language 13
2.7.2. Picture sequence 13
2.7.3. Slide show mode 14
2.7.4. Slide show interval 14
2.7.5. Photo eect 14
2.7.6. Picture transitions 14
2.7.7. Picture size 14
2.7.8. Monitor set-up 14
2.7.9. Time 15
2.7.10. Time format setting 15
2.7.11. Formatting the memory 15
2.7.12. Reset 15
2.7.13. Exit 15
3. Conformity 16
4. Frequently asked questions 17
5. Cleaning 18
6. Disposal 18
6.1. Packaging 18
6.2. Device 18
7. Warranty and Service 18
8. Technical Data: 19
9. Keyword index 20

4
Safety instructions
DANGER for children
• Childrendonotrecognizethedangersassociatedwiththeimproperhandlingofelectrical
appliances.Therefore,keepchildrenawayfromtheproduct.
• Keepchildrenawayfromthepackagingmaterials.Thereisalsoadangerofsuocation!
DANGER from electricity
• Donotimmersethedigitalpictureframe,thepowercableandthemainsadapterintowater,
sincetherewillthenbeadangerofelectricalshock.
• Donottouchtheproductwithwethandsandnotoperateitoutdoorsorinroomswithhigh
humidity.
• Donotplaceanyliquidlledobjectsuchasvasesonorintheimmediateenvironment.Theliquid
lledobjectcanbeknockedoverandtheliquidimpairtheelectricalsafety.
• Onlyconnecttheunittoaproperlyinstalledoutletwhosemainsvoltagematchesthe
specicationsoftheACadapter.
• UnplugtheACadapterfromthewalloutlet...
...ifyoudonotusetheunitforalongtime,
...duringalightningstorm,
...beforecleaningtheunitand
...iffaultsoccurduringtheoperation.Hereby,alwayspullontheACadapter,notonthepower
cord.
• Thepowerbuttondoesnotdisconnectthedevicefromthemainsvoltage.Tocompletely
disconnectthepowersupply,unplugthepoweradapter.Useagoodaccessibleoutletsothatyou
can,ifnecessary,unplugthepowercordquickly.
• Thepowercablemaynotbekinkedorcrushed.Keepthepowercableawayfromhotsurfacesand
sharpedges.
• Donotputthedeviceintooperation,ifthedeviceitself,thepoweradapterortheelectriccable
showvisibledamages.
• Donotmakeanymodicationstotheproduct.Eventhepowercableitselfmaynotbereplaced.
Onlyhaverepairstothedeviceoronthepoweradapterconductedbyaspecialistworkshoporin
theServiceCenter.Improperrepairscancauseconsiderabledangertotheuser.
• UseonlythesuppliedACadapter.
WARNING of injuries
• Routethepowercableinsuchawaythatitdoesnotbecomeatrippinghazard.

5
CAUTION - Damage to property
• Setthedigitalpictureframeinarm,levelsurface.
• Protectthedevicefrommoisture,dust,hightemperaturesanddirectsunlight.Otherwisethere
mightbemalfunctionsanddamagetotheelectronicsorthehousingcouldoccur.
• Makesurethatthereissucientspaceforventilationaroundtheunit.
• Keepsucientdistancefromheatsourcessuchasstoves,orfurnaces.
• Donotdropthedigitalpictureframeandexposeittostrongimpact.
• Donotplaceanyopenamesources,suchaslightedcandlesonorneartheunit.
• Donotplacethedevicenearstrongmagneticelds,e.g.speakers.Theplaybackcouldbe
disrupted.
• Donottouchthescreenunnecessarily.Donotexertpressureonthesurfaceanddonottouchit
withasharpobject.
• Absolutelyobservetheinstructionforthecorrectinsertionofmemorycards.Incorrectinstallation
cancausedamagetothecardorthedevice.
• Donotremovethememorycardfromthedevicewhenlesarebeingread.Datacouldbe
damagedorlost.
• Forthecleaning,donotuseharshchemicalsorabrasive,aggressivecleaningagents
Intended use
TheDigitalPictureFrameisintendedfortheplaybackofdigitalphotos(fromstoragemedia)
indryindoorrooms.Itisdesignedforpersonaluseandnotsuitableforcommercialapplica-
tions.

6
1. Quick Guide
1.1. Mains connection
Placeyourdigitalpictureframeonaatsurface.InserttheconnectorplugoftheACadapterinto
theDCINjackonthebottomofthepictureframeandtheACadapterintoanelectricaloutlet.
1.2. Installing the stand
Thebasestandisinthepackaging.
1. Aligntheopeningofthestandabovethecorrespondingopeningontherearofthepicture
frame.
2. Byturningthestandyoucanoptionallysetupyourpictureframeverticallyorhorizontally.
Hereby,thestandisalwaysata45°angletothebodyofthepictureframe.
3. Attachthestandwiththeprovidedscrew.
1.3. Wall mounting
Youcanattachthepictureframetothewallwithscrewsandanchors.Inthebackofthehousing
therearecut-outsforeitherverticalorhorizontalwallmounting.
Note:
• CheckbeforepluggingintheACadapter,ifthespecicationsonthenameplatecorrespond
tothoseofyourlocalpowergrid.

7
1.4. Inserting the memory card or USB ash drive
Toplaybackimagesfromamemorycard,insertthememorycardintothememorycardslot(1)on
thebottom.AUSBashdrive,canbepluggedintothesideUSBconnector(2)oftheframe.
IswhenthepictureframeisswitchedonandamemorycardoraUSBstickisinsertedintothe
device,itwillautomaticallystartaslideshowfromthatstoragemedium.
Caution!: TheUSBconnectormaynotbeusedtoconnectthepictureframetoacomputer!
1.5. Switching on the Digital Picture Frame
Thepowerswitchislocatedonthebackoftheframe(see1inFigure1onthenextpage).Pressthe
powerbuttononthepictureframe.Allsupportedmedialeswillnowautomaticallybedownloaded
fromtheinsertedstoragemedium.Aftertheloadingplaybackwillbeginautomatically.
2
Note:
• Thisunitsupportsthefollowingtypesofmemorycards:SD/SDHC/MMC
• Furtherinformationaboutsupportedmemorycardsandleformatscanbefoundinthe
productspecications.

8
Whenthepictureframeisturnedonforthersttime,amenuwillappearforthelanguage
selection.ChooseyourlanguageandconrmyourselectionbypressingtheOKbutton.
1.6. Control buttons
Thecontrolbuttonsofyourpictureframearelocatedabovethepowerbuttononthebackofthe
frame.Withthesekeys,allfunctionsoftheon-screenmenuscanbecalledupandoperated.Hereis
anoverviewofthekeys(seeFigure1):
1. On/o switch: Toturnthepictureframeonando
2. OK-button: Toconrmaselectionorsetting,tostopandstarttheslideshow
3. Exit-button:Toexitthesub-menuortheslideshow
4. Menu-button: Toopenthe"Settings"menuorasub-menu
5. Up-button: Navigatethemenu
6. Down-button: Navigatethemenu
7. Left-button: Navigatethemenu
8. Right-button: Navigatethemenu
Ifthecontrolbuttonsarepressedwhileviewingapictureoraslideshow,thepictureframewill
displaythecontrolpanelwithintheimageforafewsecondsintheupperrightcorner(Fig.2).
Fig. 2
Note:
• Incasethedevicedoesnotswitchon,initiallycheckifthewalloutletandmainsadapter
areconnectedproperly.
• Toopenthelanguageselectionmenuagain,thepictureframemustbereturnedtothe
factorydefaultsettingsinthe"Settings"menu.
Fig. 1

9
1.7. Remote control functions
1.8. Changing the battery of the remote control
1. Openthebatterydoorbypullingpullingitoutoftherearcut-outopening.
2. Replacethelithiumbattery"CR2025"withoneofthesametype.Thenclosethe
batterycompartmentagain.
Safety instructions
• Batteriescanbelife-threateningifswallowed.
Therefore,keepbatteryandremotecontrol
outofthereachofsmallchildren.Ifabattery
isswallowed,seekmedicalassistance
immediately.
• Keepthebatteryfortheremotecontrolaway
fromstrongheatsourcessuchassunbeams,
re,etc.
• Batteriesmaynotbecharged,takenapart,
thrownintoreorshortcircuited.Thereisa
riskofexplosion!
• Caution!Thereisanexplosiondangerifthe
batteryisimproperlyreplaced!Onlyreplace
thebatterywiththesameorequivalenttype.
• Lithiumbatteriescanexplodeiftheyare
insertedincorrectly.Therefore,absolutely
observedthepolarity(+/-)duringthe
insertion.
• Removethebatteryfromtheremotecontrol
whenitisconsumedortheunitisnotinuse
foralongerperiodoftime.Thiswayyouare
abletopreventdamage,whichcouldresult
frombatteryleakage.
• Avoidanycontactofthebatteryuidwith
theskin,eyesandmucousmembranes.Upon
contactwiththeaectedareas,immediately
ushwithplentyofcleanwaterandconsulta
doctorimmediately.
• Ifnecessary,cleanthebatteryanddevice
contactsbeforeinserting.

10
2. Functions
YournewpictureframeMAGINONDPF-8SuperSlimfeatureseasytousemenusandfunctionsthat
areexplainedinthefollowingchapter.
2.1. Slide show
Whenthephotoframeisturnedonbyconnectingtothepowerorpressingthepowerbutton,a
slideshowofimagesfromthestoragemediathatwasselectedbeforethelastpowerowill
automaticallystart.TheshowcanalsobestartedatanytimebypressingtheSLIDE SHOWbutton
ontheremotecontrol.
2.2. Selection of the storage medium
DuringtheslideshowpresstheEXIT buttononthe
remotethreetimestogototheselectionofthe
storagemedium.Subsequentlyallinstalledstorage
mediawillbelisted.
Usethebuttons/toselectthedesiredmemory
device"InternalMemory","USB"or"SD/MMCcard"
andconrmthisbypressingtheOKbutton.Thiswill
takeyoutothemainmenu.
2.3. Main menu
DuringtheslideshowpresstheEXITbuttononthe
remotetwotimestogotothemainmenu.Toreach
themainmenuagainfromtheleorcalendarmode
aswellasfromthesettings,presstheEXITbutton
once.
Themainmenuwilloeryoutheoptions“Photo",
“File","Calendar"and"Settings".Usethebuttons
/toselectthedesiredoptionandconrmthis
bypressingtheOKbutton.
Withtheoption"Photo"youcanreachthesingle-pictureview,inwhichalltheimagesonthe
selectedmediawillbedisplayedasthumbnailssortedbyname.
Themenuitem"File"willdisplaythecontentsoftheselectedstoragemediumintheexistingfolder
structure.
Whenselecting"Calendar"acalendarviewwillbedisplayedtogetherwiththeslideshow.
Themenuitem"Settings"displaythesettingsoptionsforyourpictureframe.
TheEXITbuttonwilltakeyoubackfromthemainmenutotheselectionofthestoragemedium.

11
2.4. Photo
Byselectingthe"photo"inthemainmenu,apicture
displaywillopen.
Inthispictureyoucanseethethumbnailsofallimages
ontheselectedmedia.Thisdisplayisindependent
fromthefolderstructurewhichispresentonthe
storagemedium.Theimagesaresortedinan
ascendingorderbylename,ifnoneofthelenames
containsmorethan8characters.
2.4.1. Single picture mode
Inthethumbnailview,usethebuttons///toselectapictureandthenpresstheOK
buttontodisplayitinfullsizeonthescreen.Thepictureframewillthenbeinthesingle picture mode.
Inthesinglepicturemodetheselectedpicturewillbedisplayedcontinuously.Youcanrotate,
enlargethisimage,ortransferittotheinternalmemory.Usingthebuttons/youcanswitchto
thepreviousornextpicture.WiththeOKbuttonyoucanswitchfromthesinglepicturemodetothe
slideshowmodeandback.
2.4.1.1. Rotate picture
Torotateapicture,presstheROTATEbuttononthe
remotecontrolinthesinglepicturemode.Thenthe
imagewillberotated90degreesclockwise.Youcan
alsorotatethepicturebypressingtheMENUorSETUP
buttonandthenselecting"rotateimage”inthemenu
thatappears.
Therotationofanimageisonlymaintaineduntila
dierentpictureisdisplayed.Therotatedimagecan
notbesaved.
2.4.1.2. Enlarge picture
BypressingtheZOOMbuttoninthesinglepicturemode,thedisplayedimageisgraduallyenlarged.
Theenlargementsherebycorrespondtothevalues125%,150%,200%,300%and400%.Ifduring
thegreatestenlargementtheZOOMbuttonispressedagain,thepicturewillbedisplayedin
originalsize.Youcanalsoenlargethepicturebypressingthe MENUorSETUPbuttonandthen
selecting"enlargeimage”inthemenuthatappears.
Theenlargedpicturecanbemovedwiththe///buttons.
Theenlargementofanimageisonlymaintaineduntiladierentpictureisdisplayed.Theenlarged
imagecannotbesaved.
Toreachthepreviousornextpictureusingthebuttons/duringtheenlargedplaybackyou
mustrstswitchtotheoriginalsizeagain.

12
2.4.1.3. Save picture
Thepictureframehasasmallinternalmemory,whereamaximumof5imagescanbestored.To
copyanimagetothisinternalmemory,selectthedesiredimageinsinglepicturemodeusingthe
///buttons.OpenthemenubypressingtheMENUorSETUPbuttonandthenselectthe
item"saveimage”.OnceyouconrmyourselectionwiththeOKbutton,theimageiscopiedtothe
internalmemory.Hereby,theimageisscaledtotthescreen.
Whentheinternalmemoryisfull,thefollowingmessagewillappearonthescreen:"MemoryFull!
Pressanykeytocontinue."Thenpressanykeytoreturntothesinglepicturemode.Todeleteimages
fromtheinternalmemory,proceedasdescribedinChapter2.3.2.“Deleteimage”
Picturesintheinternalmemorycannotbecopiedbacktoanothermedium.
2.4.2. Delete picture
Inthumbnailview,youcandeleteindividualimagesfromtheselectedmedia.Usethebuttons
///toselectapicturetobedeleted.ThenpresstheSETUPbuttonandinthedisplayed
menuswitchto"DeleteFile"usingthe/buttons.OnceyouconrmyourselectionwiththeOK
button,theimagewillbedeleted.
Please observe that deleted images can not be restored.
2.5. File
Selecting"File”fromthemainmenuwillprovide
youwithanoverviewofthefoldersandimages
containedontheselectedmedia.Hereyoucan
browsethefoldersseparatelyforexistingimages,
deleteindividuallesandfoldersorstartaslide
showwithinaselectedfolder.
Usethe/buttonstoselectafolderand
presstheOKbuttontoopenthefolder.
Withinafolder,youcanselectindividualimages
withthe/buttons.Afterselectinganimage
presstheOKbutton,tostartaslideshow,which
islimitedtothecontentsoftheselectedfolder.
Todeleteanimage,rstselectthedesiredimage
withinthefolderusingthe/buttons.ThenpresstheSETUPorMENUbuttonandinthemenu
select"DeleteFile”usingthe/buttons.OnceyouconrmyourselectionwiththeOKbutton,
theimagewillbedeleted.
Please observe that deleted images can not be restored.

13
2.6. Calendar
Fromthemainmenu,select"Calendar",and
youwillreceiveanon-screencalendarview.In
additiontodisplayingthecurrentdateandtime
aslideshowwillberunninginparallelinasmall
window.Thisslideshowwillbeperformed
accordingtothesettingsmadeinthe"Settings"
menu(seeChapter2.7.9.).
Withinthecalendarview,youcanchangethe
datedisplayedwiththe///buttons.
However,thissettingwillnotbesaved;thedate
canonlybesetviathe"Settings"menu.
2.7. Settings
Fromthemainmenu,select"Settings",andyou
willreachtheSettingsmenuofthepictureframe.
Fromthismenuyouhavetheoptionofmaking
settingsrelatedtotheon-screendisplayandthe
slideshow.
Withinthemenu,pressthe///buttons
toaccessthevariousmenuitems.Usethe OK
buttontoselectasub-menuortomakeasettings
change.Asinglesettingcanbechangedwiththe
/button.Withthe EXITbuttonyouareable
toexitamenuorreturntothemainmenufrom
theSettingsmenu.
2.7.1. Language
Selectthelanguagetobeusedinthemenus.ConrmyourselectionbypressingtheOK button.
2.7.2. Picture sequence
Hereyoucanspecifytheorderinwhichtheimagesaredisplayedduringslideshow.Thefollowing
twooptionsareavailable:
ByName:Providedthatalltheimageshavealenamesnolongerthan8characters,theimagesare
displayedsortedbythatnameinascendingorder.
Random:Playbackisperformedrandomlyamongallimageswithoutrepetitions.Onlywhenallthe
imageshavebeenplayedonce,willtheyappearagain.

14
2.7.3. Slide show mode
Here,youareabletospecifywhether1,2,3or4imageswillbedisplayedsimultaneouslyduringa
slideshow.
2.7.4. Slide show interval
Youcansethowlongapictureisdisplayedduringaslideshowonthescreenbeforethenextimage
appears.Youareabletochoosefromintervaltimesof3,5,15and30seconds,1,5,15and30
minutesandupto1hour.
Pleasenotethat,especiallyforthesettingofshorttransitiontimes,thesemaynotbeprecisely
adheredtoinallcases.Ifanimagehasahighresolution,theremaybedelaysof2-3secondsbefore
itcanbereadanddisplayed.
2.7.5. Photo eect
Hereyoucansetinwhichhuetheimageswillbeplayback.Availableoptionsarecolour,mono-
chrome(blackandwhite)andSepia(yellow).
2.7.6. Picture transitions
Hereyoucanchoosetheforminwhichthecurrentimagewillfadeoutandhowthenextimagewill
fadein.Atotalof14dierenttransitionmodesareavailableaswellasasettingarandomlyselected
imagetransition.
2.7.7. Picture size
Imageswhoseresolutionislargerthanthatofthepictureframe(800x600pixels)atleastone
direction,andwhoseheight-widthratiodoesnotmatchthatofthepictureframe(4-3),canbe
adaptedtothescreeninvariousways.
Automatic adaption: Theimagesareadjustedsothattheycoincideinthedirectionofthegreater
extensionofthescreen.Intheotherdirection,blackbarswillbeshown.
Optimal size:Theimagesareadjustedsothattheycoincidewithbothdirectionsofthescreen.
Overlappingimagepartswillherebybe"cuto".
Full screen: Theimagesareadaptedsothattheyareushwiththeleftandrightandllthescreen
intheupanddowndirectionthroughstretching.
Imageswhoseresolutionislessthan800x600pixelsinbothdirectionswillbedisplayedunchanged.
2.7.8. Monitor set-up
Hereyoucanspecifythesettingsforthedisplaycharacteristicofthescreen.Specically,youcan
adjustcontrast,brightness,colourandtinteachinarangeof1-40.

15
2.7.9. Time
Inthismenuyoucansetthedateandtimeforthecalendarview.Initially,usethebuttons/to
selectthevaluetobechanged.ThenpresstheOKbutton,andtheselectedvalueisdisplayedinred.
Usethebuttons/tochangethevalueandconrmthisbypressingtheOKbutton.
Onceyouhavesetallthevalues,switchto“Savetime”andconrmthesettingswiththeOKbutton.
Onlyafteryouhaveperformedthisoption,willthesettingsofdateandtimebetakenover
permanently.
2.7.10. Time format setting
Specifywhethertodisplaythetimeinthe12or24hourformat.
2.7.11. Formatting the memory
Toformattheinternalmemory,select"FormatMemory",thenpresstheOKbutton.Usethebuttons
/toswitchto“Yes”andconrmagainbypressingtheOKbutton.Apossiblyinsertedmemory
cardoraUSBashdrivecannotbeformattedwiththisfunction.
Caution: By formatting, all pictures from the internal memory of the photo frame will be deleted!
2.7.12. Reset
Usethisoptiontoresetthepictureframetothefactorysettings.Dateandtimewillremain
unchanged,andthedataonthestoragemediawillnotbedeleted.
2.7.13. Exit
ToexittheSettingsmenu.Thiswilltakeyoutothemainmenu.

16
3. Conformity
ThisdevicewaslabelledwiththeCEmarking,inaccordancewiththefollowing
EuropeanDirectives:
LowVoltageDirective2006/95/EC
EMCDirective2004/108/EC
TheEUdeclarationofconformitycanberequestedfromtheaddresslistedon
thewarrantycard.
Operationofthisequipmentisacceptableifthefollowingtwoconditionsarefullled:
(1) Thisdevicemaynotemitanyharmfulinterferencepick-up.
(2) Thisdevicemustaccepttheinuenceofinterferencepick-up.Thisincludesinterference
pick-upwhichcanimpedetheoperationorcauseoperationalmalfunctions.
Incaseofaninterferenceoftheradioandtelevisionreceptionthroughthisdevice-thiscanbe
determinedbysimplyswitchingonandoofthedevice-theusershouldtrytocorrectthe
interferencewiththefollowingmeasures:
• Turnthereceiverantennaintoadierentdirectionorinstallitsomewhereelse.
• Increasethespacebetweentheequipmentandreceiver.
• ContactthedealershiporanexperiencedradioTVtechnician.

17
4. Frequently asked questions (FAQ)
Priortoshipmentthisproductwassettothedefaultmodes.Ifyouhavequestionsonusingthe
digitalpictureframe,initiallyapplythefollowingtroubleshootingmeasures.
Q:HowdoIturnonthedigitalpictureframe?
A:Thedigitalpictureframewillalreadybeoperationalwithinminutesafterunpacking.Connect
theACadaptertothedigitalpictureframeandastandardwallsocket.Insertthememorycard
intotheprovidedcardslot(seeSection1.4.).
Q:Whatmemorymediacanbereadbythedigitalpictureframe?
A:ThecompatiblestoragemediaincludesSecureDigital™(SD),SecureDigitalHighCapacity™
(SDHC),MultiMediaCard™(MMC)andUSBmemorystick.
Q:Whatdataformatswillthepictureframeplayback?
A:TheframeplaysimagesintheJPEGformat.
Q:Amemorycardisinserted,butnopicturesareappearing.
A:Pleasecheckwhetherthereisdataonthememorycardandthatthedatacorrespondstothe
supportedformats.Checkifthememorycardissupportedbythepictureframe.Ifthe
requirementsaremet,pleaseturntheframeoandonagain.
Iftheabovetroubleshootingsolutionsarenotsuccessful,youshouldcontacttheCustomerService
listedinthewarrantydocuments.Theycangiveyoufurtherassistanceandsupport,andspareparts
canbeorderedifrequired.
CAUTION!Donotopenthedevicehousing!Therearenoserviceablepartsinit.Unauthorized
interferencewiththedeviceputtheuserindangerandleadtolossofwarranty.
Note:
• Insomedigitalcameras,theimagesarestoredinotherformats.Forinformationabout
whichimageformatyourcamerauses,refertothemanualofyourcamera.

18
5. Cleaning
CAUTION!Beforeperforminganycleaningcleaningworkremovethepowerplugfromthe
socket.
Forthecleaning,neverusesolventsorcorrosive/abrasivecleaners,sinceotherwisethesurfaces
couldbedamaged.
Carefullycleanthedeviceanddisplaywithasoftdrycloth.Removestubborndirtbylightly
moisteningthecloth,butbecarefulthatnomoisturepenetratesintothedevice.Subsequently,
wipethedevicecompletelydry.
6. Disposal
6.1. Packaging
Theproductpackagingismadefromrecyclablematerialsandcanbeintroduced
totherecoveredsubstancecycle.Disposeoftheseinanenvironmentallyfriendly
manner.
6.2. Device
Afterthedevicehascompleteditsservicelifeitmustbedisposedofincompliance
withtheDirective2002/96/ECataproperdisposalpointandshouldneverbe
disposedofwithnormalhouseholdwaste.Disposeofolddevicesatacollection
pointforelectronicwaste.There,recyclablescontainedinthedevicewillbe
introducedtotherecycling,andthusavoidacontaminationoftheenvironment.For
furtherinformationcontactyourlocalwastedisposalcompanyoryourmunicipal
administration.
7. Warranty and Service
Ifproblemsshouldoccurduringtheoperationofthedevice,weareavailableunderserviceaddress
tohandleanyquestionsandproblemsyoumayhave.Wewillissueathree-yearmanufacturer's
warrantyforthedevice.Fordetails,pleaserefertotheseparatelyenclosedwarrantycard.
Beforeyousendusadefectiveunit,pleasecontactourhotline.
Service Address:
Schenker Australia Pty Ltd
MAGINON®Service
P.O.Box329
Villawood,NSW2163
Australia
Tel.:1800623432
Manufacturer address:
supra
Foto-Elektronik-Vertriebs-GmbH
Denisstr.28A
67663Kaiserslautern
Germany
Table of contents