manuals.online logo
Brands
  1. Home
  2. •
  3. Brands
  4. •
  5. Magnavox
  6. •
  7. TV
  8. •
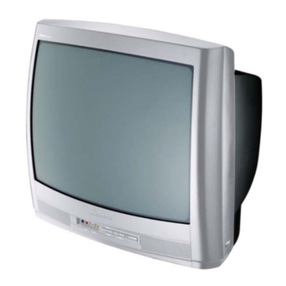
  9. Magnavox PR1397 User manual

Magnavox PR1397 User manual

COLORTELEVISION
AND
REMOTECONTROL
_Getting Started
Warning/Precautions .............................. 1, 8
Hooking Up YourTV ................................ 2
VCR to TV Antenna Connections ............................. 2
Basic TV and Remote Control Operation ................. 3
How to Use the First Time Set-Up Control .............. 3
I----IOn-Screen Features
+Setting the TV for Cable TV Operation ............. 4
+Adding Channels in Memory (Automatically)...4
+Adding Channels in Memory (Manually) .......... 4
+Using the Surf Control ........................................ 4
+ Using the Smart Picture Control ........................ 5
+Using the Smart Sound Control .......................... 5
+Using the TV Volume Bar Control .................... 5
+Setting the TV Sleep Timer Control ................... 5
+ Using the Set Clock Control ............................... 6
+ Using the Set Timer Control ............................... 6
+Using the Timer ................................................... 6
+Using the Reminder Control ............................... 6
_'How to Set the TV for Closed Captioning ........ 7
+Adjusting the TV Picture .................................... 7
+Using the On-Screen Language Option .............. 7
MC_eneral Information
Glossary of TV Terms ................................................ 7
Tips if Something Isn't Working ............................... 8
Index .......................................................................... 8
Warranty ..................................................................... 8
First Time Set Up which automatically sets the
TV for local channels and the correct picture
signal (antenna or cable).
Infrared Remote Control which works your
TV as well as all on-screen feature controls.
Standard broadcast (VHF/UHF) or Cable
TV (CATV) channel capability.
Closed Captioning which allows the viewer to
read TV program dialogue or voice conversa-
tions as on-screen text.
Automatic Programming of channels for
quick and easy selection of favorite stations
available in your area.
On-Screen Features (in either English, French,
or Spanish) which show helpful messages for
setting of TV controls.
Sleep-Timer which automatically turns the TV
OFF at preset times.
Smart Button for the control of TV Sound and
Picture levels. Use the Smart Button on the
remote to quickly adjust Smart Sound (to keep
volume levels consistent during program
changes or commercial breaks), and Smart
Picture (for automatic picture adjustments on a
variety of program sources).
Clock Timer feature which can turn ON the TV
at any preset time - just like an alarm clock.
Feature Demonstration Mode Preview. Press
the Volume& and Channel • buttons on the TV
at the same time to begin a series of messages
that describe the use and benefit of your TV's
features. To cancel the demonstration, press any
button on the front of the TV and follow the on-
screen instructions.
Vour Cable TV input
• into your home may be
a single (75 ohm) cable, or
a Converter Box installa-
tion. In either case the
connection to the TV is
very easy. Just put the
threaded end of the cable
signal to the TV's antenna
plug and screw it down
tight.
I
If your Cable TV sig-
nal is a single round cable (75
ohm) then you're ready to con-
nect to the TV.
If you have a Cable TV
Converter Box:
Connect the Cable TV signal to
the Cable Signal IN(put) plug
on the Converter.
Cable TV Company
<Connect the Cable TV
cable to the ANTENNA/CABLE
plug on the TV.
If you have a Cable TV
Converter Box:
Connect the OUT(put) plug
from the Converter to the
ANTENNA/CABLE plug on the
W. !_1]
Box Connection 75_ Ohm
INOTE: The connecting cable for [
the Converter is supplied from
the Cable 'IV Company.
Back ofTV
Remember,
set the TV for the
type signal you've
just connected (see
page 3 of this Set-
Up Guide.)
To select only the
channel numbers on
your Cable system
see "Auto Program"
(page 3). If you use
a Cable Converter
box, set the TV to
the same channel as
the converter's CH
3/4 switch (on the
rear of the convert-
er.)
I
A ombination antenna
receives normal
broadcast channels (VHF
2-13 and UHF 14-69).
Your connection is easy
since there is only one
75_ (ohm) antenna plug
on the back of your TV -
and that's where the anten-
na goes.
If your antenna has a
round cable (75 ohm) on the
end, then you're ready to con-
nect it to the TV.
If your antenna has fiat twin-
lead wire (300 ohm), you first
need to attach the antenna wires
to the screws on a 300 to 75
ohm adapter. \\\ II7 ff Z 1/,
2_ Push the round end of the
adapter (or antenna) onto the
ANTENNA/CABLE plug on
the rear of the TV. If the round
end of the antenna wire is
threaded, screw it down tight.
300 to 75_
Adapter
483521827003)
Back of TV
Combination VHF/UHF Antenna
(Outdoor or Indoor) ',Cable
Remember, !
be sure to set the
TV for the type sig-
nal you've connect-
ed (see page 3 of
this Set-Up Guide.)
To set the TV to
select only the
channel numbers in
your area see how
to "Program" or
"Add" channels in
memory on page 3.
T ]er any
o_ .ial accessory
-L i ks m ,ak'J(e) m--_Press the POWER
button to turn the TV ON.
6
t<_Press the VOLUME UP
(A) or DOWN (Y) button to
adjust the sound level.
'<_f_ress the CHANNEL UP
(A) or DOWN ('Y')button to
select TV channels. @Remember,
You can press any
button on the front
of the TV to turn
the TV ON.
The tuned channel
number will always
briefly appear when
the TV is first
turned ON (and
with channel
changes.) You can
also press the STA-
TUS button (on the
remote) to see what
channel the TV is
ON.
lOad the supplied bat-
ries into the remote:
1. Remove the battery
compartment lid on the
back of the remote.
,Place the batteries (2-
AAA) in the remote. Be
sure the (+) and (-) ends
of the batteries line up
correctly (inside of case is
marked.)
3. Reattach the battery lid.
__PPolnt the remote con
Itwr°L:°W% n::=°wt:Sens r:[
[ating the TV with the remote..@
Channel Scan Button
Press to scan up or down
through channel numhe_.
Press to see the current channel number on the TV screen.
Also press thisbuttonto clear the'IV screen after control
adjustlTlcnt s.
vM._au.._vJiL_amam
Press the Mbutton to show on-screen controls. Press Channel
• or •buttons to move through the list of controls. Press the
Volume (+. -) buttons to 'adjust the MENU controls.
Mute Button
Press to turn the sound OFF on the TV. Press again to
return the sound to its previous level.
Power Button
Press to turn TV ON and OFF.
Volume (-) and (+) Buttons
Press to 'adjust the TV sound level. When used with the MENU but-
ton. press to "adjust the selected on-screen (MENU) feature controls.
Pressto select previouslyviewed channels.
For example:Youare watching channel 4 and change to chan-
nel 10(using the channel number buttons). PressSURF and
your TVwill return to channel 4. Press SURF again andyour
TVwill returnto channel 10.Turnto page (5) to see how the
"SURF" control is usedto quickly select a series ofchannels.
Number Buttons
Press two number buttons to select TV channels. For
to .select channel 6..press "0" first; then "6".
Siren Button
Press to set the TV to automati-
cally turn itself OFF. See page (6)
for details.
Preg,_to select automatic settings for TV Picture and
Sound. Smart Picture for factory preset video levels on a
variety of program sources. Smart Sound to control "IV
,sound levels during program changes or commercial
breaks. See page (5) for details.
If you went
through First Time Setup
i(page 3), this task has already
been completed for you.
You need to make sure that
the TV is set to pick up either
Cable 73/stations or Antenna
signals. In other words, the
TV needs to know whether
you have connected a Cable
TV signal or a normal anten-
na to its ANTENNA plug (see
page 2).
Press the MENU (M)
button on the remote, then the
CHANNEL •or • buttons
(or press the MENU • or •
on the TV) to select the word
CABLE with the TV's on-
screen Arrow.
-,7_ the VOLUME (+)
or (-) buttons (on the TV or the
remote) to select either.
YES- If you DO have Cable
TV connected to the
TV. Channels 1-125
can be selected.
If you have an Antenna
connected to the TV.
Channels 2-69 can be
selected.
'_Press STATUS button on I
the remote control to clear the I
I
screen.
!
Try it out. t
Press the CHANNEL
• • buttons and scan
the channels. CH••
works only after STA-
TUS button is pressed
to clear the screen (or
Menu times out -
about 1minute.)
Remember, to set the
TV to select the chan-
nels on your Cable
system, or in your
area. see the
"Autoprogram" and
"Adding Channels " in
the section below.
OTE: If you went
rough First Time Setup
(page 3), this task
been completed for you.
Auto-Program isfor adding
local area channel numbers
into the memory of the TE.
This makes it easy for you to
select only your area (or
Cable system) channels when
the CHANNEL • • buttons
are pressed.
Press the MENU (M)
button on the remote, then the
CHANNEL • or • buttons
(or the MENU • or • buttons
on the TV) to select the word
PROGRAM with the TV's on-
screen Arrow.
,__VOLUME
button (on the TV or the (+)
remote) to PROGRAM.
'_Pre_ the VOLUME (+)
button again to start the TV
search for area channels.
[Flashing channel numbers will
1
]count upward on the screen as
the TV looks for channels to
"ADD".
<[_You may press any button
(on the TV or remote) to stop
the channel search at any time.
When the channel search is
completed the TV will return to
the last viewed channel.
The TV screen will be blocked
off until the search for channels
is done. i_ I
"RED" channel numbers have been
"added to the TV's memory.
"WItlTE" channel numbers are not
presenl in the TV's program memory,
"-I_'l_l][_Try it out Press
\ I /r, "I
I
CHAN ..... . •• buttons
-_/-, and se, iich channels I
have. h_en added.
To drop any unwanted channels
from the TV's memory, see
how to "Manually" delete
channels in the section below.
I hen searching for channels the
TV screen display "V jitter
slightly. This is n Jand does
not indicate a need lot service.
ether you're watching
movie or a video
game your TV has automatic
picture settings matched for
your current program source
or content. The Smart Picture
feature quickly resets your
TV's picture for a number of
different types of programs
and viewing conditions you
may have in your home.
Each Smart Picture setting is
preset at the factory to auto-
matically adjust the TV's
Brightness, Picture, Color,
Tint, and Sharpness viewing
control levels.
Press the Smart button
on the remote.
Press the Menu (M) • or •
button to select the desired
Smart Menu feature (highlight-
led with arrow).
_W----_-h the Smart Picture
control selected, press the (+)
or (-) button repeatedly to select
any of the preset viewing cate-
gories (Example: Video Games,
Movies, etc.).
i3_Press the STATUS button
to clear the screen. eRemember,
the Smart Picture
settings are stored
into the TV at the
factory and can
only be reset by
field and service
technicians.
re you tired of the sound
of commercials following
you into the next room or all
through the house? Smart
Sound allows you to keep a
desired volume level that the
TV sound will not go above.
This makes for an even, more
consistent sound by reducing
the peaks and valleys that
can occur during program
changes or commercial
breaks.
ss the Smart button
on the remote.
Press the Menu (M) • or •
button to select the desired
Smart Menu feature (highlight-
ed with arrow).
,_With the Smart Sound
control selected, press the (+)
nor(-)button to turn the volume
level control ON or OFF.
•_Press the STATUS button
to clear the screen when com-
pleted.
Press the MENU (M)
OTE: If you went
rough First Time
Setup (page 3), this task has
already been completed for
you.
Your TV comes with an on-
screen clock. During normal
use the clock shows on the
screen with every channel
change (and when the STA-
TUS button is pressed.)
button on the remote, then the
CHANNEL • or • buttons
(or the Menu • or • buttons
on the TV) to select the words
SET CLOCK with the TV's
on-screen Arrow.
,_7_p-_ VOLUME (-) but-
ton to set the hour (and AM or
PM) parts of the clock.
Press VOLUME (+) button to
set the minutes part of the
clock.
'_P-'_ess STATUS buttOnntd
set the clock in operation a
clear the screen. oRemember, !
the remote's number
buttons can also be
used to enter the
time. Be sure to
press "0" first for
single digit hour
entries. Press the
or 2 number buttons
for the clock's AM
or PM settings.
St like an alarm clock
ou can set the TV to turn
itself on at the same time
everyday.
Press MENU (M)
button on the remote, then
press the CHANNEL • or •
buttons (or press the MENU •
or • buttons on the TV) to
select the words SET TIMER
with the TV's on-screen Arrow.
__ VOLUME (-)
button on the remote to set the
hour you want the TV to turn
itself ON. (Also press the VOL-
UME (-) button for the correct
AM or PM setting).
Press the VOLUME (+) but-
ton on the remote to set the
minutes partof the timer clock•
[3_P_--__th_e STATUS button 1
to set the "ON TIME" and [
clear the screen.
le plci
Remember,
the TIMER SET-
TING will not take
place unless the
TIMER Menu con-
trol is also set to
"ON". (See TIMER
section below)
The remote's num-
ber buttons can also
be used to set the
clock. Be sure to
press "0" first for
single digit hour
entries. Press the !
number buttons
_e clock's AM
nr PM _ettin_.
lyOSed Captioning allows
ou to read the voice
content of television pro-
grams on the TV screen.
Designed to help the hearing
impaired, this feature uses
on-screen "text boxes" to
show dialogue and conversa-
tions while the TV program is
in progress.
Note: Broadcast stations will
often use spelling abbrevia-
tions, symbols, dropouts and
other grammatical shortcuts
in order to keep pace with the
on-screen action. These type
factors vary upon the source
of the captioned text material
and do not indicate a need
for service on the part of the
TV.
Press MENU (M)
buttofl on the remote, then
press the CHANNEL • or •
(or press the MENU • or •
buttons on the TV) to select the
word CAPTION with the TV's
on-screen Arrow.
NOTE: The "CCi
W/MUTE" setting
automatically
swtiches the TV to
the Closed Caption
I mode whenever
the MUTE button
(on the remote con-
trol) is pressed. The
Closed Caption I
mode will turn OFF
when the TV sound
is returned or
unmuted.
_Press VOLUME (+) or (-)
buttons to select the desired
Closed Caption (CC) mode -
For Example: CAPTION 1.
Note: Usually "CAPTION 1"is
the most used mode to view
captioned material. Caption
modes 2, 3, and 4 are seldom
used by broadcast stations.
CAPTION 1, 2, 3, or 4 mode: dialogue (and
descriptions) for the action on the captioned
TV program shows on-screen. (See Smart Help
on this page.)
__ATUS
after making your Caption
mode selection. The TV dis-
play will clear and Captioning
material (if available on the
currently selected TV program)
will appear on the TV screen.
To cancel, set the CAPTION
feature to OFF when finished
viewing.
6This symbol
will appear
with channels
that contain
Closed
Captioning
material.
TEXT 1, 2, 3, or 4mode: often used for chan-
nel guide, schedules, or bulletin board informa-
tion for CC programs. Text mode blocks the
TV screen.
Remember,
and product com-
mercials are made
for broadcast with
Closed Caption
(CC) information
included. Neither
are all Closed
Caption modes
(CAPTION 1-4. or
TEXT 1-4)) neces-
sarily being used by
a broadcast station
during the transmis-
sion of a closed
caption program.
Refer to your area's
TV program listings
for the stations and
times of Closed
Caption shows.
adjust your TV picture
ntrols, select a channel
and follow the steps shown to
the right.
NOTE: The Smart Picture
control can automatically
adjust your TV's picture for a
variety of progrl _d
viewing conditior_o. See page
Press the MENU
Ibutton on the remote, then
press the CHANNEL • or •
(or press MENU • or • but-
tonson the TV) until the desired
control shows on-screen.
'a_nd press VOLUME (+)
the
(-) to adjust the selected
[picture control.
DPICTURE
'E_xI_TUS button (or
I Menu) to clear the screen
Iwhen picture adjustments are
completed.
Remember. ![
i ith the bar scale
centered the control
settings are at normal
mid-range levels.
_.,B.LCa.I_f,._ Press (-) or (+) until darl_ [
parts of the picture are as bright as you pr_ iI
PICTURE Press (-) or (+) until lightest parts
lease make these simple
checks before calling for
service. Theses tips can save
you time and money since
charges for TV installation
and adjustment of customer
controls are not covered
under your warranty.
CAUTION: A video source
(such as a video game,
Compact Disc Interactive -
CDI, or TV information
channel) which shows a con-
stant non-moving pattern on
the TV screen, can cause pic-
ture tube damage. When not
in use, turn the video source
OFF. Regularly alternate the
use of such video sources
with normal TV viewing.
No Power
Check the TV power cord.
Unplug the TV, wait 1
minute, then reinsert plug
into outlet and push POWER
button again.
Check to be sure outlet is not
on a wall switch.
This TV is equipped with
protective circuitry that shuts
the TV off in case of moder-
ate power surges. Should
this occur turn the TV back
on by pressing the POWER
button once or twice, or
unplug (wait 10 seconds) and
then replug the power cord at
the AC outlet. This feature is
NOT designed to prevent
damage due to high power
surges such as those caused
by lightning, which is not
covered by your warranty.
< Sound
•Check the VOLUME buttons.
Check the MUTE button on
the remote control.
Picture
i heck the CABLE/YES NO
control for correct position.
Check antenna connections
on the rear of the TV. Are
they properly secured to the
antenna plug on the TV?
Doesn't
Work
• Check batteries. Replace
with AAA Heavy Duty (Zinc
Chloride) orAlkaline batter-
ies if necessary.
• Clean the remote and the
remote sensor window on the[
TV.
• Check the TV power cord.
Unplug the TV, wait 1
minute, then reinsert plug
into outlet and push POWER
button again.
5 Wron Channel
(or no Channels
above 13)
• Repeat channel selection.
• Add desired channel num-
bers (CHANNEL control)
into TV memory.
•Check CABLE/ YES NO
control for correct position.
and Care
Io Unplug the TV before clean-
i .
rag.
I. Avoid using anything abra-
sive that could scratch the
! screen.
•Wipe the TV screen with a
clean cloth dampened with
water.
• Gently wipe cabinet surfaces
with a clean cloth or sponge
dampened with cool clear
water. Use a clean dry cloth
to dry the wiped surfaces.
• Occasionally vacuum the
ventilation holes or slots in
the cabinet back.
Accessories ............ 2
Add Channels .......... 4
Antenna Connect ........ 2
Autoprogram ........... 4
Batteries ............... 3
Cable TV Connect ....... 2
Cable TV Control ........ 4
Channel Memory ........ 4
Clock ................. 5
Closed Caption .......... 7
Coaxial Cable .......... 2
Controls/TV ............ 3
Controls/Rem0te ........ 3
Display ............... 3
Features ............... 1
First Time Use .......... 3
Glossary .............. 7
Language ............. 7
Menu Button ........... 3
Minus(-) Buttons ........ 3
Plus(+) Button .......... 3
Precautions ........... 1, 8
Programming ........... 4
Reminder .............. 6
Remote Control ......... 3
RF Cable .............. 2
Safety Notes ............ 1
Service ................ 8
Sensor Remote .......... 3
SETUP ................ 3
Sleep Timer ............ 5
Smart Picture ........... 5
Smart Sound ........... 5
Status Button ........... 3
Surf .................. 4
Timer ................. 6
Tips for Service ......... 8
VCR Connections ....... 2
Volume Bar ............ 5
Warranty .............. 8

Other Magnavox TV manuals

Magnavox MD301B series User manual

Magnavox

Magnavox MD301B series User manual

Magnavox TP3573 User manual

Magnavox

Magnavox TP3573 User manual

Magnavox PR1910 User manual

Magnavox

Magnavox PR1910 User manual

Magnavox FP4650 User manual

Magnavox

Magnavox FP4650 User manual

Magnavox TS2573C10 User manual

Magnavox

Magnavox TS2573C10 User manual

Magnavox MS1940B User manual

Magnavox

Magnavox MS1940B User manual

Magnavox 32MF369B/F7 User manual

Magnavox

Magnavox 32MF369B/F7 User manual

Magnavox 27PT5245 - 27" Stereo Tv Quick start guide

Magnavox

Magnavox 27PT5245 - 27" Stereo Tv Quick start guide

Magnavox 27MS343S User manual

Magnavox

Magnavox 27MS343S User manual

Magnavox MS3250C User manual

Magnavox

Magnavox MS3250C User manual

Magnavox 40MV336X/F7 User manual

Magnavox

Magnavox 40MV336X/F7 User manual

Magnavox 20MT4405 - 20" Real Flat Stereo Tv User manual

Magnavox

Magnavox 20MT4405 - 20" Real Flat Stereo Tv User manual

Magnavox 20MS3442/17 User manual

Magnavox

Magnavox 20MS3442/17 User manual

Magnavox 27MT5005D - 27" Integrated Sdtv Quick start guide

Magnavox

Magnavox 27MT5005D - 27" Integrated Sdtv Quick start guide

Magnavox 50MV376Y User manual

Magnavox

Magnavox 50MV376Y User manual

Magnavox \ User manual

Magnavox

Magnavox \ User manual

Magnavox 20MT1336 - 20" Color Tv Quick start guide

Magnavox

Magnavox 20MT1336 - 20" Color Tv Quick start guide

Magnavox 42MF438B - 42" LCD TV User manual

Magnavox

Magnavox 42MF438B - 42" LCD TV User manual

Magnavox TS3253 User manual

Magnavox

Magnavox TS3253 User manual

Magnavox \ Manual

Magnavox

Magnavox \ Manual

Magnavox 13MT1432-17B User manual

Magnavox

Magnavox 13MT1432-17B User manual

Magnavox 37MF437B - LCD TV - 1080p User manual

Magnavox

Magnavox 37MF437B - LCD TV - 1080p User manual

Magnavox 42MF231D - Hook Up Guide Installation instructions manual

Magnavox

Magnavox 42MF231D - Hook Up Guide Installation instructions manual

Magnavox \ User manual

Magnavox

Magnavox \ User manual

Popular TV manuals by other brands

Haier DTA2181 Service manual

Haier

Haier DTA2181 Service manual

Beko B55 Q 990 A user manual

Beko

Beko B55 Q 990 A user manual

Toshiba 19A20 Service manual

Toshiba

Toshiba 19A20 Service manual

Sharp Aquos LC 37D64U Service manual

Sharp

Sharp Aquos LC 37D64U Service manual

Logik L26FE12I instruction manual

Logik

Logik L26FE12I instruction manual

Sony bravia KD-65S9000B reference guide

Sony

Sony bravia KD-65S9000B reference guide

Sharp 20LK61M Service manual

Sharp

Sharp 20LK61M Service manual

Philips 75PFL6601 quick start guide

Philips

Philips 75PFL6601 quick start guide

Panasonic TX-28HA1F operating instructions

Panasonic

Panasonic TX-28HA1F operating instructions

Sharp 32F641 Operation manual

Sharp

Sharp 32F641 Operation manual

Philips 9507 Series quick start guide

Philips

Philips 9507 Series quick start guide

GPX TD930 quick start guide

GPX

GPX TD930 quick start guide

Sony KV-34HS420N operating instructions

Sony

Sony KV-34HS420N operating instructions

HANNspree HANNSz.dog quick start guide

HANNspree

HANNspree HANNSz.dog quick start guide

JVC AV28CH1EUS Service manual

JVC

JVC AV28CH1EUS Service manual

Samsung The Sero LS05T user manual

Samsung

Samsung The Sero LS05T user manual

Panasonic TX-P54Z11E operating instructions

Panasonic

Panasonic TX-P54Z11E operating instructions

VESTEL 65Q9700TT operating instructions

VESTEL

VESTEL 65Q9700TT operating instructions

manuals.online logo
manuals.online logoBrands
  • About & Mission
  • Contact us
  • Privacy Policy
  • Terms and Conditions

Copyright 2025 Manuals.Online. All Rights Reserved.