manuals.online logo
Brands
  1. Home
  2. •
  3. Brands
  4. •
  5. Magnavox
  6. •
  7. TV
  8. •
  9. Magnavox TR2516 User manual

Magnavox TR2516 User manual

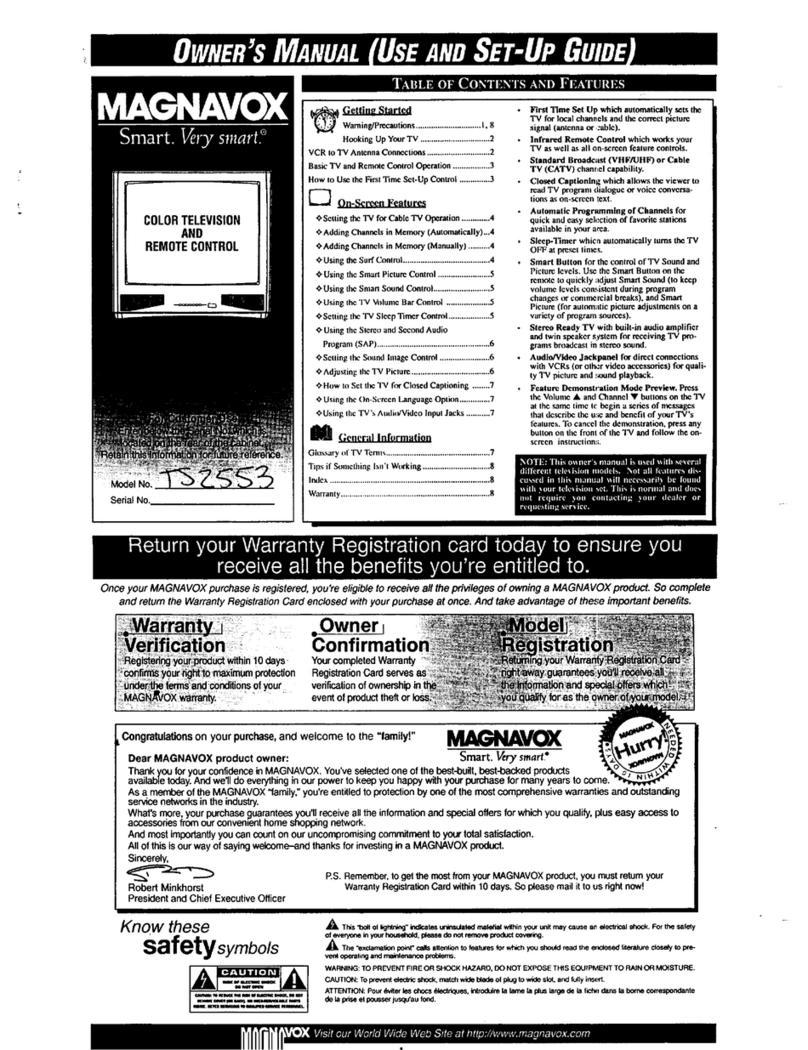
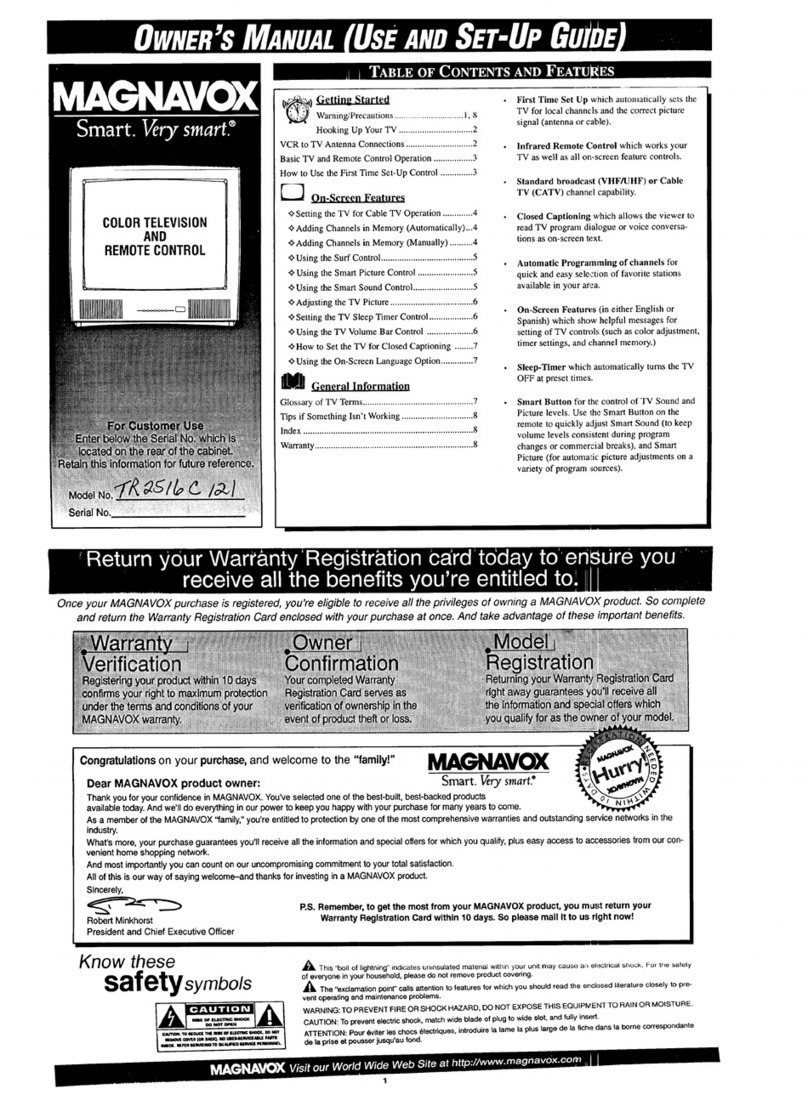
_ Gettin_ Started
WarningtPrecautions .............................. I, 8
Hooking Up Your 'IV ................................ 2
VCR to 'IV Antenna Connections ............................. 2
Basic I'€ and Remote ControlOperation ................. 3
How to Use theFirs[ Time Set-Up Control.............. 3
----] On-Screen Features
_Settlng theTV for Cable TV Operation............. 4
_Adding Channels in Memory (Autumadcally)...4
_'Adding Channels in Memory (Manually) ..........4
.0.Using the Surf Control ........................................ 5
_Using the Smart Picture Control........................ 5
_'Using the SmartSound Control .......................... 5
_'Adjusting theTV Picture.................................... 6
_Setting the"IV SleepTimer Control..............,....6
_'Using [he "IVVolume Bar Control .................... 6
_.How to Set [he "IV for Closed Captioning ........ 7
_Using the On-Screen Language Option .............. ?
I General Information
Glossary of'IV Terms ................................................ 7
Tips ifSomething Isn'tWorking ...............................8
Index ..........................................................................8
Warranty.....................................................................8
• FirstTimeSetUp whichautomaticallysets the
TVforlocalchannelsand[hecorrectpicture
signal(antennaorcable).
• Infrared Remote Control which works your
'IV as well as all on-screen feature controls.
•Standard broadcast (VHF/UHF) or Cable
"IV (CAT_ channel capability.
•Closed Captioning which allows [he viewer to
read TV program dialogue or voice conversa-
tions as on-screen text.
•Automatic Programming of channels for
quick and easy selection of favorite stations
available in your area.
On-ScreenFeatures(ineither Englishor
Spanish)whichshow helpfulmessagesfor
settingofTVcontrols(suchas coloradjustment,
timersettings,andchannelmemory.)
• Sleep-Tlmer which automatically turns [he 'IV
OFFat preset times.
Smart Button for [he control of TV Sound and
Picture levels. Use the Smart Button on the
remote toquickly adjustSmart Sound (tokeep
volume levels consistent during program
changes or commercial breaks), and Smart
Picture (for automatic picture adjustments on a
varietyof program sources).
-) . ,
Onoe your MAGNA VOX purchase isregistered, you're e/igibleto receive all the privileges of owning a MAGNA VOX product. So complete
and return the Warranty RegistrationCard enc/osed withyour purchase at once. And take advantage of these importantbenefits.
Congratulationson yourpumhase,andwelcometo the=familyV _V_[
Dear MAGNAVOX product owner: Smart. Vrry s_rt?
Thank you for yourconfidenceInMAGNAVOX.You'veselectedone ofthe best-built,best-backedproducts
availabletoday.And we'lldo everythinginour powertokeep youhappywithyour purchaseformanyyearsto come.
As a memberofthe MAGNAVOX"family,"you'reentitledto protectionbyor_ ofthe mostcomprehensivewarrantiesandoutstandingservicenetworksinthe
What'smore,yourpurchaseguaranteesyou'llreceiveall the Informationend specialoffersforwhichyouqualify,pluseasy a_,essto accessoriesfromour con-
vanionthomoshoppingnetwork.
Andmostimportantly youcan counton our uncompromisingcommitmenttoyourtotal satisfaction.
Allof[hisis ourway of sayingwelcome-andthanksforInvestingInaMAGNAVOXproduct.
Sincerely,
_==n==_.._ RS. Remember, to get the most from your MAGNAVOX product, you must return your
Robed Minkhomt Warranty RegLMxetlonCard within 10 days. 8o please mall h to us right howl
Presidentand Chief ExeoutivoOfficer
Know these
safetysymbo/s _k This'l_oltofligl'_ Indicstssunlnsulatedmatedalwithinyouru_tmay¢_zuseanelectrical_. F_ _ _fe_
olavecyoa_Inyourhouaohold,faun donotremorapmdu¢ €oving.
_T_e'_kuzte_ pokd"€_dl_atte_k_ tof_duresfor_x_h youId_uk:lre_l theenclosedlltsra_ _ _ W_
vwt op_g =ndma_e_ proU=_.
WARNING:TOPREVENTFIREORSHOCKHAZARD,DONOTEXPOSETHISEQUIPMENTTORAINORMOISTURE.
GAUTION:TOprm,,emdecide=_'mck,matchwidebladeoh:_,ugtowidaedot.endlu¢lyinu,rt.
ATI'ENTION:Po_r(hitsrle_d_€_ _ectdque_,I_'ed_CreI_ImmelapCu_la_edeI_6chedar_I_borne_
d__Wtme_peu_erJu_qu'auf,_d.
[llffffl_ IIIkl
u_
your Cable TV input
nto your home may be
asingle (75 ohm) cable, m
aConverter Box installa-
tion. In either case the
connection to the TV is
very easy. Just put the
threaded end of the cable
signal to the TV's antenna
plug and screw it down
!tight.
-(_/f your Cable TV sig-
nal is a singleround cable (75
ohm) then you're ready to con-
nect to the "IV.
If you have a Cable TV
Converter Box:
Connect the Cable TV signal to
the Cable Signal IN(put) plug
on the Converter.
C,bte'rv_y
cable to the ANTENNA/CABLE
plug on the 'IV.
If you have a Cable TV
Converter Box:
Connect the OUT(put) plug
from the Converter to the
ANTENNA/CABLE plug on the
TV. O'
Jibe Convenerh supplkdfrmn
[tbt CableTV ComF_l.
BackofIN
set the "IV for the
type signal you've
just connected (see
page 3of this Set-
Up Guide.)
To select only the
channel numbers on
your Cable system
see "Auto Program"
(page 3). If you use
aCable Converter
box,set the TVto
the samechannelas
the converter's CH
314 switch (on the
rear of th_ conven-
er.)
_z_ B3mil_
Aombination antenna
receives normal
broadcast channels (VHF
2-13 and UHF 14-69).
Your connection is easy
since there is only one
75_ (ohm) antenna plug
on the back of your TV.
land that's where the anten.
no goes.
lbl Nil _ltU hill I|i| l I 1
btwmeofyou may hove
oseparate antennas.
One anNnna is for VHF
channels (2-13) and the
other antenna is for UHF
,:honnels (14-69).
For homes with separute
UHFIVHF antennas, you
will need an optional
"combiner" before you can
connect to the TE See the
"Smart Help" section (to
the right on this page)for
ordering details.
_ _'h the round end of the
our antenna has a adapter (orantenna) onto the
round cable (75 ohm) on the
end, then you're ready to con- ANTENNA/CABLE plug on
nect it to the 'IV. the rear of the 'IV. if the round
end of the antenna wire is
Ifyour antenna has flat twin- threaded, screw it down tight, t_
lead wire (300 ohm), you first
need to attach the antenna wires
to the screws on a 300 to 75
ohm adapter. _ 1 "_ _ _ _*W
\\\ ,q
/ _!.'.._'_"_' _,_ U._&"@_ l. I i _. _'_l I
_(_Attach the separate
UHF and VHF antennas to
]the correct screws on the com-
biner.
<_Push the round end of the combiner
onto the ANTENNA/CABLE plug on ]
the rear of the TV. O
(Twin-lead 300 Ohm)
Outdoor VHF Anlelma
(l_ia-kad 300 Ohm)
be sure to set the
TV for the type sig-
nal you've connect-
(see page 3of
this Set-Up Guide.)
To set the TV to
select only the
channel numbers in
your area see how
to "Program" or
"Add" channels in
memory on page 3.
To order any
optional accessory
contact your dealer
or call the toll-free
accessory ordering
number (1-800-292-
6066):
• UHF/VHF
Combiner.
(SBV1133AOI)
• 75-300 Ohm
Adapter:.
(SBV1113AOI)
•300-75 Ohm
Adapter.
(483521827003)
r _ Connect your
[Antenna or Cable TV signal
]to the IN FROM ANT(enna)
basic Antenna or _,......1._V,._
'Pr_ .Iplo.........
&Cable T_,to VCR to
TVconnection is shown to
the right. Formore infor- _VHV_HV
marionon other hookups
(passible when Cable
ConverterlDescrambler
boxes are included) refer
ta your accessory VCR
and Cable Converter
Owner's Manual for
details.
•<_Connect the OUT TO TV _Refer to the Owner's
plug on the VCR to the Manual included with your
ANTENNA plug on the TV VCR for other possible con-
(connecting cable supplied nectioas and TV/VCR operat- [
wth the VCR.) ng deta Is. _1
VCR
IlUlUllllII --o II!1
i||! l i ui_11k_.l |111111 [lXli
Pro load the supplied bat-
J[ terie$ into the remote:
1. Remove the battery
compartment lid on the
back of the remote.
2. Place the batteries (2-
AAA) in the remote. Be
sure the (+) and (-) ends
of the batteries line up
correctly (inside of case
marked.)
3. Re,attach the battery lid.
VOLUMEUPI i
(•) or DOWN (•) button to (&) or DOWN (V) button to /
adjust the sound level, select TV channels. .,,el_ Youcanpressany
buttonon the front
ofthe TVtoturn
theTVON.
k"lll_
illU[I]_ || I [|] ISl I k"[l'_l
¢ "SETUP" on-screen
ntrol is automatically
selected when you first plug.
in your TV and press the
MENU button (on the TV or
the remote.)
Firet Time Setup takes care
of,rome basic 73/control set-
tings for you. Follow the
steps in this section to quick-
ly _utd area channel numbers
into the TV's memory, and set
the TV for your connected
signal (Antenna or Cable.)
button to select SETUP. Press
the VOLUME (+) button (on
the mmo_ or TV) to show _
list of SETUP ilems.
Press CHANNEL A or V on
the remote (or ldEIWU • ox •
on the TV) to chnose any
SETUP item listed.
'_Wlth SELECT LAN-
GUAGE control highlighted,
press the VOLUME (+) button
to set the language of the TV's
]Menu controls. (Either English
[orEspanol/Spanish).
[S3_ELWIthAUTO CABLE
ECT control highlighted,
press (+) button to automatical-
ly set the TV to receive either
Cable TV or Antenna signals
I(c°nnected at the mar of the
]'IV.)
control highlighted, press (+)
button to automatically add
available channels into the
TV's memory.
_Pmss the
I_/.. remote's STATUS button I
I.\if/-- (orn_"ram+'')tohackI
I _ ontof_SETUPMenu.
$
Remember, SETUP is a first- I
use, one-time operation and I
will not have to be repeated
(even if the TV is unplugged.)
If the SETUP Menu disappears
and you are not finished, just
press theMENU and (+) buttons
to return to theSETUP screen,
1
• e/
....................... ICHANNEL • or • buttons /
JP_3"._"_._"wen'_ ICorp_"t_ MF,_aJ• or• [
••through First Tinge Setup [on the TV) to select the word [
(page 3) t.hls task has alread2 [CABLE With the TV's on- |
benpte,edforyo . [scanArrow. |
Cable TV stations or Antenna
signals. In other wmd_. the
TV needs to know whether
you have connected a Cable
TV signal or anormal anten-
na to its ANTENNA plug (see
page 2).
or (-) buttons (on the TV or the
remote) to select either:.
YES- If you DO hove Cable
"IVconnectedto the
TV. Channels 1-125
can be selected.
NO- If you have an Antennn
connected to the "IV.
CZzanneis 2-69 can be
selected.
_<__ button on 1
the remote control to clear the
SCrP_n. O|Press the CHAN-
NEL &• buttons
and scan the chan-
nels. CH&_' works
only after STATUS
button is pressed to
clear the screen (or
Menu times out -
about 1 minute,)
Remember. to set
the TV to select the
channels on your
Cable system, or in
lout" area, see the
"Autoprogram" and
"Adding Channels"
in the section
below,
_ ' ih:{oIMmt'mu-
|lI [IU |11 [I M_I/W ]|! k| I k_
NT£:,lyo.-n,
rough First _Setup
(page 3), this task has alreaa
been completed for you.
Auto-Program is for adding
local area channel numbers
into the memory of the TV.
This mok_s it easy for you to
select only your area (or
Cable system) channels when
the CHANNEL • _r buttons
are pressed.
_Prese the MENU (M)
button on the remote, then the
CHANNEL •or •buttons
(or the MENU •or •buttons
on the "iV) to select the word
PROGRAM with the TV's on-
screen Arrow.
ilQ_ I lt]k_lk_101 _-_press the MENU (M)
Ibotton on the remote, then
l_JUHm.milaL-_.mL'm [the CHANNEL •or •but.
Auto.Program (see above) Itons (or the MENU •or •
_r']kadds all the channels it Ion the "IV) to select the word
can find (on your Antenna or lCHANNEL with the TV's on-
Cable T¢ system) into the [screen Arrow
TV's memory. SavelDelete t "
channels makes it easy for
you to add other channels, or
drop unwanted chamwls,
from the list of channels in
the TV's memory,
,_ Press the VOLUME (+)
button (on the TV or the
remote) to PROGRAM.
,_Press the VOLUME (+) } _
I Iboutton again to stert the TV I
I search for area channels.
Flashing channel numbers will
count upw'eardon the screenas
the "IV looks forchannels to
'ADD",
_'_ You may press any button
(on the "IV or remote) to stop
the channel search at any time.
When the channel search is
completed the TV will remm to
the last viewed channel.
TheTVscreenwillbeblocked
off until the search for channels
is done.
1_ ITt'yitout._ I To drop any unwanted channels
_L •Vbuttons Ifrom the TV's memory, see
I/_-_ and see which channels] how to "Manually"delete
I] have been added. I channels in the section below.
When searching for channels the
TV screen display may jitter
slightly. This is normal and does
not indicate a need for service. I
.<_Preas Channsl Number .<_Press the VOLUME(+)t _Press the STATUS button
buttons on the remote (or ]button to SAVE the selected to clear the screen after adding
ICHAr_L &v buttons on the I]channel number into memory. I(or deleting) all the channels
[TV) to select the channel you [ [Press (.) button to DELETE a_ you want.
}wanttoSAVE(orDl_-'m.) I[channelfrom memory. I
R|II
it out.Press I The channels you SAVED
the CHANNEL• or • I should appear. The channels
buttons and "scan" from you DELETED should not
channel to channel, appear. To SAVE a channel above 100,
use the CHA• buttons on the
TV. The remote number buttons
only go up tochannel 99.
Ibutton on the remote, then
_[press the CHANNEL •or •
Aseries of_p to four previ, lior the MENU &or • buttons
l'Jkously tn'ewed channels [on the TV) to select the word
the ISURFwith the TV's on-screen
SURF button on your remote ]Arrow.
control.Withthisfeatureyou l"......
can easily switch between
d_ferent TV programs that
currently interest you.
or (-)buttonstoselectthe
[numberofchannels.(Either2.
[3, or4 channels.)
_ss STATUS button on I
the remote control to clear the [
screen,
Ito use SURF, first
select the desired
channels with the
number buttons on
the remote. (For
example: 02, 06, I I0
and 22.) Then press
the SURF button on
the remote to quick-
ly select the chan-
nels..
Try it out. Enter
the number of
desired channels
and then press the
SURF button. You
should see only the
2. 3, or 4channels
you selected for
SURF. Great for
viewing evening
news or sports pro-
gramming.
mll
W_a motheryou're walehin 8
vie or a video
game your TV has automatic
video control settings
matched for your current
program source or content.
The Smart Picture feature
quickly resets your TV's pic.
ture for a number of d_ferent
ing cona_tions you may have
in your home. Each Smart
Picture setting is preset at the
factory to automatically
adjust the TV's Brightness.
Picture. Color, Tint. and
Sharpness levels.
re you tiredof the sound
of commerdals followin 8
you into thenex: room m" oll
through the house? Smart
Somul allows you to keep a
d_jired volume level that the
IV sound will not go above.
Thismahes for an even, more
con.ffsteat sound by reducin_
thepeaks and valleys that
;can occur during program
changes or commercial
breaks.
Press the Menu (I'd) • or •
button to select the desired
Smart Menu feature (highlight-
cd with arrow).
the Smart Picture I .'b=_ the STATUS button l
€ontrolseleclM, pressIJ_ (÷)] [to clear the screen. ]
or (-) button repeatedly to select] "_ _J
any of the preset viewing rate- [
gories (Example: Video Games,
Movies, etc.).
_(][_Press the Smart button
Ibutton to select the desired
[Smart Menu feature (highlig, ht-
ed with an'ow).
__ •L
[or (-) buttonto turnthe volume
I the SmartPicture
settings are stored
into the "IV at the
factory and can
only be reset by
field and service
technicians.
the MENU (M)
remote, then
..... _-__\ .... ll,_sstheCHANNEL• or•
_.'_.' _P_ture. I_orpressME_ • or•but
J" _t a channe/ [tonson the TV) until the desired
and follow the steps shown to ]control shows on-screen
the right. I "
NOTE: The Smart Picture
control can automatically
aa_uat your TV's for a variety
of programa and viewing
conditians. See page 5 for
details.
and (-) to adjust the selected
picture control.
iEXIT Menu)to clear the screen[
when picture adjustments are [
[competed. €
El u
a;_eyoa ever fallen
ep in front of the TV
only to have it wake you up
at two in the morning with a
test pattern screeching in
tour ears? Well. your TV
c_m save you all that trouble
L,y automatically turning
i,tse_fo_
-_i_Press the SLEEP but-
ton on the remote.
Press the MENU (M) button
on the remote, then press the
CHANNEL • or •(or press
the MENU •or •buttons on
the TV) to select the word
SLEEP with the TV's on-
setv,,en Arrow,
of time (15 minutes to 2botts
ahead) before the TV will turn
itself off.
[The VOLUME (+) or (-) but-
[tons can also be used to set the
{amount of time.
to clear the screen after you ]
have set the time for the 'IV to i
turn off. /
Afew seconds*before the "IV is|
to shut off a message will come[
on the screen telling you |
IGOODNIGHT" ._
with the bar scale
centered the control
settings are at nor-
mal mid-range lev-
els.
BRIGHTNESS
Press (-) or (+) until
darkest parts of the
picture are as bright
as you prefer.
PICTU_ Press
I(') or (+) until light-
est parts of the pic-
ture show good
detail.
'COLOR Press(-)
of (+) to add or
eliminate color.
TINT Press(-)or
(+) to obtain natural
skin tones.
SHARPNESS
Press(-) or(+) to
! improve detail in
the picture.
If you ever want to
see how many min-
utes are left before
the TV shuts itself
off. press the STA-
TUS button on the
remote.
If you want to stop
a SLEEP TIMER
settifig(m_t the ....
timer back to OFF.
You could also turn
the TV off, and then
back on again, to
cancel a setting.
Pressing any key on
the remote or TV in
the last 60 seconds
will cancel the
SLEEP TIMER set-
ting,
M)
s¢ the Volwne Bar con- ss the •
yT-'__val_B_co"'l liorpress_ m_ • or
rrol to see the TV's val.
I.J _- | ]buttoasontheTV) to select the
_,v_h._ _ I Iwo_VOL.EAR*ith_,
screen_ Once set the Valurae mon-screen Arrow.
the VOLUME buttona(on the I
TV or remote) are pressed. I
',_ tile VOLUME (+)
==,ONorO,,. [" .® buttons. The VOL-
UME BAR should
appear at the bot-
tom of the screen.
NOTE: The TV's
volume level can
also be lowered
when the set is
turned OFF.
t
[il [I_N II I]1111 Ml [11011k! III
_losed Captioning allows
_._ you to read the voice
content of television pro.
grants on tl_e TV screen.
Designed to help the hearing
impaired, this feature uses
on-screen #tcxt boxes" to
show dialogue and conversao
tions while the TV program is
Jn progress.
Note: BtDadcast statious will
often use spelling abbrevia-
tions, _ymbois, dropoutsand
other grammaacal shortcuts
in order to _eep pace with th_
on-screen action. These type
factors vary upon the source
of the captioned text material
and do not i_icate a need
for service on the part of the
TE
"O_Preas MENU(M)
button on the remote, then
press the CHANNEL •or •
I (_ press the MENU •or •
[buttonsontheTV)to selectthe
Iwo,dCAPTION with the TV's
on-screen Arrow.
"--'-'-'-'-'-'-'-_Pr--,;,s VOLUME (+) or (-)
buttons to select the desired
Closed Caption (CC) mode -
For Example: CAPTION I.
Note: _.y."CAPTION I" is
the most used mode to view
captioned material. Caption
modes 2, 3, and 4are seldom
used by broadcast stations.
after making your Caption
mode selection. The TV dis-
play will clear and Captioning
material (if available on the
currently selected 'IV program)
will appear on the TV screen.
To cancel, set the CAPTION
feature to OFF when finished
viewing.
not all TV programs
and product com-
mercials aremade
for broadcast with
Closed Caption
(CC) information
included. Neither
are all Closed
Caption modes
CAPTION I-4,or
TEXT I-4)) neces-
sarilybeingusedby
abroadcast station
during the transmis-
sion of a closed
caption program.
Refer toyour area's
TV programlistings
for thestations and
times of Closed
Caption shows.
Thls_¢TNt)O_wifl_ _4h _
,_ thinConm_ C#oood C*O_UO_O
man.'lal.
CAPTION 1, 2, 3, or 4 mode: dia-
logue (anddescriptions) for theaction
on the captioned TV program shows
on-screen. (See Smart Help on this
page.)
TEXT 1, 2, 3, or 4 mode: often used
for channelguide, schedules, or bulletin
board information for CC programs.
Text mode blocksthe TV screen.
(M)
then
or •
_Ut_ w_ _I_p_stheMENU• o_•
I•through 1_rat 7Tree Setup
I•th_tup [buttons on theTV) to select the
(page 3),_his_uskhus alread ]word LANGUAGE with the
been complaed for you. [TV's on-screen Arrow.
For our Spanish speaking Tt
owners o31on-screen LAN-
GUAGE option is present.
With the LANGUAGE control
you cal_ Set the TV*$ on-
wreen features to be shown in
:ither English or Spanish
'ext.
'__(+) "I .__ button on t
the English or Spanish /I screen" 0
(ESPANOL) language option.
Text for the on-screen Menu /
will change to the selected lan-
guage.
The Language con-
trol only makes the
TV*s on-screen
(MENU) items
appear in English or
Spanish text. It does
not change the lan-
guage of other on-
screen text features
such as Closed
Captioned (CC) "IV
shows.
oaxlal Cable * A single solid antenna wire normally matched with a metal plug (F-type)
Idconnector that screws (or pushes) directly onto a 75 Ohm input found on the Television
VCR.
isptey * An on _n_O m_sage or graphics that help the user operate and adjust his
derision feature controls. See On Screen Displays (OSD).
nScreen Dlsplay_ (OSD) * Refers mthe wording or massages generated by the televi-
3n (or VCR) tOhelp the user with specific feature controls (color adjustment, program-
ing,etc.).
mu * An on-semen listing of"feature controls shown on the Television screenthatara
_deavailable for user adjustment.
Programming * The procedure of adding or deleting channel numbers into the Television's
memory circuits. In this way the Television "remembers" only the I_caily available or desired
channel numbers and skips over any unwanted channel numbers.
Remote Sensor Window * A window or opening found on the Television control panel
through which infrared remote eontrel command signals am received.
Status * Allows the user to quickly confirm what channel number is currently being viewed.
Status can also be used to clear the Television of on scresn displays or information (rather than
waiting for the displays to "time out" or automatically disappear from the screen).
Twin Lead Wire * The mo_ commonly used name for the two strand300 Ohm antenna wire
used with many iadoor and outdonr antenna systems. In many cases this type of astenna wire
require,s an additional adapter (or beten) in order to connect to the 75 Ohm Input terminals
designed into the more recent Televisions and VCRs.
phrgse make these simple
c_ecks before calling for
service. Theses tips can save
you time and money since
charses for 73/installation
and adjustment of customer
contn_ls arc not covered
andu your warranty.
CAUTION: A video source
(such as a video game,
Comlmct Disc Interactive -
CDI, or'IV information
channel)which shows a con-
stuntnon-moving patternon
the TV screen, cancause pic-
turetube damage. When not
inu_, turnthe video source
OFF. Regularly alternate the
use of such video sources
with normalTV viewing.
-_'_No Power
Check the TV power cord.
Unplug the TV, wait I
minute, then reinsert plug
into outlet and push POWER
button again.
Check to be sure outlet is not
on a wall switch.
This TV is equipped with
protective circuitry that shuts
the TV off in case of moder-
ate power surges. Should
this occur turn the TV back
on by pressing the POWER
button once or twice, or
unplug (wait 10 seconds) and
then replug the power cord at
the ACoutlet.Thisfeatureis
NOT designed to prevent
damage due to high power
surges such as those caused
by lighming, which is not
covered by your wananty.
_No Sound
• Check the VOLUME buttons.
• Check the MUTE button on
the remote cofltro.
• Check antenna connections
onthe rcarofthe TV.Are I
they properly secured to the
[ antenna plug on the TV? [
<_Remote Doesn't
Work
Check batteries. Replace
with AAA Heavy Duty (Zinc
Chloride) or Alkaline hatter-
ies if necessary.
Clean the remote and the
rcmo_€ sensor window on the
TV.
Check the TV power cord.
Unplug the "IV, wait I
minute, then reinsert plug
into outlet and push POWER
button again.
_3_amg_Ch=lml
(or no Channels
above 13)
Repeat channel selection.
Add desired channel num-
bers (CHANNEL control)
into "IV memory.
Check CABLE/ YES NO
control for correct position./_,.
Cleaning and Care
Unplug the "IV befor€ clean-
ing.
Avoid using anything abra-
sive that could scratch the
Screen.
Wipe the "IV screen with a
clean cloth dampened with
water.
Gently wipe cabinet surfaces
with a clean cloth or sponge
dampened with cool clear
water. Use a clean dry cloth
to dry the wiped surfaces.
Occasionally vacuum the
ventilation holes or slots in
the cabinet hack.
Accessories ............ 2
AddChannels .......... 4
Surf ................... 5
AntennaConnect ........ 2
Autoprogram ........... 4
Batteries............... 3
CableTVConnect ....... 2
CableTVControl........ 4
Display ............... 3
Channel Memory ........ 4
Closed Caption .......... 7
Coaxial Cable .......... 2
Controls/TV ............ 3
Controls/Remote ........ 3
Features ............... I
First 'rime Use .......... 3
Glossary .............. 7
Language ............. 7
MenuButton ........... 3
Minas(-)Buttons........ 3
Plus(+)Button .......... 3
Precautions........... I,8
Programming........... 4
RemoteControl ......... 3
Service ................ 8
RF Cable,,.............2
SafetyNotes............I
SensorRemote ..........3
SETUP ......... ._...... 3
Sleep Timer ............ 6
Smart Picture ........... 5
SmartSound ........... 5
Status Button ........... 3
Tips for Service ......... 8
VCR Connections ....... 2
Volume Bar ............ 6
Warranty .............. 8
COLOR TELEVISION
90 Days Free Labor
One Year Free Replacementof Parts (TwoYears Free Replacementon Color Picture Tube)
This productcan be repairedin-home.
WHO IS COVERED?
YOUmust have proof of pu rchane to roceive warranty service. A anlee receipt or otber
doou..nant showing that you i_rchased the product is considered proof of purchase.
WHAT IS COVERED?
Wamanty ouvemge beglna the day youubuy your product. Fo( 90 days thersefl_ all
pads will be repaired o€ replaced free, and labor isfree. From 90 days to one year from
the day of purchsee, all parts will be repaired or replaced free, but you pay for all labo¢
charges,. From one to two yeers from the day of porchsee, you pay for the replacement
o€ repair of all parts excap_ the picture tube, and for all labor chargee. After two yeem
from the day of purchaan, you pay 1o€the redlanemont o€ repair of ail berts, and for ail
lat_ c_argee.
All ber_, iocludin9 repaired and _pads, are covered only fer the original warranty
period. When the wananty on the preduct exptree,the warranty on all replaced and
repaired perts al_ _
WHAT IS EXCLUDED?
Your wam_'y does not cove(:.
• labor uhargee for Inat=dlaitonor setup of the pnxiuct, adjustmant of customer confrol8
on the product, and InataHatlon or rebeir of antonna systom6 outalde of the preduct.
• product rebeJrand/or part re_anemant because of misuse, a_tdeet, unauthorized
repair or other cause not within the control of Philipe Consumer Ele_-onice Company.
• re_ problems caused by signal conditions or cable or antenna aystoms outside
the unit.
• it product that fequiree modifloatico or edaptaHon to enable il to operate in any ¢ountr/
otherthan thecountry for which itwas desl_l, manufactured, approved and/or
authorized,o( r_calrofproduch_damned by theeemedmcaUona.
•Inofdantalorcocaequer_Jaldamegsarnauitinglromtheproduot. (Some stut_ do out
allow the exdualon of Inddantul o( ocnsaquerdial damagee, an the above exdnalon
rnay not apply to yun. 1111sIocludse, but is not llmited to, Ixemou_ded matodal,
copyrlghtedor notcop,Nghted.)
•a product naed for commercial or inatltuUonalpuqx_ses.
WHERE IS SERVICE AVAILABLE?
Warranty eentica is avaJl_31e in all countries where the product is oitk_ly disfribotedby
Phllipe Consumer Electronics Company. In counkles where PhEps Consumer
Elecb'on_ Company doee not disfribute the prdduct, the local Phllipe se_ica organiza-
tionWIll attempt to provide service (although there may be a dalay i/the appropriate
spate p_ls and technical manual(n) are not readily avallai:_].
MAKE SURE YOU KEER..
Ple_.-eksepyourna_eerecaiptorotherdocurneetshowlngproofofpurchase.Attaohit
tothisowner'smanualand keepbothnearby.Alsokeepthe odginalboxandpacking
materialin caseyouneedto mtum yourproduct.
BEFORE REQUESTING SERVICE...
Please check your owners manual before requesting service. Adjustments _the
tm_ discnaeed them may save you a service call.
TO GET WARRANTY SERVICE IN U.S.A.,
PUERTO RICO OR UoS. VIRGIN ISLANDS...
Contact aPhlltpstacloo/service ol_ter (see enclosed list) or authorized service cant_ to
amuse roper.
(In U.S.A., Puerto Rico and U.S. V'ugln Islands, all iml_ed warranties, including implied
warranties of merchantability and fitness for a partioulerpurpose, are limited in duration
tOthe duration of this express warranty. But, because SonlO states do not allow limita-
tions on how long an implied wan'anty may last, this limitation may not apply to you.)
TOGET WARRANTYSERVICE IN CANADA...
Contact a Philip_ consumer _center (listed below), self-sarvicing dealer or autho-
rized servica depot to anange rep_.
Phigps Electronics Ltd.
601 MiJnarAvonue, Scarborough, Ontario, M1B 1M8
(416) 292-5161
4977 Levy Street. SL LaurenL Qu_oe¢, H4R 2N9
{514) 956-0210
1741 Boundary Road, Vancouver, B.C., V5M 3Y7
(604) 294-'3441
(In Canada, this warranty is g_venin lieu of al other wananties. NO other warranUse are
expre_Hid or knplisd, k_Jdding any implied warranUna ot merchantability or fltneesIor a
parUoular puqonae. RdlJpe is not liable under any circumstances for any direct, indirect.
spedal, Inddental or oueanquanUal damages, howsoever incurred, even if notifiedof the
poe_U,ty of =x_ damagee.)
REMEMBER...
Plonse reoccdthe modal and andai numbem found on the product below. Nso, please fill
Outand mall your warranty rng_t_tion card prompUy. It will be easier for us to notify you
il necessary.
MODEL #
SERIAL #
Phllips Service Company, RO. Box $$5, ,_dTerso_ City, Tennessee 37760
(423) 475-8869
18 7413-E001 8
Other Magnavox TV manuals

Magnavox 42MF237S - 42" Digital Plasma Hdtv User manual

Magnavox

Magnavox 42MF237S - 42" Digital Plasma Hdtv User manual

Magnavox 50ML8105D - Quickuse Installation manual

Magnavox

Magnavox 50ML8105D - Quickuse Installation manual

Magnavox 20MS233S99 User manual

Magnavox

Magnavox 20MS233S99 User manual

Magnavox 46ME313V/F7 A User manual

Magnavox

Magnavox 46ME313V/F7 A User manual

Magnavox MT1901BI User manual

Magnavox

Magnavox MT1901BI User manual

Magnavox PR1914 User manual

Magnavox

Magnavox PR1914 User manual

Magnavox 26MD251D - 26" Lcd Hd Flat Tv Quick start guide

Magnavox

Magnavox 26MD251D - 26" Lcd Hd Flat Tv Quick start guide

Magnavox 15MF200V Operating manual

Magnavox

Magnavox 15MF200V Operating manual

Magnavox TP2783 User manual

Magnavox

Magnavox TP2783 User manual

Magnavox MT1901B1 User manual

Magnavox

Magnavox MT1901B1 User manual

Magnavox color tv User manual

Magnavox

Magnavox color tv User manual

Magnavox 43ME347V User manual

Magnavox

Magnavox 43ME347V User manual

Magnavox 42MF130A - 42mf130a/37 User manual

Magnavox

Magnavox 42MF130A - 42mf130a/37 User manual

Magnavox iL01-2K3 User manual

Magnavox

Magnavox iL01-2K3 User manual

Magnavox 14MT2136 User manual

Magnavox

Magnavox 14MT2136 User manual

Magnavox 20MT1336 - 20" Color Tv Quick start guide

Magnavox

Magnavox 20MT1336 - 20" Color Tv Quick start guide

Magnavox 47MF438B User manual

Magnavox

Magnavox 47MF438B User manual

Magnavox 47MF437B - Hook Up Guide Operating manual

Magnavox

Magnavox 47MF437B - Hook Up Guide Operating manual

Magnavox PR0910X User manual

Magnavox

Magnavox PR0910X User manual

Magnavox 37MD359B User manual

Magnavox

Magnavox 37MD359B User manual

Magnavox 37MF337B - Hook Up Guide Operating manual

Magnavox

Magnavox 37MF337B - Hook Up Guide Operating manual

Magnavox 20MS334R - 20" Real Flat User manual

Magnavox

Magnavox 20MS334R - 20" Real Flat User manual

Magnavox MT1340B User manual

Magnavox

Magnavox MT1340B User manual

Magnavox MT1331B User manual

Magnavox

Magnavox MT1331B User manual

Popular TV manuals by other brands

Panasonic TX-55CRW434 operating instructions

Panasonic

Panasonic TX-55CRW434 operating instructions

Panasonic TX-24D302B operating instructions

Panasonic

Panasonic TX-24D302B operating instructions

Panasonic TX-55C320E operating instructions

Panasonic

Panasonic TX-55C320E operating instructions

Toshiba 32DV504B owner's manual

Toshiba

Toshiba 32DV504B owner's manual

Panasonic TX-40CW304 operating instructions

Panasonic

Panasonic TX-40CW304 operating instructions

TCL P745 Series Operation manual

TCL

TCL P745 Series Operation manual

LG 47LB1DA owner's manual

LG

LG 47LB1DA owner's manual

Panasonic TX-55CX400B operating instructions

Panasonic

Panasonic TX-55CX400B operating instructions

North State TV2GO user guide

North State

North State TV2GO user guide

Philips 52KV1528 user guide

Philips

Philips 52KV1528 user guide

Proview JL328-XP Service manual

Proview

Proview JL328-XP Service manual

Tesla T607 Series user manual

Tesla

Tesla T607 Series user manual

Zenith A50M84WOM Operating guide and warranty

Zenith

Zenith A50M84WOM Operating guide and warranty

Sony BRAVIA XR-48A90K reference guide

Sony

Sony BRAVIA XR-48A90K reference guide

Samsung HL-R4667W - 46" Rear Projection TV Owner's instructions

Samsung

Samsung HL-R4667W - 46" Rear Projection TV Owner's instructions

Westinghouse CW50T9XW user manual

Westinghouse

Westinghouse CW50T9XW user manual

Canadian Westinghouse 17TV2K Service manual

Canadian Westinghouse

Canadian Westinghouse 17TV2K Service manual

akira CT-34TP9ATS Service manual

akira

akira CT-34TP9ATS Service manual

manuals.online logo
manuals.online logoBrands
  • About & Mission
  • Contact us
  • Privacy Policy
  • Terms and Conditions

Copyright 2025 Manuals.Online. All Rights Reserved.