manuals.online logo
Brands
  1. Home
  2. •
  3. Brands
  4. •
  5. Magnavox
  6. •
  7. TV
  8. •
  9. Magnavox TP3296 User manual

Magnavox TP3296 User manual

Other Magnavox TV manuals

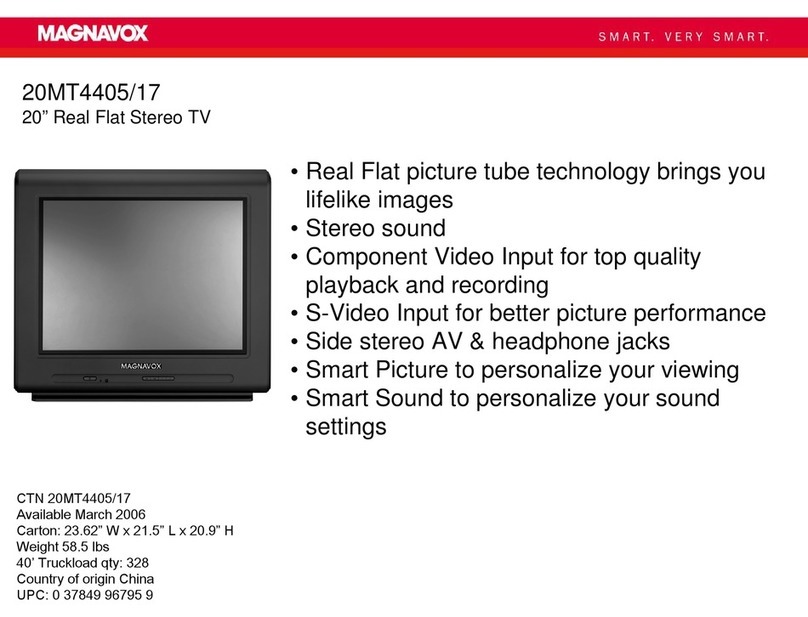
Magnavox PR1397X122 User manual

Magnavox

Magnavox PR1397X122 User manual

Magnavox PR1310 User manual

Magnavox

Magnavox PR1310 User manual

Magnavox 19ME601B Configuration guide

Magnavox

Magnavox 19ME601B Configuration guide

Magnavox 42MF231D - Hook Up Guide Technical manual

Magnavox

Magnavox 42MF231D - Hook Up Guide Technical manual

Magnavox TP3573 User manual

Magnavox

Magnavox TP3573 User manual

Magnavox FP3291A User manual

Magnavox

Magnavox FP3291A User manual

Magnavox 23MT2336 - 23" Stereo Tv User manual

Magnavox

Magnavox 23MT2336 - 23" Stereo Tv User manual

Magnavox 46ME313V/F7 A User manual

Magnavox

Magnavox 46ME313V/F7 A User manual

Magnavox 32MF369B/F7 User manual

Magnavox

Magnavox 32MF369B/F7 User manual

Magnavox 50MV376Y User manual

Magnavox

Magnavox 50MV376Y User manual

Magnavox 27MT5005D - 27" Integrated Sdtv Quick start guide

Magnavox

Magnavox 27MT5005D - 27" Integrated Sdtv Quick start guide

Magnavox PR1929C1 User manual

Magnavox

Magnavox PR1929C1 User manual

Magnavox PR1916 User manual

Magnavox

Magnavox PR1916 User manual

Magnavox PS1963C121 User manual

Magnavox

Magnavox PS1963C121 User manual

Magnavox \ User manual

Magnavox

Magnavox \ User manual

Magnavox 32MT6015D - 32" Integrated Real Flat Sdtv Owner's manual

Magnavox

Magnavox 32MT6015D - 32" Integrated Real Flat Sdtv Owner's manual

Magnavox COLOR TV 27 INCH TABLE HD2717C User manual

Magnavox

Magnavox COLOR TV 27 INCH TABLE HD2717C User manual

Magnavox \ User manual

Magnavox

Magnavox \ User manual

Magnavox 13MT143S, 20MT133S, 20MS233S User manual

Magnavox

Magnavox 13MT143S, 20MT133S, 20MS233S User manual

Magnavox \ User manual

Magnavox

Magnavox \ User manual

Magnavox color tv User manual

Magnavox

Magnavox color tv User manual

Magnavox 20MS334R - 20" Real Flat User manual

Magnavox

Magnavox 20MS334R - 20" Real Flat User manual

Magnavox 20MS233S - 20" Color Tv Stereo User manual

Magnavox

Magnavox 20MS233S - 20" Color Tv Stereo User manual

Magnavox MS3252S User manual

Magnavox

Magnavox MS3252S User manual

Popular TV manuals by other brands

IKEA UPPLEVA user manual

IKEA

IKEA UPPLEVA user manual

Toshiba 19A20 Service manual

Toshiba

Toshiba 19A20 Service manual

Sony XBR-100Z9D reference guide

Sony

Sony XBR-100Z9D reference guide

Sony Trinitron KV-HR36M90 Service manual

Sony

Sony Trinitron KV-HR36M90 Service manual

JVC AV-14AG16 instructions

JVC

JVC AV-14AG16 instructions

Loewe Table Stand Reference 55 user guide

Loewe

Loewe Table Stand Reference 55 user guide

Panasonic Genus TX-G10 operating instructions

Panasonic

Panasonic Genus TX-G10 operating instructions

Samsung LN26C350D1D Service manual

Samsung

Samsung LN26C350D1D Service manual

BBK LT1516D Service manual

BBK

BBK LT1516D Service manual

Samsung 55S9 B Series Quick setup guide

Samsung

Samsung 55S9 B Series Quick setup guide

Sharp LC-40FI5012E user manual

Sharp

Sharp LC-40FI5012E user manual

Evervue BN185 Operation manual

Evervue

Evervue BN185 Operation manual

North State TV2GO user guide

North State

North State TV2GO user guide

Toshiba CX35F70 owner's manual

Toshiba

Toshiba CX35F70 owner's manual

Philips 20HF5335D manual

Philips

Philips 20HF5335D manual

Panasonic QuintrixF TX-29AS1D operating instructions

Panasonic

Panasonic QuintrixF TX-29AS1D operating instructions

Samsung 4 Series Quick setup guide

Samsung

Samsung 4 Series Quick setup guide

Panasonic TX-21FG20R Service manual

Panasonic

Panasonic TX-21FG20R Service manual

manuals.online logo
manuals.online logoBrands
  • About & Mission
  • Contact us
  • Privacy Policy
  • Terms and Conditions

Copyright 2025 Manuals.Online. All Rights Reserved.

IIII .... III --7
UAL
...........' NERSMAN
i
,
MAGNAVOX
ensure you receive all the benefits you're entitled to.
your MAGNAVOX purchase is registered, you're eligible to receive all the privileges of owning a MAGNAVOX
)rodubt. So complete and return the Warranty Registration Card enclosed with,your purchase at once. And take
ntage of _,e.se important benefits. _ ..... ._ _ ..... ..... ._ _,_
Warranty Owner
fication confirmation • __RegiStratiOn
" ,'_ ,_" ,'_, _i:!_ _°:._ ' "
_Registering your I_roduct within 10 -Your completed Warranty .- .i,.Returningyour Warranty Reg sLation
i ati n Card s as verifica- ':: ......I_t awa uaEante"S ' I .:_
es
of MAGNAVOX ]roduct theft or loss.
MAGNAVOX
$m_.Ve_ smart.
Congratulations on your purchas,
-and welcome to the "family!"
Dear MAGNAVOX product owner:
Thank you for your confidence in MAGNAVOX. You've selected one of the
best-built, best-backed products available today. And we'll do everything in
our power to keep you happy with your purchase for many years to come.
As a member of the MAGNAVOX "family," you're entitled to protection by
one of the most comprehensive warranties and outstanding service
networks in the industry.
What's more, your purchase guarantees you'll receive all the information
and special offer.s which you qualify for, plus easy access to accessories
from our convenient home shopping network.
And most important of all, you can count on our uncompromising
commitment to your total satisfaction.
All of this is our way of saying Welcome-and thanks for investing in a
MAGNAVOX product.
Sincerely,
Robert Minkhorst
President and Chief Executive Officer
P.S. Remember, to get the most from your MAGNAVOX product,
you must return your Warranty Registration
Card within 10 days. So please mail it to us right now!
r'future
SAFETYINSTRUCTIONS- Read before operating equipment
This product was designed and manufactured to meet strict quality and
safety standards. There are, however, some installation and operation
precautions which you should be particularly awareof.
1. Read Instructions - All the safety and operating instructionsshould
be read beforethe appliance is operated.
2. Retain Instructions - The safety and operating instructions should
be retained for future reference.
3. Heed Warnings - All warnings on the applianceand in the operating
instructions should be adheredto.
4. Follow Instructions - All operating and use instructions should be
followed.
5. Water and Moisture - Theappliance should not be used nearwater
- for example, near a bathtub, washbowl, kitchen sink, laundry tub,
in a wet basement or neara swimming pool,etc.
6. Cartsand Stands- Theappliance should beused only with a cart or
stand that is recommended by the manufacturer.
6A. _ An appliance and cart combination should be moved
with care. Quick stops, excessive force, and uneven
surfaces may cause the appliance and cart combination
to overturn.
7. Wall or Ceiling Mounting - The appliance should be mounted to a
wall or ceiling only as recommended by the manufacturer.
8. Ventilation - The.applianceshould be situated so that its location or
position does not interfere with its proper ventilation. For example,
the appliance should not be situated on a bed, sofa, rug, or similar
surface that may block the ventilation openings; or, placed in a
built-in installation, such as a bookcaseor cabinet that may impede
the flow of air through the ventilation openings.
9. Heat - The appliance should be situated away from hear sources
such as radiators, heat registers, stoves, or other appliances
(including amplifiers) that produce heat.
10. Power Sources- The appliance should be connected to a power
supply only of the type described in the operating instructions or as
marked on the appliance.
11. Power-Cord Protection - Power supply cords should be routed so
that they are not likely to be walked on or pinched by items placed
upon or against them, paying particular attention to cords and
plugs, convenience receptacles, and the point where they exit from
the appliance.
12. Cleaning - The appliance should be cleaned only as recommended
bythe manufacturer.
13. Power Lines - An outdoor antenna should be located away from
power lines.
14. OutdoorAntennaGrounding- If an outside antennais connected to
the receiver, be sure the antenna system is grounded so as to
provide some protection against voltage surges and built up static
charges.
Section 810 of the National Electric Code,ANSI/NFPA No. 70-1984,
provides information with respect to proper grounding of the mats
and supporting structure grounding of the lead-in wire to an
antenna discharge unit, size of grounding connectors, location of
antenna-discharge unit, connection to grounding electrodes and
requirements for the grounding electrode. See Fig. below.
15. Non-use Periods - The power cord of the appliance should be
unplugged from the outlet when left unused for a long period of
time.
16. Object and Liquid Entry - Care should be taken so that objects do
not fail and liquids are not spilled into the enclosure through
openings.
17. Damage Requiring Service - The appliance should be serviced by
qualified service personnel when:
A. The powersupply cord or the plughasbeen damaged;or
B. Objects have fallen, or liquid has been spilled into the
•. appliance;or
C. Theappliance has been exposedtorain; or
D. The appliancedoes not appeartooperate normallyor exhibits
amarkedchangein performance;or
E. Theappliance has beendropped, or theenclosuredamaged.
18. Servicing - The user should not attempt to service the appliance
beyond that described in the operating instructions. All other
servicing should be referred to qualified service personnel.
Noteto the CAW system installer: This reminder is provided to call the
CATV system installer's attention to Article 820-40 of the NEC. that
providesguidelines for propergrounding and, in particular,specifies that
the cableground shall be connected to the grounding system of the
building, ascloseto the pointof cableentryaspractical.
EXAMPLEOFANTENNAGROUNDINGASPERNATIONALELECTRICALCODE(NEC)
Example of Antenna Grounding
as per NEC-National Electric Code
ANTENNALEADIN WIRE
ANTENNADISCHARGEUNIT(NECSECTION81020)
GROUNDINGCONDUCTORS(NECSECTION810-21)
GROUND CLAMPS
I
"---'__ POWERSERVICEGROUNDINGELECTRODESYSTEM(NECART250,PARTHI
ELECTRICSERVICEEQUIPMENT
'{t_i _Started
Welcome/Producl RcgiMialiOii ................... 2
Safety/Precautions ................................. 3
Table of Contents ....................................................... 4
Features and Model Information ................................ 5
On-Screen Features
PICTURE MENU
<bAdjusting Color, Brightness, Sharpness,
Tint, and Picture Controls ................................... 6
<bAdjusting Picture-in-Picture Color and Tint .......7
<bGhost Cancellation Feature Information ............. 7
FEATURES MENU
<bSelecting a Picture Source .................................. 8
<bSetting the TV for Closed Captioning ................. 9
¢'setting the TV for Cable or Antenna Signals .... 10
• <bAdding Channels in Memory (Automatically). I I
<bAdding Channels in Memory (Manually) ......... 12
<bSetting the TV Clock and Turn-On Timer ........ 13
<bSetting the Alternate Channel Control .............. 14
<bUsing the Sleep Timer Control ......................... 14
<bAdjusting the Channel Display Control ............ 15
<bUsing the Time/Channel Reminder Control ...... 15
SOUND MENU
<bAdjusting Bass, Treble, and Balance Sound
Controls ............................................................. 16
<bSetting the Bass Boost Control ........................ 16
<bSetting the TV for Stereo and SAP Programs ..17
<bUsing the Sound Image Control ........................ 18
<bUsing the Volume Display Control ................... 18
<bUsing the TV Speaker On/Off Control with
• the'Audio Output jacks ..................................... 19
<bSurround Sound Speaker Connections .............. 19
<bUsing the TV's Audio/Video Input and
Output Jacks ............................................... 20-21
iRemote Control Operation
Using the Remote Locator Feature ........ 22-23
Setting the Smart Picture Control ............... 24
Using Smart Sound Control ..................................... 24
Using the Channel Guide Control ............................ 25
Setting the Remote to Work VCRs .................... 26-27
Setting the Remote to Work
Cable TV Converters .......................................... 28-29
Setting the Remote to Work VCRs or Cable
Converters- "Search Method". ................................ 30
Using the Remote's VCR bunons ............................ 31
[_ _] Picture-ln-Pictu re (PIP)
How to Use PIP (Connections) ............. 32-33
How to Use PIP with the TV Remote ................ 34-35
Selecting the Picture Source for PIP ........................ 36
Adjusting the Position and Size for PIP ................... 36
More PIP Connections (Cable Converter) ............... 37
_UJl, General Information
Tips if Something Isn't Working ............... 38
TV Help Menu ......................................................... 39
Glossary of TV Terms ............................................. 39
Index .................................. i....................... ............... 40
Factory Service Locations .................................. 41-42
Warranty ......................... ......................................... 43
Accessories .............................................................. 44
your TV information packet) for details on:
• Antenna Hook-ups
• First Time Set-Up
(Automatic Settings)
• Basic TV and Remote
Control Operation
• On-Screen Menu Use
Copyright © 1995 Philips Consumer Electronics C+lilq)any. All rights rcscrvcd.
4
First Time Set Up which automatically sets the TV
for local channels and the correct picture signal
(antenna or cable). It even helps you make the
necessary connections for the Picture-In-Picture (PIP)
feature.
Infrared Remote Control which operates your TV
set and a variety of wireless remote control VCRs and
Cable TV Converters. Aspecial "Locator" feature can
also help you find the remote when it has been stuck
out of sight or misplaced.
Standard TV broadcast (VHF/UItF) or Cable TV
(CATV) channel capability.
Closed Captioning which allows the viewer to read
TV program dialogue or voice conversations as on-
screen text.
Automatic Programming of channels for quick and
easy selection of favorite stations available in your
area.
Picture-ln-Picture (PIP) which can show a TV
program and the direct video output from an accessory
(VCR, etc.) onto the TV screen at the same time.
Stereo-Ready TV with built-in audio amplifier and
twin speaker system. Receives TV programs in both
broadcast stereo sound or (SAP) bilingual broadcast.
On-Screen Features which display helpful
information for the setting of TV controls (such as
help messages, operating tips and glossaries).
Audio/Video jacks for direct connections with VCRs
(and other accessories) for quality TV picture and
sound playback.
Surround Sound external audio speaker connections.
Sleep-Timer which automatically turns the TV OFF at
preset time intervals.
Smart Sound for the control of TV volume levels
during program changes or commercial breaks.
Smart Picture allows you to choose from a list of TV
video control categories set for a variety of viewing
conditions and program sources.
As you unpack your TV please note that the
following items have been included with your set:
•Owner's Manual
• Warranty Registration Card
• Safety Tip Information
• Factory Service Center Address Listings
• Remote Control Transmitter
• Batteries for Remote Control Use
Please take a few minutes to complete your
registration card. The serial number for the TV is
on the back of the set.
To ensure that picture screen performance is of
the highest quality, please avoid rubbing any
object or material on the screen that could scratch
or damage its surface.
Refer to the back of this manual for instructions
on the cleaning and care of the TV.
) adjust youl 'IV color and
icture controls, select a TV
channel and follow the steps shown
below."
Select BRIGHTNESS,
PICTURE, COLOR, TINT, or
SHARPNESS picture control.
With the PICTURE MENU on
screen, move the RED highlight
with the MENU (M) I_ buttons.
Then press the MENU button.
>Press the (+) or (-) buttons to
adjust the selected control.
>Press the STATUS button to
clear the screen..
Remember. When the bar
g scale is centered, control
settings are at normal mid-range
levels.
II,RI_LT.]_,_ Press (-) or (+) until
clark parts of the picture show good
detail.
PICTURE Press (-) or (+) until
whitest parts of the picture are as
bright as you prefer.
COLOR Press (-) or (+) to add or
eliminate color.
TINT Press (-) or (+) to obtain
natural skin tones. (Also see Flesh
Correction on page 14 for more
information).
Press (-) or (+) to
improve detail in the picture.
-- MAIN MENU
-- PICTURE MENU
1 0F2--
. J
iiiii iiiiii::
iY
Sceclandlhenpress Il__!!(! °Nmn_._c_
MENU (M) button to
view an explanation of
the .selected feature. _.iit t,' rig tn s,
HOW TO SELECT FEATURES
(WITH BUTI'ONS ON THE REMOTI-)
Press MENU (M)',_ •
_to move from Side-to
_' /brl
(M) Z/_ _ Side within the Menu
Ptcsx Mi/NU
to select RED
highlighted Press MENU (M)
• • to move Up
and Down within
the Menu.
glg [_o] _j ',115_il i
tc I'tctul _In-Picture (1'11')
olor and Tint controls are
used to make fine tune adjustments
to the color settings for PIP (when
it is shown on the TV screen).
c-d-ffgm3
Select PIP COLOR (or PIP
TINT) control.
With PICTURE MENU (2 of 2) on
screen, move the RED highlight
with the MENU (M)4=-_ buttons.
Then press the MENU button.
)Press the MENU AV buttons
to move the RED highlight. Press
the MENU button to turn (v,_) the
PIP COLOR or TINT control ON.
The PIP automatically comes on to
show the PIP window on the TV
screen.
<_ Press the (+) and (-) buttons to
adjust the PIP for Color (or Tint)
levels you prefer.
Press the STATUS button to
clear the screen.
,-ry,t'?f'LN° .....
E:I
Ill':: 111 _
::::.:.:
. ........
.. :........ l
_,pI_W_E MENU_
SEE PIP SECTION (PAGE 32)
FOR DETAILS ON HOW TO
CONNECT AND DISPLAY PIP
(ymldn't it be great to view
our TV picture free of
ghosts or other image problems ?
Well, your TV offers the first real
step toward reducing or totally
eliminating ghosting and other
image interference. This Should be
especially good news for those
home viewer's that currently use
external or outdoor antennas to
supply their picture.
Soon local stations will broadcast
their TV programs with Ghost
Cancellation information encoded
in the TV signal. These encoded
signals, when passed through an
accessory device and the special
circuitry provided in your TV, can
dramatically reduce ghost line
images and other interference
problems.
Refer to the Owner's Manual with the
Ghost Cancellation device for detailed
instructions on its hook-up and use.
Contact your dealer or call our
Information Center number (615)
475-8869 for more details on this
exciting new development in
television broadcast technology.
l
BACK OF TV
/BROADCAST
SIGNAL
AC C[:,S S()R"t" GI_()ST
CANCELLATION DE'v" IC F-
Tt w pictut _,Jor the J V can conic
hrough either the ANTENNA
plug or the AUDIO/VIDEO INput
jacks (on the rear of the TV). The
Picture Source control simply tells
the TV which one of these picture
sources it is to show on the TV
screen.
<_ Select PICTURE SOURCE
SELECT control.
With the FEATURES MENU on
screen, move the RED highlight
with the MENU (M)4g) buttons.
Then press the MENU button.
<_ Press the MENU AV buttons
to move the RED highlight. Press
the MENU bdtton to turn the
desired PICTURE SOURCE
control ON (Ua).
ANTENNA- for a picture signal
coming from the ANTENNA
plug on the TV.
VCR/AUX- for a picture signal
coming from the Video Input
jack on the rear of the TV.
S-VIDEO- for a picture signal
coming from the S-Video
Input jack on the TV.
_Press the STATUS button to
clear the screen.
Rcxiicuibt:L. l'hc
!iVCR/AUX TV screen will
be blank unless a signal source is
connected to the Video Input jack
on the rear of the TV. (See page
20 for details).
• _ MAIN MENU ...........
FEATURE MENU
10F4_
8
losed Captioning (CC) allow_
you to read the voice content of
television programs on the TV
screen. Designed to help the hearing
impaired this feature uses on-screen
"text boxes" to show dialogue and
conversations while the TV program
is in progress.
<_ Select CLOSED
CAPTIONING control.
With the FEATURES MENU on
screen, move the RED highlight
with the MENU (M) _ buttons.
Then press the MENU button.
<_;> Press the MENU J,V buttons
to move the.RED highlight. Press
the MENU button to select (tJ) the
desired Closed Caption mode - For
Example: "ALWAYS ON" and
"CAPTION 1".
CAPTION 1, 2, 3, 4:
dialogue (and descriptions)
for the action on the captioned
TV program shows on-screen.
(See Important Note on this
page.)
TEXT 1, 2, 3, 4:
often used for channel guide,
schedules, or bulletin board
information for CC programs.
_ After making your Caption mode
selection, press the STATUS button
to clear the TV screen. The selected
Closed Caption mode will be active.
To cancel, set the Closed Captioned
feature to OFF when finished
_I
NOTE: Not all TV programs and product conamercials arc made for broadcast
with Closed Caption (CC) information included. Neither are all Closed Caption
modes (CAPTION 1-4; or TEXT 1-4) necessarily being used by a broadcast station
during the transmission of a closed caption program. Usually "CAPTION 1" is the
most used mode to view captioned material. Refer to your area's TV program
listings for the stations and times of Closed Caption shows.
MAIN MENU
i FEATURE MENU
1 OF41
."ON DURING
_ILYcontrol can
Capt ion
whenever the
the
!iiiiiiiiiiii7
i_ii!i_iii__ CAFq'ION 1 mode
Example Screen Display
Remember. Broadcast
stations will often use
spelling abbreviations, symbols,
dropouts and other grammatical
shortcuts in order to keep pace
with the on-screen action. These
type factors vary upon the source
of the captioned text material and
do not indicate a need for service
on the part of the TV.
Closed Caption information will usually appear
in black and white (although some broadcasters
or networks may occasionally use color to
highlight or draw attention to certain areas.)
I'UI.L 5(RI'LN lhXl
will block TV screen from viewing
ou need to make aule the 1V is
et to pick up either Cable TV
or Antenna signals. In other words
the TV needs to know if you
connected a Cable TV signal or a
normal antenna to its ANTENNA
plug.
NOTE: If you went through First
Time Setup (in your Quick Use
Guide), this task has already been
completed for you.
_ Select CABLE CHANNEL
TUNING control.
With the FEATURES MENU on
screen, move the RED highlight
with the MENU (M)Ivl, buttons.
Then press the MENU button.
_Press the MENU &V buttons
to move the RED highlight. Press
the MENU button to select (va) the
desired mode - For Example:
CABLE.
CABLE- If you DO have
Cable TV connected
to the TV. Channels
1-125 available.
NORMAL- If you have an
Antenna connected
to the TV. Channels
2-69 available.
<_ Press the button to
STATUS
clear the screen.
-- MAIN MENU
-- FEATURE MENU
1 OF 4--
D CABLL
D NORMAL
lo