DISASSEMBLY
1. Remove set screws from shaft.
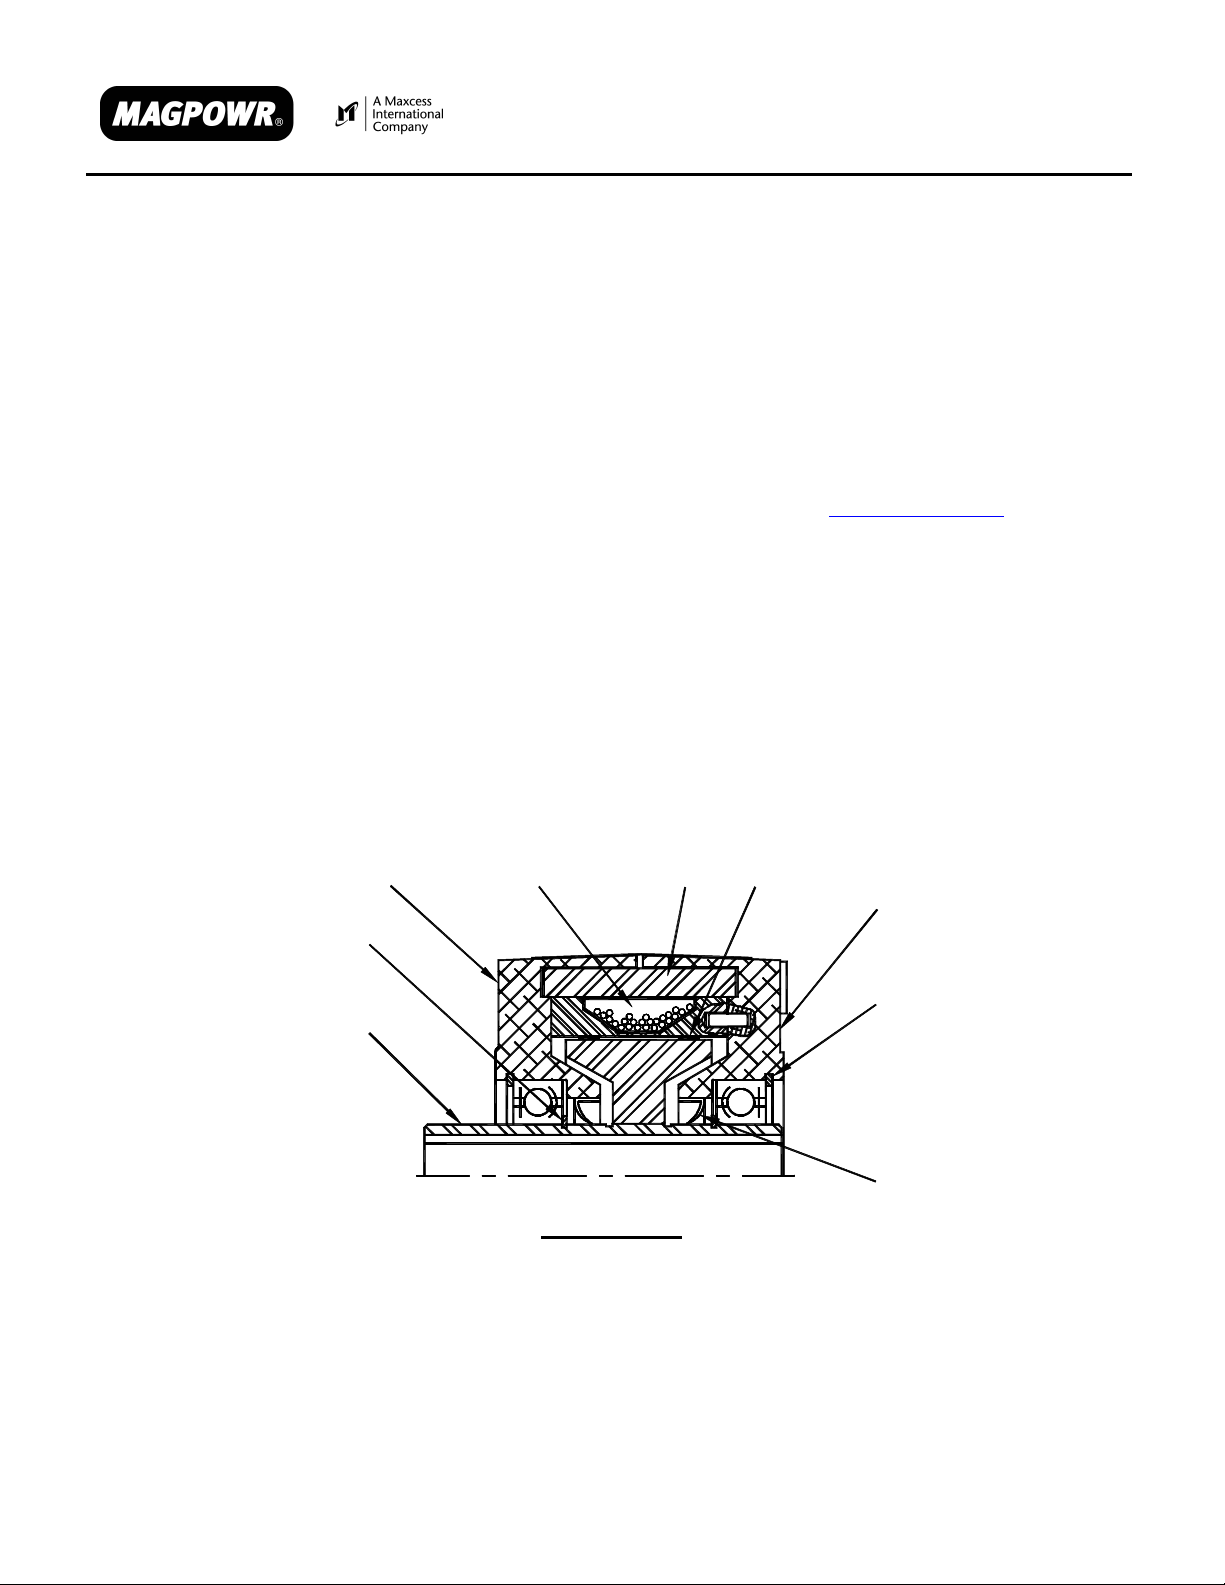
2. Remove conduit box cover and four through bolts.
3. Remove snap rings and shims. Observe location and number of shims on right stator. These must be
replaced in same position at assembly.
4. Remove right stator and bearing by tapping lightly on shaft with a soft mallet. The inner snap ring will prevent
the seal from coming off with the right stator.
5. Lift out coil and stator ring. (Do not remove stator ring from coil unless coil is to be replaced. Coil can only
be pressed out in direction of lead slot).
6. Remove rotor assembly from left stator by tapping lightly on shaft with a soft mallet.
7. Remove inner snap rings and seals from the shaft.
8. Remove bearings from left and right stator by tapping out with a soft mallet.
9. Clean gasket compound from sides of coil and insides of stator halves. Do not immerse coil in solvent.
RE-ASSEMBLY
IMPORTANT: Re-assembly of the brake must be performed in a clean area. The brake components must be
cleaned with solvent and be totally free of any grease or oil. Discard all bearings, seals, and magnetic powder from
disassembled brake as these are kit parts and will be replaced at overhaul. Any oil or grease on parts will cause
failure when the unit is rebuilt.
1. Press new seals into left and right stator with seal lips facing to the inside of the brake.
2. Support rotor on bench with the set-screw end up. Wrap a 6” x 6” piece of paper or thin plastic around the
shaft to allow seal to slide over the snap ring groove.
3. Slide left stator and seal down over the shaft until it bottoms; then pull the paper tube out from under the seal
lip.
4. Install inner snap ring, then slide bearing over shaft into the housing bore with the seal facing down. Install
outer snap ring. Now turn this assembly over.
5. If coil and stator ring are separated, heat stator ring in oven or with torch until hot to the touch, then slide
coil into place from side with slot. Center coil in ring.
6. Set coil assembly into the stator ring, aligning the leads with the groove.
7. Install right stator frame and seal assembly using paper tube as in Step 3. (Align pin in stator with hole in coil.)
8. Install inner snap ring, bearing, shims and outer snap ring.
9. Install four through bolts and nuts, and junction box cover.
10. Turn shaft by hand to insure a smooth rotation of rotating assembly.
11. To fill the brake with magnetic powder, perform the fill operation on a clean piece of paper. Any spillage is
retained to be poured into the brake. Place the brake on a 45 degree angle with the powder fill hole at the
3 o’clock position. Fill the brake with all the powder in the repair parts kit. While filling, slowly rotate the
shaft to evenly distribute the powder. Install the sealing washer and powder fill screw.
12. Replace the two set screws.