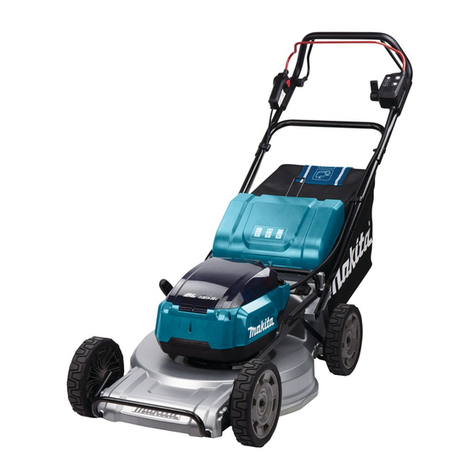
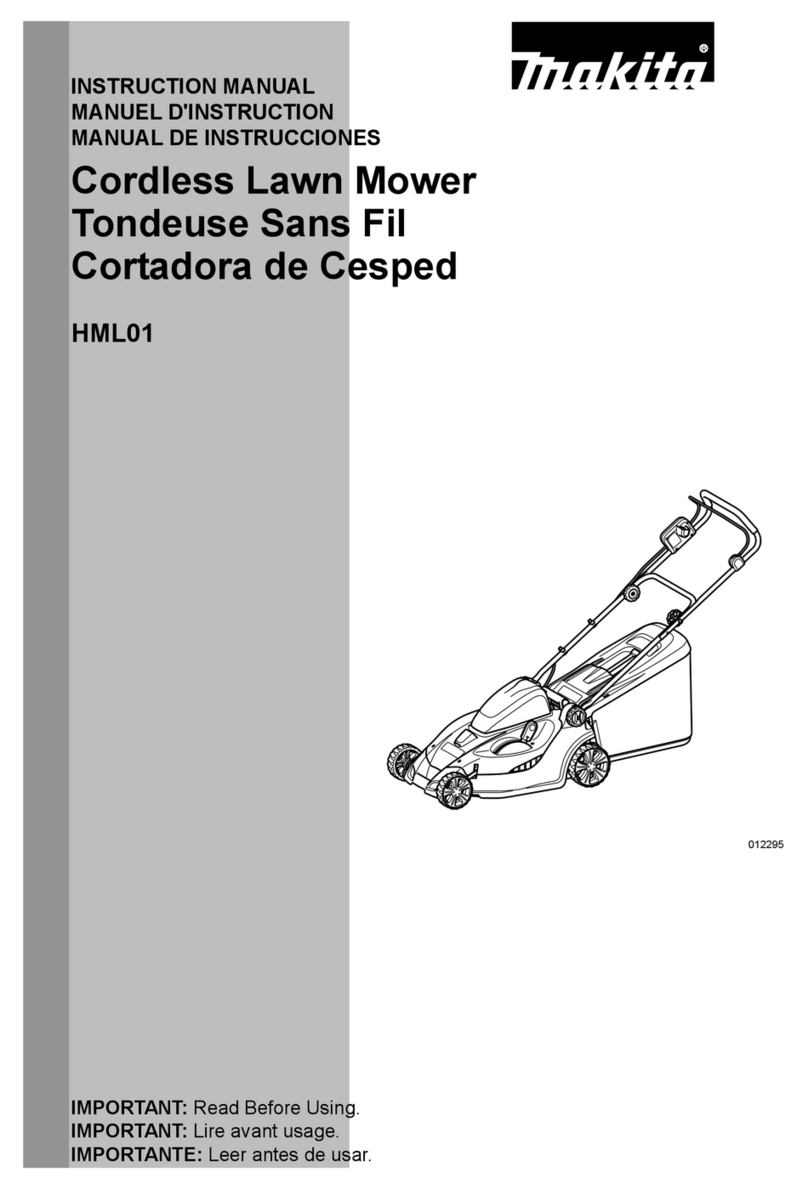
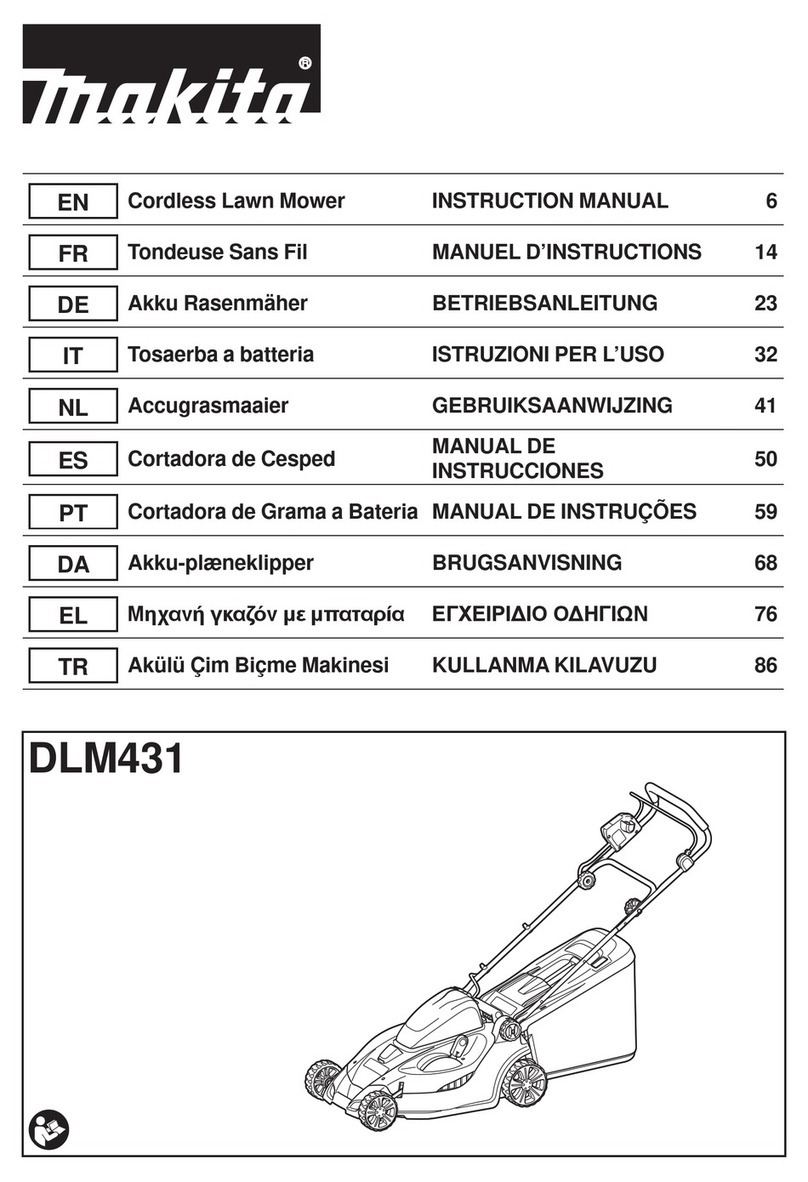
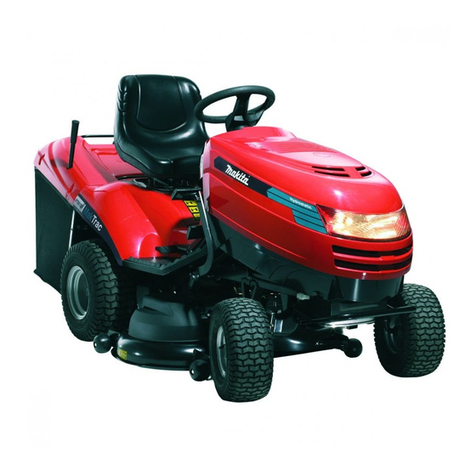
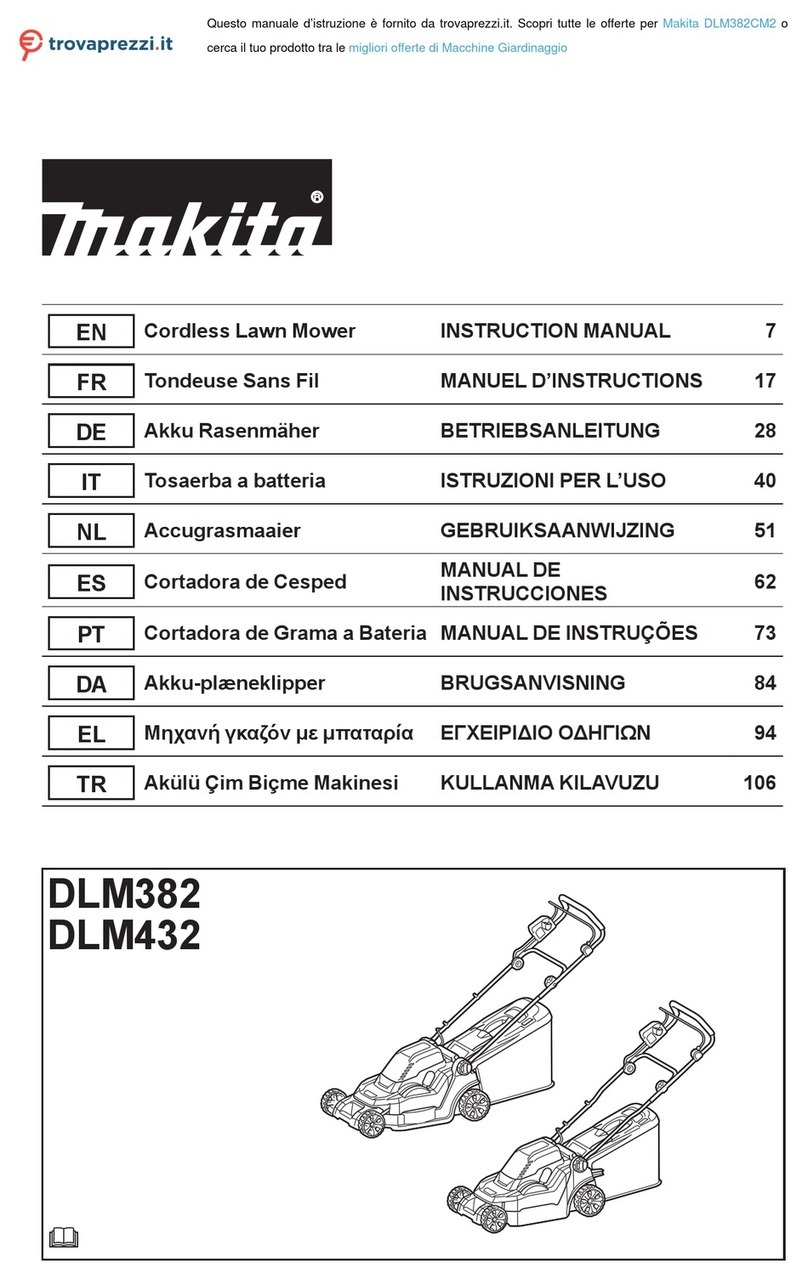
Makita DLM460 User manual

DLM460
DLM461
EN Cordless Lawn Mower INSTRUCTION MANUAL 8
SL Akumulatorska kosilnica NAVODILA ZA UPORABO 18
SQ Kositëse bari me bateri MANUALI I PËRDORIMIT 28
BG Безжична косачка за трева РЪКОВОДСТВО ЗА
ЕКСПЛОАТАЦИЯ 38
HR Bežična kosilica za travu PRIRUČNIK S UPUTAMA 50
МК Безжична косилка УПАТСТВО ЗА УПОТРЕБА 60
SR Бежична косилица за траву УПУТСТВО ЗА УПОТРЕБУ 71
RO Maşină de tuns iarba fără
cablu MANUAL DE INSTRUCŢIUNI 82
UK Бездротова газонокосарка ІНСТРУКЦІЯ З
ЕКСПЛУАТАЦІЇ 93
RU Аккумуляторная
Газонокосилка РУКОВОДСТВО ПО
ЭКСПЛУАТАЦИИ 104

1
2
3
6
5
4
Fig.1
1
2
3
6
45
Fig.2
12
3
Fig.3
1
Fig.4
1
2
Fig.5
1
Fig.6
2

1
2
Fig.7
1
Fig.8
13
2
Fig.9
12
Fig.10
1
2
Fig.11
12
Fig.12
1
2
Fig.13
1
2
Fig.14
3

1
Fig.15
1
Fig.16
1
2
Fig.17
2 31
4
5 6
Fig.18
1
3
2
Fig.19
1
Fig.20
4

1
2
Fig.21
12
3
21
Fig.22
Fig.23
Fig.24
12
33
Fig.25
Fig.26
Fig.27
5

1 2 3
Fig.28
1
2
Fig.29
13
2
Fig.30
1
2
2
Fig.31
1
2
3
Fig.32
1
2
3
Fig.33
6

1
2
Fig.34
1
2
3
Fig.35
1
2
3
Fig.36
1
2
Fig.37
7

8ENGLISH
ENGLISH (Original instructions)
SPECIFICATIONS
Model: DLM460 DLM461
Mowing width (blade diameter) 460 mm
No load speed 2,500 min-1
Maximum speed 3,300 min-1
Part number of replacement mower blade 199367-2 199368-0
Dimensions
(L x W x H) during operation L: 1,319 mm to 1,518 mm
W: 532 mm
H: 879 mm to 1,138 mm
when stored
(without grass basket) L: 1,004 mm to 1,125 mm
W: 532 mm
H: 533 mm to 713 mm
Rated voltage D.C. 36 V
Net weight 25.3 - 27.6 kg 26.6 - 28.4 kg
Protection degree IPX4
• Duetoourcontinuingprogramofresearchanddevelopment,thespecicationshereinaresubjecttochange
without notice.
• Specicationsandbatterycartridgemaydifferfromcountrytocountry.
• Theweightmaydifferdependingontheattachment(s),includingthebatterycartridge.Thelightestandheavi-
est combination, according to EPTA-Procedure 01/2014, are shown in the table.
Applicable battery cartridge
BL1815N / BL1820 / BL1820B / BL1830 / BL1830B / BL1840 / BL1840B / BL1850 / BL1850B / BL1860B
• Someofthebatterycartridgeslistedabovemaynotbeavailabledependingonyourregionofresidence.
WARNING: Only use the battery cartridges listed above.Useofanyotherbatterycartridgesmaycause
injuryand/orre.
Symbols
Thefollowingsshowthesymbolsusedfortheequip-
ment.Besurethatyouunderstandtheirmeaningbefore
use.
Take particular care and attention.
Read instruction manual.
Danger;beawareofthrownobjects.
The distance between the tool and
bystandersmustbeatleast15m.
Neverputyourhandsandfeetnearthe
blade under the mower. Blades continue to
rotate after the motor is switched off.
Removethelockkeybeforeinspecting,
adjusting,cleaning,servicing,leavingand
storing the mower.
Ni-MH
Li-ion OnlyforEUcountries
Donotdisposeofelectricequipmentor
batterypacktogetherwithhouseholdwaste
material!
In observance of the European Directives,
on Waste Electric and Electronic
EquipmentandBatteriesandAccumulators
and Waste Batteries andAccumulators
and their implementation in accordance
withnationallaws,electricequipmentand
batteriesandbatterypack(s)thathave
reached the end of their life must be col-
lectedseparatelyandreturnedtoanenvi-
ronmentallycompatiblerecyclingfacility.
Intended use
The tool is intended for lawn mowing.
Noise
ThetypicalA-weightednoiseleveldeterminedaccord-
ing to EN60335-2-77:
Model DLM460
Sound pressure level (LpA) : 79 dB(A)
Sound power level (LWA) : 91 dB (A)
Uncertainty(K):3.4dB(A)
Thenoiselevelunderworkingmayexceed80dB(A).

9ENGLISH
NOTE: The declared noise emission value(s) has
been measured in accordance with a standard test
methodandmaybeusedforcomparingonetoolwith
another.
NOTE: The declared noise emission value(s)
mayalsobeusedinapreliminaryassessmentof
exposure.
WARNING: Wear ear protection.
WARNING: The noise emission during actual
use of the power tool can differ from the declared
value(s) depending on the ways in which the
tool is used especially what kind of workpiece is
processed.
WARNING: Be sure to identify safety mea-
sures to protect the operator that are based on an
estimation of exposure in the actual conditions of
use (taking account of all parts of the operating
cycle such as the times when the tool is switched
off and when it is running idle in addition to the
trigger time).
Vibration
The vibration total value (tri-axial vector sum) deter-
mined according to EN60335-2-77:
Model DLM460
Vibration emission (ah) : 2.5 m/s2or less
Uncertainty(K):1.5m/s2
NOTE: The declared vibration total value(s) has been
measured in accordance with a standard test method
andmaybeusedforcomparingonetoolwithanother.
NOTE:Thedeclaredvibrationtotalvalue(s)mayalso
beusedinapreliminaryassessmentofexposure.
WARNING: The vibration emission during
actual use of the power tool can differ from the
declared value(s) depending on the ways in which
the tool is used especially what kind of workpiece
is processed.
WARNING: Be sure to identify safety mea-
sures to protect the operator that are based on an
estimation of exposure in the actual conditions of
use (taking account of all parts of the operating
cycle such as the times when the tool is switched
off and when it is running idle in addition to the
trigger time).
EC Declaration of Conformity
For European countries only
TheECdeclarationofconformityisincludedasAnnexA
to this instruction manual.
SAFETY WARNINGS
Lawn Mower Safety Instructions
WARNING: Read all safety warnings and
all instructions. Failure to follow the warnings and
instructionsmayresultinelectricshock,reand/or
seriousinjury.
Save all warnings and instruc-
tions for future reference.
1. Do not insert the lock key into mower until it is
ready to be used.
2. Children should be supervised to ensure that
they do not play with the mower.
3. Never allow children or people unfamiliar with
these instructions to use the mower. Local
regulations can restrict the age of the operator.
4. Never operate the mower while people, espe-
cially children, or pets are nearby.
5. Keep in mind that the operator or user is
responsible for accidents or hazards occurring
to other people or their property.
6. While operating the mower, always wear sub-
stantial footwear and long trousers. Do not
operate the mower when barefoot or wearing
open sandals. Avoid wearing clothing or jew-
elry that is loose tting or that has hanging
cords or ties. They can be caught in moving
parts.
7. Always wear protective goggles to protect
your eyes from injury when using power tools.
The goggles must comply with ANSI Z87.1 in
the USA, EN 166 in Europe, or AS/NZS 1336
in Australia/New Zealand. In Australia/New
Zealand, it is legally required to wear a face
shield to protect your face, too.
It is an employer's responsibility to enforce
the use of appropriate safety protective equip-
ments by the tool operators and by other per-
sons in the immediate working area.
8. Operate the mower only in daylight or in good
articial light.
9. Avoid operating the mower in wet grass.

10 ENGLISH
10. Battery tool use and care
- Recharge only with the charger specied by
the manufacturer. Acharger that is suitable for
onetypeofbatterycartridgemaycreateariskof
rewhenusedwithanotherbatterycartridge.
- Use power tools only with specically desig-
nated battery cartridges.Useofanyotherbat-
terycartridgesmaycreateariskofinjuryandre.
- When battery cartridge is not in use, keep
it away from other metal objects, like paper
clips, coins, keys, nails, screws or other small
metal objects, that can make a connection
from one terminal to another. Shorting the bat-
teryterminalstogethermaycauseburnsorare.
- Under abusive conditions, liquid may be ejected
from the battery; avoid contact. If contact acci-
dentally occurs, ush with water. If liquid con-
tacts eyes, additionally seek medical help.Liquid
ejectedfromthebatterymaycauseirritationorburns.
- Do not dispose of the battery(ies) in a re.
Thecellmayexplode.Checkwithlocalcodesfor
possible special disposal instructions.
- Do not open or mutilate the battery(ies).
Releasedelectrolyteiscorrosiveandmaycause
damagetotheeyesorskin.Itmaybetoxicif
swallowed.
- Do not charge battery in rain, or in wet
locations.
11. Always keep a rm hold on the handle.
12. Always be sure of your footing on slopes.
13. Walk, never run.
14. Don't grasp the exposed cutting blades or
cutting edges when picking up or holding the
mower.
15. Physical condition - Do not operate mower
while under the inuence of drugs, alcohol, or
any medication.
16. Keep hands and feet away from rotating
blades. Caution - Blades coast after the mower
is switched off.
17. Use only the manufacturer genuine blades
specied in this manual.
18. Check the blades or blade bolts carefully for
cracks or damage before operation. Replace
cracked or damaged blades or blade bolts
immediately.
19. Be sure the area is clear of other people before
mowing. Stop mower if anyone enters the area.
20. Remove foreign matters such as rocks, wire,
bottles, bones and large sticks from the work
area before mowing to prevent personal injury
or damage to the mower.
21. Stop operation immediately if you notice
anything unusual. Switch off the mower and
remove the key. Then inspect the mower.
22. Never attempt to make cutting height adjust-
ments while mower is running if the mower
has cutting height adjustment feature.
23. Release switch lever and wait for blade rota-
tion to stop before crossing driveways, walks,
roads, and any gravel-covered areas. Also
remove the lock key if you leave the mower,
reach to pick up or remove something out of
your way, or for any other reason that may
distract you from what you are doing.
24. Objects struck by the mower blade can cause
severe injuries to persons. The lawn should
always be carefully examined and cleared of
all objects prior to each mowing.
25. If the mower strikes a foreign object, follow
these steps:
- Stop the mower, release the switch lever and
wait until the blade comes to a complete stop.
- Remove the lock key and the battery
cartridge.
- Thoroughly inspect the mower for any
damage.
- Replace the blade if it is damaged in any way.
Repair any damage before restarting and con-
tinuing to operate the mower.
26. Check the grass basket frequently for wear or
deterioration. For storage, always make sure
the grass basket is empty. Replace a worn
grass basket with a new factory replacement
for safety.
27. Use extreme caution when reversing or pulling
the mower towards you.
28. Stop the blade(s) if the mower has to be tilted
for transportation when crossing surfaces
other than grass, and when transporting the
mower to and from the area to be used.
29. Never operate the mower with defective
guards or shields, or without safety devices,
for example deectors and/or grass basket, in
place.
30. Switch on the mower carefully according to
instructions and with feet well away from the
blade(s).
31. Do not tilt the mower when switching on the
motor, except if the mower has to be tilted for
starting. In this case, do not tilt it more than
absolutely necessary and lift only the part,
which is away from the operator.
32. Do not start the mower when standing in front
of the discharge opening.
33. Do not put hands or feet near or under rotating
parts. Keep clear of the discharge opening at
all times.
34. Do not transport the mower while the mower is
turned on.
35. Stop the mower, and remove the disabling
device. Make sure that all moving parts have
come to a complete stop
- whenever you leave the mower,
- before clearing blockages or unclogging
chute,
- before checking, cleaning or working on the
mower,
- after striking a foreign object. Inspect the
mower for damage and make repairs before
restarting and operating the mower.
36. If the mower starts to vibrate abnormally
(check immediately)
- inspect for damage,
- replace or repair any damaged parts,
- check for and tighten any loose parts.
37. Be careful during adjustment of the mower
to prevent entrapment of the ngers between
moving blades and xed parts of the mower.
11 ENGLISH
38. Mow across the face of slopes, never up and
down. Exercise extreme caution when chang-
ing direction on slopes. Do not mow exces-
sively steep slopes.
39. Check the blade mounting bolt at frequent
intervals for proper tightness.
40. Keep all nuts, bolts, and screws tight to
be sure the equipment is in safe working
condition.
41. Always allow the mower to cool down before
storing.
42. When servicing the blades be aware that, even
though the power source is switched off, the
blades can still be moved.
43. Replace worn or damaged parts for safety.
Use only genuine replacement parts and
accessories.
44. Do not use the machine when there is a risk of
lightning.
45. When you use the machine on muddy ground,
wet slope, or slippery place, pay attention to
your footing.
46. Avoid working in poor environment where
increased user fatigue is expected.
47. Do not use the machine in bad weather where
visibility is limited.Failuretodosomaycause
fallorincorrectoperationduetolowvisibility.
48. Do not replace the battery in the rain.
49. Do not submerge the machine into a puddle.
50. Do not leave the machine unattended outdoors
in the rain.
51. Do not insert or remove the lock key in the
rain.
52. When wet leaves or dirt adhere to the suc-
tion mouth (ventilation window) due to rain,
remove them.
53. Do not wash the machine with high pressure
water.
54. When washing the machine, be sure to remove
the battery and lock key and close the battery
cover, and pour water toward the bottom of the
machine to which the blade is attached.
55. When storing the machine, avoid direct sun-
light and rain, and store it in a place where it
does not get hot or humid.
56. Perform inspection or maintenance in a place
where rain can be avoided.
57. After using the machine, remove the adhered
dirt and dry the machine completely before
storing. Depending on the season or the area,
there is a risk of malfunction due to freezing.
58. Do not wet the terminal of battery with liquid
such as water, or submerge the battery. Do not
leave the battery in the rain, nor charge, use,
or store the battery in a damp or wet place. If
theterminalgetswetorliquidentersinsideofbat-
tery,thebatterymaybeshortcircuitedandthereis
ariskofoverheat,re,orexplosion.
59. After removing the battery from the machine or
charger, be sure to attach the battery cover to
the battery and store it in a dry place.
60. Do not replace the battery with wet hands.
61. Do not use the machine in the snow.
62. If the cut-off grass is wet, it is likely to be
clogged inside of the machine. Check the con-
dition of the machine regularly, and remove the
adhered grass as necessary.
SAVE THESE INSTRUCTIONS.
WARNING: DO NOT let comfort or familiarity
with product (gained from repeated use) replace
strict adherence to safety rules for the subject
product.
MISUSE or failure to follow the safety rules stated
in this instruction manual may cause serious
personal injury.
Important safety instructions for
battery cartridge
1. Before using battery cartridge, read all instruc-
tions and cautionary markings on (1) battery
charger, (2) battery, and (3) product using
battery.
2. Do not disassemble battery cartridge.
3. If operating time has become excessively
shorter, stop operating immediately. It may
result in a risk of overheating, possible burns
and even an explosion.
4. If electrolyte gets into your eyes, rinse them
out with clear water and seek medical atten-
tion right away. It may result in loss of your
eyesight.
5. Do not short the battery cartridge:
(1) Do not touch the terminals with any con-
ductive material.
(2) Avoid storing battery cartridge in a con-
tainer with other metal objects such as
nails, coins, etc.
(3) Do not expose battery cartridge to water
or rain.
A battery short can cause a large current
ow, overheating, possible burns and even a
breakdown.
6. Do not store the tool and battery cartridge in
locations where the temperature may reach or
exceed 50 °C (122 °F).
7. Do not incinerate the battery cartridge even if
it is severely damaged or is completely worn
out. The battery cartridge can explode in a re.
8. Be careful not to drop or strike battery.
9. Do not use a damaged battery.
10. The contained lithium-ion batteries are subject
to the Dangerous Goods Legislation require-
ments.
Forcommercialtransportse.g.bythirdparties,
forwardingagents,specialrequirementonpack-
aging and labeling must be observed.
For preparation of the item being shipped, consult-
inganexpertforhazardousmaterialisrequired.
Pleasealsoobservepossiblymoredetailed
national regulations.
Tape or mask off open contacts and pack up the
batteryinsuchamannerthatitcannotmove
around in the packaging.
11. Follow your local regulations relating to dis-
posal of battery.

12 ENGLISH
12. Use the batteries only with the products
specied by Makita. Installing the batteries to
non-compliantproductsmayresultinare,exces-
siveheat,explosion,orleakofelectrolyte.
SAVE THESE INSTRUCTIONS.
CAUTION: Only use genuine Makita batteries.
Use of non-genuine Makita batteries, or batteries that
havebeenaltered,mayresultinthebatterybursting
causingres,personalinjuryanddamage.Itwill
alsovoidtheMakitawarrantyfortheMakitatooland
charger.
Tips for maintaining maximum
battery life
1. Charge the battery cartridge before completely
discharged. Always stop tool operation and
charge the battery cartridge when you notice
less tool power.
2. Never recharge a fully charged battery car-
tridge. Overcharging shortens the battery
service life.
3. Charge the battery cartridge with room tem-
perature at 10 °C - 40 °C (50 °F - 104 °F). Let
a hot battery cartridge cool down before
charging it.
4. Charge the battery cartridge if you do not use
it for a long period (more than six months).
ASSEMBLY
WARNING: Always be sure that the lock key
and battery cartridge are removed before carrying
out any work on the mower. Failure to remove the
lockkeyandthebatterycartridgemayresultinseri-
ouspersonalinjuryfromaccidentalstart-up.
WARNING: Never start the mower unless it is
completely assembled. Operation of the tools in a
partiallyassembledstatemayresultinseriousper-
sonalinjuryfromaccidentalstart-up.
Installing the handle
NOTICE: When installing handles, position the
cords so that they are not caught by anything
between the handles. If the cord is damaged, the
mower switch may not work.
1. Attach the lower handle so that the holes in the
handletintheprotrusionsonthemowerbody.Insert
the bolts from inside, then attach washerAfrom outside,
and then tighten the thumb nuts.
►Fig.1: 1. Lower handle 2. WasherA3. Thumb nut
4. Protrusion 5. Hole 6. Bolt
2. Align the hole in the lower handle with the hole
in the upper handle, then insert the bolts from inside,
then attach washer B from outside, and then tighten the
thumb nuts.
►Fig.2: 1. Upper handle 2. Hole 3. Washer B
4. Thumb nut 5. Lower handle 6. Bolt
CAUTION: Hold the upper handle rmly so
that it does not drop off your hand. Otherwise, the
handlemayfallandcauseaninjury.
3. Attach holderAand holder B to the handle.
Positionthecordsasshowninthegure.
►Fig.3: 1. Cord 2. HolderA3. Holder B
NOTE: When attaching holder A, be sure to x the
cord with the holder as shown in the gure.
Removing the mulching attachment
For DLM460
1. Open the rear cover.
►Fig.4: 1. Rear cover
2. Remove the mulching attachment while holding
down the lever.
►Fig.5: 1. Lever 2. Mulching attachment
For DLM461
1. Open the rear cover.
►Fig.6: 1. Rear cover
2. Remove the mulching attachment while pulling the
lever.
►Fig.7: 1. Mulching attachment 2. Lever
Installing the grass basket
1. Open the rear cover.
►Fig.8: 1. Rear cover
2. Hook the grass basket on the rod of the mower
bodyasshowninthegure.
►Fig.9: 1. Rod 2. Guard 3. Grass basket
NOTICE: Make sure that the guard on the grass
basket is facing downward. Otherwise, the grass
basketmaynotcatchallofcut-offgrass.
Attaching the mulching attachment
For DLM460
1. Open the rear cover, and then remove the grass
basket.
►Fig.10: 1. Rear cover 2. Grass basket
2. Attach the mulching attachment while holding
down the lever, and then release the lever to lock the
mulching attachment.
►Fig.11: 1. Lever 2. Mulching attachment
For DLM461
1. Open the rear cover, and then remove the grass
basket.
►Fig.12: 1. Rear cover 2. Grass basket
2. Attach the mulching attachment while pulling the
lever, and then release the lever to lock the mulching
attachment.
►Fig.13: 1. Mulching attachment 2. Lever

13 ENGLISH
FUNCTIONAL
DESCRIPTION
Installing or removing battery
cartridge
CAUTION: Always switch off the tool before
installing or removing of the battery cartridge.
CAUTION: Hold the tool and the battery car-
tridge rmly when installing or removing battery
cartridge.Failuretoholdthetoolandthebattery
cartridgermlymaycausethemtoslipoffyourhands
andresultindamagetothetoolandbatterycartridge
andapersonalinjury.
CAUTION: Make sure that you lock the battery
cover before use. Otherwise,mud,dirt,orwatermay
causedamagetotheproductorthebatterycartridge.
CAUTION: Always install the battery cartridge
fully until the red indicator cannot be seen. If not,
itmayaccidentallyfalloutofthetool,causinginjuryto
youorsomeonearoundyou.
CAUTION: Do not install the battery cartridge
forcibly.Ifthecartridgedoesnotslideineasily,itis
notbeinginsertedcorrectly.
NOTE:Thetooldoesnotworkwithonlyonebattery
cartridge.
To install the battery cartridge;
1. Pullupthelockinglever,andthenopenthebattery
cover.
►Fig.14: 1.Batterycover2. Locking lever
2. Alignthetongueonthebatterycartridgewiththe
slot on the mower then slide the cartridge until it locks in
place with a little click.
►Fig.15: 1.Batterycartridge
3. Insertthelockkeyintheplaceshowninthegure
as far as it will go.
►Fig.16: 1.Lockkey
4. Closethebatterycoverandpushituntilitis
latched with the locking lever.
To remove the battery cartridge from the mower;
1. Pullupthebatterycoverlockingleverandopen
thebatterycover.
2. Pulloutthebatterycartridgefromthemowerwhile
sliding the button on the front of the cartridge.
3. Pulloutthelockkey.
4. Closethebatterycover.
Tool / battery protection system
Thetoolisequippedwithatool/batteryprotectionsys-
tem.Thissystemautomaticallycutsoffpowertothe
motortoextendtoolandbatterylife.Thetoolwillauto-
maticallystopduringoperationifthetoolorbatteryis
placed under one of the following conditions:
Overload protection
Whenthebatteryisoperatedinamannerthatcauses
ittodrawanabnormallyhighcurrent,thetoolautomati-
callystopsandthemainpowerlampblinksingreen.In
this situation, turn the tool off and stop the application
that caused the tool to become overloaded. Then turn
the tool on to restart.
Overheat protection
Whenthetoolorbatteryisoverheated,thetoolstops
automaticallyandthemainpowerlamplightsupinred.
Inthiscase,letthetoolandbatterycoolbeforeturning
the tool on again.
Overdischarge protection
Whenthebatterycapacityisnotenough,thetoolstops
automaticallyandthemainpowerlampblinksinred.In
thiscase,removethebatteryfromthetoolandcharge
thebatterycartridgesorchangethebatterycartridges
tofullychargedones.
Indicating the remaining battery
capacity
Only for battery cartridges with the indicator
►Fig.17: 1. Indicator lamps 2. Check button
Pressthecheckbuttononthebatterycartridgetoindi-
catetheremainingbatterycapacity.Theindicatorlamps
light up for a few seconds.
Indicator lamps Remaining
capacity
Lighted Off Blinking
75% to 100%
50% to 75%
25% to 50%
0% to 25%
Charge the
battery.
Thebattery
mayhave
malfunctioned.
NOTE: Depending on the conditions of use and the
ambienttemperature,theindicationmaydifferslightly
fromtheactualcapacity.

14 ENGLISH
Control panel
The control panel has the main power switch, the mode
switchingbutton,andtheindicatorofremainingbattery
capacity.
►Fig.18: 1.Batteryindicator2. Mode switching
lamp 3. Main power lamp 4. Check button
5. Mode switching button 6. Main power
switch
Main power switch
WARNING: Always turn off the main power
switch when not in use.
To turn on the machine, press the main power switch.
The main power lamp lights up in green. To turn off the
machine, press the main power switch again.
NOTE: If the main power lamp lights up in red or
blinks in red or green, refer to the instructions for tool/
batteryprotectionsystem.
NOTE:Thismachineemploystheautopower-off
function. To avoid unintentional start up, the main
powerswitchwillautomaticallyshutdownwhenthe
switch lever is not pulled for a certain period after the
main power switch is turned on.
Mode switching button
Youcanswitchtheoperatingmodebypressingthe
mode switching button. When the machine is turned on,
themachinestartsupinthenormalmode.Whenyou
press the mode switching button, the machine shifts to
theenergy-savingmodeandthemodeswitchinglamp
lightsupingreen.Intheenergy-savingmode,youcan
decreasethenoiseatmowing.Whenyoupressthe
mode switching button again, the machine returns to
the normal mode.
Indicating the remaining battery
capacity
Pressthecheckbuttontoindicatetheremainingbattery
capacities.Thebatteryindicatorscorrespondtoeach
battery.
Battery indicator status Remaining battery
capacity
On Off
50% - 100%
20% - 50%
0% - 20%
Switch action
WARNING: Before installing the battery car-
tridge, always check to see that the switch lever
actuates properly and returns to the original posi-
tion when released. Operating a tool with a switch
thatdoesnotactuateproperlycanleadtolossof
controlandseriouspersonalinjury.
NOTE: The mower does not start without pressing the
switch button even the switch lever is pulled.
NOTE:Mowermaynotstartduetotheoverload
whenyoutrytomowlongordensegrassatatime.
Increase the mowing height in this case.
Thismowerisequippedwiththeinterlockswitchand
handleswitch.Ifyounoticeanythingunusualwitheither
oftheseswitches,stopoperationimmediatelyand
havethemcheckedbyyournearestMakitaAuthorized
Service Center.
1.
Installthebatterycartridges.Insertthelockkeyinto
theinterlockswitchandthenclosethebatterycover.
2. Press the main power switch.
3. Press the switch button and hold it.
4. Grab the upper handle and pull the switch lever.
►Fig.19:
1. Switch button 2. Upper handle 3. Switch lever
NOTE:Ifthelockkeyisnotinserted,thepowerlamp
blinksingreenwhenyoupulltheswitchlever.
5. Release the switch button as soon as the motor
startsrunning.Themowerwillcontinuetorununtilyou
release the switch lever.
6. Release the switch lever to stop the motor.
Adjusting the mowing height
WARNING: Never put your hand or leg under
the mower body when adjusting the mowing
height.
WARNING: Always make sure that the lever
ts in the groove properly before operation.
For DLM460
Themowingheightcanbeadjustedintherangeof
between 20 mm and 75 mm.
For DLM461
Themowingheightcanbeadjustedintherangeof
between 16 mm and 71 mm.
Removethelockkey,andthenpullthemowingheight
adjustingleveroutwardofthemowerbodyandmoveit
toyourdesiredmowingheight.
►Fig.20: 1.Mowingheightadjustinglever
Hold the front grip with one hand, and then move the
mowingheightadjustingleverwiththeotherhand.
►Fig.21:
1.Mowingheightadjustinglever2. Front grip
NOTE:Themowingheightguresshouldbeused
justasaguideline.Dependingontheconditionsof
thelawnortheground,theactuallawnheightmay
becomeslightlydifferentfromthesetheight.
NOTE:Tryatestmowingofgrassinalessconspicu-
ousplacetogetyourdesiredheight.

15 ENGLISH
Adjusting the handle height
CAUTION: Before removing the bolts, hold
the upper handle rmly.Otherwise,thehandlemay
fallandcauseaninjury.
Thehandleheightcanbeadjustedinthreelevels.
1. Loosen the thumb nuts of the lower handle, and
then remove the bolts, washer, and thumb nuts.
►Fig.22: 1. Thumb nut 2. Washer 3. Bolt
2. Adjustthehandleheight.
3. Insert the bolts from inside, then attach washers
from outside, and then tighten the thumb nuts.
Using mulching attachment
Themulchingattachmentallowsyoutoreturnthecut
grass to the ground without gathering the cut grass in
thegrassbasket.Whenyouoperatethemachinewith
the mulching attachment, be sure to remove the grass
basket.
Electronic function
Themachineisequippedwiththeelectronicfunctions
foreasyoperation.
• Constant speed control
Electronic speed control for obtaining constant
speed.Possibletogetnenish,becausethe
rotating speed is kept constant even under load
condition.
• Soft start
The soft-start function minimizes start-up shock,
andmakesthemachinestartsmoothly.
OPERATION
Mowing
WARNING: Before mowing, clear away sticks
and stones from mowing area. Furthermore, clear
away any weeds from mowing area in advance.
WARNING: Always wear the safety goggles or
safety glasses with side shields when operating
the mower.
CAUTION: If the cut grass or foreign object
blocks up inside of the mower body, be sure to
remove the lock key and battery cartridge and
wear gloves before removing the grass or foreign
object.
NOTICE: Use this machine for mowing lawn only.
Do not mow weeds with this machine.
►Fig.23
Firmlyholdthehandlewithbothhandswhenmowing.
Themowingspeedguidelineisapproximately1meter
per 4 seconds.
►Fig.24
The center lines of the front wheels are guidelines to
mowing width. Using the center lines as guidelines,
mowinstrips.Overlapbyonehalftoonethirdtheprevi-
ousstriptomowthelawnevenly.
►Fig.25: 1. Mowing width 2. Overlapping area
3. Center line
Change the mowing direction each time to prevent the
grassgrainpatternfromforminginjustonedirection.
►Fig.26
Periodicallycheckthegrassbasketformowedgrass.
Emptythegrassbeforeitbecomesfull.Beforeevery
periodical check, be sure to stop the mower then
removethelockkeyandthebatterycartridge.
NOTE: Using the mower with the grass basket full
prevents smooth blade rotation and places an extra
loadonthemotor,whichmaycausebreakdown.
Mowing a long-grass lawn
Donottrytocutlonggrassallatonce.Instead,mow
thelawninsteps.Leaveadayortwobetweenmowings
untilthelawnbecomesevenlyshort.
►Fig.27
NOTE: Mowing long grass to a short length all at
oncemaycausethegrasstodie.Thecutgrassmay
alsoblockupinsideofthemowerbody.
Emptying the grass basket
WARNING: To reduce a risk of accident, reg-
ularly check the grass basket for any damage or
weakened strength. Replace the grass basket if
necessary.
1. Release the switch lever.
2. Removethelockkey.
3. Open the rear cover and take out the grass basket
byholdingthehandle.
►Fig.28: 1. Rear cover 2. Handle 3. Grass basket
4. Emptythegrassbasket.
MAINTENANCE
WARNING: Always be sure that the lock
key and battery cartridge are removed from the
mower before storing or carrying the mower or
attempting to perform inspection or maintenance.
WARNING: Always remove the lock key when
the mower is not in use. Store the lock key in a
safe place out of reach of children.
WARNING: Wear gloves when performing
inspection or maintenance.
WARNING: Always wear the safety goggles or
safety glasses with side shields when performing
inspection or maintenance.

16 ENGLISH
NOTICE: Never use gasoline, benzine, thinner,
alcohol or the like. Discoloration, deformation or
cracks may result.
To maintain product SAFETY and RELIABILITY,
repairs,anyothermaintenanceoradjustmentshould
beperformedbyMakitaAuthorizedorFactoryService
Centers,alwaysusingMakitareplacementparts.
Maintenance
1. Removethelockkeyandbatterycartridges,and
thenclosethebatterycover.
2. Put the mower on its side and clean grass clip-
pings accumulated on the underside of mower deck.
3. Pour water toward the bottom of the machine to
which the blade is attached.
NOTICE: Do not wash the machine with high
pressure water.
4. Check all nuts, bolts, knobs, screws, fasteners etc.
for tightness.
5. Inspect moving parts for damage, breakage, and
wear. Damaged or missing parts should be repaired or
replaced.
6. Store the mower in a safe place out of the reach of
children.
Carrying the mower
Whencarryingthemower,holdthefrontgripandlower
handlewithtwopeopleasshowninthegure.
►Fig.29: 1. Lower handle 2. Front grip
Storing
Storemowerindoorsinacool,dryandlockedplace.
Don't store the mower and charger in locations where
thetemperaturemayreachorexceed40°C(104°F).
1. Open the rear cover and take out the grass basket
byholdingthehandle.
►Fig.30: 1. Rear cover 2. Handle 3. Grass basket
2. Loosen the thumb nuts and fold the upper handle.
►Fig.31: 1. Upper handle 2. Thumb nut
Removing or installing the mower
blade
WARNING: Always remove the lock key and
battery cartridge when removing or installing the
blade. Failure to remove the lock key and battery
cartridge may cause a serious injury.
WARNING: The blade coasts for a few sec-
onds after releasing the switch. Do not start any
operation until the blade comes to a complete
stop.
WARNING: Always wear gloves when han-
dling the blade.
Removing the mower blade
For DLM460
1. Put the mower on its side so that the mowing
heightadjustinglevercomestotheupperside.
2. To lock the blade, insert a lumber or similar into
the mower.
3. Turn the bolt counterclockwise with the wrench.
►Fig.32: 1. Mower blade 2. Wrench 3. Lumber
4. Remove the bolt, washer, mower blade in order.
►Fig.33: 1. Mower blade 2. Washer 3. Bolt
For DLM461
1. Put the mower on its side so that the mowing
heightadjustinglevercomestotheupperside.
2. Turn the bolt counterclockwise with the wrench
while holding the base plate.
►Fig.34: 1. Wrench 2. Base plate
3. Remove the bolt, washer, base plate in order.
►Fig.35: 1. Base plate 2. Washer 3. Bolt
4. To remove the individual blade, turn the bolt coun-
terclockwise with the wrench while holding the base
plate.
►Fig.36: 1. Base plate 2. Mower blade 3. Wrench
Installing the mower blade
To install the mower blade, take the removal procedure
in reverse.
WARNING: Install the blade carefully. It has
a top/bottom facing. Place the blade so that the
rotational direction arrow faces outward.
WARNING: Tighten the bolt clockwise rmly
to secure the blade.
WARNING: Make sure that the blade and all
the xing parts are installed correctly and tight-
ened securely.
WARNING: When you replace the blades,
always follow the instructions provided in this
manual.
For DLM461
NOTICE: When installing the mower blade, slide
the mower blade as shown in the gure so that
the protrusions touch the mower blade.
►Fig.37: 1. Protrusion 2. Mower blade

17 ENGLISH
TROUBLESHOOTING
Beforeaskingforrepairs,conductyourowninspectionrst.Ifyoundaproblemthatisnotexplainedinthemanual,
donotattempttodismantlethetool.Instead,askMakitaAuthorizedServiceCenters,alwaysusingMakitareplace-
ment parts for repairs.
State of abnormality Probable cause (malfunction) Remedy
Mower does not start. Twobatterycartridgesarenotinstalled. Installthechargedbatterycartridges.
Batteryproblem(undervoltage) Rechargethebatterycartridge.Ifrechargingisnot
effective,replacebatterycartridge.
Thelockkeyisnotinserted. Insertthelockkey.
Motor stops running after a little use. Battery'schargelevelislow. Rechargethebatterycartridge.Ifrechargingisnot
effective,replacebatterycartridge.
Cutting height is too low. Raise the cutting height.
Motor does not reach maximum
RPM. Batterycartridgeisinstalledimproperly. Installthebatterycartridgeasdescribedinthis
manual.
Batterypowerisdropping. Rechargethebatterycartridge.Ifrechargingisnot
effective,replacebatterycartridge.
Thedrivesystemdoesnotwork
correctly. Askyourlocalauthorizedservicecenterforrepair.
Cutting tool does not rotate:
stopthemowerimmediately!
Foreignobjectsuchasabranchis
jammedneartheblade. Removetheforeignobject.
Thedrivesystemdoesnotwork
correctly. Askyourlocalauthorizedservicecenterforrepair.
Abnormal vibration:
stopthemowerimmediately!
Bladeisimbalanced,excessivelyor
unevenlyworn. Replace the blade.
OPTIONAL
ACCESSORIES
CAUTION: These accessories or attachments
are recommended for use with your Makita tool
specied in this manual.Theuseofanyother
accessories or attachments might present a risk of
injurytopersons.Onlyuseaccessoryorattachment
for its stated purpose.
Ifyouneedanyassistanceformoredetailsregard-
ingtheseaccessories,askyourlocalMakitaService
Center.
• Mower blade
• Makitagenuinebatteryandcharger
NOTE:Someitemsinthelistmaybeincludedinthe
toolpackageasstandardaccessories.Theymay
differfromcountrytocountry.

18 SLOVENŠČINA
SLOVENŠČINA (Originalna navodila)
TEHNIČNI PODATKI
Model: DLM460 DLM461
Širinakošnje(premerrezila) 460 mm
Hitrost brez obremenitve 2.500 min-1
Najvišjahitrost 3.300 min-1
Številka dela nadomestnega rezila kosilnice 199367-2 199368-0
Mere
(D x Š x V) včasuuporabe D: 1.319 mm do 1.518 mm
Š: 532 mm
V: 879 mm do 1.138 mm
včasushranjevanja
(brez koša za travo) D: 1.004 mm do 1.125 mm
Š: 532 mm
V: 533 mm do 713 mm
Nazivna napetost D.C. 36 V
Netoteža 25,3 – 27,6 kg 26,6 – 28,4 kg
Stopnjazaščite IPX4
• Kernenehnoopravljamoraziskaveinrazvijamosvojeizdelke,selahkotehničnipodatkivtemdokumentu
spremenijobrezobvestila.
• Tehničnipodatkiinbaterijskivložkiselahkorazlikujejogledenadržavouporabeizdelka.
• Težaselahkorazlikujegledenapriključke,vključnozakumulatorskobaterijo.Najlažjainnajtežjakombinacijav
skladu s postopkom EPTA 01/2014 sta prikazani v preglednici.
Uporabna akumulatorska baterija
BL1815N / BL1820 / BL1820B / BL1830 / BL1830B / BL1840 / BL1840B / BL1850 / BL1850B / BL1860B
• Nekaterezgorajnavedeneakumulatorskebaterijemordavvašidržaviprebivališčanisonavoljo.
OPOZORILO: Uporabljajte le zgoraj navedene akumulatorske baterije. Uporaba drugih akumulatorskih
baterijlahkopovzročitelesnepoškodbein/alipožar.
Simboli
Naslednjisimboliseuporabljajovpovezavisstrojem.
Preduporaboizdelkaseobveznoseznaniteznjihovim
pomenom.
Potrebnajeposebnapozornostin
previdnost.
Preberite navodila za uporabo.
Nevarnost;paziteseletečihpredmetov.
Razdaljamedorodjeminosebamivbližini
morabitinajmanj15m.
Nikolinepribližujterokinnogrezilupod
kosilnico.Koizključitemotor,serezilaše
vednovrtijo.
Predpregledovanjem,prilagajanjem,
čiščenjem,servisiranjem,puščanjemin
shranjevanjemkosilnicevednoodstranite
ključzazaklep.
Ni-MH
Li-ion SamozadržaveEU
Nezavrziteizrabljeneelektričneopremeali
akumulatorskegasklopamedgospodinjske
odpadke!
V skladu z Evropskimi direktivami o
odpadnielektričniinelektronskiopremi,
baterijahinakumulatorjih,odpadnihbate-
rijahinakumulatorjihterupoštevanjem
njihovihdoločilvskladuzdržavnozako-
nodajojetrebaelektričnoopremo,baterije
inakumulatorje,katerihživljenjskicikel
jepretekel,zbiratiločenoinjihdostaviti
vustrezenobratzarecikliranje,kideluje
skladnozokoljevarstvenimizahtevami.
Predvidena uporaba
Orodjejenamenjenozakošnjotrave.
Hrup
ObičajnaA-ovrednotenaravenhrupavskladuz
EN60335-2-77:
Model DLM460
Ravenzvočnegatlaka(LpA): 79 dB (A)
Ravenzvočnemoči(LWA): 91 dB (A)
Odstopanje(K):3,4dB(A)
Nivohrupameddelomlahkopreseže80dB(A).

19 SLOVENŠČINA
OPOMBA:Navedenevrednostioddajanjahrupaso
bileizmerjenevskladusstandardnimimetodami
testiranjainselahkouporabljajozaprimerjavoorodij.
OPOMBA:Navedenevrednostioddajanjahrupa
selahkouporabljajotudipripredhodnioceni
izpostavljenosti.
OPOZORILO: Uporabljajte zaščito za sluh.
OPOZORILO: Oddajanje hrupa med dejansko
uporabo električnega orodja se lahko razlikuje od
navedenih vrednosti, odvisno od načina uporabe
orodja in predvsem vrste obdelovanca.
OPOZORILO: Upravljavec mora za lastno
zaščito poznati varnostne ukrepe, ki temeljijo
na oceni izpostavljenosti v dejanskih pogojih
uporabe (poleg časa proženja je treba upoštevati
celoten delovni cikel, vključno s časom, ko je
orodje izklopljeno, in časom, ko deluje v prostem
teku).
Vibracije
Skupnevrednostivibracij(vektorskavsotatrehosi)v
skladu z EN60335-2-77:
Model DLM460
Emisijevibracij(ah): 2,5 m/s2alimanj
Odstopanje(K):1,5m/s2
OPOMBA:Navedeneskupnevrednostioddajanja
vibracijsobileizmerjenevskladusstandardnimi
metodamitestiranjainselahkouporabljajozaprimer-
javoorodij.
OPOMBA:Navedeneskupnevrednostioddajanja
vibracijselahkouporabljajotudipripredhodnioceni
izpostavljenosti.
OPOZORILO: Oddajanje vibracij med
dejansko uporabo električnega orodja se lahko
razlikuje od navedenih vrednosti, odvisno
od načina uporabe orodja in predvsem vrste
obdelovanca.
OPOZORILO: Upravljavec mora za lastno
zaščito poznati varnostne ukrepe, ki temeljijo
na oceni izpostavljenosti v dejanskih pogojih
uporabe (poleg časa proženja je treba upoštevati
celoten delovni cikel, vključno s časom, ko je
orodje izklopljeno, in časom, ko deluje v prostem
teku).
Izjava o skladnosti ES
Samo za evropske države
IzjavaESoskladnostijevključenavdodatkuA,kije
priložentemnavodilomzauporabo.
VARNOSTNA
OPOZORILA
Varnostna navodila za kosilnico
OPOZORILO: Preberite vsa varnostna opo-
zorila in navodila. Neupoštevanjeopozorilinnavodil
lahkoprivededoelektričnegaudara,požarain/ali
resnih telesnih poškodb.
Shranite vsa opozorila in navo-
dila za poznejšo uporabo.
1. Ne vstavljajte ključa za zaklep v kosilnico,
dokler ni pripravljena za uporabo.
2. Zagotovite ustrezen nadzor otrok in preprečite
igranje s kosilnico.
3. Nikoli ne dovolite uporabe kosilnice otrokom
ali osebam, ki niso seznanjene z navodili.
Lokalni predpisi lahko omejijo starost uporab-
nika naprave.
4. Nikoli ne uporabljajte kosilnice v bližini ljudi,
zlasti otrok ali hišnih ljubljenčkov.
5. Upoštevajte, da je upravljavec ali uporabnik
odgovoren za nesreče ali nevarnosti, ki se
zgodijo drugim ljudem ali njihovi lastnini.
6. Med delom s kosilnico vedno nosite ustrezno
obutev in dolge hlače. Kosilnice ne upo-
rabljajte, ko ste bosi ali nosite odprte sandale.
Ne nosite oblačil ali nakita, ki so ohlapna ali
imajo viseče vrvice ali pentlje. Lahko se zatak-
nejo v gibljive dele.
7. Pri uporabi električnih orodij vedno nosite
zaščitna očala, da preprečite poškodbe oči.
Očala morajo ustrezati standardu ANSI Z87.1
v ZDA, EN 166 v Evropi ali AS/NZS 1336 v
Avstraliji/Novi Zelandiji. V Avstraliji/Novi
Zelandiji je zakonsko zahtevano tudi nošenje
obrazne zaščite.
Delodajalec mora zagotoviti, da upravljavci
orodja in druge osebe v neposrednem delov-
nem območju uporabljajo ustrezno zaščitno
opremo.
8. Kosilnico upravljajte samo podnevi ali ob
dobri umetni svetlobi.
9. Ne uporabljajte kosilnice za košnjo mokre
trave.

20 SLOVENŠČINA
10.
Uporaba akumulatorskega orodja in ravnanje z njim
– Ponovno napolnite le s polnilnikom, ki ga je
določil proizvajalec. Polnilnik,kijeprimerenza
enovrstoakumulatorskihbaterij,lahkopovzroči
nevarnostpožara,čegauporabljatezdrugimi
akumulatorskimibaterijami.
– Električno orodje uporabljajte le s posebej
oblikovanimi akumulatorskimi baterijami.
Uporabadrugihakumulatorskihbaterijlahko
pomeninevarnosttelesnihpoškodbalipožara.
– Kadar akumulatorske baterije ne uporabljate,
je ne hranite ob kovinskih predmetih, kot so
sponke za papir, kovanci, ključi, žeblji, vijaki ali
drugi manjši kovinski predmeti, ki lahko pove-
žejo oba terminala.Kratekstikakumulatorskih
priključkovlahkopovzročiopeklinealipožar.
– V neprimernih pogojih lahko iz akumulatorja
uhaja tekočina; izogibajte se stiku. Če pride do
nenamernega stika, sperite z vodo. Če pride
tekočina v stik z očmi, takoj poiščite zdrav-
niško pomoč.Tekočinaizakumulatorjalahko
povzročidraženjealiopekline.
– Akumulatorja/-ev ni dovoljeno metati v ogenj.
Celica lahko eksplodira. Preverite lokalne predpise
gledemorebitnihposebnihnavodilzaodstranjevanje.
– Ne odpirajte ali spreminjajte akumulatorja/-ev.
Sproščenielektrolitjekoroziveninlahkopovzroči
poškodbeočialikože.Prizaužitjujelahkostrupen.
– Akumulatorja ne polnite v dežju ali na mokrih mestih.
11. Vedno trdno držite ročaj.
12. Pri hoji po pobočjih bodite vedno previdni.
13. Hodite, ne tecite.
14. Kadar dvigujete ali držite kosilnico, ne prije-
majte izpostavljenih rezil ali rezalnih robov.
15. Fizično stanje – ne uporabljajte kosilnice,
kadar ste pod vplivom drog, alkohola ali
kakršnih koli zdravil.
16. Ne približujte rok in nog vrtečim se rezilom.
Previdno: rezila se po izklopu kosilnice prosto
premikajo.
17. Uporabljajte samo originalna proizvajalčeva
rezila, opredeljena v tem priročniku.
18.
Pred uporabo skrbno preverite rezila ali vijake rezil
glede obrabe, razpok ali poškodb. Takoj zamenjajte
počena ali poškodovana rezila ali vijake rezil.
19. Pred košnjo se prepričajte, da v območju koš-
nje ni drugih oseb. Če kdor koli vstopi v obmo-
čje, ustavite kosilnico.
20. Pred košnjo iz delovnega območja odstranite
tujke, kot so kamni, žice, steklenice, kosti in
velike palice, da preprečite telesne poškodbe
ali poškodbe kosilnice.
21. Če opazite kaj neobičajnega, takoj prenehajte
uporabljati kosilnico. Izklopite kosilnico in
odstranite ključ. Nato preglejte kosilnico.
22. Če ima kosilnica funkcijo nastavitve višine za
rezanje, nikoli ne poskušajte prilagajati višine
za rezanje, ko je kosilnica vklopljena.
23. Preden prečkate dovoze, pločnike, ceste in
katere koli peščene površine, sprostite preklo-
pno ročico in počakajte, da se rezilo ustavi.
Ključ za zaklep odstranite tudi če pustite kosil-
nico, sežete, da bi pobrali ali odstranili nekaj s
poti, ali iz katerega koli drugega razloga, ki bi
vam lahko preusmeril pozornost.
24. Predmeti, ob katere zadene rezilo, lahko pov-
zročijo hude telesne poškodbe oseb. Pred
vsako košnjo je treba trato vedno skrbno pre-
gledati in z nje odstraniti vse predmete.
25. Če kosilnica zadene ob tujek, upoštevajte
naslednja navodila:
– Ustavite kosilnico, sprostite preklopno ročico
in počakajte, da se rezilo popolnoma ustavi.
– Odstranite ključ za zaklep in akumulatorsko baterijo.
– Natančno preglejte kosilnico in preverite
morebitne poškodbe.
– Če je rezilo kakor koli poškodovano, ga
zamenjajte. Pred ponovnim zagonom in nadalj-
njo uporabo kosilnice popravite vse poškodbe.
26. Redno pregledujte koš za travo glede obra-
bljenosti ali okvar. Pri shranjevanju se vedno
prepričajte, da je koš za travo prazen. Zaradi
varnosti obrabljeni koš za travo zamenjajte z
novim tovarniškim košem.
27. Bodite izjemno previdni, ko premikate kosil-
nico vzvratno ali jo vlečete proti sebi.
28. Ustavite rezilo/-a, če morate kosilnico nagniti,
kadar se pomikate po netravnatih površinah in
kadar kosilnico prenašate do območja, ki ga
želite pokositi, ali z njega.
29. Ne uporabljajte kosilnice z okvarjenimi varo-
vali ali ščitniki ali brez varnostnih naprav, npr.
deektorjev, in/ali nameščenega koša za travo.
30. Zaženite kosilnico v skladu z navodili in bodite
pozorni, da so vaše noge in roke dovolj odda-
ljene od rezil/-a.
31. Med zagonom motorja ne nagibajte kosilnice,
razen če je treba. V tem primeru kosilnice ne
nagibajte več, kot je treba, in dvignite samo
tisti del, ki je obrnjen stran od upravljavca.
32. Ne zaganjajte kosilnice, kadar stojite pred
odprtino za izmet.
33. Ne segajte z rokami ali nogami pod vrteče se
dele ali v njihovo bližino. Vedno bodite odmak-
njeni od odprtine za izmet.
34. Med prevozom kosilnica ne sme biti vključena.
35. Ustavite kosilnico in odstranite napravo za
onesposabljanje. Prepričajte se, da so se vsi
premični deli popolnoma ustavili:
– kadar pustite kosilnico nenadzorovano,
– preden odpravite ovire ali očistite korito,
– pred pregledom, čiščenjem ali delom na kosilnici,
– po trku s tujkom. Preden ponovno zaženete
in uporabite kosilnico, jo preglejte glede
poškodb in izvedite popravila.
36. Če začne kosilnica neobičajno vibrirati (takoj
preglejte):
– preglejte glede poškodb,
– zamenjajte ali popravite vse poškodovane dele,
– preverite in pritrdite vse razrahljane dele.
37. Med nastavljanjem kosilnice bodite previdni,
da preprečite ujetje prstov med premikajoča se
rezila in ksne dele stroja.
38. Kosite prečno po pobočju, nikoli gor in dol.
Kadar na pobočjih menjujete smer, bodite izje-
mno previdni. Ne kosite pri izredno nagnjenih
pobočjih.
39. Pogosto preverite, ali je vijak za pritrditev
rezila ustrezno zategnjen.
Other manuals for DLM460
13
This manual suits for next models
1
Table of contents
Languages:
Other Makita Lawn Mower manuals

Makita
Makita DLM462 User manual

Makita
Makita DLM460 User manual

Makita
Makita PLM4100 User manual

Makita
Makita DLM431 User manual

Makita
Makita DLM432 User manual

Makita
Makita PLM4815 User manual

Makita
Makita LM001C User manual

Makita
Makita LM001C User manual

Makita
Makita XML03CM1 User manual

Makita
Makita PRM0700 User manual

Makita
Makita DLM463 User manual

Makita
Makita DLM536 User manual

Makita
Makita LM2350 User manual

Makita
Makita PLM5113N2 User guide

Makita
Makita DLM431 User manual

Makita
Makita PLM4630 User guide

Makita
Makita PLM5115 User manual

Makita
Makita LM001C User manual

Makita
Makita XML05 User manual

Makita
Makita LM003J User manual