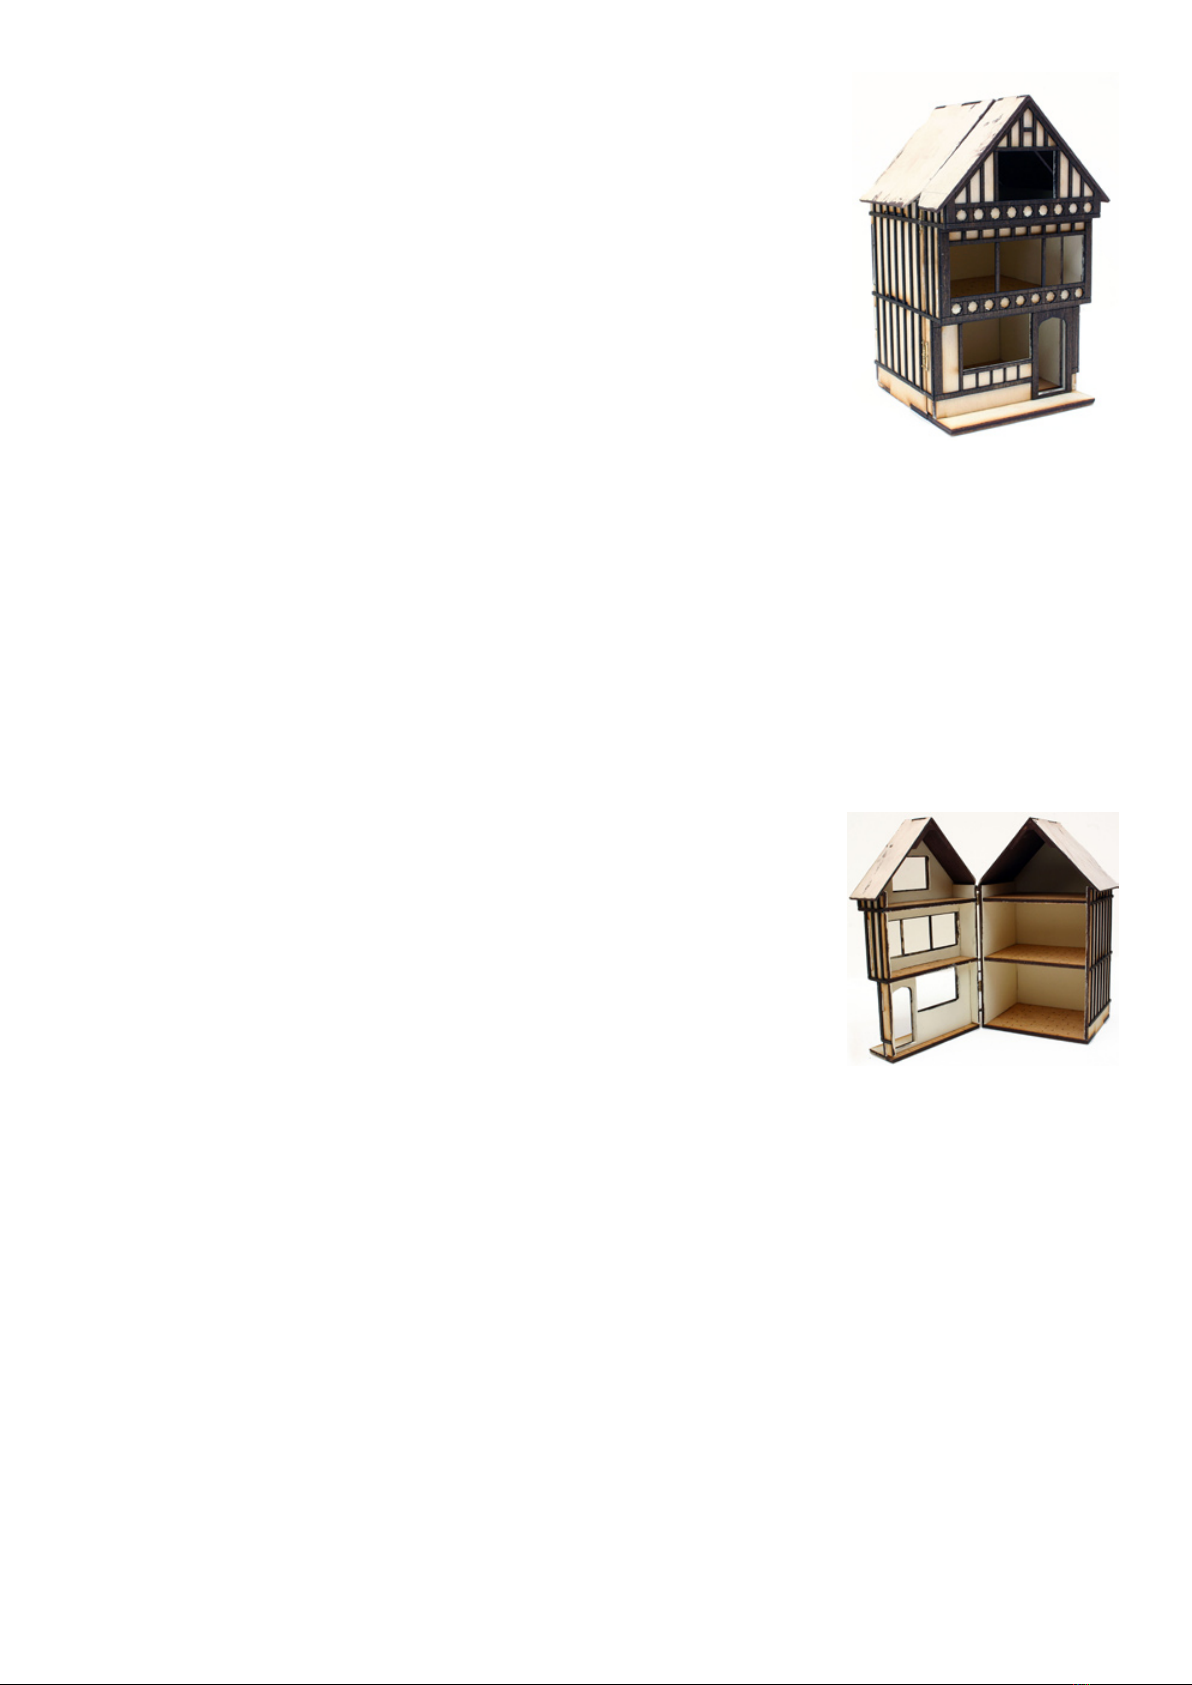
Malcolm's Miniatures Stratford BK202 User manual

This is a kit for a typical mber framed “black & white” building, based on a
building in Straord upon Avon.
Contents of the kit:
Ref Descripon Qty
1side of building shell 2
2rear of building shell 1
3ground oor 1
4intermediate oor 2
5upper oor front 1
6middle oor front 1
7ground oor front 1
8front sides 2
9upper oor 1
10 middle oor 1
11 ground oor/pavement 1
12 upper oor overlay 1
13 middle oor overlay 1
14 ground oor overlay 1
15 front side overlay 2
16 main side overlay 2
17 barge board 1
18 upper window frame 2
19 upper window glass 1
20 upper window lace 1
21 middle window frame 2
22 middle window glass 1
23 middle window lace 1
24 lower window frame 2
25 lower window glass 1
26 lower window lace 1
27 door 2
28 main roof 2
29 front roof 2
30 roof truss 2
Hinges and pins 2
Chimney & chimney pot 1
The main parts are provided with slots and tabs to ease assembly. Some of the wall parts have a horizontal
line marked as a guide to placing of the mber frame overlay. The walls must be ed with this line to the
outside. Handle the window laces with care as they are quite fragile.
To complete the kit you will need glue, paint, woodstain (or paint), white DAS or similar air drying clay,
Impress moulds for stone or brick and les or slates, as required.
We recommend the use of Aliphac Resin and a pin point applicator for assembly of this kit.
Instructions for Kit No BK202 - 1/48
Timber Framed building - The Stratford

Assembly of the kit
Before commencing assembly or painng it is useful to do a dry run to check how the parts t together 1.
- it is much harder to correct mistakes when glue has been applied!!
Start by staining or painng the mber overlays (parts 12-16), barge board (17), window frames 2.
(18,21,24), door parts (27) and oors (3,4,9,10,11). Use a dark oak stain or similar dark coloured paint
for the mber frames, windows, etc. A lighter colour could be used for the oorboards.
It is also easier to paint the internal walls and ceilings before assembly (parts 1-10) and the door 3.
threshold.
When the paint and/or stain is dry start assembly with the main part of the building. Note it may be 4.
necessary to sand o any paint on the slots and tabs to achieve a good t.
Glue one side (1) to the rear (2) ensuring that the tabs engage fully 5.
in the slots.
Glue the two internal oors (4) into the slots in the side (1). Note 6.
that the tab is not central so the oors only t one way round.
Glue the other side wall (1) to the rear and oors.7.
Glue the boom oor (3) to the assembly and set aside to dry.8.
Glue the ground oor front (7) to the two front sides (8) ensuring 9.
that the tabs engage fully in the slots. Make sure that the sides are
square to the front.
Glue the other two front pieces (5 & 6) to the sides. Ensure that the 10.
slot on part 6 is to the boom.
Glue the two oor secons (9 & 10) in place. The large tab at the front engages in the slot in the 11.
appropriate front wall and the two small tabs t into the slots in the sides.
Glue the ground oor/pavement (11) in place with the tab on the front wall engaging in the slot in the 12.
oor and the oorboards to the inside.
When the glue has dried t the hinges next. Two large elasc bands can be used to hold the two parts 13.
together while the hinges are aached. The hinges may be ed on either the le or right side of the
building as required. Fit the hinges where the marks are on the side walls. This means that the internal
oors provide some support when pushing the pins in. Be careful to keep the hinges straight and
central to the join between the walls. A lile superglue may be used to aach the hinges in addion
to the pins. A lile extra superglue may also be run round the edges of the hinges aer pinning. Be
careful to keep the superglue away from the join in the hinge!
Paint the underside of the jeed upper oors a dark colour to match the mber overlays.14.
Now glue the mber framing overlays in place starng with the front ones (12,13,14). The overlays 15.
project at the sides so as to overlap the side overlays. Apply glue to the back of the overlay preferably
using a ne point applicator.
On the side where the hinges are located chamfer the edges of the side overlays slightly (15, 16) so that 16.
they don’t prevent the front opening.
Glue the front side overlays (15) in place bung up to the front overlays with the boom of the overlay 17.
above the marked line on the side.
Glue the overlays (16) in place on the main side walls. Note that the shorter projecng mber is to the 18.
front - this give the correct spacing between the mbers across the join.
On the side where the hinges are located cut o the corners of the front and 19.
main roof secons (28, 29) where marked to allow the front to open.
Glue the two main roof pieces (28) and glue a roof truss (30) under the front 20.
edge to set the angle.
Repeat with the front roof pieces (29) and remaining roof truss (30).21.
Paint the underside of the roof secons and trusses and leave to dry.22.
Glue the chimney pot into the chimney.23.
Roll out some DAS (or similar air drying clay) into a thin sheet. Spread a 24.
lile glue (PVA or Aliphac resin) onto the chimney. Lay the DAS around the
chimney and trim o the surplus. While the DAS is sll so use a stretcher
bond brick impress mould to create the bricks on the chimney.
When the glue has dried on the main assembly the next step is to add the inll between the mber 25.
framing and the base wall.
Spread a lile glue between the mber frames and press DAS into the gaps. Smooth the DAS out 26.
removing any excess to leave it ush with the mber surface.
Roll out some DAS into a thin sheet, cut into strips to t the space below the boom of the mber 27.
framing (ie the base of the wall). Spread a lile glue over this area and apply the DAS. Use a suitable
impress mould to create the paern of stones or bricks.
Chamfer the top edge of the side walls/mber overlay so that the roof ts properly without any gaps 28.
and then glue the two roof secons onto the building.
When the DAS on the chimney has dried, glue the chimney onto the roof.29.
Glue the barge board (17) in place on the front edge of the roof.30.
Roll out some more DAS into a thin sheet, apply glue over the roof areas 31.
and apply the DAS. Use either a le or slate impress mould to create the
nish on the roof.
Leave unl the DAS is dry.32.
Next paint the base wall, chimney and roof with thin washes of acrylic 33.
paint in appropriate colours. When the wall and chimney paint has dried apply a very, very thin wash of
mortar colour to sele into the grooves between the stones or bricks.
Assemble the windows by inserng one of the window frames (18,21,24) into the window opening 34.
from behind with the coloured side facing outwards, followed by the window lace (20,23,26) and the
glazing (19,22,25). Then apply a lile glue into the edge of the window aperture behind the glazing and
t the second window frame (18,21,24) with the coloured side facing inwards.
Glue the two halves of the door together and add dummy hinges and other door furniture from card if 35.
required. Then glue the door into the door frame in either the open or closed posion.
Other thin washes of paint can be applied to weather the roof, walls and, if required, the inll between 36.
the mber framing.
On this type of building the mber was oen creosoted or painted so the mber can be le with the 37.
stain or paint nish. Alternavely to represent a more weathered mber eect a lile chalk can be
rubbed over the mber.
© 2012 Malcolm’s Miniatures 14, Oakdene, Woodcote, Oxfordshire RG8 0RQ
Table of contents
Popular Toy manuals by other brands

Align
Align TREX 700E V2 instruction manual

4M
4M Clever Cleaning Robot instruction manual

H-KING
H-KING Cessna Skyline instruction manual

Hobby-Lobby
Hobby-Lobby eRC F-18E Super Hornet 90mm EDF instruction manual
 Assembly manual")
REVELL
REVELL U.S.S. New Jersey BB-62 (1982) Assembly manual

Chicco
Chicco LULLABY SHEEP user manual


Mattel
Mattel Mega Construx Despicable Me DYG41 instructions

Fisher-Price
Fisher-Price GROW-WITH-ME TRIKE 72667 instructions

Carson
Carson Cessna 182 Skylane instruction manual

Lionel
Lionel Maritime ExplorationReady-to-Run Train Set owner's manual

Mega Bloks
Mega Bloks Halo Wars UNSC Gremlin manual

Dynam
Dynam A-10 manual