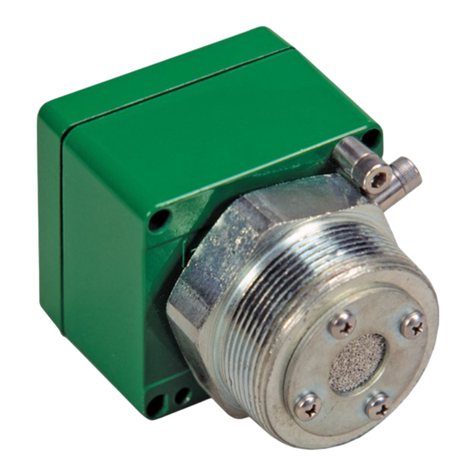
Manning AirScan IR-F9 Manual

405BarclayBoulevard
Lincolnshire, Illinois 60069
Tel: +1 847 955 8200
Toll free: +1 800 538 0363
Fax: +1 847 955 8208
ha_manning@honeywell.com
www.honeywellanalytics.com
www.manningsytems.com
18908 AirScan-iR-comm 05/2016 REVD
MOUN T ENCLOSURE THI S END UP. DO NOT BLOCK PERFORATED VENT HOLES.
AirScan

Contents
Serialnumber:
Manning AirScan-iR Refrigerant Sensor
18908 AirScan-iR-comm
2
Section
Title
Page
1 SensorDescription
System Specifications and Sensor Specifications
4
2
Installation
A
Locating the Sensor
5
Figu
re
1:
Mo
u
n
ting
Dimens
io
ns
fo
r
the
AirScan
TM
iR
5
B
Wiring
6
Fig
u
re
2:
Wiring
Diag
ram
fo
r
AirSc
an
TM
iR
6
3
Operation
A
Start-up Procedure
7
Figure 3: Required LED Status at Start-up
7
B
Pushbutton Operation, LED Indicators, Adjustment Pots and Test Points
8
Figure 4: Board ComponentLayout
8
Figure 5: LED Layout
8
LED Indicators and BlinkSequence
9
Figure 6: LED Blink Sequence
9
Figure 7: LED Indicator Summary
10
Normal RunModes
10
4/20 mA Loop Test Mode
10
Calibration Mode
10
Fault Indicator Error Sequences
11
C
Modes of Operation
12
Normal RunModes
12
4/20 mA Loop Modes
13
Calibration / Programming Modes
14
D
Calibration
15
Figure 8: Board ComponentLayout
15
4/20 mA Output Calibration
17
Zero Calibration
17
Figure 9: Board ComponentLayout
18
Span Calibration
18
E
Diagnostic Procedures
19
Simple Zero Test
19
4/20 mA Output Loop Integrity Check
19
F
Troubleshooting
21
Electrical Interference
21
F
igur
e
10:
T
r
oublesh
ootin
g
th
e
A
i
rS
ca
n
TM
iR
21
Sensor On-Board Diagnostic System
21
Erroron4/20mAOutput
22
Sensor Output at 0 mA
22
Sensor Output at .5 mA
22
Gas Concentration Indicated with No Refrigerant Present
22
IR Source Failure
22
4
Maintenance
23
5
Replacement Parts
23
6
Limited Warranty
24

Introduction
Manning AirScan-iR Refrigerant Sensor
18908 AirScan-iR-comm.
3
This manual has been prepared to help in the use and installation of the Manning Systems
AirScan
TM
iR
(Infrared Refrigerants) Sensor.
This manual
will
convey
the operating
principles of the sensor, ensure proper installation, and demonstrate start-up and routine
maintenance procedures.
This manual must be carefully followed by all individuals who have or will have the
responsibility
for using or servicing the
AirScan
TM
iR Sensor.
Warranties
made
by
Manning Systems, Inc. with respect to this equipment will be voided if the equipment is
not used and serviced in accordance with the instructions in this manual. If indoubt
about a procedure, please contact Manning Systems, Inc. before proceeding.

Manning AirScan-iR Refrigerant Sensor
18908 AirScan-iR-comm.
4
1
Sensor Description
Gasdetectionbytheinfraredmethodisbasedonthe
principle that most gases absorb infrared energy at a
characteristic frequency. In this instrument, a broad
band infrared source emits energy which is then band-
pass filtered to produce a narrow range of frequencies
characteristic of the refrigerants’ (CFC/HCFC/HFC)
absorption spectra. Any refrigerant in the gas sample cell
selectively absorbs energy reaching the detector. This
reductioninenergyisdetected,amplified and sent tothe
signal processing portion of the system.
Cable Recommendation:
Three conductor, stranded,
shieldedcablewithdrainwire,allenclosedinavinyl
jacket. For cable runs up to 200 feet use, #18 AWG
(Belden #8770 orequivalent). For cable runs up to 1,000
feet, use #16 AWG (Belden #8618 or equivalent).
Unit Enclosure:
NEMA 4, gasketed, molded fiberglass
reinforced polyester. Non-painted, non-rusting
construction appropriate forfoodareas. UL 508 listed,
CSA certified for use with industrial control equipment.
TM
The
Manning Systems AirScan
TM
iR
Sensor line
is
a
three-
wire,4/20mA sensorfortwo bandsof refrigerants
NOTE:
The standard AirScan
classified areas only.
iR is foruse innon-
available in a range of 0–3,000 ppm, but can be adjusted
for lower ranges, if required. The low-band or R-404a
infrared sensor reacts to R-123, R-134a, R-404a and R-507.
The
high-band
or
R-22
AirScan
TM
iR
sensor reacts
to
R-22.
Itssolid,high-massmetalbenchprovidesstructuraland
thermal stability, greater immunity to vibration, as well as
superior
EMI/RFI
shielding
of
the
detector
and
source.
Internal compensation for environmental changes allows
the sensor to automatically adapt to fluctuating
temperature and humidity conditions. The unit exhibits
extremely high reliability with no moving parts.
Sens
o
r
Spec
ific
ation
s
Type:
CFC/HCFC/HFCselectiveinfraredgassensor/
transmitter AirScan
TM
iR
Method of Detection:
Dual channel infrared energy
absorption (N.D.I.R. Non-dispersive Infrared)
Gases Monitored:
Low-Band (R-404a, R-507, R-134a,
and R-123), High-Band (R-22)
Range Available:
0–3,000 ppm (can berescaled to 0–
1,000ppm,or0–500 ppm ifrequired)
TM
Every
two
s
e
conds
SensorCheck
TM
techno
l
o
gy
mo
nito
rs
SensorCheck
Features:
Dual channel functionality test,
the
AirScan
TM
iR
source
and ensures
that
the
dual
channels are functioning properly. A notification signal
willbetransmittedifanyofseveralperformance
parameters is not met.
Monitoring equipment must be configured to indicate a
fault if the signal is less than 1.5 mA. All signals over
20mAmustbeconsideredahighgasconcentration.
Manning Systems infrared sensors are normally long-
lived (5 years plus), unless physically damaged or wetted
with water or other liquid.
System Specifications
Electrical Power:
24 Volts DC regulated, 1.0 amp.
Output:
Linear 4/20 mA output into a load resistor of
500 ohmsmaximum
Cable Length to Sensor:
1,000 feet maximum
source strength evaluation, incoming voltage monitor,
IR source integrity check, operating temperature monitor,
“zero” down drift monitor, and internal circuitry check.
Accuracy:
± 3% of full scale
Repeatability:
±1%offullscale
Cross Sensitivity:
Not affected by moisture, food odors,
floor cleaners, temperature changes, etc.
Operating Humidity:
0–100% RH (condensing)
Operating Temperatures:
–20° F to +140° F
Storage Temperature:
–20° Fto +140° F
Gas Sampling:
Diffusionmethod with no moving parts
Sampling Frequency:
Real time continuous monitoring
ofallpoints
Response Time:
T
90
in10 seconds with full-scale target
calibrationgas @ .75 liters/min. flow rate
Weight:
4.4lbs.
Dimensions:
9.59" high x 7.71" wide x 4.52" deep

2 Installation
Manning AirScan-iR Refrigerant Sensor
18908 AirScan-iR-comm
5
3.68”
MOUNT ENCLOSURE THIS END U P. DONOT B LOCK PERFORATED VEN T HOLES.
AirScan
A
Locating the Sensor
Because each sensor can only “report” what it is
seeing at the moment,
it is very important that the
sensor be located where leaks are most likely to
occur.
CFC/ HCFC/HFC vapor is heavier than
ambientair, so in a roomwith no airmovement it will
tend to settle. For quickest detection, mount the
sensoraboutonetotwofeetfromthe floor,closeto
the potential leak source.
Ifthe primaryapplicationis thefastestpossible leak
detection, mount the sensor near the potential leak
sources. In doing this, be aware that the indicated
concentration may not be representative of personnel
exposureand easyaccessforthe required calibration
and maintenance could be compromised.
General Mounting Considerations:
•
Must be easily accessible for calibration and
maintenance.
•
Always
mount the sensor vertically.
•
Mountthesensorclosetothepotentialleak
source for fastest possible leak detection.
•
If personnel protection is the primary
application, mount in the “breathing zone.”
•
Protect sensor from water, excessive humidity,
and wash-down.
•
To prevent electrical interference, keep sensor
and wire runs away from mercury vapor lights,
variable speed drives, and radio repeaters.
•
Protect sensor from physical damage (fork lifts,
etc.).
•
Do not mount the sensor overa door in a
refrigerated area.
•
Forhighlycriticallocationsmorethanone
sensorshouldbeinstalledineachroom.
Very Important:
•
Sensor
must
be mounted vertically
•
Never
mount sensorflat on a ceiling
•
Enter enclosure
only
through existing hole in
bottom of enclosure
•
Always
make a drip loop in the conduit
•
Never
mountsensoronavibratingsurface.
Mount sensor enclosures through the flange holes as
shown in Figure 1, and
always
mount vertically.
Penthouses:
Multi-Coil(defrostonecoilatatime)–
Inthis case the best location is usually in the center of
thepenthousefourorfivefeetabovethegrate.
Single Coil (or when all coils defrost at the same time) –
In this case high moisture conditions can occur and the
sensorshouldbemountedonefootabovethe grate.
TM
•
Take air movement and ventilation patterns into
Engine Rooms:
TheAirScan
iRsensorshouldbe
account.
Figure1: Mounting Dimensionsforthe AirScan
TM
iRSensor
mounted in a cool part of the room, if possible. Keep
thesensorawayfromhotairexhaustingfromelectric
motors or other machinery.
7.71”
1”
9.59”
9.19”
4.52”
5.01”
FRONT VIEW
SIDE VIEW
TOP VIEW

Manning AirScan-iR Refrigerant Sensor
18908 AirScan-iR-comm
6
2
Installation
continued
Output (white)
+24 VDC(red)
SIG
+24
GND
SHLD
JP1
DC ground (black)
Shield (bare)
TEST +
TEST -
Ceiling
Hung Evaporators:
When
mounting AirScan
TM
iR
sensorsnear evaporators,mount the sensornohigher
than two feet below the top of the evaporator coil.
Do not
mount in high air flow (1,200 feet/minute
maximum).
Never
mount the sensor on evaporators as
vibration can damage the sensor.
Other Locations:
When
mounting AirScan
TM
iR
sensors
inlocationssuchasrooftopairunits,ductwork,attic
spaces, makeup air intakes, etc., contact Manning Systems
for application assistance and recommendations.
B
Wiring
Electrical wiring must comply with all applicable codes.
Plantequipmentthatmaybeinvolvedandoperatingcon-
ditions should be discussed with local operating personnel
todetermine ifanyspecialneedsshouldbeconsidered.
Groundtheshieldatthemaincontrolpanel.Connect
the shield wire in the sensor terminal block labeled
shield
. Tape all exposed shield wire at the sensor to
insulate it from the enclosure.
All penetrations into a refrigerated room should be
sealed to prevent condensate from forming in the
conduit and dripping into the sensor enclosure.
Make drip loops for cables going into sensor housings
(see Figure 1). Follow the special mounting instructions
ontheenclosure(…
This EndUp).
Electrical Power:
24 VDC regulated, 1.0 amp.
Output:
Circuitboardmounted sensorprovidesalinear
4/20 mA output. Monitoring equipment may have a
maximum input impedance of 500 ohms.
Contact Manning Systems for specific wiring
TM
Nearly all start-up problems are due to improper wiring
instructions when usingAirScan
TM
iR sensors withan
or monitor configuration. Please follow these guidelines
AirAlert
96d readout unit.
carefully.
Always use three conductor, insulated, stranded,
shielded coppercable. Use
only
three conductor cable,
not
two cables of two conductor wire (see Figure 2).
CableRecommendation:
Use#18/3(Belden#8770)
for cable runs up to 200 feet. Use #16/3 (Belden
#8618)forcablerunsupto1,000feet.Useonlythe
existing punchedholesforconnectionsto the sensor.
TM
If
th
e
Ai
rS
c
a
n
TM
iR
is
to
be
us
ed
with
the
AirAlert
TM
96d,
Monitoring:
The AirScan
iR Refrigerant Sensor may be
please call Manning Systems for specific wiring instructions.
Donotpullsensorwiringwith ACpower cables.
Thiswill
cause electricalinterference.Be sure there are no breaks
or splices in sensor wiring runs. If cable runs cannot be
made without a splice,all connections must be soldered.
Solderingshouldbedoneusingarosinfluxtotiethe
connecting ends of sensor wires to ensure a positive and
long-lastingcontact.
monitored by any Manning Systems Readout/Alarmunit
or other appropriately configured system. Monitoring
equipmentmust be configuredto indicate a fault if the
signal isbelow1.5mA. Allsignalsabove 20mA mustbe
consideredahighgasconcentration.Afailedsensorwill
output a 0.5 mA signal.
Figure 2: Wiring Diagram for the AirScan
TM
iR Sensor
White
connectsto signalinputof
monitoring equipment
Red
connects to 24 VDC power supply
positive side
Black
connects to 24 VDC ground side
Bare wire wrap
connects to case ground
at monitoring equipment (earth ground)

Manning AirScan-iR Refrigerant Sensor
18908 AirScan-iR-comm
7
3
Operation
The AirScanTMiR has several modes of operation,
including two normal run modes, two 4/20 mA loop
check modes and five calibration modes. These will be
explained inOperation, Section C, Modes of Operation.
Modes are entered by properly activating pushbuttons
located on the circuit board, shown in Figure 4.
Sensor operation status is indicated by the blink
pattern of seven LEDs located in a vertical row on the
right side of the sensor circuit board (see Figure 4).
LED status is differentiated by color and duration/
pattern of blink(s). LED Indicators and Blink
Sequences are shown in Figure 6, followed by an
explanation of blink patterns.
A
Start-Up Procedure
Before applying power, make a final check of all wiring
for continuity, shorts, grounds, etc. It is usually best to
disconnect external alarms and other equipment from the
sensor until the initial start-up procedures are completed.
Check the power supply voltage to the sensor with a
digital volt meter set to VDC. Place the black lead on
sensor terminal GND and the red lead on +24 (see
Figure 4, Note 1). Voltage should be between 21 and 28
IMPORTANT:
The AirScanTMiR sensor is factory
calibrated and should require minimal adjustments after
installation.
CARB Compliance: To ensure continued compliance
with CARB performance guidelines, calibrate the unit
in the environment in which it will be used. Frequency
of calibration can improve accuracy; Honeywell
Analytics recommends calibration every 6 months.
Environmental factors such as temperature, humidity,
and pressure can affect accuracy. Consider these factors
when establishing a maintenance program .
Allow the sensor to operate for 12 hours with the
enclosure sealed prior to testing the sensors. This will
give the sensor time to reach thermal equilibrium to the
external and internal temperatures while in operation.
Because sensors are normally located at a distance from
the main unit, the test time required and accuracy of the
response checks will be improved if two people perform
the start-up procedures and use radio contact.
Start-Up Test:
1)
One person exposes each sensor to a small amount
of the gas that is being monitored.
VDC. If voltage is outside this range, check power supply 2) The second person stays at the control unit to
and wiring.
After power-up, ensure the LEDs below are operational
as follows (see Figure3):
•Green “Power” LED continuous ON
•Both Fault LED’s areOFF
•Green “source” LED is blinking once every
2 seconds
NOTE: Forcold/humidadverseenvironmentalconditions
the “ATMOS” LED may be turning on and off periodic-
ally. In addition, the “system” LED may be blinking or
continuous ON, also described in later sections.
determine that each sensor, when exposed to the
gas fumes, is connected to the proper input and
responds, causing appropriate alarm functions.
Figure3: Required LED Status at Start-up
LED
WITH OUTPUT
FILTERING
WITHOUT OUTPUT
FILTERING
POWER
G
SYSTEM
Y
CALIBRATE
Y
OFF
OFF
FAULT
R
OFF
OFF
mA FAULT
R
OFF
OFF
SOURCE
G
ATMOS
G
ON PERIODICALLY
ON PERIODICALLY

Manning AirScan-iR Refrigerant Sensor
18908 AirScan-iR-comm
8
3
Operation
continued
B
Pushbutton Operation,
LED Indicators,
Adjustment Pots and
Test Points
The
AirScan
TM
iR has
two
internal
pushbuttons, and
two
adjustment pots that are utilized for navigation of test
functions, calibrations, and operating modes. In addition,
apairoftestpointsisalsoprovidedthatassistinthe
connection to standard meter leads for use in the
upcoming calibration and diagnostic procedures (see
Figure 4).
Figure 4: Board Component Layout
•
“Zero” adjustment pot – adjusts output calibration
ofthe4mA nominalrestingpoint
•
“Span”adjustmentpot–adjuststhe20mA
concentration level or unit span/sensitivity.
•
PushbuttonS1– used to initiate the auto-zero
function, program the 4 mA output calibration,
and initiate the 4/20 mA loop test.
•
Pushbutton S2 – used to program the span setting.
•
Test(+) and Test(–) for connection to a DC Volt
meter(see Figure 4, Note 2).
IMPORTANT:
The pushbutton(s) must be pressed the
correct numberof times and at thecorrect rate.
•
When a multi-press sequence must be performed,
ICSP Programming Port
Serial Port
the button must be pressed rapidly and evenly,
Zero Adjust
Span Adjust
Note 1:
Checking
voltage to sensor
at +24 and GND
24
VDC
ZERO
SPAN
JP3
S1
S2
Pushbutton S1
Pushbutton S2
Draw
Chamber
Rx LED
Tx LED
JP2
lifting one’s finger completely from the actuator
foreach consecutivepress.
•
Forpressandholdactivations,one’sfingermust
always be applying a down pressure without
disruption for the specified time in order to
activate the desired mode.
•
See complete details of each operation in other
parts of the manual.
The
AirScan
TM
iR
also
has
a
group
of
LED’s
(see
Figure
5)
thatblink in specificsequences(seeFigure 6on next
Black
-Red
+
JP1
SIG
+24
GND
SHLD
POWER
SYSTEM
CALIBRATE
FAULT
mA FAULT
IR SOURCE
ATMOS
ACTIVE
page) to indicate sensor operation and programming
modes. A summary of sensor operation and
programming modes with corresponding LED blink
sequencesis shownin Figure7 onpage 10.
Note 2:
Reading
signalatTEST+
and TEST-
TEST +
TEST -
Figure 5: LED Layout
40-200
mVDC
POWER
Black
-
Red
+
Tubing to
calibration point
SYSTEM
CALIBRATE
FAULT
mA FAULT
IRSOURCE
ATMOS
ACTIVE

Manning AirScan-iR Refrigerant Sensor
18908 AirScan-iR-comm
9
3
Operation
continued
LED Indicators and Blink Sequence
Figure6: LED BlinkSequence
SEQUENCE
1 sec. 2 sec. 3 sec.
SOURCE BLINK
SLOW BLINK
MEDIUM DOUBLE BLINK
FAST BLINK
CONTINUOUS ON
Green Power LED
•
Continuous ON when power is applied
Yellow System LED
•
Continuous ON during normal filtered output run
mode – “dead band” from 4 to 4.6 mA
•
Slow blink during normal non-filtered output run
mode
•
Fast blink indicating unit lost calibration data
•
OFF during 4/20 mA loop check
Yellow Calibrate LED
•
Continuous momentary ON for auto-zero mode
activation
•
Slow blink for 4 mA output calibration mode
•
Mediumdoubleblinkindicates4/20mAloop
check .5 mA (low)
•
Fast blink for “span” calibration mode and
4/20 mA loop check 22 mA (high)
Red Fault LED (all scenarios produce a .5 mA output)
•
Continuous ON indicates a failed source, low
signal, or circuit failure
•
Slow blink indicates the power supply DC 24V
inputvoltageistoolow.
•
Medium double blink indicates sensor is outside
the operating temperature range.
•
Fastblinkindicatesthesignal drifted below4mA
and needsto be re-calibrated, onlyinnon-filtered
output run mode (no dead-band).
Red mA Fault LED attempts to output .5 mA fault signal
•
Fast blink indicates4/20mAloopfailure or load
resistance too high
Green Source LED
•
Oneblinkevery2secondsindicateswhensource
is energized and also that the source is not short
circuited.
Green ATMOS LED
•
Continuous ON indicates ATMOS circuitry is active
or adjusting the enclosure’s internal environmental
conditionsforthesensortofunctionreliably.
NOTES:
•
Ifthe SourceLEDisn’t blinking,
do not
proceed
untiltheconditioniscorrected.
•
If a Fault LED is lighted, immediately refer to
Fault IndicatorError Sequences (page 11) to
determine potential problem. Do not attempt
calibration if a Fault is indicated.
•
All status LED’s are subordinate to Fault
indicators.
•
If an LED is indicated as OFF, it must actually be
OFF for proper sensor operation.
•
IfanLEDstatusisN/A(notapplicable),thatLED
indication may vary depending on other
operational factors.

Manning AirScan-iR Refrigerant Sensor
18908 AirScan-iR-comm
10
3
Operation
continued
G
Y
R
Figure 7: LED Indicator Summary
See LED indicators and blink sequence descriptions on page 9.
= Initiated by button press
= GreenLED
= YellowLED
= RedLED
Normal RunMode 4/20 mA Loop Test Mode
NOTE1:
Dead-bandfrom 4mAto4.6mA
NOTE2:
Nodead-bandfrom 0to26mA
NOTE 3:
Environmental compensation energized for cold temperatures
NOTE1:
Erroronoutput willresult infast blink on redmAFAULTLED.
Calibration Mode
LED
ZERO FUNCTION
INITIATED
1
DURING SPAN
CALIBRATION
DURING 4 mA
OUTPUT CALIBRATION
FACTORY CALIBRATION
LOST
2
POWER
G
SYSTEM
Y
N/A
CALIBRATE
Y
N/A
FAULT
R
OFF
OFF
N/A
N/A
mA FAULT
R
OFF
OFF
OFF
N/A
SOURCE
G
N/A
N/A
N/A
N/A
ATMOS
G
N/A
N/A
N/A
N/A
NOTE 1:
Indicates that “Zero” function is initiated and pushbutton S1 can be released. Yellow Calibrate LED will be off after pushbutton is released.
NOTE 2:
Indicates unit lost the factory calibration data. Contact Manning Systems.
LED
4/20 mA LOOP TEST
(22 mA HIGH)
1
4/20mA LOOPTEST
(.5 mA LOW)
1
POWER
G
SYSTEM
Y
OFF
OFF
CALIBRATE
Y
FAULT
R
N/A
N/A
mA FAULT
R
N/A
N/A
SOURCE
G
N/A
N/A
ATMOS
G
N/A
N/A
LED
WITH OUTPUT
FILTERING
1
WITHOUT OUTPUT
FILTERING
2
POWER
G
SYSTEM
Y
CALIBRATE
Y
OFF
OFF
FAULT
R
OFF
OFF
mA FAULT
R
OFF
OFF
SOURCE
G
ATMOS
G
ON PERIODICALLY
3
ON PERIODICALLY
3

Manning AirScan-iR Refrigerant Sensor
18908 AirScan-iR-comm
11
3
Operation
continued
G
Y
R
Figure7:LEDIndicatorSummary,continued
See LED indicators and blink sequence descriptions on page 9.
Fault Indicator Error Sequences
= Initiated by button press
= GreenLED
= YellowLED
= RedLED
LED
LOST FACTORY
CALIBRATION
1
FAILED 4/20 mA
OUTPUT
2
LOW SIGNAL OR
FAILED SOURCEORCIRCUIT
POWER SUPPLY
VOLTAGE TOO LOW
OPERATING TEMPERATURE
RANGE EXCEEDED
POWER
G
SYSTEM
Y
N/A
N/A
N/A
N/A
CALIBRATE
Y
N/A
N/A
N/A
N/A
N/A
FAULT
R
N/A
N/A
mA FAULT
R
N/A
N/A
N/A
N/A
SOURCE
G
N/A
N/A
N/A
N/A
N/A
ATMOS
G
N/A
N/A
N/A
N/A
N/A
NOTE 1:
Indicates Normal Run Mode wthout output filtering where unit lost factory calibration data. Contact Manning Systems for technical support.
NOTE 2:
Indicates failed 4/20 mA output signal. Load resistance is too high.
LED
READING DRIFTED
BELOW 4mA
1
SHORTED
SOURCE
POWER
G
SYSTEM
Y
N/A
N/A
CALIBRATE
Y
N/A
N/A
FAULT
R
mA FAULT
R
N/A
N/A
SOURCE
G
N/A
OFF
ATMOS
G
N/A
N/A
NOTE 1:
Indicates the gas reading drifted below 4 mA and needs to be
re-calibrated only in non-filtered output run mode (nodead-band).

Manning AirScan-iR Refrigerant Sensor
18908 AirScan-iR-comm
12
3
Operation
continued
C
Modes of Operation
The
AirScan
TM
iR has various
modes
of
operation and
calibration:
•
Normal run mode with output filtering
•
Normal run mode without output filtering
•
4/20 mA loopcheck
•
4/20mAcalibrationtoanexternalPLCor
read-out panel
•
Neutral gas resting point or “zero” calibration
mode
•
Span calibration modes
NormalRunModes
Normal runmodewith outputfiltering
Thismode outputs asignalfrom4to 27mAwitha
“dead band” from 4 to 4.6 mA. This “dead band” masks
small environmental anomalies that could facilitate
output signal fluctuations or transients around the 4 mA
resting point when the unit is not sensing target gas.
Start:
If the “system” LED is blinking slowly, press and
holdbothS1andS2simultaneouslyfor1secondor
more until the “system” LED is continuous ON, then
release both buttons. If the “system” LED is blinking
fast, thismodecannotbe engagedand the factoryneeds
to be contacted. See the followingexample.
Normal runmodewithoutoutput filtering
This mode outputs a signal that nominally rests at 4 mA
andcanrange continuouslyfrom0to 27mA.Anysubtle
changes in sensor response will be sent to the mA loop
output. This mode is entered automatically when the
calibrationmodes are activated. Some users may wish
to see the subtle anomalies in the signal near the
nominal 4 mA restarea.
Start:
Ifthe “system” LEDis continuous ON, press and
hold both S1 and S2 simultaneously for 1 second or
more until the “system” LED is blinking slowly then
releasebothbuttons to enterthis mode. Ifthe “system”
LEDis blinkingfastthis modeis always engagedand
canonly be exited by fully calibratingthe unit.See the
following example.
LED
SEQUENCE
POWER
G
SYSTEM
Y
CALIBRATE
Y
OFF
FAULT
R
OFF
mA FAULT
R
OFF
SOURCE
G
ATMOS
G
N/A
LED
SEQUENCE
POWER
G
SYSTEM
Y
CALIBRATE
Y
OFF
FAULT
R
OFF
mA FAULT
R
OFF
SOURCE
G
ATMOS
G
N/A

Manning AirScan-iR Refrigerant Sensor
18908 AirScan-iR-comm
13
3
Operation
continued
4/20mA LoopTest
{22 mA full-scale and .5 mA fault check}
Start:
Press S1 5 times within a two to three second
period of time. The yellow “system” LED will turn off
andthe yellow“calibrate”LEDwillblinkfast.Seethe
following example. Output should be 21 to 22.5mA.
22 mA Full Scale Output Test
ToproceedtothenextstepinthemAtest,pressand
hold S1 for 1 secondor more until the yellow “calibrate”
LED is a medium double blink. See the following
example.Theoutputshouldbe between.4and.6mA.
.5mA Fault OutputTest
LED
SEQUENCE
POWER
G
SYSTEM
Y
OFF
CALIBRATE
Y
FAULT
R
N/A
mA FAULT
R
N/A
SOURCE
G
N/A
ATMOS
G
N/A
Exit:
Press and hold S1 for 1 second or more until the
yellow “system” LED resumes the state beforethe mA
test was initiated and theyellow “calibrate” LED turns
off.
LED
SEQUENCE
POWER
G
SYSTEM
Y
OFF
CALIBRATE
Y
FAULT
R
N/A
mA FAULT
R
N/A
SOURCE
G
N/A
ATMOS
G
N/A

Manning AirScan-iR Refrigerant Sensor
18908 AirScan-iR-comm
14
3
Operation
continued
Calibration/Programming Modes:
Refer to
Calibration, Section D
before proceeding.
Auto “ZERO” Program Function
Start:
PressandholdS1for1secondoruntiltheyellow
“calibrate”LEDturnscontinuousON.ReleaseS1andthe
yellow “calibrate” LED will turn off. This indicates the unit
“zero” is now programmed to a neutral or 4 mA resting
state for
0 ppm of target gas.
LED
SEQUENCE
POWER
G
SYSTEM
Y
N/A
CALIBRATE
Y
FAULT
R
OFF
mA FAULT
R
OFF
SOURCE
G
N/A
ATMOS
G
N/A
“Span” Calibration/Programming Mode
Start:
Press and hold S2 for 1 second or until the yellow
“system” LED blinks slowly and the yellow “calibrate”
LED blinks fast. Once in this mode the “span” pot can be
adjusted to determine the 20 mA full-scale concentration.
Exit:
To program the “span” setting and exit this mode,
press and hold S2 for 1 second or until the yellow
“system” LEDresumesthe state beforethe calibration
mode was initiated and the yellow “calibrate” LED turns
off.
4 mA Output Calibration/Programming Mode
Start:
Press and hold S1 for 7 seconds or until the yellow
“system” LED turns continuous ON and the yellow
“calibrate LED blinks slowly. See the following example.
Once in this mode the “zero” pot can be adjusted to
calibrate the 4 mA output to a PLC, SCADA system,
panel, etc.
LED
SEQUENCE
POWER
G
SYSTEM
Y
CALIBRATE
Y
FAULT
R
N/A
mA FAULT
R
OFF
SOURCE
G
N/A
ATMOS
G
N/A
Exit:
Toprogramthe4mAcalibrationpointandexit
thismode,pressandholdS1for1secondoruntilthe
yellow “system” LED resumes the state before the
calibration mode was initiated and the yellow “calibrate”
LED turnsoff.
LED
SEQUENCE
POWER
G
SYSTEM
Y
CALIBRATE
Y
FAULT
R
OFF
mA FAULT
R
OFF
SOURCE
G
N/A
ATMOS
G
N/A

Manning AirScan-iR Refrigerant Sensor
18908 AirScan-iR-comm
15
3
Operation
continued
JP3
S1
ZERO
D
Calibration
Before calibrating the unit, ensure the startup procedure
was followed and unit was powered on for a minimum
of 12 hours (with the enclosure door closed) in the
operating environment.
IMPORTANT NOTE:
For environments where the ambient
temperature is less than 10° F, during the calibration
procedure, the door must be closed as far as possible.
This will ensure the sensor temperature will not drop
belowtheminimumoperatingtemperaturewhichcould
adversely affect the programmed calibration parameters.
There are only two adjustment pots and two pushbuttons
on the main board that are used for programming the
calibration parameters. See
Section B, Pushbutton
Operation, LED Indicators, Adjustment Pots and Test
Points.
UseSectionBtofamiliarizeyourselfwiththe
pushbuttonsS1,S2,adjustmentpots“zero”,“span”,
Test(+), Test(–) and their locations on the main board
(see Figure8).
Figure 8: Board Component Layout
In addition, the LED indicators and blink pattern
meaningsarealsosummarizedinthissection.The
calibration procedure will require use and knowledge of
the following tools within the sensor:
•
“Zero” adjustment pot – adjusts output calibration
ofthe4mAnominalrestingpoint
•
“Span” adjustment pot – adjusts the 20mA
concentration level or unit span/sensitivity
•
Pushbutton S1 – used to initiate the auto-zero
function and program the 4 mA outputcalibration
•
Pushbutton S2 – used to program the spansetting
Inaddition,thereare fourLED’susedinthecalibration
procedure. Yellow “system” and “calibrate”, and red
“fault” and “mAfault”LED’s locatedonthemainboard
areutilizedasstatusindicatorsduring thecalibration
procedure and as diagnostic and trouble indicators.
Non-calibrated Sensor or Loss of Factory Calibration
IMPORTANT:
Uponpowerup,iftheyellow“system”
LEDisshowingafastblinkpattern,theunithasn’tbeen
calibrated yet or has lost the factory calibration and
ICSP ProgrammingPort
Serial Port
requires a
full
calibrationbeforeit can reliably read the
Zero Adjust
Span Adjust
Pushbutton S1
Pushbutton S2
Rx LED
Tx LED
target gas. See the following example. Should thisoccur,
please contact Manning Systems for assistance!
JP2
SPAN S2
Draw
Chamber
POWER
SYSTEM
CALIBRATE
JP1
TEST +
TEST -
SIG
+24
GND
SHLD
FAULT
mA FAULT
IR SOURCE
ATMOS
ACTIVE
Tubing to
calibration point
LED
SEQUENCE
POWER
G
SYSTEM
Y
CALIBRATE
Y
N/A
FAULT
R
N/A
mA FAULT
R
N/A
SOURCE
G
N/A
ATMOS
G
N/A

Manning AirScan-iR Refrigerant Sensor
18908 AirScan-iR-comm
16
3
Operation
continued
Before continuing with the calibration procedure,
determine which of the two Normal output modes is
best for the control scheme. Filtered output holds a
stable4mAsignal withinadead-bandrange whilethe
non-filtered output allows the signal to be seen without
any output limitations.
After this output mode choice is made, continue
through Steps 1–3of the Calibration Procedure. As a
firststep,the4mAoutputismatchedtothesignal
input device being used as a controlpanel. Afterthis is
accomplished, Step 2 (Zero Calibration) and Step 3
(SpanCalibration)canbecompletedinthatorder.
Filtered Output Mode
Each unit is equipped with a filtered output or “dead
band” output mode which locks the output at 4 mA for
signal readings of 4 to 4.6 mA. This masks surrounding
abruptadverseenvironmentaltransients thatwould
cause asmallshort-termanomalyonthe 4mA resting
point fora near0 ppm reading ofthe target gas. Inthis
mode,theyellow“system”LEDwillbeON.Seethe
following example.
Non-Filtered Output Mode (no signal deadband)
Start:
Press and hold both the “zero” (S1) and “span”
(S2)buttonssimultaneouslyforonesecondoruntil the
“system” LED begins to blink slowly. See example
below.
Thismodewillallowanyanomaliestobetransmitted
from 0 to 27 mA on the output. This mode is also used
in the upcoming Simple Zero Test procedure.
LED
SEQUENCE
POWER
G
SYSTEM
Y
CALIBRATE
Y
OFF
FAULT
R
OFF
mA FAULT
R
OFF
SOURCE
G
ATMOS
G
N/A
Exit:
To revert back to “dead band” mode, repeat the
same button press procedure above. This button press
sequence will toggle between modes (filtered to non-
filtered).
LED
SEQUENCE
POWER
G
SYSTEM
Y
CALIBRATE
Y
OFF
FAULT
R
OFF
mA FAULT
R
OFF
SOURCE
G
ATMOS
G
N/A

Manning AirScan-iR Refrigerant Sensor
18908 AirScan-iR-comm
17
3
Operation
continued
STEP 1
4-20 mA Output Calibration
This procedure calibratesthe 4/20mAoutput to matcha
PLCinputconverterorvariousdevicesthatinterpretthe
4/20 mA signal output to ensure the 4mAoutput rests at
a true 4 mA even with minor mismatches in load
resistance, long feed wiring, or adverse environmental
conditions.
Start:
Set meter to mV DC and place meter leads on
Test(+) and Test(–) respectively (see Figure 9).
•
Press and hold the “zero” button (S1) for 5 seconds
oruntilthe “calibrate”LEDis blinkingslowly and
the“system”LEDiscontinuousON.Makesurethe
“mA Fault” LED is OFF.
•
Adjustthezeropotentiometeruntiltheoutput
reads 3.99 to 4.01 mA (39.9 to 40.1 mV). This sets
the 4 mA resting point. Make small adjustments and
wait for the output to change because adjustment
response is delayed between source pulses.
4mAoutputprogrammingcalibrationmode
LED
SEQUENCE
POWER
G
SYSTEM
Y
CALIBRATE
Y
FAULT
R
N/A
mA FAULT
R
OFF
SOURCE
G
N/A
ATMOS
G
N/A
Exit:
Press and hold the “zero” button (S1) for one
secondormoreuntilthe“calibrate”LEDturnsoff.
The“system”LEDwillresumethepreviousstate,either
“filtered” or “non-filtered” output mode. This indicates the
parameters are now programmed into memory.
STEP 2
Zero Calibration
This procedure sets the internal reference that is
indicativeof0ppmoftargetgas.
ItMUSTbeperformed
before proceeding or every other setting will be offset
and inaccurate.
The “zero” can be initiated at any time as
long as a neutral gas is flowing through the calibration
port or the surrounding air is known to be FREE of any
target gasdownto1ppm.
Start:
Apply
pure nitrogen
(N
2
) into the calibration port at
a rate of .6 liter/min. for at least 3 minutes (OR until out-
putsignaliswithin±.02mAofsignaldeviation/change).
•
Press and hold the “zero” button (S1) for approxi-
mately1secondoruntiltheyellow“calibrate”LED
is continuous ON.
•
When yellow calibration LED is continuous ON,
release the “zero” button. The “calibrate” LED will
turn off and the unit will be zeroed. See example
below.
“Zero”programmingcalibration mode
LED
SEQUENCE
POWER
G
SYSTEM
Y
N/A
CALIBRATE
Y
FAULT
R
OFF
mA FAULT
R
OFF
SOURCE
G
N/A
ATMOS
G
N/A
Exit:
System will automatically resume previous mode,
either“normal”or“no dead band” mode.This indicates
the parameters are now programmed into memory.
Placemulti-meterleadsonTest(+)andTest(–)and
ensuretheoutputissteadilyresting between3.9to
4.1 mA (see Figure 9 on next page). If this isn’t the
case, initiatetheauto“zero”procedureonceagain.

Manning AirScan-iR Refrigerant Sensor
18908 AirScan-iR-comm
18
3
Operation
continued
JP3
S1
ZERO
40-200
mVDC
Black Red
-
+
Figure 9: Board Component Layout
ICSP Programming Port
Serial Port
Pressandholdthe“span”button(S2)for1secondor
more until the yellow “calibrate” LED blinks fast andthe
Zero Adjust
Span Adjust
Pushbutton S1
Pushbutton S2
Rx LED
Tx LED
yellow “system” LED is blinking slowly. See the
following example.
JP2
Note 1:
Checking
voltage to sensor
at +24 and GND
VDC
SPAN S2
Black
-
Red
+
Draw
Chamber
POWER
SYSTEM
CALIBRATE
Note 2:
Reading
signal at TEST+
and TEST-
STEP 3
Span Calibration
JP1
TEST +
TEST -
SIG
+24
GND
SHLD
FAULT
mA FAULT
IR SOURCE
ATMOS
ACTIVE
Tubing to
calibration point
Ensure the output rests between3.9and 4.1 mA (39.0
to 41.0 mV). If this is not the case, perform the “zero”
procedure again.
Once the output is within the required range with
nitrogen flowing, apply
full-scale
target gas into the
calibrationport at a rate of .6 liters/min for 3 minutes
immediately following the nitrogen flow.
If the signal is 26 mA or greater, adjust the “span”
potentiometer counter-clockwise until the signal is near
This procedure sets the “span” or concentration level
that would depict a 20 mA reading for full-scale target
gasonthe4/20mAoutput.Thelowerthetargetgas
concentrationis fora span of 20mA, the more sensitive
orresponsivetheunitwould be tolower ppmreadings.
NOTE:
Thisprocedureshouldonlybeperformedifthe
zero and4/20mAproceduresaresuccessfullycompleted.
Start:
SetmetertomVDC, placemeterleadson
Test(+) and Test(–) respectively (see Figure 9).
Apply
pure nitrogen
(N
2
) into the calibration port at
arate of.6 Liter/min. forat least 3minutes (OR until
output signal has stabilized to within ± .02 mA of signal
deviation/change). If N
2
is currently flowing from previous
“zero” calibration, disregard the additional flow time.
20mA.
Becausethere is a slight delay inpotentiometer
movement, make small adjustments and wait for the
output to change because adjustment response is
delayed between source pulses.
Wait until theoutput signal hasstabilizedto within±.02
mA of signal deviation/change. Adjust the “span”
potentiometer again until the output reads around 20 mA.
Exit:
Press and hold the “span” button (S2) for one
second or more until the yellow “calibrate” LED turns
off. The yellow “system” LED will resume the previous
state, either “filtered” or “non-filtered” output mode.
This indicates the parameters are now programmed into
memory.
24
LED
SEQUENCE
POWER
G
SYSTEM
Y
CALIBRATE
Y
FAULT
R
OFF
mA FAULT
R
OFF
SOURCE
G
N/A
ATMOS
G
N/A

Manning AirScan-iR Refrigerant Sensor
18908 AirScan-iR-comm
19
3
Operation
continued
E
Diagnostic Procedures
Simple ZeroTest
Thistestwillensuretheunitiscalibratedforatrue
“zero” and duly represents an absence of target gas in
this condition.
Start:
Set meter to mV DC, place meter leads on
Test(+) and Test(–) respectively (see Figure 9).
•
Apply
pure nitrogen
(N
2
) into the calibration port
atarateof.6Liter/min.foratleast3minutes.
Check the status of the yellow “system” LED.
IfthisLEDiscontinuousON,placetheunitin
non-filtered output run mode by pressing both the
“zero” (S1) and “span” (S2) buttons
simultaneouslyfor1secondoruntilthe “system”
LED begins to blink slowly. See example below.
•
Wait until output signal has stabilized to within
±.02mAofsignal deviation/change.
•
Outputshouldreadbetween3.9and4.1mA
(39.0 to 41.0 mV).
If this is not the case, proceed to the next step.
•
Follow the “zero”procedure above to re-zero the
unit
•
Follow the“simplezerotest”procedure toensure
theunitisrestingattheoptimum4mApoint.
Simple “Zero” test – NO “Dead-band” mode 0 to 26 mA
Exit:
Pressandholdboththe“zero”(S1)and“span”
(S2)buttons simultaneouslyfor1secondormoreuntil
“system”LEDis continuousON.Unitshouldbe ready
for long-term operation.
4/20 mA Output Loop Integrity Check
22 mA High Signal Test
STEP 1
Start:
Set meter to mV DC, place meter leads on
Test(+) and Test(–) respectively (see Figure 9).
•
Press the “zero” (S1) button 5 times. The yellow
“calibrate” LED will blink fast and the yellow
“system” LED will turn off. The output should be
21 to 22.5 mA (210 to 225 mV).
Ifaproblemexistsontheoutputsignalline,orthe
output load is not within the specified range, the “mA
fault”LEDwill blinkeitherbeforeoruponactivationof
this test. In some cases the 22 mA high signal output
will cause incorrect output load resistance values to
surface because of the demand on high resistances to
produce high currents.
Low power supply voltages can also be something to
investigateifthiserrorsurfacesonlywhenthe22mA
high test is initiated.
During 4/20 mA loop test (22 mA high)
LED
SEQUENCE
POWER
G
SYSTEM
Y
OFF
CALIBRATE
Y
FAULT
R
N/A
mA FAULT
R
N/A
SOURCE
G
N/A
ATMOS
G
N/A
LED
SEQUENCE
POWER
G
SYSTEM
Y
CALIBRATE
Y
OFF
FAULT
R
OFF
mA FAULT
R
OFF
SOURCE
G
ATMOS
G
N/A

Manning AirScan-iR Refrigerant Sensor
18908 AirScan-iR-comm
20
3
Operation
continued
During 4/20 mA loop test (22 mA high) w/ Error on output
LED
SEQUENCE
POWER
G
SYSTEM
Y
OFF
CALIBRATE
Y
FAULT
R
N/A
mA FAULT
R
SOURCE
G
N/A
ATMOS
G
N/A
.5 mA Low Signal Output Test for
Fault Conditions
NOTE:
The unit must be in the 4/20 mA loop (22 mA
high) test to proceed with this test.
STEP 2
Start:
Press and hold the “zero” (S1) button for at least
one second or until the yellow “calibrate” LED shows
medium double blink. The yellow “system” LED will
remain off and the output should change to .4 to .6 mA
(4to6mV).
Ifaproblemexistsontheoutputsignalline,orthe
output load is not within the specified range, the “mA
fault”LEDwill blinkeitherbeforeoruponactivationof
this test.
If an error surfaces during this test only, the possibility
ofcross-talkcanexist onthe signalline. This is caused
by resistive shorts to power or other voltage sources
thatcanraisethe.5mA target currentontheline.
Moistureintheconnectorcancausestrayvoltageto
migrate fromthe 24VDC pinover to the 4/20 mAsignal
line. Check connectors or refer to the troubleshooting
sectionorerrorcode analysis sectionforassistance.
During 4/20 mA loop test (.5 mA low)
LED
SEQUENCE
POWER
G
SYSTEM
Y
OFF
CALIBRATE
Y
FAULT
R
N/A
mA FAULT
R
N/A
SOURCE
G
N/A
ATMOS
G
N/A
During 4/20 mA loop test (.5 mA low) with Error
LED
SEQUENCE
POWER
G
SYSTEM
Y
OFF
CALIBRATE
Y
FAULT
R
N/A
mA FAULT
R
SOURCE
G
N/A
ATMOS
G
N/A
STEP 3
Exit:
Pressandholdthe“zero”(S1)buttonforatleast
one second or until the yellow“calibrate LED turns off.
The yellow “system” LED will resume the previous state,
either “filtered” or “non-filtered” output mode.
NOTE:
Inaddition totestproceduresinitiatedmanually,
every 2
seconds
SensorCheck
TM
technology monitors several
performance
parameters
of
the
AirScan
TM
iR.
A
notification
of.5mAontheoutputsignalistransmittedif anyof
theseparametersisnotmet.
Table of contents
Other Manning Accessories manuals
Popular Accessories manuals by other brands
MTS Sensors
MTS Sensors Level Plus M Series Replacement guide

Byron
Byron BY103 Installation and operation instruction
turck
turck RU600U Series Instructions for use

Image Sensing Systems
Image Sensing Systems RTMS G4 Installation, operation, maintenance, & troubleshooting

Kogan
Kogan SMARTERHOME KARMDF200BA user guide
Omron
Omron ZFX-C10 COMMUNICATION user manual
