March Networks ME6 IR Dome User manual

March Networks
ME6 IR Dome
Configuration Guide
Software Version 1.1.5

© 2021 March Networks Corporation. All Rights Reserved.
Information in this document is subject to change without notice. MARCH NETWORKS,
March Networks Command, March Networks Searchlight, March Networks RideSafe, and
the MARCH NETWORKS logo are trademarks of March Networks Corporation. All other
trademarks are the property of their respective owners.
North America.................................+1 800 563 5564
Latin America..................................+5255 5259 9511
Europe.............................................+39 0362 17935
Asia..................................................+65 6818 0963
Australia and New Zealand............+61 1300 089 419
Middle East and Africa...................+971 4 399 5525
www.marchnetworks.com
Notice of Rights
The software described in this document is furnished under a license agreement or
nondisclosure agreement. The software may be used or copied only in accordance with
the terms of those agreements. The contents of this manual and accompanying software
are protected by copyright. No part of this publication may be reproduced, stored in a
retrieval system, or transmitted, in any form or by any means, electronic, mechanical,
recording, or otherwise without the prior written permission of March Networks
Corporation.
Part Number
38311 Rev6.0 October 2021

ME6 IR Dome Configuration Guide 3
Contents
Chapter 1: Welcome to the Configuration Guide ......................5
Before You Begin ................................................................................................................... 6
Understanding the Product Suite ......................................................................................... 6
What does this Guide Provide?............................................................................................. 7
Other Available Publications .............................................................................................. 7
What's Next ............................................................................................................................ 7
Chapter 2: Getting Started ..........................................................8
Reviewing the System Requirements................................................................................... 9
Detecting the ME6 IR Dome on the Network .................................................................... 10
Accessing the Web Setup ................................................................................................... 12
Viewing Live Video ..............................................................................................................15
Upgrading the ME6 IR Dome............................................................................................... 18
Chapter 3: Configuring System Settings ..................................20
Setting the Interface Language .......................................................................................... 21
Changing the Administrator Password............................................................................... 21
Viewing the System Log...................................................................................................... 23
Accessing the System Configuration Page ........................................................................ 24
Setting the Camera’s Date and Time.................................................................................. 25
Configuring HTTPS Connections ........................................................................................ 27
Configuring the 802.1x Protocol......................................................................................... 31
Configuring the Camera’s Network Settings ..................................................................... 33
Managing the Camera’s Bandwidth.................................................................................... 36
Configuring the SNMP Protocol.......................................................................................... 37
Setting the Default Location for Saved Media .................................................................. 38
Reverting the Configuration to Factory Defaults .............................................................. 39
Upgrading the ME6 IR Dome............................................................................................... 40
Exporting and Importing Configuration Settings ............................................................. 41

ME6 IR Dome Configuration Guide 4
Contents
Chapter 4: Configuring Encoding Profiles and Audio .............43
Configuring the Encoding Profiles ......................................................................................44
Mirroring and Rotating the Image.......................................................................................47
Configuring Superimposed Text..........................................................................................48
Configuring a Region of Interest on Secondary Streams..................................................51
Adjusting the Compression on Selected Regions..............................................................52
Configuring Video Streaming to the Web Setup ...............................................................54
Setting Privacy Masks...........................................................................................................55
Configuring Bi-Directional Audio Channels .......................................................................56
Chapter 5: Configuring the Camera’s Sensor...........................58
Configuring the Camera’s Sensor........................................................................................59
Saving Different Sets of Sensor Configurations.................................................................65
Chapter 6: Configuring Local Recording..................................67
Managing the microSDXC Card ...........................................................................................68
Configuring Local Recording...............................................................................................70
Exporting Video Evidence and Static Images....................................................................72
Chapter 7: Creating Schedules..................................................74
Chapter 8: Configuring Alarms .................................................76
Configuring Input Alarms and Output Switches ................................................................77
Configuring Motion Detection Alarms ................................................................................79
Configuring the Anti-Tampering Alarm ..............................................................................82

ME6 IR Dome Configuration Guide 5
Chapter 1
Welcome to the Configuration Guide
The ME6 IR Dome camera from March Networks® is a ruggedized vandal-resistant dome
camera that combines high-definition megapixel video with powerful High Dynamic
Range (WDR) and IR illumination for excellent image quality in all lighting conditions.
The camera features a set of powerful video analytics: tripwire, intrusion detection,
loitering detection, and detection of suspicious objects and vehicles. Video analytics, also
referred to as automated video content analysis, enable organizations to enhance
security in both public and private spaces by detecting perimeter or area breaches,
unattended objects, and atypical activity more rapidly and consistently. The software
detects camera tampering in real time and also promotes more proactive system
maintenance by alerting staff to camera obstructions or changes in camera positioning
that may otherwise go unnoticed.
This guide outlines the basic configuration and maintenance activities that administrators
can perform to locate IP devices on the network, configure the camera sensor, configure
evidence storage and recording, and customize recording schedules.
Important Note: This guide does not cover the March Networks ME6 Video Analytics
configuration and usage. For information about configuring the analytics, see the ME6
Video Analytics User Guide, available for download from the March Networks official
website and the Partner Portal.

ME6 IR Dome Configuration Guide 6
Before You Begin
Before You Begin
Before you begin, you must properly install the camera. For more information, see the
ME6 IR Dome Installation Guide, available for download from the March Networks
corporate website and the Partner Portal.
Understanding the Product Suite
ME6 IR Dome can be used and configured with the following software applications.
March Networks Software
Component Description
Command Config A standalone application that allows you to configure
and manage servers and recorders.
Command Client A standalone application that allows you to access live
and recorded video streams from recorders and servers.
Note: For cameras and encoders, Command Client is a
browser-based interface hosted on the device
Command Recording
Software & Command Lite
The Command Recording Software (CRS) and its free
version Command Lite, support the recording, storage,
retrieval, and management of video evidence. Evidence
is streamed to the CRS by IP cameras, encoders, and
NVRs using a network connection.
Command Enterprise A management server that monitors devices from a
central location, allowing administrators to manage user
accounts system-wide, apply system-wide configuration
updates, monitor the system health, and centrally
manage firmware updates for connected devices.
Searchlight for Retail &
Searchlight for Banking
A Command-powered application that allows integrating
transaction data from ATM, teller workstations and POS
terminals with the relevant video captured by cameras
and recorded by March Networks NVRs and CRSs. The
software allows you to create custom rules to
proactively warn operators about fraud, create
customized reports and charts, compare analytics data
to transaction data, and manage alarms.
Administrator Console A standalone application that allows you to configure
and manage 8000 Series, 9000 Series, and RideSafe
recorders.
Discovery Browser A utility that allows you to detect March Networks
devices on the network, modify their network
configurations, and upgrade their firmware.

ME6 IR Dome Configuration Guide 7
What does this Guide Provide?
What does this Guide Provide?
This guide outlines the configuration, maintenance, and administration activities that
administrators can perform to set up their ME6 IR Dome cameras.
This guide is intended for system administrators and operators.
Other Available Publications
Additional March Networks hardware and software publications are available in PDF
format for download from the March Networks corporate website and the Partner Portal.
What's Next
You can perform the following configurations on your ME6 IR Dome camera:
• “Getting Started” on page 8
• “Configuring System Settings” on page 20
• “Configuring Encoding Profiles and Audio” on page 43
• “Configuring the Camera’s Sensor” on page 58
• “Configuring Local Recording” on page 67
• “Creating Schedules” on page 74
• “Configuring Alarms” on page 76

ME6 IR Dome Configuration Guide 8
Chapter 2
Getting Started
This chapter explains how to detect the ME6 IR Dome on the network and how to
configure your Microsoft Internet Explorer browser to access the Web Setup interface.
This chapter contains the following topics:
• “Reviewing the System Requirements” on page 9
• “Detecting the ME6 IR Dome on the Network” on page 10
• “Accessing the Web Setup” on page 12
• “Viewing Live Video” on page 15
• “Upgrading the ME6 IR Dome” on page 18

ME6 IR Dome Configuration Guide 9
Reviewing the System Requirements
Reviewing the System Requirements
Ensure the computer from which you will access your ME6 IR Dome meets the minimum
recommended requirements. For information about the updated system requirements,
consult the latest Release Notes, available from the March Networks Partner Portal.
Web Setup
Requirements Description
Operating system (OS)
Windows 8, Windows 8.1, and Windows 10
Note: To properly view live video from the camera in the
Web-Setup interface, it is required to download and
install the latest security updates for .NET Framework
3.5 and 4.7.2 for your OS.
Processor (CPU) Intel i3 or equivalent (minimum)
Memory 2GB (minimum); 4GB (recommended)
HDD Space 50 MB
Network interface Gigabit Ethernet
Video
Intel HD 4000 video card (minimum) or an equivalent
video card compatible with Microsoft DirectX 11 and
Direct3D
Web Browser
Microsoft Internet Explorer (9 ore later), Safari, Google
Chrome, Microsoft Edge, Mozilla Firefox, or Chromium-
based browsers.
Note: The Sensor and Encoder pages display video at
high resolution with H.264 encoding only with Internet
Explorer 9 (or later) and it is recommended that you use
this browser. To view high resolution video on the
Sensor and Encoder pages with other browsers, you
must enable a secondary stream with MJPEG encoding.

ME6 IR Dome Configuration Guide 10
Detecting the ME6 IR Dome on the Network
Discovery Browser
Detecting the ME6 IR Dome on the Network
After you install the ME6 IR Dome and connect it to the network for the first time, the
device automatically attempts to obtain an IP address using the DHCP service. If the
DHCP service is not available on the network, the camera switches to a link-local IP
address, dynamically assigned by the internal protocol in the range 169.254.XXX.XXX.
You must use the Discovery Browser tool to change this IP address and switch it to a
valid static IP in your subnet.
Requirements Description
Operating system (OS)
Windows 8, Windows 8.1, and Windows 10
Note: 64-bit Operating System and a minimum of 4GB of
memory are required for smooth reverse playback via
Command Client and Command Player.
Software
• For Windows 8.1 users, it is required to download
and install the following updates from the Microsoft
website. The updates must also be applied in the
following order:
1- KB2919442
2- KB2919355
• Microsoft .NET Framework 4.5.2 and Visual C++ 2015
Redistributable required
Note: If .NET Framework 4.5.2 and Microsoft Visual
C++ 2015 Redistributable are not installed on the
Client PC, the Command Client and the Command
Player .EXE installers automatically trigger the
installation of the components (an internet
connection is required). To install Command Client
and Command Player from .MSI installers, or to use
the Command Player Portable application, (if not
present) it is required to manually install the two
components from the Command Software DVD or
from the Microsoft official website. For the .NET and
Visual C++ system requirements, please visit the
Microsoft official website.
Processor (CPU) Intel i3 or equivalent (minimum)
Memory 2GB (minimum); 4GB (recommended)
HDD Space 200 MB (Edge Devices version); 1 GB (Administrator
Console)
Network interface Gigabit Ethernet
Video Intel HD video card or equivalent (minimum)

ME6 IR Dome Configuration Guide 11
Detecting the ME6 IR Dome on the Network
The Discovery Browser (Edge Devices version) tool, available for download from the
March Networks Partner Portal and official website, is a user-friendly Network Discovery
Utility that allows you to configure the network settings of each March Networks device
on the network. It also allows you to upgrade the camera’s firmware. For more
information about the tool’s installation and usage, consult the Discovery Browser User
Guide, available for download from the March Networks Partner Portal and official
website.
Important Notes: You must upgrade the Discovery Browser to version 4.5 (or higher) to
discover ME6 cameras.
You can change the assigned link-local IP address in the 169.254.XXX.XXX range and
switch it to a valid static IP using the following procedure.
To switch the camera to a valid static IP address
1 Launch the Discovery Browser tool.
2 Select your ME6 IR Dome camera with the generic IP address.
The Change Device Password dialog box appears.
3 Click Cancel, as it is not possible to change the password when the camera has an IP
address in the 169.254.XXX.XXX range.
4 Enter a static IP address in the IP Address field.
Note: The Discovery Browser notifies you if a static IP address is already in use by
another discovered device by changing the IP address field color to red, and by
highlighting the conflicting devices in the list.
5 Enter the subnet mask in the Netmask field.
6 Enter the IP address of the network gateway in the Gateway field.
7 Enter the IP addresses of the primary and secondary DNS servers in the DNS fields.
8 Click the
Save All
button on the main toolbar to save and apply changes.
The IP address for the camera is changed.
9 You can now change the password by clicking the button.
ME6 IR Dome Configuration Guide 12
Accessing the Web Setup
Accessing the Web Setup
You can access the Web Setup page from the following browsers: Microsoft Internet
Explore, Google Chrome, and Apple Safari. This section explains how to perform the
preliminary steps required to connect to the configuration interface.
Notes:
• The Sensor and Encoder pages display video at high resolution only with Internet
Explorer 9 (or later) and it is recommended that you use this browser. To view high
resolution video on the Sensor and Encoder pages with other browsers, you must
enable a secondary stream with MJPEG encoding.
• To properly view live video from the camera in the Web Setup page, it is required to
download and install the latest security updates for .NET Framework 3.5 and 4.7.2 for
your Windows OS.
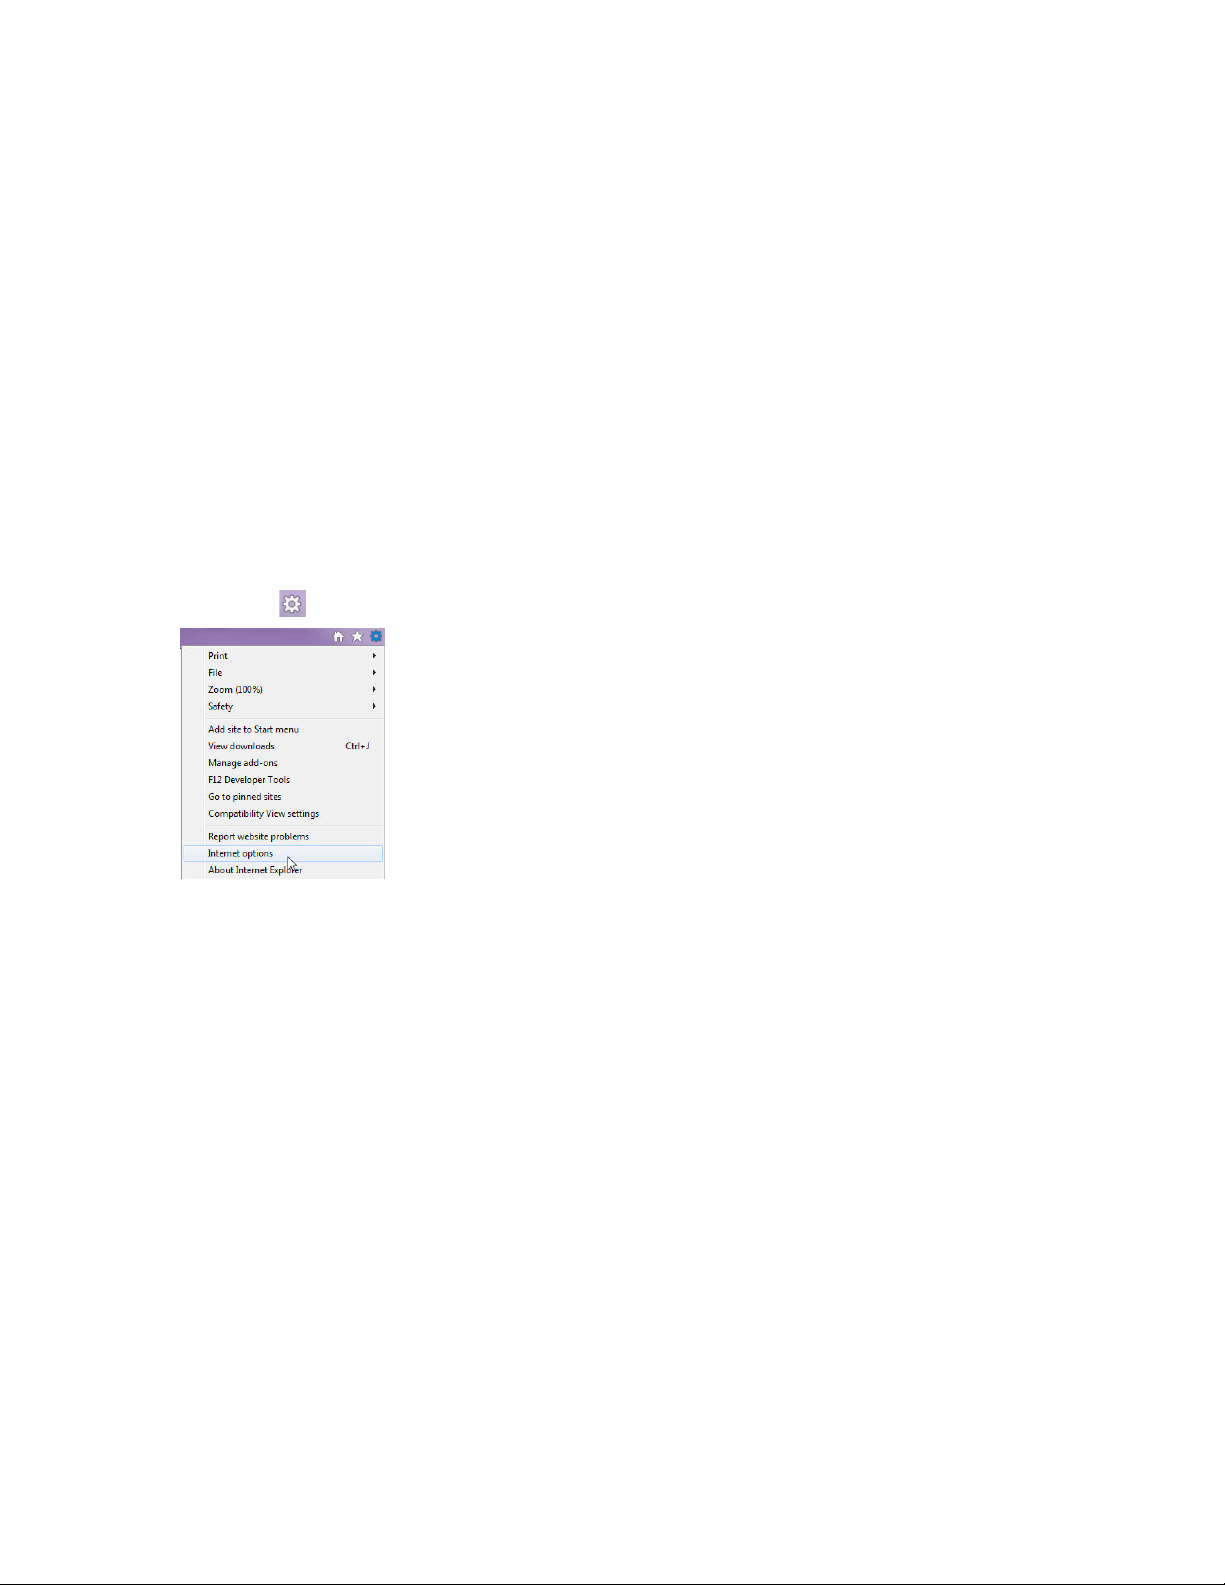
To set up Internet Explorer for the connection to the camera
1 Launch the Internet Explorer browser.
2 Click the icon, and select Internet Options.
The Internet Options dialog box appears.
3 Click the Security tab.
4 Click the Internet icon.

ME6 IR Dome Configuration Guide 13
Accessing the Web Setup
5 Click Custom Level.
The Security Settings - Internet Zone dialog box appears.
6 Set all ActiveX settings (apart from the two settings about unsigned controls and
scripts not marked as safe) to Enable or Prompt.
7 Click Ok to close the dialog box.
8 Click Ok to save and apply the changes.
To access the Web Setup interface
1 To access the Web Setup interface type the camera’s IP address in the browser’s
address bar.
If you changed the password using the Discovery Browser tool (see "Detecting the
ME6 IR Dome on the Network" on page 10), the home page appears. If you did not
change the password using the Discovery Browser tool, the Password Change page
appears.
Notes:
• You can also log on using the HTTPS certificate (https://<camera’s IP address>).
For more information about installing certificates, see “Configuring HTTPS
Connections” on page 27.
ME6 IR Dome Configuration Guide 14
Accessing the Web Setup
• You must first set a valid IP address (static or dynamic) before successfully
changing the password (see "Detecting the ME6 IR Dome on the Network" on
page 10).
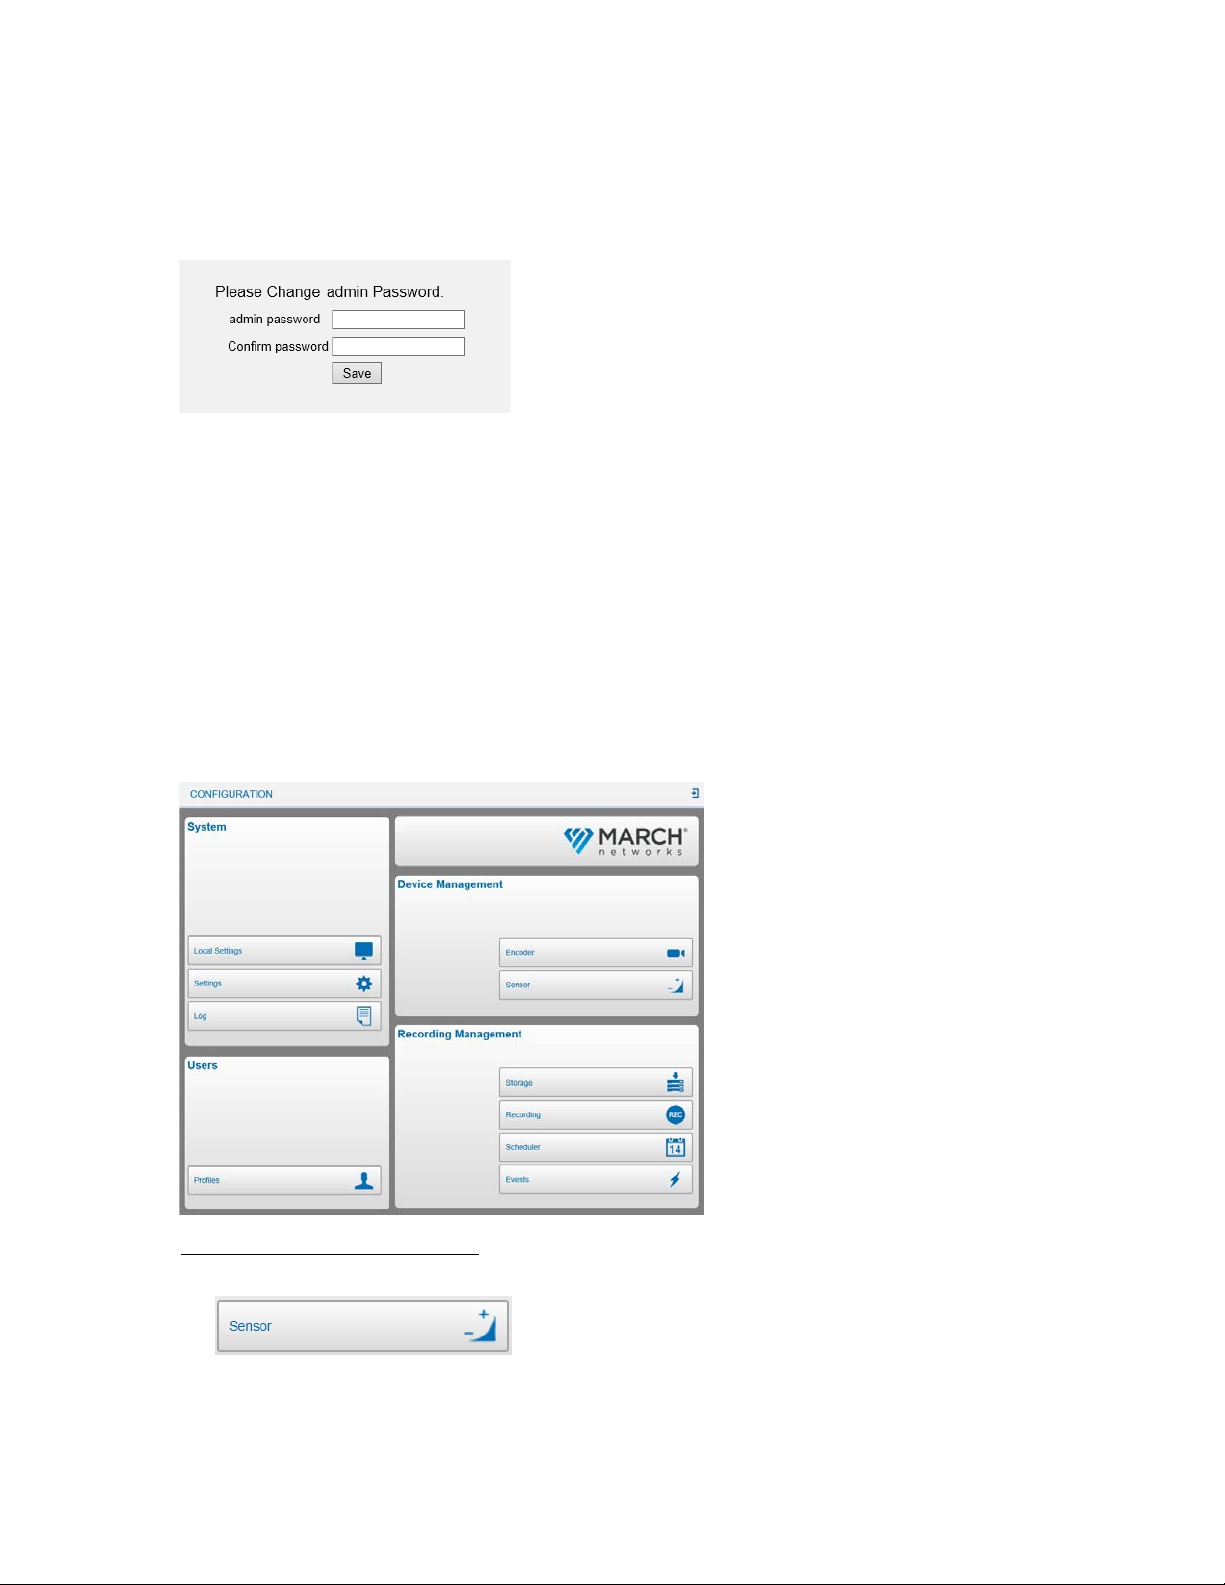
2 In the Admin Password field, enter a new password.
Note: It is strongly recommended that you use a strong password (min. 8 characters
long, with the use of lower case and upper case letters, numbers, and special
symbols).
3 In the Confirm Password field, enter the new password a second time.
4 Click Save to save and apply the changes.
The password for the admin account is changed and the camera restarts.
Note: After the first login, you can change the password from the User Profiles page
(see "Changing the Administrator Password" on page 22).
5 When the camera is restarted, reload the login page. Ensure that the User name is
admin and enter the new Password.
The Web Setup home page appears.
6 (Internet Explorer user only) To install the ActiveX control:
a Under Device Management, click Sensor.
A notification bar appears on the bottom of the screen.

ME6 IR Dome Configuration Guide 15
Viewing Live Video
b On the notification bar click Install.
The login panel appears.
c Ensure that the User name is admin and enter the Password.
A security warning dialog box appears.
d Click Install to enable the ActiveX control and download the Viewer software on
the system.
e After the control installation has completed, click Finish.
The Web Setup refreshes and the login panel appears a second time.
f Ensure that the User name is admin and enter the Password.
The Web Setup home page appears.
7 Click Sensor.
Live video appears on the Sensor Settings page.
Important Note: The Sensor and Encoder pages display video at high resolution only
with Internet Explorer 9 (or later) and it is recommended that you use this browser.
To view high resolution video on the Sensor and Encoder pages with other browsers,
you must enable a secondary stream with MJPEG encoding.
Viewing Live Video
The Sensor Settings page allows you to view the camera’s live video, adjust the zoom
and focus levels, activate the talk channel, take a snapshot of the current scene, and start
instant recording.
Select your configuration:
• “To view live video” on page 16
• “To adjust the zoom and focus levels” on page 17

ME6 IR Dome Configuration Guide 16
Viewing Live Video
To view live video
1 On the Web Setup home page, under Device Management, click Sensor.
The Sensor Settings page appears.
2 Select which encoding profile you want to display in the video preview from the
Stream list over the video preview.
Note: To view live video on full screen, right-click the view preview and select
Fullscreen. To return to the Web Setup, either press the ESC key or right-click the
video preview and select Normal View.
• You can perform various actions using the buttons below the video preview, as
described in the following table:
Button Description
Displays live video in full screen.
Note: Press the ESC key to return to the Web setup interface.
Enables the output audio (Talk) channel on the camera.
Mutes the input audio channel (2.7-12mm model only).
Saves a snapshot of the current image.
Note: To set the snapshot destination folder, see “Setting the Default Location
for Saved Media” on page 38.

ME6 IR Dome Configuration Guide 17
Viewing Live Video
To adjust the zoom and focus levels
1 On the Web Setup home page, under Device Management, click Sensor.
The Sensor Settings page appears.
2 In the ZOOM section, keep the WIDE and TELE buttons pressed to manually change
the zoom level.
3 To manually refine the zoom level on the image, select the check box and manually
select the number of steps for each click from the Steps list.
4 To reset the zoom settings to factory default, click the RESET button
5 In the AF Mode section, select the automatic focus management mode:
Hides live video from the preview. Click the button again to display live video.
Starts instant recording. Click the button a second time to stop instant
recording.
Notes:
• Instant recording saves the video evidence on the PC and it is independent
from local recording on a microSDXC card.
• To set the instant recording destination folder, see “Setting the Default
Location for Saved Media” on page 38.
Displays information about the status of the alarms (red = triggered).
Button Description

ME6 IR Dome Configuration Guide 18
Upgrading the ME6 IR Dome
• Click MANUAL to manually adjusting focus by clicking the buttons in the FOCUS
section
• Click ZM TRIG, to automatically adjust focus every time the zoom level is changed.
• Click PUSH AF button to launch the automatic focus setting. After a few moments,
the camera automatically adjusts focus on the image.
6 To manually refine the FOCUS level on the image, select the check box and manually
select the number of steps for each click from the Steps list.
7 To reset the focus settings to factory default, click the RESET button.
Upgrading the ME6 IR Dome
You can upgrade the software for the ME6 IR Dome by accessing the System
Configuration page.
Notes:
• You can download software upgrades for the ME6 IR Dome from the March Networks
Partner Portal. If you do not have access to the Partner Portal, contact your March
Networks representative.
• It is recommended that you back up the configuration of your camera before the
upgrade. To back up the configuration, access the System Settings page, click the
Maintenance sub-menu, and then click Export. For more information, see “Exporting
and Importing Configuration Settings” on page 41.
To upgrade your ME6 IR Dome using the Web Setup interface
1 Download the latest upgrade for your device from the March Networks Partner Portal,
and unzip the file in a directory of your choice.
Note: You can discard the .xml file: that file is required only for the firmware upgrade
procedure using Command Enterprise Server and the Discovery Browser (v.4.4 and
higher).
2 Access the Web Setup interface.
3 On the main page, under System click Settings.
The System Settings page appears.
4 To view the current firmware installed, click the Software Version tile.

ME6 IR Dome Configuration Guide 19
Upgrading the ME6 IR Dome
5 Click the Software Upgrade tile.
The Software Upgrade sub-menu appears.
6 Click Browse.
The Open dialog box appears.
7 Navigate to the folder where the firmware upgrade file is stored, select it, and click
Open.
8 Select the firmware file from the drop down list.
9 Click Upgrade.
WARNING: You must not turn off the unit or unplug the power cable during the
software upgrade.
After a few minutes, the ME6 IR Dome firmware is upgraded.

ME6 IR Dome Configuration Guide 20
Chapter 3
Configuring System Settings
This chapter explains how to set the Web Setup language, change the password for the
admin profile, access the system log, and configure system settings.
This chapter contains the following topics:
• “Setting the Interface Language” on page 21
• “Changing the Administrator Password” on page 21
• “Viewing the System Log” on page 23
• “Accessing the System Configuration Page” on page 24
• “Setting the Camera’s Date and Time” on page 25
• “Configuring HTTPS Connections” on page 27
• “Configuring the 802.1x Protocol” on page 31
• “Configuring the Camera’s Network Settings” on page 33
• “Managing the Camera’s Bandwidth” on page 36
• “Configuring the SNMP Protocol” on page 37
• “Setting the Default Location for Saved Media” on page 38
• “Reverting the Configuration to Factory Defaults” on page 39
• “Upgrading the ME6 IR Dome” on page 40
• “Exporting and Importing Configuration Settings” on page 41
Table of contents


