MARCUM Showdown 5.6 User manual

Showdown5.6
Digital Fish Finder
User Manual
www.marcumtech.com

Versa Electronics
www.marcumtech.com
About Your New Showdown Digital Fish Finder
Congratulations! Your new ShowDown 5.6 Digital Fish Finder
delivers unmatched system performance and offers the most
intuitive and easy to use system on the market… the future of
ice-fishing electronics is here! As a result of your purchase, you
will catch more fish and have more fun! When you combine the
simplicity of the Vertical LCD Display with the user-friendly
interface, you will spend more time actually fishing and less time
trying to figure out how to use and interpret what your sonar unit
is showing you
Simply turn your ShowDown 5.6 on to immediately begin
observing the action below. The ShowDown’s Auto Depth Range
feature means there’s no switching between various depth
ranges. Nor will you have to guess at bottom or depth itself. The
ShowDown 5.6 immediately locks on to the proper depth range,
while also displaying digital depth at all times.
In Your Showdown 5.6 Package
•
Showdown 5.6 sonar
•
Adjustable gimbal tilt-bracket
•
8-foot transducer / power cable and 200 kHz – 20 degree
transducer
•
Battery Shuttle with retractable transducer arm
•
Neoprene soft pack with interior mesh transducer pocket
•
Rubber stopper for transducer cable
•
12-volt, 9.0-amp battery, 2 amp inline fuse
•
Battery Charger
•
User’s Manual
•
Warranty Card
- 3 -

Versa Electronics
www.marcumtech.com
Getting Started
Your new Showdown 5.6 Digital Fish Finder comes completely assembled, and
nearly ready to use. Follow the simple steps below and you will be ready to
fish.
(1) Remove the ShowDown 5.6 from the box. Gently remove the entire unit
from the neoprene case. Your ShowDown should be firmly attached to a clear
gimbal bracket.
(2) Make sure all wire connections are solid.
(3) Make sure that the round rubber stopper is securely in place on the trans-
ducer cable, and that the hook and loop battery strap is tight to keep battery
snug in the battery compartment.
(4) Slide fully assembled Showdown 5.6 back into the neoprene case.
(5) The 9 amp battery provided comes with a good charge on it and can be
taken fishing upon opening the box. Before initial use, you may want to charge
it fully if you are not going fishing immediately. To charge the battery, see
below.
(6) Route transducer cable through the adjustable transducer turning arm.
Affix rubber cable stopper at the desired depth above transducer.
(7) Place your Showdown 5.6 on a relatively level spot on the ice, extend the
transducer arm over ice hole, place the transducer into the water, and turn
the unit ON by pressing the POWER key.
(9) To store your ShowDown, turn power OFF, fold in transducer arm, tuck
transducer into interior mesh pocket, and fold hook and loop closure over.
Remember to recharge battery after every use—this will maximize run time
and battery longevity.
- 4 -

Versa Electronics
www.marcumtech.com
Charging the Battery in your Showdown
Your Marcum system comes with a 3-stage battery charger. This style of
charger has proven to be the most effective and easiest to use of all charging
systems available. Because this is a 3-stage charger, there is no danger of
overcharging your battery. When properly cared for, a sealed lead acid battery
will last for at least a couple of years. Batteries are made to be used, and they
need to be used to make the most of them. The most important thing you can
do is to promptly recharge your battery after each use. Not charging your
battery immediately after use is the number one thing that leads to battery
failure.
For safety reasons, it is recommended that you place your system on
a flat, hard surface like cement or tile when charging it, away from any
flammable materials. Be sure to disconnect the charger from the wall when
not in use, and avoid leaving your battery hooked up to the charger for
extended periods of time.
When you get home from a trip, put your battery on charge right away, and
leave it there overnight, or for around 8-12 hours. Likewise, on the night
before you go ice fishing, put it on the charger again, just to make sure. Again,
there is no danger of overcharging your battery. We often talk to people who
hesitate to charge their battery after each use for fear that the battery will de-
velop a “memory” and this will lead to a shortened run time—THIS IS FALSE!!!
ALWAYS CHARGE YOUR BATTERY AFTER EVERY USE!!! Be sure to use the charger
that came with your system, or a similar one that is between .5 amp and 1
amp. Using a larger charger, like you would use on a car, truck, RV, or boat is
likely to cause damage to the battery. There is really very little danger of
overcharging your battery with a low amp charger, and most chargers auto-
matically go into “maintenance mode” once a full charge has been achieved.
To charge your battery:
Your battery has a wiring harness attached to it; this is what you plug the
charger into. To charge, simply couple the end of the charger with the end of
the wiring harness. It is normal for a green light to appear on the charger at
this time. It is also normal for the light on the charger to be green if it is just
plugged into the wall. When it is plugged into the wall and battery, you will see
a red LED light appear on the charger. If the light is red, the battery is being
charged. When your battery is fully charged, this red light should change to
green. If it is time to go fishing and the light has not turned green, go fish and
try to allow a longer charging period next time.
If you need to remove the battery, unplug the two battery terminals from the
battery. Remove the strap that is holding the battery in place and lift the battery
out. To replace the battery, place a new battery of similar specifica- tions into the
battery compartment and secure it with the Velcro strap and re-connect the
positive and negative terminals.
- 5 -

Versa Electronics
www.marcumtech.com
Operating The Showdown 5.6
The ShowDown’s straightforward control panel is designed to let you
concen- trate on fishing. Most settings work by first activating the function
itself (ex: press SENS to trigger sensitivity adjustment), then simply pressing
the UP or DOWN keys to adjust levels.
POWER
ON— To turn your Showdown 5.6 POWER to ON, press and hold the POWER
key for two seconds.
OFF— To turn your Showdown 5.6 POWER to OFF, press and hold POWER
for two seconds. Your Showdown 5.6 automatically preserves your sonar
settings the next time you activate unit.
BACKLIGHT— To turn the backlight on, turn your POWER ON, then press
POWER key again (do not hold key down). To turn backlight OFF, press
Power momentarily again (do not hold down the power button).
SIMULATOR mode— With Showdown 5.6 POWER OFF, enter SIMULATOR
mode by pressing and holding POWER key for 5 seconds. The “SIMU”
indicator will appear at the top-right of Showdown 5.6 view-screen. To exit
SIMULATOR, turn Showdown 5.6 POWER to OFF, then turn unit back ON.
UP/DOWN— Pressing the UP or DOWN key lets you adjust the Sensitivity,
Range, Zoom and Noise. Trigger a function first by pressing the appropriate
function key, then move UP or DOWN.
Showdown 5.6 Features
ICE-MODE
Your Showdown 5.6 sonar offers exclusive ICE MODE, a feature unique to
Versa Electronics brand sonar units, which allows for operation in the
coldest conditions. With ICE MODE active, Showdown 5.6 triggers an internal
LCD heater that keeps the liquid crystals moving at their normal super high
speeds in sub-freezing temperatures. This means that anglers no longer have
to worry about their sonar “slowing down” due to freezing liquid crystal.
While this feature is called “ICE MODE”, you may find that your Showdown
performs better under a wide variety of conditions when in “ICE MODE”.
NOTE: If your Showdown 5.6 is left in extreme cold for an extended time
period with the POWER turned OFF, allow one to two minutes for the Ice
Mode LCD heater to warm the crystals sufficiently after the POWER has been
turned ON and ICE Mode has been activated. After the ICE Mode LCD heater
has been running for an extended period, it is perfectly normal for the
Showdown 5.6 power-head to feel warm.
- 6 -

Versa Electronics
www.marcumtech.com
TO INITIATE ICE MODE, simply press the UP and DOWN buttons simul-
taneously. You will now see the “ICE” mode indicator appear at the top of
the Showdown 5.6 Dual Beam display screen. In ICE mode, an internal LCD
heater is initiated. To exit ICE MODE and return Showdown 5.6 to normal
operating mode, press the UP and DOWN keys simultaneously. The ICE
MODE indicator will no longer show at the top of the display screen.
SENS (SENSITIVITY) — The Showdown 5.6 is a highly-sensitive sonar unit
capable of reading the tiniest of solid objects below. It features a 25-level
Sensitivity function that adjusts either automatically or manually. By simply
turning on your Showdown, it will automatically select a level of sensitivity
appropriate for the given depth and signal strength. Ideally the Sensitivity
should be set at the lowest level possible to still view your lure and
surrounding fish, while at the same time "tuning out" excessive clutter in the
water column. Clutter can make reading the sonar screen more difficult.
Clutter can be caused by any number of suspended items including algae,
zooplankton, tiny bubbles, and other particles.
If you’re seeing too much clutter, simply decrease the Sensitivity level until
the clutter disappears. Conversely, if you’re not reading your lure directly
below the transducer, consider increasing the Sensitivity level.
MANUAL SENSITIVITY— While your Showdown will automatically select an
appropriate level of sensitivity, you may wish to adjust the level yourself. To
manually adjust Showdown 5.6 SENSITIVITY press the SENS button. The
“SENS” indicator will appear at the lower left of view-screen, along with a
number and bar indicator that displays Sensitivity level (0 to 25) at the
bottom of the screen.
With the SENS indicator active, press the UP or DOWN key to increase or
decrease your SENSITIVITY to the desired level. In most cases, you will have
the best performance with the Sensitivity set between 5 and 10.
RANGE— The Showdown 5.6 is equipped with 6 separate depth ranges—20,
40, 60, 80, 120, and 240-feet. Regardless of the manual depth range setting,
Showdown 5.6 will always display digital depth, even if the bottom is deeper
than the bottom limit of the RANGE setting, (down to 240’).
AUTO RANGE— In Auto Range mode, Showdown 5.6 will automatically lock
into the depth range appropriate to the depth of the water. For instance, in
32-feet of water, Showdown 5.6 will automatically lock in at the 40-foot
depth range. Auto Range allows you to simply turn on the power and begin
fishing.
MANUAL RANGE— To manually adjust the Showdown’s depth range, press
the RANGE key. This will cause the digital depth markers to flash on-and-off,
indicating that the sonar has switched from AUTO RANGE mode to MANUAL
RANGE mode.
While the display is flashing, press either the UP or DOWN key to toggle
between depth ranges—20-FT, 40-FT, 60-FT, 80-FT, 120-FT, 240-FT. Pressing
UP moves RANGE to the next shallower depth zone; DOWN moves to the
next deeper zone.
- 7 -

Versa Electronics
www.marcumtech.com
To return to AUTO RANGE, press the RANGE key, and then press the UP key
(moving Range to the next shallower setting) until the Range passes the 20-
foot range by one step. At this point, you will hear an audible fast beep, and
see a flashing “A” icon above the FEET indicator.
ZOOM— The Zoom feature allows you to focus the display on a specific
depth within the water column. The position of the ZOOM window is
adjust- able in one-foot increments. Zoom can focus on bottom (for
detecting bottom-hugging fish), or at any level above bottom. The Zoom
window is programmed to display 25% of the depth range (i.e. – in 100 feet
of water, you will zoom to different 25-foot segments of the water column).
MANUAL ADJUSTABLE ZOOM— To zoom the display in on a specific
segment of the water column, press the ZOOM key once. Once ZOOM is
activated, the word ZOOM will appear at the top left of the display screen.
You can now adjust ZOOM to any depth segment by simply pressing the UP
or DOWN keys—once for each ZOOM level. To ZOOM into the bottom,
simply continue pressing the DOWN key until you reach the desired level.
To disengage ZOOM (bringing the Showdown 5.6 back to normal surface- to-
bottom view) simply press the ZOOM button a second time. The ZOOM
indicator will no longer appear at the top left of the display.
AUTO BOTTOM TRACK ZOOM— The Showdown 5.6 sonar also offers Auto
Bottom Track Zoom that automatically zooms and locks onto the bottom
25-percent of the water column. This is especially useful for locating
bottom hugging fish like walleyes and perch. To automatically zoom onto
the bottom 25-percent of the water column, you may choose to enter Auto
Bottom Track Zoom. This is an extremely helpful feature that will always lock
onto and zoom in on the bottom, even if you have removed the transducer
from one area, and placed it into completely different depth.
To enter Auto Bottom Track Zoom, press the ZOOM key (you should see the
ZOOM icon at the top left of the screen). Press the UP key until you have
passed the shallowest depth range. At this point, you will hear an audible
fast beep, and see a flashing “A” icon at the bottom of the screen.
NOISE (Interference Rejection) — The unit’s Noise Rejection feature allows
you to use your Showdown 5.6 in close proximity to other sonar units,
trolling motors, and other electronic devices without experiencing excessive
signal interference. A ten (10) level Noise Rejection function allows you to
adjust to a wide range of rejection levels. If “noise interference” occurs,
increase the Noise Rejection level until you effectively eliminate the signal
interference. To adjust the ShowDown’s NOISE Rejection control, simply
press the NOISE button once. The NOISE indicator bar will appear at the
bottom of the screen, along with a number (0 to 10), which shows the NOISE
control setting. Press the UP button to move to the next highest NOISE
rejection level, or press DOWN to move to the next lowest NOISE rejection
level. As you do so, you should notice the indicator number change. After
approximately 5-seconds, the NOISE indicator bar will disappear and be
replaced by the normal operat- ing depth display.
- 8 -

Versa Electronics
www.marcumtech.com
Other Showdown 5.6 Features
Backlight— Your Showdown 5.6 offers a warm “nightglow” backlight that
actually accentuates the pixels in the display. Can be turned on or off by
briefly pressing the POWER button after unit is ON.
Neoprene Carry Bag— Protects your Showdown 5.6 during storage, use and
transport. Exterior hook and loop flap seals out dust and moisture.
Interior Transducer Pocket— Small mesh pocket inside neoprene carrying
case. Always place your transducer in this pocket when not in use.
Adjustable Transducer Arm— Your Showdown 5.6 is equipped with an
extendable and adjustable transducer arm which directs the transducer over
your ice fishing hole. Coupled with the round rubber transducer cable
stopper which fits over the top of the arm clip, this handy item keeps your
transducer level in the water at all times for optimal signal return. When not
in use, the arm folds up, and fits snugly inside the neoprene carrying bag.
Digital Depth— The digital depth display on the Showdown 5.6 sonar
provides a quick and easy way to determine depth. Digital Depth is always
displayed in the bottom-right of the view screen (unless NOISE or SENS are
being adjusted). In addition, digital depth scale indices show to the left of
the display area for quickly determining the depth of fish or your lure.
Simulator— To trigger the Showdown 5.6 Simulator mode, start with unit
turned OFF. Press and hold the POWER button for approximately 5-
seconds. You should see the “SIMU” indicator bar appear at the top right of
the display. Simulator mode shows how bottom, a lure and fish might appear
on the unit if you were fishing in 32’ of water. It also allows you to adjust and
learn various sonar settings before you get out fishing. To turn Simulator
mode off, it is necessary to turn your Showdown 5.6 power OFF by holding
down the POWER button again.
Low Battery Warning— When battery power reaches very low levels, a low
battery indicator will appear and flash at the top right of the display. An
audible beep will also sound every 30 seconds. This signifies that it is time to
recharge the battery, or replace it with a fully charged spare. WARNING:
When you see and hear this warning, the Showdown 5.6 may shut down
within minutes.
“Last Settings” Memory— Your Showdown 5.6 automatically remembers the
settings you used last. So when it is turned OFF and then ON again, your
previous settings will be preserved and active.
- 9 -

Versa Electronics
www.marcumtech.com
Tips For Using Your Showdown 5.6
Setting up the transducer for ice-fishing: When used in conjunction with the
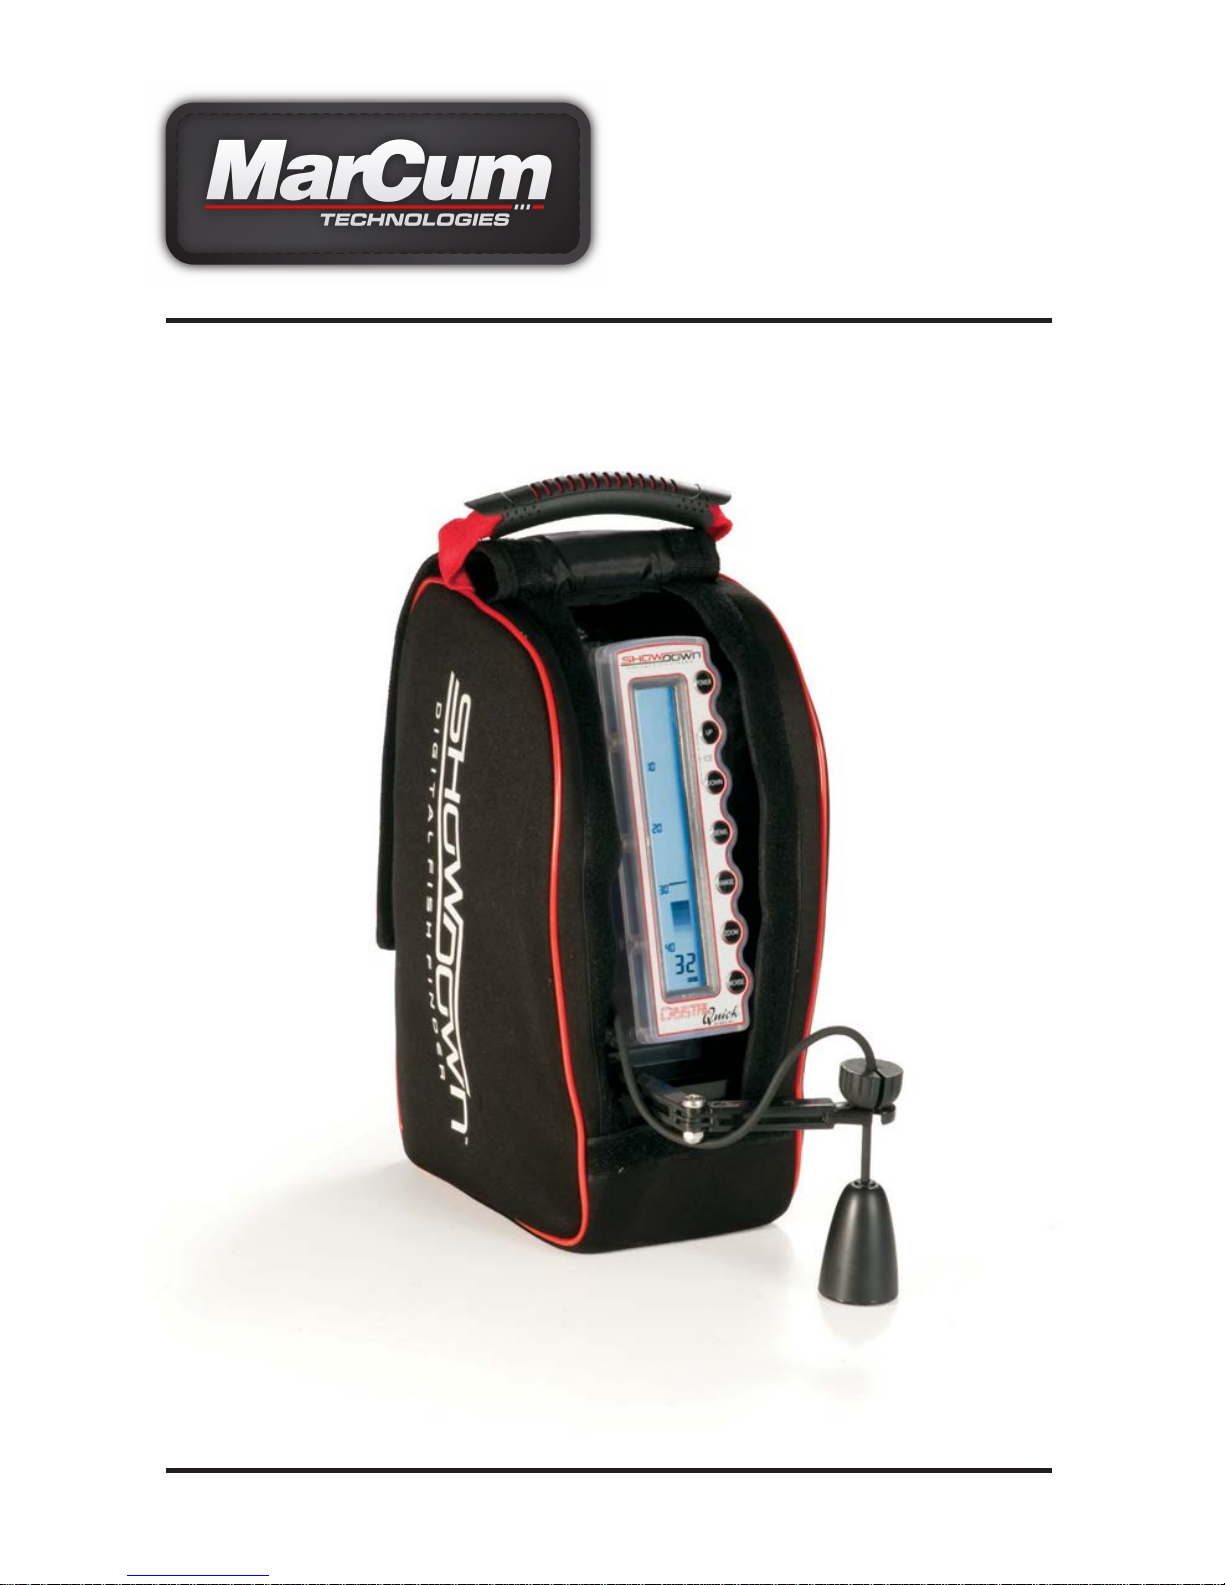
retractable pivoting transducer arm and rubber stopper, the Showdown’s
transducer will automatically level itself in your ice hole. To begin operation,
simply insert transducer cable into rubber stopper at desired depth. Extend
transducer arm; insert cable into open end of transducer arm, and allow the
rubber stopper to rest in the open end of the transducer arm. We
recommend setting your stopper to have the transducer down the least
amount possible. The Showdown Dual Beam puts out enough power that in
most cases it is not necessary to have your transducer down more than a
few inches below the water line to get a good reading. When the ice
thickness is over two feet, it may be necessary to have your transducer set
farther down. Remember-- the less transducer cable you have out, the
easier it is to pull it out of the water when bringing in a fish, or to move to a
new location. Under no circumstances should you ever have the ducer below
the ice as this can lead to the ducer becoming damaged.
It is also important that you keep the cable near the center of the ice hole.
We frequently hear from anglers who allowed their cable to freeze into the
side of the ice hole. If this should happen to you, make sure the unit is turned
off before attempting to chisel it out. If you accidentally cut the ducer cable,
do not try to use that ducer again.
Reading the ShowDown 5.6 sonar signals:
The ShowDown 5.6 displays the water column in its natural state (vertically),
rather than in a circular configuration as with traditional dial flashers. On the
ShowDown, top is the surface, and bottom is the lake bottom. Bottom
appears as a dark solid bar above decreasingly solid bars below. A thicker
“bottom band” indicates a harder bottom composition, such as rock, gravel
or sand. A thinner band indicates a softer bottom.
Generally, a solid band that appears on the screen between the surface and
bottom indicates some form of aquatic life (gamefish, baitfish, insects,
plankton, etc.), or your lure. A thicker or more solid band implies a stronger
signal, possibly from a larger fish. This is due to the nature of the
ShowDown’s sonar signals. Stronger or denser objects return a stronger
signal back to the transducer than smaller objects. However, even a smaller
fish or your jig may give a very strong signal depending on your settings, the
water depth, and the target’s position relative to the transducer.
- 10 -
At the same time, even a large fish may not return a strong signal until it
swims directly beneath your transducer. This is because the transducer
emits a cone- shaped signal that increases in diameter as the signal travels
deeper. Therefore, not only will a fish appear to grow in size as it travels
beneath the transducer (the signal has become stronger), but it will also
appear to be swimming from deeper water to shallower water, even though
this may not be the case at all. A fish that’s swimming at 25 feet may not
display at 25-feet until it passes directly beneath the sonar transducer.
That’s simply because the sonar signal travels further to return an echo
from a fish that’s off to the side than it does for a fish that’s directly below.

Versa Electronics
www.marcumtech.com
The best way to find your lure on the ShowDown 5.6 screen is to simply drop
your lure down to bottom, then reel it up about a foot. You should see a single
solid band appear above bottom to signify your lure. If you do not see this,
adjust the sonar Sensitivity by pressing the SENS button and the UP/DOWN
keys (see SENSITVITY). Adjust sensitivity until you can make out your lure
even as you reel it up toward the surface, or jig it up and down. Do not
increase sensitivity too much, however, as doing this may cause your
ShowDown 5.6 to display excess “clutter” that makes following your lure and
nearby fish more difficult.
Battery life and sonar run-time: A fully charged 12-volt, 9.0-amp battery
(included) will provide up to 30-hours of use. To assure long battery life, and
peak sonar performance, we recommend charging the battery after every
use.
How to check the depth through the ice: This is a great way to save time
while looking for a particular spot or depth. To receive a sonar signal directly
through the ice (without drilling a hole), first clear off any snow that may be
covering ice. Make sure that ice in the area is relatively “clear” ice without
excessive bubbles or frost pockets, which can deflect sonar signals. Pour
about a cup of water on the spot, and immediately rest the transducer on
the standing water on the ice. If you still don’t have a signal, pour additional
water under the transducer. If the surface of the ice is rough or filled with
air bubbles, drilling a 1” deep hole in the ice before checking the depth may
be necessary.
Moving the ShowDown to a new location: Mobility is one key to
being successful on the ice. Whenever you move from one spot to
another, it is tempting to leave your transducer hanging on the transducer
arm. This is likely to lead to failure of the transducer arm, and can cause
damage to the transducer itself if it is allowed to drag on the ice. Always
fold the transducer arm in, and stow the transducer inside the pack when
you are moving. Keeping the amount of transducer cord you have out at a
minimum will make transporting your ShowDown easier. Similarly, you may
need to quickly remove your transducer from the hole when about to land a
fish. We have actually seen anglers in a panic actually grab the shuttle itself
and toss the entire unit to the side. This is no way to treat any piece of
electronics; a much better approach is to simply lift the transducer out of
your way by the cord, and the shuttle itself can be gently pushed aside.
- 11 -

Versa Electronics
www.marcumtech.com
Caring For Your ShowDown 5.6
Stow your ShowDown 5.6 properly when not in use. Turn sonar power off,
and disconnect Power plug from back of unit. If possible, gently wipe excess
water or moisture from the ShowDown 5.6 screen and transducer arm with a
soft cloth. Should your ShowDown system become wet, it is unlikely that any
harm will come to it, but make sure to get the entire system completely dried
out as soon as possible.
Slide the adjustable transducer arm back into the housing, and stow trans-
ducer into the interior pocket. Close and secure soft case door with hook and
loop enclosure. Store in cool (above 30°F, below 85°F), dry location whenever
possible. Recharge your battery after every use. Even if you only used your
ShowDown for a short time, getting in the habit of regularly charging your
battery will maximize the life of your battery. During prolonged storage
periods, recharge the battery every few months. These steps will maximize the
life of your battery.
Clean your ShowDown 5.6 periodically. Using a mild dishwashing soap and a
soft cloth, gently clean the power head and view screen. DO NOT use window
cleaner or alcohol-based cleaning products—they may damage LCD screen
and void your warranty.
If you are unable to get your ShowDown to turn on, it may be due to one of
the following:
1---Battery not connected. Properly connect the battery; red to red (positive),
black to black (negative)
2---Battery is dead or not properly charged [see battery charging section]
3---Blown fuse (located on the RED (+) wire coming off the battery). The wire
in a 2 amp fuse is very fine, and it can take a very close look to determine if it
is still intact. If there are any beaks in the wire or discoloration in the clear
plastic, replace the fuse. It is acceptable to replace the 2 amp fuse with a 3
amp fuse. Using a fuse larger than a 3 amp may damage your ShowDown.
BATTERY CHARGER TROUBLESHOOTING
Many inquiries that come to our office are battery or battery charger related.
Battery failure can be caused by a fault in the charging system, and many
times the issue is with the fuse on the wiring harness. If you suspect your
battery is not being charged, follow these troubleshooting tips
1.
When the charger is plugged into the WALL ONLY it should show a
green light. If there is no light showing, confirm that the outlet is
good. If the outlet is good, then it is very likely that the charger
itself is faulty.
2.
If the charger is plugged into the BATTERY ONLY it should show a
green light. If it does not show a green light, it is likely that the
charger is not making contact with the battery. The most likely
reason for this is a faulty fuse on the wiring harness. This fuse is a
2-amp automotive fuse, and it should be replaced with a 2 or 3-
amp fuse available anywhere that sells auto parts.
- 12 -
3.
When the charger is plugged into both the wall and the battery,
there should be a red light showing on the charger. A red light
showing indicates that the charger is in contact with the battery
and is actively charging the battery. Once the battery has
reached a voltage level that is considered "fully charged the

Versa Electronics
www.marcumtech.com
4.
If the charger is plugged into the wall and battery and you get a
blinking light on the charger, it is very likely that the battery is
faulty and should be replaced.
ShowDown 5.6 Specifications
Current Draw: 400 mA maximum
Transducer Frequency: 200kHz
Transducer Angle: 20°
Transmit Power: 1000-watts true RMS / 8000 watts peak-to- peak power
Ping Rate: 40 pings per second
Max Sonar Resolution: 0.46” (in 20’, 40’ and 60’ ranges)
Sensitivity Control: 25-level
Noise Rejection Control: 10-level anti-interference
Range Control: 6 depth ranges—20’, 40’, 60’, 80’, 120’, 240’
Zoom Control: Zooms in to 25% of the water column, or in one foot
increments as specified by user
Ice Mode: Activates LCD heater, and boosts gain
Digital Depth Display: Yes
Display Grayscale: 4-level Grayscale
HOW TO OBTAIN SERVICE
If your unit is malfunctioning, check the FAQ section of our website. You may
find that the solution to your problem is something you can resolve yourself.
If you need to send it in, there is no need to contact our office. Getting repairs
made is as simple as going to our website, clicking on the service tab, and then
filling out the Warranty Service Form. If your unit is under warranty, be sure
to attach a picture/scan of your proof of purchase with date included. If your
system is out of warranty, we have a flat-rate fee that will cover the cost of
repairs, including parts and labor. Once you have completed the Warranty or
Flat-Rate repair, package the unit as described on the website and ship it to
us.
- 13 -
One-Year Limited Warranty
Marcum warranties this product to be free from defects in materials and
workmanship for one year from the date of purchase. This warranty applies
to customers who properly complete the online product registration form
found on the MarCum Technologies Website: www.marcumtech.com/
support
If you are unable to use the internet, please fill out and submit the enclosed
warranty registration card to be eligible for the one year warranty. Marcum
Technologies will repair or replace any components that fail in normal use.
Failures due to abuse, misuse, unauthorized alteration, modification, or
repair are not covered. The warranty is valid only for the original owner who
purchases the unit from an authorized dealer. An original sales receipt dated
within the warranty period is required for all warranty claims.
In an effort to best serve our customers, Marcum Technologies has set a
standardized battery warranty policy. Battery warranty coverage requires a
proof of purchase. Please see our website, www.marcumtech.com/support,
for full details.
red light should change to green. If after 24 hours the light has not
changed to green there is no cause for alarm! Remember that
when the light is red, the battery is being charged, and you will be
able to use your system.

Versa Electronics
www.marcumtech.com
Please send your email inquiries to servi[email protected]
If you are unable to use email or internet, you may also call us at
763-512-3987. Our office hours are Monday – Friday, 8 – 4 Central Time.
International callers may use 888-778-1208
OUR ADDRESS:
MARCUM TECHNOLOGIES
ATTN: SERVICE DEPT.
3943 QUEBEC AVE NORTH
MINNEAPOLIS, MN 55427
The customer is responsible for shipping costs associated with returning the
unit to Marcum Technologies. Marcum will pay for shipping the repaired
unit back to the customer while it is still under warranty. All out of warranty
services will be charged a fee for service and shipping which must be paid in
advance. The unit should be securely packed and shipped “pre-paid freight”
and insured to Marcum Technologies. It is the customer’s full responsibility to
track their products sent out in the mail or other forms of delivery service.
Marcum Technologies will not be liable for packages lost en route to us.
Unless specified otherwise, do not include batteries or other accessories
when returning the product for repair. Marcum Technologies will not be
responsible for lost or damaged accessories. Turnaround time can vary, on
average it is about 1 week.
ShowDown 5.6 Replacement Parts
The rigors of ice fishing can take a toll on equipment. Replacement parts that
have become lost or damaged can be easily ordered, go to marcumtech.com,
or you can call us at 763-512-3987.
PARTS LIST
Ice Ducer: If your transducer has been damaged or lost
Turning arm: This is the front half of the ducer arm
Straight arm: This is the rear half of the ducer arm
Soft Pack: Neoprene Soft pack that protects your Showdown from the
elements Gimbal: This is the white pyramid-shaped part that the Showdown
display clips onto Stopper: Replacement ducer stop- in case yours goes down
the hole
2-Amp fuse: If you can’t find a replacement fuse for the wiring harness locally
12 volt 9 amp battery: Batteries must be replaced every few years
- 14 -
There is no need for an authorization or reference number, just make sure
that you have included your contact info and a brief description of the issue
on a note in the box. If you do not have the ability to use the Internet, you
may also fill out the service request form included in the box with your unit. If
you enclose this form in the box with your unit there is no need to contact our
office, just include the filled out form in the shipping box. Some people are
more comfortable calling for shipping instructions. During peak ice season, we
sometimes receive a high volume of calls, making it impossible to get to all
customers who phone in. For this reason, strongly consider using the on-line
form or email rather than calling. In your email, please provide your name,
complete address, and phone #. Please indicate what model Marcum you
have, approximate date of purchase, and what has gone wrong with it.

Versa Electronics
www.marcumtech.com
OTHER MARCUM PRODUCTS
Here are some other great systems from Marcum. These items can be pur-
chased from one of our many fine retailers, or direct from us at
marcumtech.com
LX-5
The LX-5 incorporates the latest in sonar technology, featuring a patented
flexible zoom that can be set anywhere between surface and bottom, a
patent pending TrueColor display, 2500 watts of peak-to-peak power,
patented signal interference rejection, Superfine Line Technology, and target
separation down to 3/4inch.
LX-7
The LX-7 Digital Sonar takes DNA from other fine Marcum sonars –you might
say it was “bred” for excellence. Because the LX-7 is digital, we can pack it
full of more features than have ever been found in an ice sonar before. With
an 8” customizable dashboard display, superior target separation, 12-level
interfer- ence rejection, dual-beam transducer, expandable zoom, and much,
much more, the LX7 is the perfect combination of macro features and micro
precision.
ShowdownTrolle
r
The new Showdown Troller Digital Fish Finder is a palm-sized sonar device
with full size performance. For use in either ice-fishing or open water
situations…quickly “troll” from hole to hole while ice-fishing or shoot
through your canoe or kayak in order to find fish and the correct depth. As a
scouting tool it has ne equal; the ultimate in portability is matched to
ShowDown’s proven Crystal-Quick® vertical display. The sonar instantly
locks on to bottom, and clearly displays the location of fish and your lure,
anywhere in the water column.
VS825SD
The VS825sd offers several technologies that are the first of their kind,
making this system the most technologically advanced underwater viewing
system available.
Using new technology such as an 8” Solar Intelligent- H2D display will
deliver the sharpest, most vivid display, even in direct sunlight; Color Kill
technology allows you to switch between a Color or Black and White image
on demand, while maintaining crisp screen resolution; On-Screen displays of
Camera Direc- tion, Depth, Temp and Battery Voltage take all of the guess
work out of your camera position so your new VS825sd can be used to hunt
for underwater trea- sures, locate the “spot on the spot”, observe fish in
their natural habitat or learn how fish react to your lure or bait presentation.
The applications are endless, and it’s never been easier or more fun to view.
- 15 -

www.marcumtech.com
Marcum Technologies
3943 Quebec Avenue North
Minneapolis, Minnesota 55427
MarCum User Manuals are available for download from
www.marcumtech.com.
Table of contents
Popular Fish Finder manuals by other brands

Norcross
Norcross D10DX.01T Installation and operation manual

Garmin
Garmin Fishfinder 300C installation instructions

Lowrance
Lowrance HDS Gen2 Touch Operator's manual

Furuno
Furuno FCV-600 installation manual

Garmin
Garmin ECHOMAP UHD manual

Lowrance
Lowrance M68C IceMachine Installation and operation instructions

Humminbird
Humminbird 425 SX Operation manual

Eagle
Eagle FISHSTRIKE 1000C Installation and operation instructions

NorthStar
NorthStar EXPLORER 443S Installation and operation manual

Humminbird
Humminbird 531338-1_C Operation manual

Humminbird
Humminbird SINGLEBEAM 405SX Operation manual

Humminbird
Humminbird Platinum ID 600 Operation manual