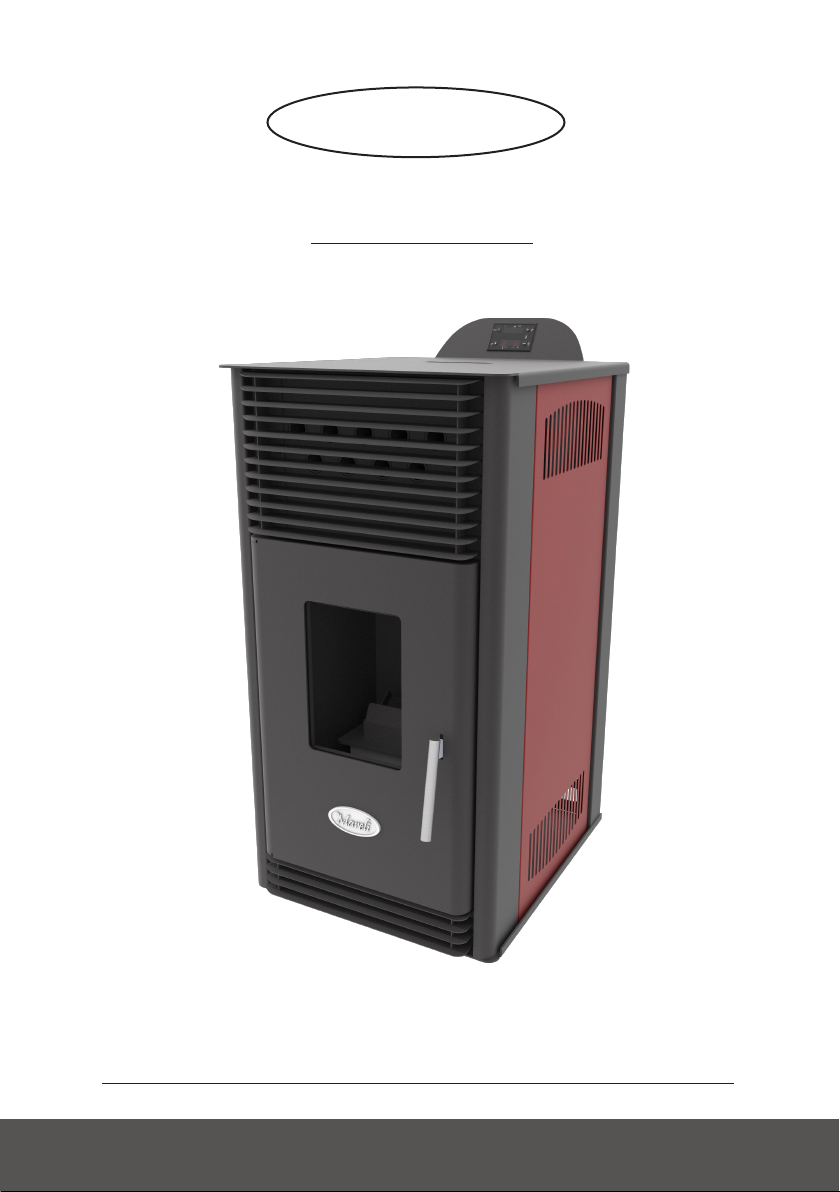
Mareli Systems PS 10 User manual

PS 10 Pellet stove
Assembly and exploitation manual
e present stove is designed and manufactured according to
Standards: BNS (Bulgarian National Standard) EN 14785-2006
Mareli Systems

2
Mareli Systems
Observing the prescriptions of the present manual is in the user’s favour and is one of the war-
ranty conditions. Compliance with this instruction is in the interest of the consumer and one of
the warranty terms.
INSTRUCTIONS FOR SECURITY:
• is appliance is not intended for use by people (including children) with limited physical, sensory or
mental abilities or lack of experience and knowledge. e installation must be performed by a qualied
expert in the eld of heating installations or authorized by “Marelli Systems’ service. e place and way of
connecting the stove should be selected carefully in accord with the safety instructions. Install away from
ammable objects!
• Before starting any operation, the user must read and fully understand the contents of this instruction
manual. Incorrect setup may cause hazardous conditions and / or incorrect function of the stove;
• Do not wash the stove with water. Water can get inside the replace and damage the electronics and
cause an electric shock;
• Do not put clothes to dry on the stove. Any clothes hangers and other objects must be located within a
reasonable distance from the replace. Fire hazard;
• e user is fully responsible for the proper use of the product which exempts the company from liability
of any users errors or misbehaviour or omissions;
• Any intervention or replacement that is made by unauthorized people or using non original spare parts
for the product can be risky for the user and release the company from all liability;
• Most surfaces of the stove are extremely hot (the door handle, glass, ue pipe, etc.). Avoid contact with
these parts before assuring yourself that you us temperature resistant gloves as well as suitable temperature
resistant instruments;
• Under no circumstances should the re be ignited with the door open or broken glass;
• e product must be electrically connected to a system equipped with an eective earth conductor.
(Must be grounded);
• Turn o the stove in case of failure or malfunction;
• All unburned pellets in the burner aer each unsuccessful attempt ignition must be removed before a
new ignition;
• When installing the product all re safety requirements must be respected
If there is a re in the ue pipe, extinguish the stove, disconnect the power cord and never open the door. •
• Call competent authorized service technicians;
• Do not light the stove with ammable materials if the ignition system failed;
• Periodically check and clean the smoke outlet ducts of the stove (connection to the ue pipe);
• Pellet stove is not a cooker;
• Always keep the cover closed;
SAFE DISTANCES:
When installing the product a safe distance of at least 600 mm must be respected. is distance
applies to the product located near materials of B or C ammability level. e safe distance is
doubled if the product is close to materials of C3 combustion level.

3
Mareli Systems
1. PURPOSE
e stove is purposed to heat domestic and public premises by the means of pellets. e stove is
equipped with a steel water jacket designed for heating systems with water temperature up to 90º
C at a maximum super pressure up to 0,15 Mpa. Tests are run at pressure of 0,3 Mpa.
e stove is designed and manufactured to work with A-class pellets only
( DIN plus 51731 ) with the following characteristics:
• Material 100% pure conifer or broad-leaf wood;
• Diameter Ф6/8 mm;
• Length 20-30mm;
• Calorie capacity 5.2 kW/kg;
• Ash content < 8%;
e use of pellets with characteristics dierent from the recommended may result in power de-
crease, unstable and inconsistent work of the stove.
What are the pellets.
e pellets are produced by compressed wooden waste le from the production of various furni-
ture, sawmills and others. is type of fuel is environmentally friendly because in the production
process no agglutinate agents (glues, resins and others) are added. Actually, the integrity of the
pellets is guaranteed by the lignite – a natural ingredient contained in the wood itself. While the
wood has a calorie capacity of 4.4 kW/kg (15% humidity at 18 months drying), the pellets have
5.2 kW/kg.
Info: To ensure the proper work of the stove the pellets must be stored in a dry place!
Recharging of pellets can be done during work, with the following sequence:
1. Open the bunker (located at the top rear of the product);
2. Fill the hopper, using non-combustible container;
3. Close the lid of the bunker;
Attention!!! Use gloves! Beware of hot surfaces!

4
Mareli Systems
2. TECHNICAL DATA
3. ASSEMBLY
3.1 General conditions.
For ensuring the proper and safe work of the stove the observation of the following prescriptions
is required:
e assembly of the stove and the related equipment must be performed by authorized personnel
only.
e foundation upon which the stove is going to be placed must be even and horizontal, made
out of non-ammable materials with a dimension of at least 40 cm. in front of the stove and not
less than 20 cm from both sides and the rear side.
If ammable materials or constructions are present, the distance between them and the stove
must be at least 80 cm.
When assembling the stove make sure that the joints between the separate pipes and the chimney
socket are well insulated.
A smell on rst start-up of the stove is due to the burning of the paint.
e stove is painted with thermal resistant paint which reaches its nal resistance aer a couple
start-ups and warm ups. THAT IS WHY THE OUTER SURFACES MUST NOT BE TOUCHED
in order to avoid damage to the casing.
e periodic cleaning of the ash tray must be done only when the stove is cold.

5
Mareli Systems
3.2 Basic rules and prescriptions.
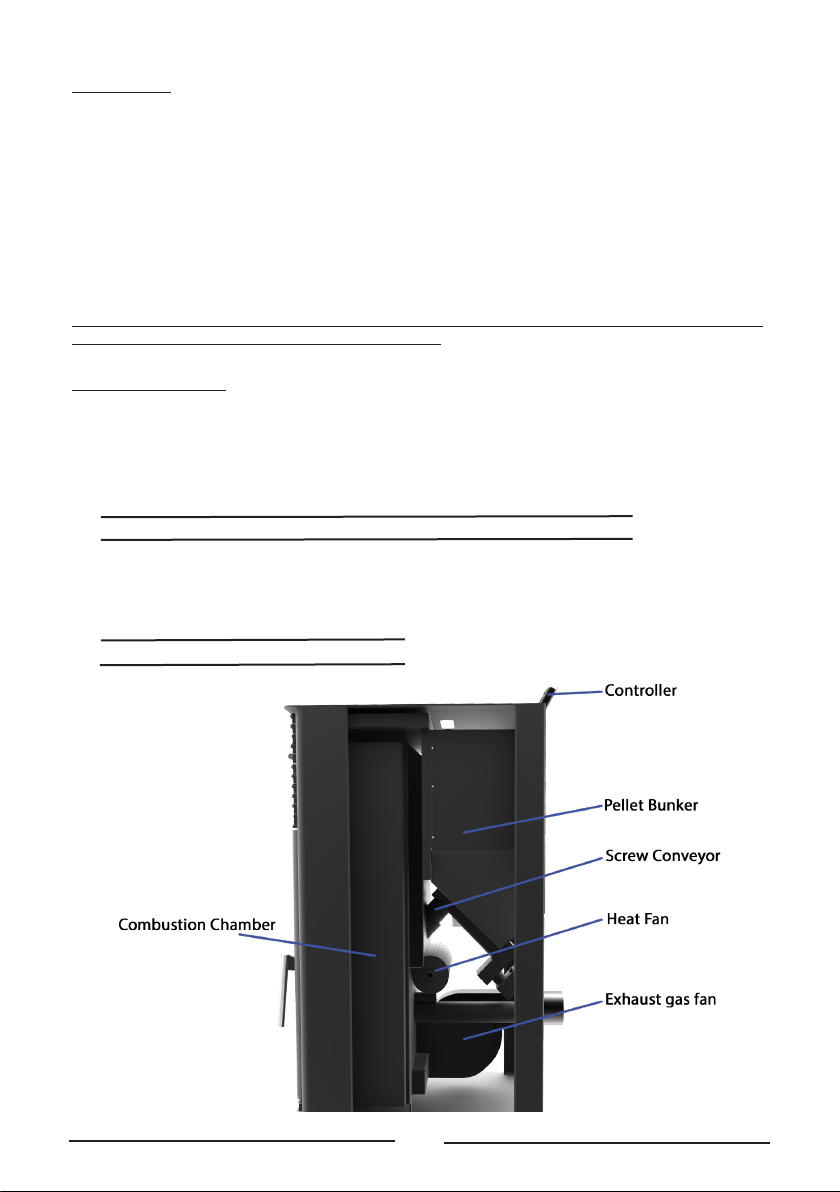
e stove with water jacket operates on water heating boiler principle.
e advantage of this type of heating system is the maximum utilization of the heat that is pro-
duced during the combustion process. With this method the heat from the combustion chamber
is taken to remote and hard to reach for a normal heat exchange premises in order to maintain an
even temperature and warmth comfort.
• Ensure that every branch and element of the installation is airtight at every single moment of its
exploitation.
• All elements of the installation must be protected from freezing, especially if the enlarging pot or
other parts are situated in non-heated premises.
• e circulation pump can be chosen by the capacity required by using the following formula:
G=0,043. P , (m³/h), in which:
P, kW is the heat output of the water jacket. e circulation pump can be turned on and o
by the means of a thermostat in combination with an electric switch
• e rst service cleaning of the pump’s lter must be done immediately aer testing the installation.
• If an old installation is going to be used it must be washed several times to ensure the removal of any
accumulated dirt on the surfaces of the water jacket.
• Do not drain the circulating water of the installation during the non-heated season.
• Chemical treatment of the circulating water is not recommended.
Chart 1 is a basic combined chart for heating with solid fuel stove, electrical boiler equipped with
water serpentine and a solar panel. For economy and eciency of the system and a constant avail-
ability of cheap hot water a qualied assembly of the automatic shier controlling the thermal
ows to and out of the solar panel and the boiler is required.
Chart 2 shows a one storey heating with a compulsory circulation. e advantage of this chart is
that the water-conducting elements can be hidden.
e enlarging pot must have a direct atmosphere connection which means that it must be placed
on the highest spot in the system. Its capacity can be determined as 0,1 part of the total capacity
of the system.
e lling or unloading of the system is done via a hose through a facet mounted in the lowest
area. Mounting a membrane enlarging pot is permitted when constructing a closed type system.
During the initial 3-4 start-ups a condensation on the surfaces of the water jacket may occur
which depending on the fuel’s humidity and the temperature of the incoming water may reach
0,3 litr on a single start-up. e accumulating char reduces the temperature dierence and the
condensation.
• “Mareli Systems” provides a warranty and out of warranty service and replacement of the
water jackets.
• e warranty is not valid in case of a stove with a swollen water jacket which is a result of
pressure increase in the system and improper connecting.
• e water jackets are tested under pressure of 400 kPa (4 bar).
It is recommended that the assembly is performed by an authorized specialist.

6
Mareli Systems
3.3 Assembly of the duct components.
Duct components and pipes
For the assembly of the duct pipes the use of non-ammable materials, resistant to the ammable
products and condensation is obligatory. e assembly must be performed in such a manner so
it guarantees the airtight sealing and prevents condensation. If possible, avoid adding horizontal
sections. Direction shi is done by using knee joints with a max angle of 45˚.
For heating devices equipped with a smoke ventilator, i.e all of the “MARELI” stoves, the follow-
ing instructions must be observed:
• Horizontal sections must have a minimum incline of 3° upwards;
• e length of the horizontal sections must be as short as possible, but without exceeding 3
m;
• More than four direction shis are forbidden, including the cases where a T-shaped element
is used;
• e duct components must be airtight and to be insulated if extending outside the premises
in which the replace is installed;
• e duct components must allow a soot cleaning;
• e duct components must have a constant section. A section change is allowed only in the
chimney joint;
Chimney
e chimney or the duct component must conform with the following requirements: to be air-
tight, waterproof and properly insulated, to be constructed with materials resistant to the normal
mechanical wear and to the heat coming from the combustion products and condensation.
• To be kept away from ammable materials.
e recommended chimney dra at work - from 12-20 Pa.
Attention!!! In case of a re hazard turn o the product from the display. is will stop the oxy-
gen ow to the product.
3.4 Types of connection to the chimney

7
Mareli Systems
3.5 Air intake
Suction pipe or air intake is placed in the back and has a cir-
cular section with a diameter of 48 mm.
e combustion air can be aspirated:
• From the camera, as long as it is near an air intake com-
municating with the outside wall having a minimum
area of 100 cm2, properly positioned and protected by
a grid.
• Or by connecting directly outside with a suitable tubing
having an inner diameter of 48 mm and a maximum
length of 1.5 M.2
4. Cleaning
Cleaning the replace should be done only when cold.
e cleaning of the combustion chamber must be car-
ried out daily. For this purpose, make sure the replace
has ceased operation and is completely cold. Pull up the
combustion pot and remove it from the stove and then
clean it from soot. When removed fuel pot at the bot-
tom of the combustion chamber opens a hole designed
for the accumulated ash. Collect ashes in the ashtray
and return fuel pot in place and then close the door.
e replace is ready for operation.
Cleaning of ues and chimneys are conducted once
every 1.5 tons of fuel used
Cleaning of ues:
1. Open the top cover of the replace by pulling
it up;
2. Loosen the screws on the lid for cleaning (key
number 10);
3. Remove decorative shutters;
4. Loosen the screws on small and large revision
door;
5. Cleaning ues:
• Remove the Turbulators channels and clean
them
• Use appropriate cleaning tools.
• Clean ash that has fallen through (part of the
ash falls into the combustion chamber);
6. Once clean audits and close the cleaning lid. Check that the bolts are tightened well. Every time
you open check for violations of the isolation seal. If this happens do not use the product until
the isolation seal is repaired.

8
Mareli Systems
5 Safety and unexpected risks
Terms of danger may arise in the following cases:
• Automated pellet stove is used incorrectly;
• e unit is installed by unqualied personnel;
• e safety instructions described in this management are not met;
Unforeseen risks:
Pellet replace “Mareli” has been designed and manufactured in accordance with the safety re-
quirements on the national, regional and European levels. Although considered possible risks
arising from improper use, you may experience the following risks:
• Risks of spreading combustion outside replace - opening the door of the chamber of the
replace may fall hot / burning particles (as hot ash and small particles burning coal), which
could lead to a re in the heated room. It is therefore necessary that the product always works
with a tightly closed door. It can only be opened when the product has completely cooled
down;
• Risks of burns caused by high temperatures as a result of the combustion process in the
combustion chamber and / or access to the door of this burn chamber when the product is
not completely cool;
In case of re hazard the product should be stopped by the controller and power supply until the
cause of the problem is determined.

9
Mareli Systems
ESC
G S W
L1
L5
L4
D2 D4D3
D1 P3
P1
P4
P2
L6 L7
L2 L3
KEY
CLICK
LONG PRESSURE
P2
Ignition / Extinguishing /
Block reset
Visualisations / Exit Menu
P1
ermostat modify (+) /
Increase data Pellet loading correction
P3
Combustion Power modify /
Save data
Manual pellet loading
P4 ermostat modify (-) /
Decrease data
Combustion Fan speed
correction
Values shown on the main frame
Display D1: time, system state, error, Menu,Submenu, parameter value; Display D2: power, parameter code;
Display D3: recipe; Display D4: main temperature, parameter code.
L1
L2
L3
L4
L5
G
L6
S
L7
W
Heating Fan On
Auger On
Ignition Resistance On
ermostat temperature reached
Daily program selected
Weekly program selected
Week End program selected
Control Panel: Use and Functions
Er01 - Security Error High Voltage 1. It may also intervene with the system o;
Er02 - Security Error High Voltage 2. It can only intervene if the Combustion fan is active;
Er03 - Extinguishing for low exhaust temperature or missing light in the brazier;
Er05 - Extinguishing due to high exhaust temperature;
Er06 - Pellet Thermostat open (ame return from the brazier);
Er07 - Encoder Error. The error may occur due to lack signal from Encoder;
Er08 - Encoder Error. The error can occur due to problems of adjustment of the number of revolutions;
Er11 - Clock Error. The error occurs due to problems with the internal clock;
Er12 - Extinguishing for ignition failure;
Er15 - Extinguishing due to power failure for more than 50 minutes;
Er17 - Adjusting the Air Flow Failed;
Er18 - No more Pellet in the bunker;
Er39 - Sensor Flowmeter broken;
Er41 - Minimum air ow in Check Up is not reached;
Er42 - Maximum air ow exceeded (F40);
Er44 - Open door error;
Er47 - Error Encoder Auger: missing signal Encoder (if P81=1 or 2);
Er48 - Error Encoder Auger: Auger regulation speed not achieved (if P81=1 or 2);
Er52 - Error Module I/O I2C;
Service - Service error. It noties that the planned hours of functioning (parameter T66) is reached.
It is necessary to call for service.
ALARMS

10
Mareli Systems
tA = Room Temperature [°C];
tF = Exhaust Temperature [°C];
tr = Remote Room temperature [°C];
UF = Speed Combustion Fan [RPM];
P1 CLICK
P1 CLICK (3 sec)
It is possible to activate the ignition process with long press on the P1 button;
It is possible to activate the extinction process with long press on the P1 button;
It is possible to clear the Block with long press on the P1 button.
Click on P2 button: the D2 display blinks. With other click of the
same button the power is changed. Ex.: 1–2–3–4–5–A (A=Automatic
combustion). Aer 5 seconds the new value is saved and the display shows
as normal.
Combustion Power Setting
P2 CLICK
USER MENU 1
ermostat Setting
P4 CLICK
P3 CLICK
P2 CLICK (3sec)
Manual Pellet Loading
Press the P3 or P4 key: the D3 display blinks. With sequential clicks on the
P3 / P4 button, it is possible to increase or decrease the set temperature of
the thermostat. Aer 5 seconds the new value is saved and the display shows
as normal.
e long pressure of button P2 activates the Pellet Manual Loading with
activation of Auger engine in continuous way. e bottom display shows the
word LoAd, the up display shows the elapsed loading time. To stop the loading
push any button. e loading stops automatically aer 300 seconds.
Description
Code
Sond
Hi
Clean
Port
Ignition
block
Cleaning on
Link Error
Anomaly of the probes checking, during Check Up phase.
Room temperature greater than 50 °C.
is message noties that the planned hours of functioning (parameter T67) are reached.
Door Open.
e message appears if the system is turned o during Ignition (aer Preload) not manually:
the system will stop only when it goes in Run Mode.
Periodical Cleaning in progress.
No communication between motherboard and keyboard
MESSAGES

11
Mareli Systems
P3 CLICK (3 sec) Pellet Loading Correction
P4 CLICK (3 sec)
Combustion Fan Correction
e access to the menu is done by pressing P2 and P4 at the same time.
MODALITY
LED
Gior:
Daily Program , 3 programs for each day of the week;
WG S
SEtt:
Weekly Program , 3 programs for all days of the week;
WG S
FiSE:
Week-End Program , 3 programs for Mon-Fri and Sat-Sun;
WG S
OFF:
Programs Disabled;
WG S
e long pressure of P3 button activates this function (You have to do it two
times to access the modify modality). e bottom display shows PELL, the
upper display the value. With buttons P3/P4 the value is increased or
decreased; the default set is ‘0’. Aer 5 seconds the new value is saved and
the display shows as normal.
e long pressure of P4 button activates this function (You have to do it two
times to access the modify modality). e bottom display shows UEnt, the
upper display the value. With buttons P3/P4 the value is increased or
decreased; the default set is ‘0’. Aer 5 seconds the new value is saved and the
display shows as normal.
Heating Power (Air)This menu allows to change the heating power:
• Power manually set from 1 to 5.
• Heating Power set automatic by the system.
Chrono Enable Menu
This menu allows to select the chrono modality. On display appears the label ModE.
MENU FOR PROGRAMMING TIME RANGES
On display appears the label ProG.It has 3 submenus, one for each program modality:
Daily: it allows to set 3 programs for each day of the week
M o;
Weekly: it allows to set 3 programs for all days of the week
M S;
Week-End: it allows to set 3 programs for Mon-Fri and 3 programs for Sat-Sun
M F - S S;
Instructions - For each program, it is necessary to set the time on and the time o.
1) Scroll with the buttons P3/P4 until the wished Submenu and push the button P3 (G i o r n);
2) Push the buttons P3/P4 to select one of the 3 available programs;
3) Push the button P1 for 3 seconds;
4) Select the ignition time;
5) Push the button P2 to enter in modify mode: the selected value (hours or minutes) blinks. Push the button P3
to switch between hours and minutes, P3/P4 to modify the value;
6) Push the button P2 to save;
7) Select with the button P3 the O Timer and repeat the procedure from point 5;
For each time is possible to modify minutes with intervals of 15 minutes (e.g.: 20:00, 20:15, 20:30, 20:45).
Only for 11 p.m. is possible to increase minutes from 45 to 59, in order to get an ignition around midnight.
USER MENU 2

12
Mareli Systems
START
STOP
DAY
DAY
Using the P3/P4 buttons is possible to view all programs:
• e top of the display shows programs;
• No Programs is shown with (- - - -);
• e bottom of the display shows: day / time zone / start / stop;
Continuously pressing button P1 is possible to switch on / o the selected time.
Program Chrono across Midnight (00:00)
Set the ON time of the previous day to the desired value: Ex. 20h30;
Set the OFF time of the previous day: 23h59 Set the hour of the next day 00h00;
Set OFF time the next day: Ex. 6h30. e system turns ON at 20:30 from Tuesday to
Wednesday and turns OFF at 06:30.
Clock (oroL) - is Menu allows to set time and date. e above display shows hour and minutes, the
under display shows the day of the week. Push the button P2 to enter editing. e selected value (hours,
minutes, days) blinks. To change the value use the P3/P4 button. Push the button P2 to switch to modify the
other parameters. Push again P2 to save the set value.

13
Mareli Systems

14
Mareli Systems

15
Mareli Systems

MARELI SYSTEMS disclaims any responsibility for possible inaccuracies contained in this manu-
al if they are due to printing or transcription errors. We reserve the right to make any change that
appears to be necessary or useful without harm the essential characteristics.
Mareli Systems
Mareli Systems
Industrial Zone
Simitli, 2730
Region Blagoevgrad
Bulgaria
info@mareli-systems.com
www.mareli-systems.com
Table of contents
Other Mareli Systems Pellet Stove manuals
Popular Pellet Stove manuals by other brands

Harman
Harman Accentra 52i installation manual

Bronpi
Bronpi Kira Installation instructions and user guide

Moretti Design
Moretti Design ARIA ERGONOMIC GLASS A/C/RELAX CLEAN DEDICATED MANUAL

RIKA
RIKA REVO TOUCH operating manual

ThermoFLUX
ThermoFLUX Minitherm AQUA User and maintenance manual

Extraflame
Extraflame Pellet stove user manual