manuals.online logo
Brands
  1. Home
  2. •
  3. Brands
  4. •
  5. Marq
  6. •
  7. Watch
  8. •
  9. Marq GOLFER Instruction manual

Marq GOLFER Instruction manual

Quick Start Manual ............................................................................................1
󳗑󸷁󱮦󹠗󳧼󱯤
..............................................................................................19
© 2022 Garmin Ltd. or its subsidiaries
Garmin, ANT+, QuickFit, and the Garmin logo are trademarks of Garmin Ltd. or its subsidiaries, registered in
the USA and other countries. Garmin Connect, Garmin Pay, and MARQ are trademarks of Garmin Ltd. or its
subsidiaries. These trademarks may not be used without the express permission of Garmin.
The BLUETOOTH®word mark and logos are owned by the Bluetooth SIG, Inc. and any use of such marks by
Garmin is under license. Advanced heartbeat analytics by Firstbeat. Other trademarks and trade names are those
of their respective owners.
M/N: A04263
MARQ Golfer (Gen2) 1
EN
Introduction
WARNING
See the Important Safety and Product
Information guide in the product box for
product warnings and other important
information.
Always consult your physician before
you begin or modify any exercise
program.
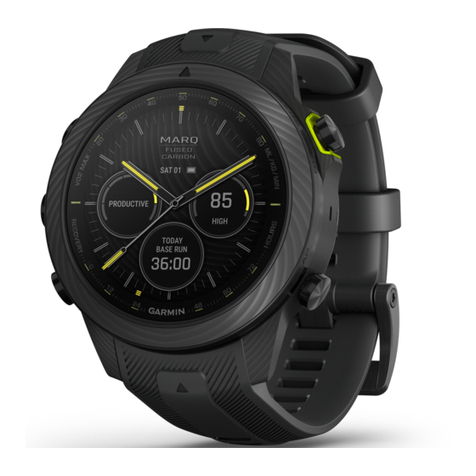
Never settle. Aim for glory. The MARQ
Golfer is a modern tool watch like no
other. It’s built from Grade-5 titanium to
be harder and stronger, with a stunning
new AMOLED touchscreen display.
With more than 42,000 preloaded
golf courses and our most advanced
game-tracking data ever, you’ll be able
to take your performance to entirely new
heights.
Getting Started
When using your watch the first time,
you should complete these tasks to set
it up and get to know the basic features.
1 Press LIGHT to turn on the watch
(page 1).
2 Follow the on-screen instructions to
complete the initial setup.
During the initial setup, you can pair
your smartphone with your watch
to receive notifications, sync your
activities, and more (page 3).
3 Charge the device (page 12).
4 Start an activity (page 10).
Device Overview

Touchscreen
• Tap to choose an option in a
menu.
• Hold the watch face data to open
the glance or feature.
2 MARQ Golfer (Gen2)
EN
NOTE: This feature is not available
on all watch faces.
• Swipe up or down to scroll through
the glance loop and menus.
• Swipe right to return to the
previous screen.
• Cover the screen with your palm to
return to the watch face and turn
down the screen brightness.

LIGHT
• Press to turn on the watch.
• Press to turn down the screen
brightness.
• Quickly press twice to turn on the
flashlight.
• Hold to view the controls menu.

UP·MENU
• Press to scroll through the glance
loop and menus.
• Hold to view the menu.

DOWN
• Press to scroll through the glance
loop and menus.
• Hold to view the music controls
from any screen.

START·STOP
• Press to choose an option in a
menu.
• Press to view the activity list and
start or stop an activity.
• Hold to open the performance
glance.

BACK·LAP
• Press to return to the previous
screen.
• Press to record a lap, rest, or
transition during a multisport
activity.
• Hold to view the watch face from
any screen.
Enabling and Disabling the
Touchscreen
yTo temporarily enable or disable
the touchscreen, hold DOWN and
START.
yTo enable or disable the touchscreen
during general use, activities, or
sleep, hold MENU, select System >
Touch, and select an option.
MARQ Golfer (Gen2) 3
EN
Using the Watch
yHold LIGHT to view the controls
menu.
The controls menu provides quick
access to frequently used functions,
such as turning on do not disturb
mode, saving a location, and turning
the watch off.
yFrom the watch face, press UP or
DOWN to scroll through the glance
loop (page 3).
yFrom the watch face, press START
to start an activity or open an app
(page 10).
yHold MENU to customize the watch
face, adjust settings, and pair
wireless sensors.
Viewing the Glance Loop
Glances provide quick access to health
data, activity information, built- in
sensors, and more. When you pair your
watch, you can view data from your
phone, such as notifications, weather,
and calendar events.
1 Press UP or DOWN.
The watch scrolls through the
glance loop and displays summary
data for each glance.
TIP: You can also swipe to scroll or
tap to select options.
2 Press START to view more
information.
3 Select an option:
• Press DOWN to view details about
a glance.
• Press START to view additional
options and functions for a
glance.
Smart Features
Pairing Your Phone
To use the connected features on your
4 MARQ Golfer (Gen2)
EN
watch, you must pair it directly through
the Garmin Connect™ app, instead of
from the Bluetooth®settings on your
phone.
1 From the app store on your phone,
install and open the Garmin Connect
app.
2 During the initial setup, select Yes
when you are prompted to pair with
your phone.
3 Follow the instructions in the app
to complete the pairing and setup
process.
Syncing the Time with GPS
Each time you turn on the device
and acquire satellites, the device
automatically detects your time zones
and the current time of day. You can also
manually sync the time with GPS when
you change time zones, and to update
for daylight saving time.
1 Hold MENU.
2 Select System > Time > Sync With
GPS.
3 Wait while the device locates
satellites.
Setting Up Your Garmin Pay Wallet
NOTICE
This feature is not available for/in all
regions.
The Garmin Pay feature allows you to
use your watch to pay for purchases in
participating stores. You can add one or
more participating credit or debit cards
to your Garmin Pay wallet. Go to Garmin.
com.sg/garmin-pay to find participating
financial institutions.
1 From the Garmin Connect app,
select or .
2 Select Garmin Pay > Get Started.
3 Follow the on-screen instructions.
You can open your Garmin Pay wallet
from the controls menu on your watch.
See the owner’s manual for more
information on using the Garmin Pay
feature.
MARQ Golfer (Gen2) 5
EN
Music
NOTICE
The copyright of music provided by
third-party music services are owned
by the record companies. The record
companies license the music tracks or
albums to third-party music services
with a time limit, and the music
license must be periodically updated
and renewed. If you often listen to
downloaded music offline, you will need
to reconnect your watch to the internet
every 7 days (via Wi-Fi or Garmin
Connect) so that you can continue to
make use of third-party offline music
services.
You can download audio content to
your device, so you can listen when your
smartphone is not nearby. The Garmin
Connect app and Garmin Express
application allow you to download audio
content from a third- party provider or
your computer.
You can use the music controls
to control music playback on your
smartphone or to play music stored on
your device. To listen to audio content
stored on your device, you must connect
headphones with Bluetooth technology.
Connect IQ Features
You can add Connect IQ apps, data
fields, glances, music providers, and
watch faces to your watch using the
Connect IQ store on your watch or
phone (Garmin.com.sg/products/apps/
connect-iq/).
Golfing
Playing Golf
Before you play golf, you should charge
the watch.
1 Press START.
2 Select Golf.
The device locates satellites,
calculates your location, and selects
a course if there is only one course
nearby.
3 If the course list appears, select a
6 MARQ Golfer (Gen2)
EN
course from the list.
4 If necessary, set your driver
distance.
5 Select to keep score.
6 Select a tee box.
The hole information screen
appears.

Current hole number

Distance to the back of the green

Distance to the middle of the green

Distance to the front of the green

Par for the hole

Map of the green

Driver distance from the tee box
NOTE: Because pin locations
change, the watch calculates the
distance to the front, middle, and
back of the green, but not the actual
pin location.
7 Select an option:
• Tap the front, middle, or back
distances to the green to view the
PlaysLike distance.
• Tap the map to view more detail
or measure distance with touch
targeting.
• Press UP or DOWN to view the
location and distance to a layup or
to the front and back of a hazard.
• Press START to open the golf
menu.
When you move to the next hole, the
watch automatically transitions to
display the new hole information.
Attaching the Sensor to a Club
1 Screw the sensor into the hole at the
end of the grip.
MARQ Golfer (Gen2) 7
EN
2 Tighten the sensor so it does not
move during use.
3 Return the club to your golf bag.
Using a Partial Set of Sensors
Your MARQ Golfer device features
automatic shot detection and recording.
Garmin recommends you attach the
sensors to your putter and wedges to
improve the Garmin AutoShot feature.
For automatic scoring, a sensor must
be attached to your putter to accurately
detect the number of strokes.
Pairing Your Sensors with Your
Device
Before you can record shots, you must
pair your Approach CT10 sensors with
a compatible Garmin golf device, and
assign sensors to your clubs.
1 Attach all sensors to your clubs.
2 Take a club out of your golf bag.
You should keep all of the other
clubs in your golf bag while pairing
TIP: You should complete the
pairing process in a well-lit room.
The sensors automatically wake up
based on the ambient light.
3 Bring the club within 1 m (3 ft.) of
your device.
NOTE: The grip should be pointed
up.
4 From the device settings, select
Club Sensors > Add New.
The device begins searching for the
sensor. A message appears when
the sensor is detected.
5 Follow the on-screen instructions to
pair your device with the club you
removed from the bag.
A message appears when the
sensor is assigned.
6 Return the club to your golf bag.
7 Take out the next club from your
golf bag.
8 Repeat steps 5 through 7 until all of
the sensors have been assigned to
your clubs.
Waking Your Sensors
The sensors automatically wake or
8 MARQ Golfer (Gen2)
EN
enter sleep mode based on the detected
ambient light and orientation.
Take up to three clubs out of your
golf bag, and point the club heads
toward the ground.
The sensors wake up and connect
to your paired device. Your
device displays the names of the
connected clubs.
NOTE: Your paired device
can connect to three sensors
simultaneously.
Store your clubs upside down in your
golf bag. The sensors enter sleep mode
and are disconnected from your paired
device.
Recording Your Shot
1 On your MARQ Golfer device, start
a round.
2 Take a club out of your golf bag.
The sensor wakes up and connects
to your paired device. Your device
displays the name of the connected
club and your typical shot distance
with that club.
NOTE: Your typical shot distance is
displayed after you have taken four
shots with a club and have uploaded
scorecards to the Garmin Golf app.
Your typical shot distance is not
displayed for the putter.
3 Hit a shot.
The sensor records your shot and
uploads data to your paired device
automatically.
Upload scorecards to the Garmin Golf
app after each round to view updated
statistics on your device. Review an
analysis of your game to determine
areas for improvement and where
to focus your practice. You can view
detailed statistics in the app.
Virtual Caddie
Before you can use the virtual caddie,
you must play five rounds with Approach
CT10 sensors or enable the Club Prompt
setting, and upload your scorecards.
For each round, you must connect to
a paired smartphone with the Garmin
MARQ Golfer (Gen2) 9
EN
Golf app. The virtual caddie provides a
recommended club and aim direction
based on the hole, wind data, and your
past performance with each club.
Changing the Club
Recommendation
1 Press START.
2 Select Virtual Caddie.
The device displays the calculated
average number of strokes

for
the recommended clubs

.
3 Select a different club
recommendation.
The map updates to show the new
shot direction target.
NOTE: The device automatically
recalculates the club recommendation
as you progress through the course.
You can select Recalculate to manually
update the club recommendation.
Garmin Golf App
The Garmin Golf app allows you
to upload scorecards from your
compatible Garmin device to view
detailed statistics and shot analyses.
Golfers can compete with each other
at different courses using the Garmin
Golf app. More than 42,000 courses
have leaderboards that anyone can
join. You can set up a tournament event
and invite players to compete. With a
Garmin Golf membership, you can view
green contour data on your phone and
compatible Garmin device.
The Garmin Golf app syncs your data
with your Garmin Connect account. You
can download the Garmin Golf app from
the app store on your phone (garmin.
com/golfapp).
Activities and Apps
Your watch can be used for indoor,
10 MARQ Golfer (Gen2)
EN
outdoor, athletic, and fitness activities.
When you start an activity, the watch
displays and records sensor data. You
can create custom activities or new
activities based on default activities.
When you finish your activities, you can
save and share them with the Garmin
Connect community.
Starting an Activity
1 From the watch face, press START.
2 Select an activity.
3 If the activity requires GPS, go
outside, and wait while the watch
locates satellites.
4 Press START to start the activity
timer.
NOTE: The watch does not record
your activity data until you start the
activity timer.
5 After you complete your activity,
press STOP to stop the activity
timer.
6 Select Save to save the activity and
review the activity summary.
Device Information
Viewing Device Information
You can view device information, such
as the E-label, unit ID, software version,
regulatory information, and license
agreement.
1 Hold MENU.
2 Select > System > About.
About the AMOLED Display
By default, the watch settings
are optimized for battery life and
performance.
Image persistence, or pixel “burn-in,” is
normal behavior for AMOLED devices.
To extend the display life, you should
avoid displaying static images at high
brightness levels for long time periods.
To minimize burn-in, the MARQ Athlete
display turns off after the selected
timeout. You can turn your wrist toward
your body, tap the touchscreen, or press
a button to wake the device.
MARQ Golfer (Gen2) 11
EN
Wearing the Watch
CAUTION
Some users may experience skin
irritation after prolonged use of the
watch, especially if the user has
sensitive skin or allergies. If you notice
any skin irritation, remove the watch
and give your skin time to heal. To help
prevent skin irritation, ensure the watch
is clean and dry, and do not overtighten
the watch on your wrist. For more
information, go to Garmin.com.sg/
legal/fit-and-care.
yWear the watch above your wrist
bone.
NOTE: The watch should be snug
but comfortable. For more accurate
heart rate readings, the watch
should not shift while running or
exercising. For pulse oximeter
readings, you should remain
motionless.
NOTE: The optical sensor is located
on the back of the watch.
ySee the owner’s manual for more
information.
Changing Hinged QuickFit
Accessories
1 Slide the latch on the hinged
QuickFit strap, and remove the strap
from the watch.
12 MARQ Golfer (Gen2)
EN
2 Align the new hinged strap with the
watch.
3 Press the strap into place.
NOTE: Make sure the strap is
secure. The latch should close over
the watch pin.
Changing Integrated QuickFit
Accessories
1 Pull to open the latch, and remove
the integrated QuickFit strap or
bracelet from the watch.
2 Pull to open the latch on the
integrated strap or bracelet, and
align it with the watch.
3 Close the latch over the watch pin.
NOTE: Make sure the strap or
bracelet is secure. There should be a
small gap

between the latch and
the strap or bracelet.
Charging the Device
WARNING
This device contains a lithium-ion
battery. See the Important Safety
and Product Information guide in the
product box for product warnings and
other important information.
Both the device and its charger contain
magnets. Under certain circumstances,
magnets may cause interference
with some medical devices, including
pacemakers and insulin pumps.
Devices and chargers that contain
magnets should be kept away from
such medical devices.
MARQ Golfer (Gen2) 13
EN
NOTICE
Both the device and its charger contain
magnets. Under certain circumstances,
magnets may cause damage to some
electronic devices, including hard
drives in laptop computers. Use caution
when devices and chargers that contain
magnets are near electronic devices.
To prevent corrosion, thoroughly
clean and dry the contacts and the
surrounding area before charging or
connecting to a computer. Refer to the
cleaning instructions in the owner’s
manual.
1 Align the charger with the back of
the device, and press the charger
into place.
2 Plug the USB cable into a USB
charging port.
The watch displays the current
battery charge level.
Specifications
NOTE: Visit the product page for full
specifications.
Operating temperature range: From -20
to 45°C (from -4 to 113°F)
Charging temperature range: From 0 to
45°C (from 32 to 113°F)
Approach CT10 Specifications
Operating temperature range: From -10°
to 50°C (from 14° to 122°F)
Wireless frequency: 2.4 GHz @ -0.45
dBm maximum
Troubleshooting
Restarting Your Watch
1 Hold LIGHT until the watch turns off.
2 Hold LIGHT to turn on the watch.
Getting the Owner’s Manual
The owner’s manual includes
14 MARQ Golfer (Gen2)
EN
instructions for using device features
and accessing regulatory information.
Go to Garmin.com.sg/products/
wearables/marq-gen2-golfer.
Getting More Information
You can find more information about
this product on the Garmin website.
yGo to support.Garmin.com/en-SG
for additional manuals, articles, and
software updates.
yGo to Garmin.com.sg/buy, or contact
your Garmin dealer for information
about optional accessories and
replacement parts.
yGo to Garmin.com.sg/legal/
atdisclaimer for information about
feature accuracy.
This is not a medical device.
MARQ Golfer (Gen2) 15
EN
Important Safety and Product
Information
WARNING
Failure to heed the following warnings could result
in an accident or medical event resulting in death or
serious injury.
Battery Warnings
A lithium-ion battery can be used in this device. Coin
cell batteries are used in the accessory.
If these guidelines are not followed, batteries may
experience a shortened life span or may present a
risk of damage to the device, fire, chemical burn,
electrolyte leak, and/or injury.
yDo not expose the device or batteries to fire,
explosion, or other hazard.
yBATTERIES ARE HAZARDOUS AND MUST
BE KEPT AWAY FROM CHILDREN.
NEVER PUT NEW OR USED BATTERIES IN
MOUTH OR IN ANY PART OF THE BODY.
ySevere or fatal injuries can occur within 2 hours
if swallowed or placed inside the body. If this
occurs or is suspected, seek medical attention
immediately.
yDo not disassemble, modify, remanufacture,
puncture or damage the device or batteries.
yDo not remove or attempt to remove the non-
user replaceable battery.
Device Warnings
yDo not leave the device exposed to a heat
source or in a high-temperature location, such
as in the sun in an unattended vehicle. To
prevent the possibility of damage, remove the
device from the vehicle or store it out of direct
sunlight, such as in the glove box.
yDo not operate the device outside of the
temperature ranges specified in the printed
manual in the product packaging.
yWhen storing the device for an extended time
period, store within the temperature ranges
specified in the printed manual in the product
packaging.
yDo not use a power cable, data cable and/or
power adapter that is not approved or supplied
by Garmin.
Health Warnings
yIf you have a pacemaker or other internal
electronic device, consult your physician before
using a heart rate monitor.
yThe Garmin optical wrist heart rate monitor
and pulse oximeter sensor emit green, red, and
infrared light and flash occasionally. Consult
your physician if you have epilepsy or are
sensitive to bright or flashing lights.
yAlways consult your physician before beginning
or modifying any exercise program.
yThe Garmin device, accessories, heart rate
monitor, pulse oximeter sensor, and related data
are intended to be used only for recreational
purposes and not for medical purposes, and are
not intended to diagnose, monitor, treat, cure, or
prevent any disease or condition.
16 MARQ Golfer (Gen2)
EN
yThe heart rate and blood oxygen saturation
readings are for reference only, and no
responsibility is accepted for the consequences
of any erroneous readings.
yWhile the Garmin optical wrist heart rate
monitor technology typically provides an
accurate estimate of a user’s heart rate, there
are inherent limitations with the technology
that may cause some of the heart rate readings
to be inaccurate under certain circumstances,
including the user’s physical characteristics, fit
of the device, and type and intensity of activity.
yWhile the Garmin pulse oximeter sensor
technology typically provides an accurate
estimate of a user’s blood oxygen saturation,
there are inherent limitations with the
technology that may cause some of the oxygen
saturation readings to be inaccurate under
certain circumstances, including the user’s
physical characteristics, fit of the device,
position of the device, and movement.
yGarmin activity trackers rely on sensors that
track your movement and other metrics. The
data and information provided by these devices
is intended to be a close estimation of your
activity and metrics tracked, but may not be
completely accurate, including step, sleep,
distance, heart rate, oxygen saturation, and
calorie data.
Safety and Tracking Warning
The assistance feature allows you to send your
location to an emergency contact. This is a
supplemental feature and should not be relied
upon as a primary method to obtain emergency
assistance. The Garmin Connect app does not
contact emergency services on your behalf.
Bicycle Warnings
yAlways use your best judgement, and operate
the bicycle in a safe manner.
yMake sure your bicycle and hardware are
properly maintained and that all parts are
correctly installed.
Navigation Warnings
If your Garmin device uses or accepts map data,
follow these guidelines to ensure safe navigating.
yAlways carefully compare information displayed
on the device to all available navigation sources,
including information from visual sightings,
local waterway rules and restrictions, and maps.
For safety, always resolve any discrepancies
or questions before continuing navigation, and
defer to posted signs and conditions.
yUse this device only as a navigational aid. Do
not attempt to use the device for any purpose
requiring precise measurement of direction,
distance, location, or topography.
Off-Road Navigation Warnings
If your Garmin device is able to suggest off-road
routes for various outdoor activities, such as
biking, hiking, and all-terrain vehicles, follow these
guidelines to ensure safe off-road navigation.
yAlways use your best judgment and exercise
common sense when making off-road
navigational decisions. The Garmin device is

This manual suits for next models

1

Other Marq Watch manuals

Marq Athlete Gen 2 Instruction manual

Marq

Marq Athlete Gen 2 Instruction manual

Popular Watch manuals by other brands

LAMAX TECH WatchY quick start guide

LAMAX TECH

LAMAX TECH WatchY quick start guide

SKY DEVICES SKY Watch user guide

SKY DEVICES

SKY DEVICES SKY Watch user guide

Citizen C320 Abbreviated Instruction

Citizen

Citizen C320 Abbreviated Instruction

Garmin VIVOSMART 5 quick start guide

Garmin

Garmin VIVOSMART 5 quick start guide

Casio G-Shock G-5600-9 user guide

Casio

Casio G-Shock G-5600-9 user guide

IWC Schaffhausen Aquatimer Automatic 2000 operating instructions

IWC Schaffhausen

IWC Schaffhausen Aquatimer Automatic 2000 operating instructions

LG gizmogadget Get to know

LG

LG gizmogadget Get to know

Pro-4 Tactical Survival Watch instruction manual

Pro-4 Tactical

Pro-4 Tactical Survival Watch instruction manual

Casio 1301 user guide

Casio

Casio 1301 user guide

Garmin VIVOACTIVE 3 Faq

Garmin

Garmin VIVOACTIVE 3 Faq

Roxy Sprint instruction manual

Roxy

Roxy Sprint instruction manual

Letsfit IW1 user manual

Letsfit

Letsfit IW1 user manual

ALIGATOR WATCH LADY user manual

ALIGATOR

ALIGATOR WATCH LADY user manual

Casio 4736 Operation guide

Casio

Casio 4736 Operation guide

Merlin ActiFit GO quick start guide

Merlin

Merlin ActiFit GO quick start guide

Citizen 0S22 instruction manual

Citizen

Citizen 0S22 instruction manual

Eurotops 40649 instruction manual

Eurotops

Eurotops 40649 instruction manual

VocaTime Talking Atomic Dual Voice Analog Watch instruction manual

VocaTime

VocaTime Talking Atomic Dual Voice Analog Watch instruction manual

manuals.online logo
manuals.online logoBrands
  • About & Mission
  • Contact us
  • Privacy Policy
  • Terms and Conditions

Copyright 2025 Manuals.Online. All Rights Reserved.