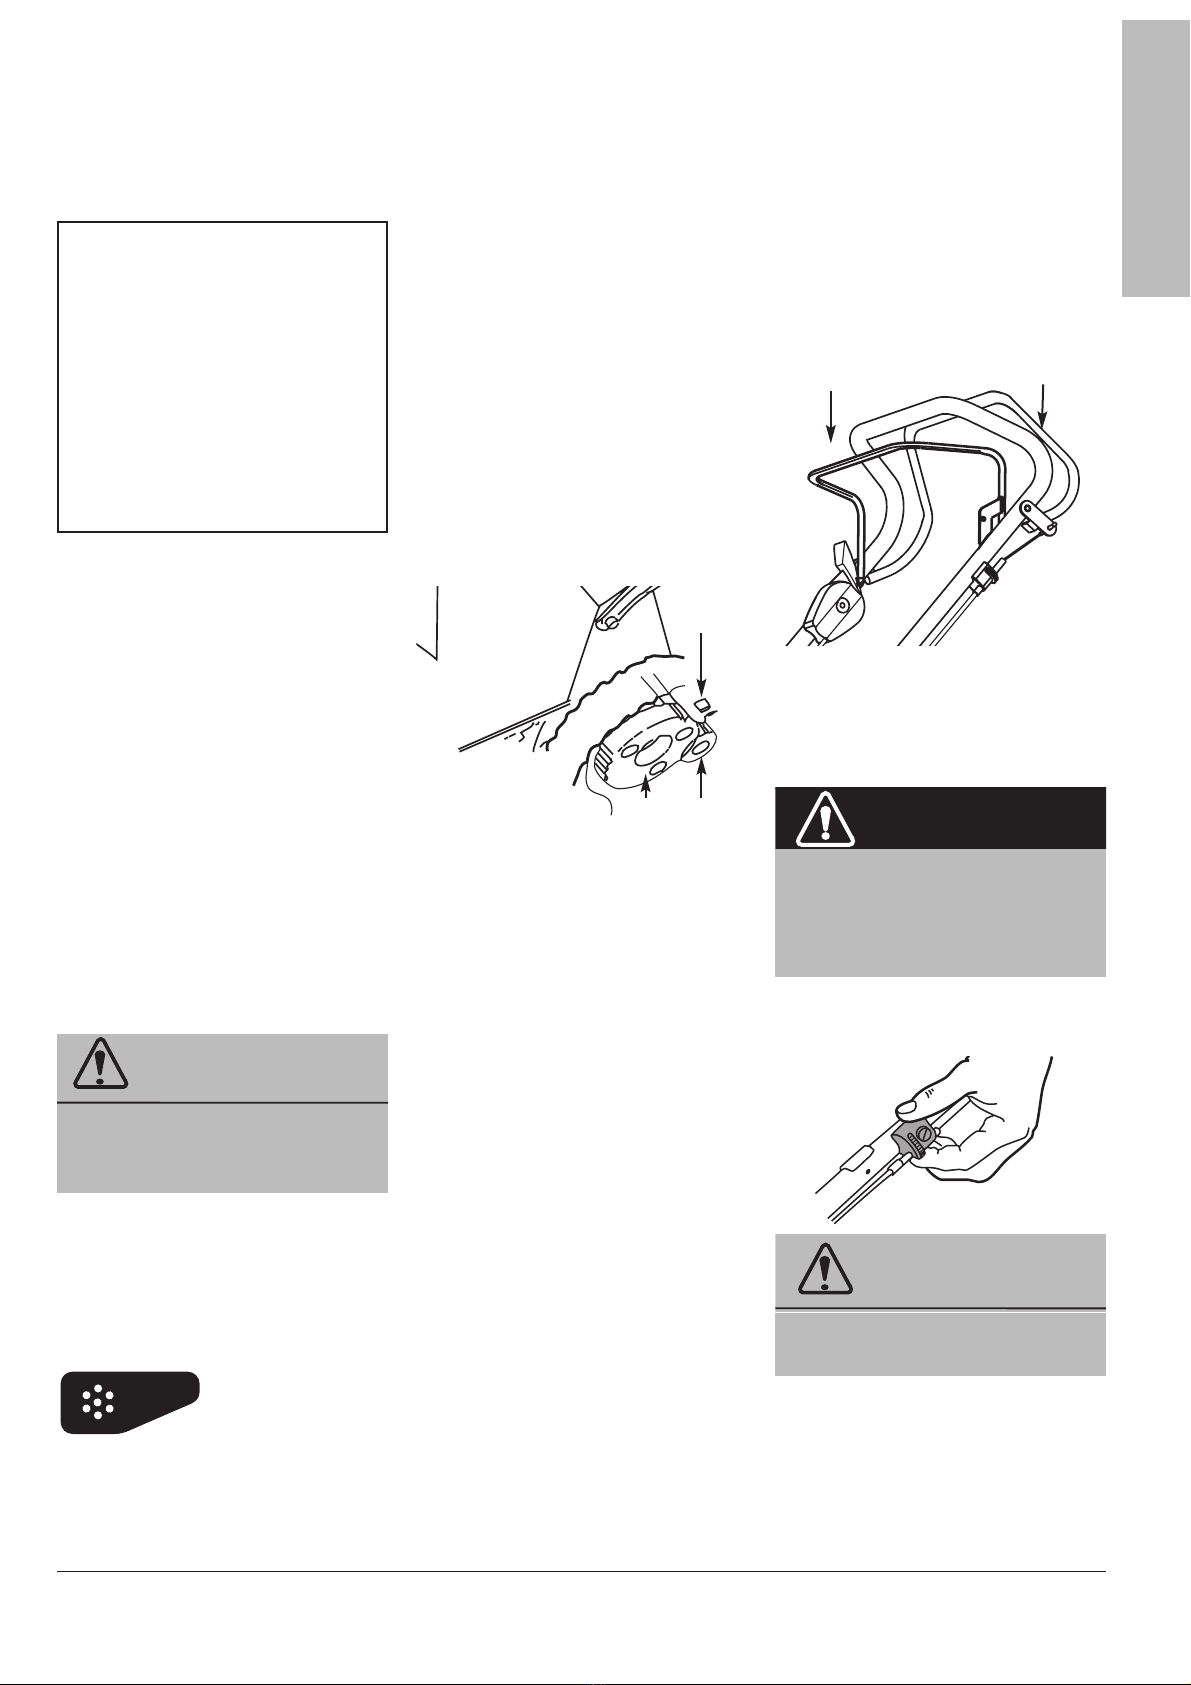
Never use the ‘Smart Chute’ on the catcher with
its door open. This could cause damage or injury
to property or bystanders.
The ‘Smart Chute’ allows you to mow without
catching the grass or mulching. By simply
opening the ‘door’ located on the bottom left
hand corner of the ‘Smart Chute’, the lawn
can safely be mown while smoothly spreading
the clippings to the left. For wet, heavy or very
long grass it is recommend setting the mower
cut height to #4 or more to avoid the possibili-
ty of clogging. If clogging becomes persistent
because of unfavourable conditions, try walk-
ing slower, cutting a narrower strip or raising
the cut height more.
AVOID USING THE LOWEST
TWO OR THREE CUT SET-
TINGS IN WET OR VERY
LONG GRASS .
TROUBLE PROBABLE CAUSE SOLUTION
Uneven or poor Blunt blade. Sharpen blade.
cut.
Heavy mulch left Cutting height is too low Adjust the cutting height to approximately
on cut strip. for the height of the grass one third of the length of the grass. Then
being cut. work down to the desired height.
Engine not running at full Move the throttle to fast.
speed.
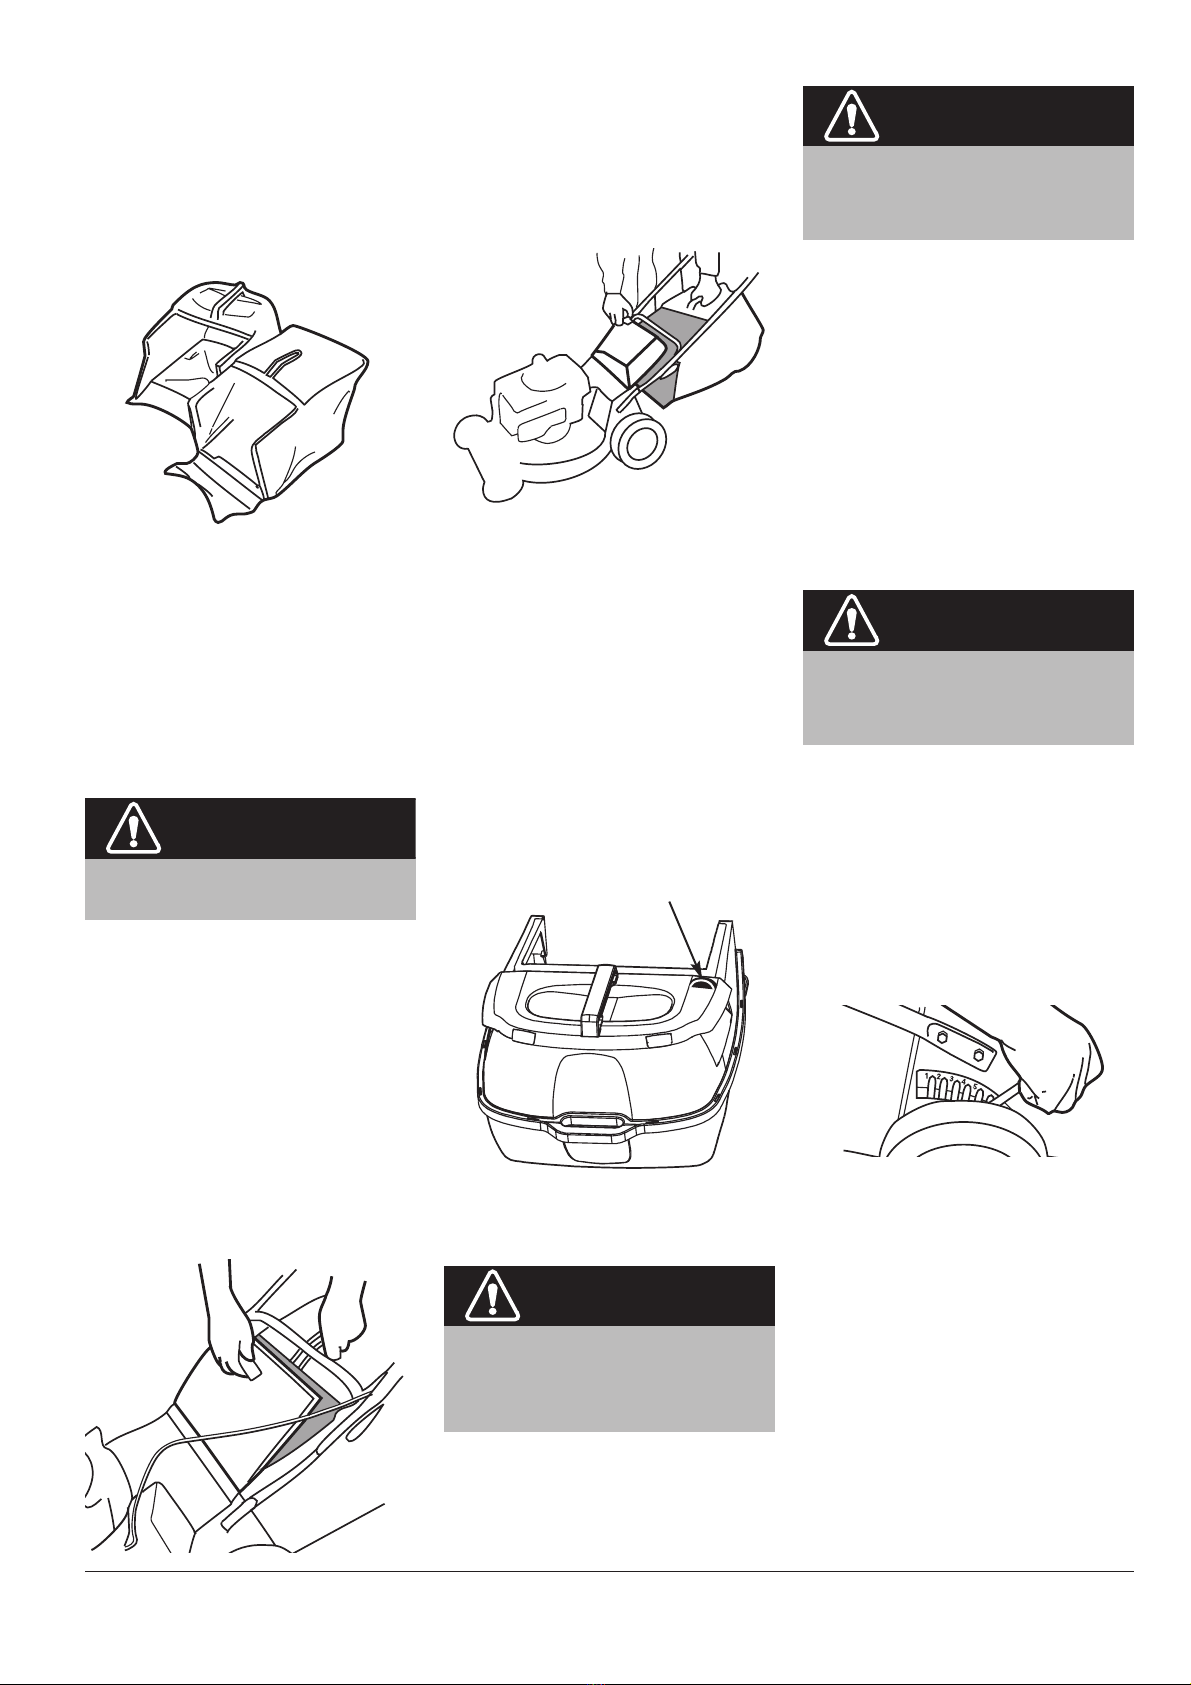
Underside of the mower's Hose off the underside of the mower using
deck is clogged with wet the cyclowash hole in the mower body.
grass clippings.
TROUBLE SHOOTING
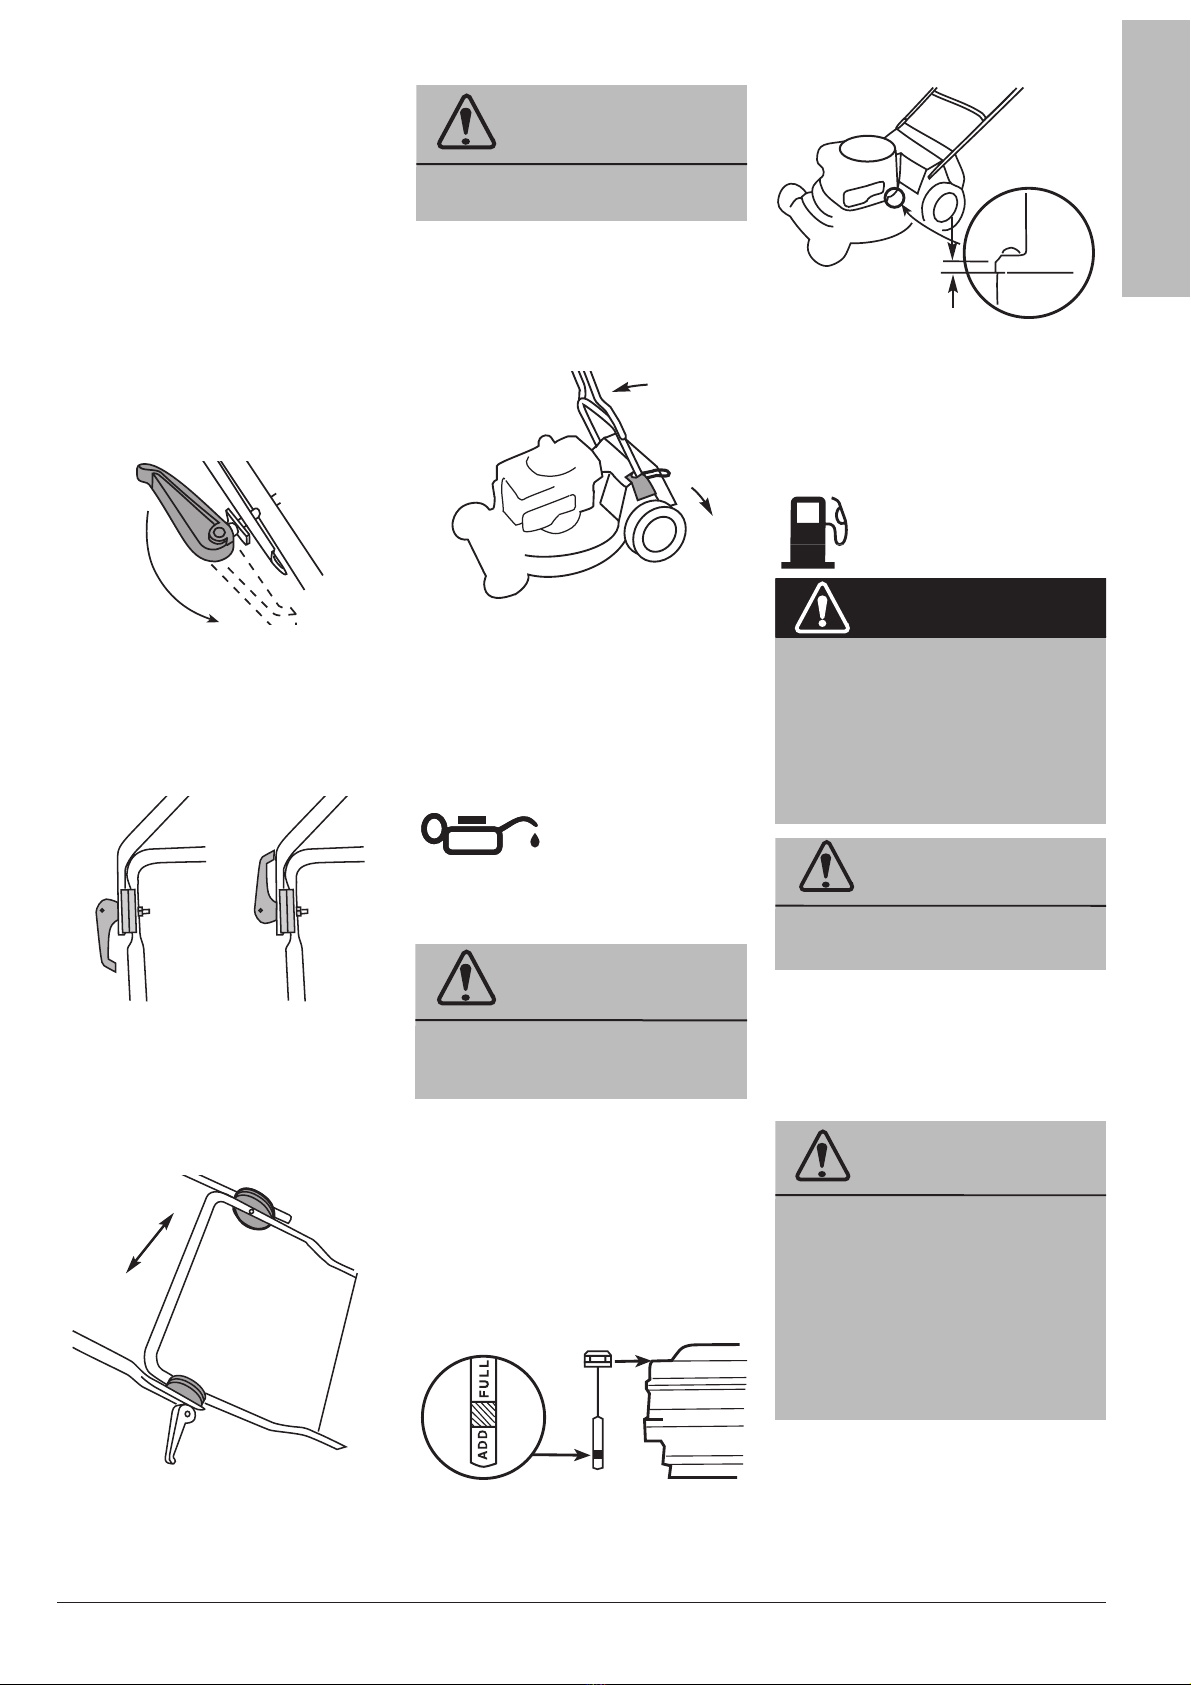
FITTING THE
MULCHING BLOCK TO
THE MOWER
1. Stop the engine.
2. Make sure the discharge chute and the
underside of the mower are clean. If not,
clean the mower using the cyclowash noz-
zle–refer page 10.
3. Raise the flap, and using the hand hold on
the mulching block,insert the mulching block,
the angled section to the mowers right, into
the discharge chute. Make sure the that the
back of the block is sitting on the rear axle.
and lower the flap. See ‘Mowing Advice’ for
tips on mulching, this page.
ENGLISH
MOWING ADVICE
The best time time to mow your lawn is the
early afternoon. By this time the grass has
had a chance to dry out. Also the sensitive
newly cut grass area isn’t exposed to the
direct sun.
For healthy growth, grass should not be cut
too short. Using the lowest settings can result
in destruction of the crown of grass, allowing
flat lying weeds to develop.
Vary your cutting pattern from week to week.
One week mow your lawn from north to south,
the next week, mow your lawn from east to
west. This will help prevent matting and grain-
ing of the grass.
For best performance, always keep the mow-
ers blade sharp. A dull blade tends to tear,
not cut, the blades of grass.
When cutting very long grass, a preliminary
cut on a high setting, followed by a lower cut
(preferably a day or so later), will minimise the
overall time required for the job.
Do not try to cut too much off the grass at one
time. This can excessive loads to be put on
the engine and also effect the mulching per-
formance.
Avoid using the lowest two or three height
settings when mulching. For best results
when mulching; cut off only the top third (or
less) of the grass. Cutting lower than this will
have a detrimental effect on the mulching per-
formance.
When mulching, turning the mower at the end
of a strip you may notice unmulched
grass.The mower deck is naturally tilted
upward when turning so that the air flow
which holds the grass in position for recutting
is momentarily decreased. After mowing the
lawn, you can go back and mow only the
turns so that the clippings are no longer visi-
ble.
Clean the mowing chamber frequently to
remove grass build-up. This will keep mowing
performance at its best, especially when
mulching. Avoid cutting your lawn when it is
wet. Wet grass tends to form clumps and
interferes with the mulching action of the
mower.
If you are not collecting the cut grass, mow in
a pattern that deposits the clippings on the
previously cut swathe. So, if your mower dis-
charges clippings on the left, the next cut
should be to the right of the previous one, and
vice-versa.
If you use the mower often without collecting
the clippings, you will find that the accessory
grass delivery chute (available from your
Dealer for most models) will assist by spread-
ing the clippings more effectively.
When cutting close to obstructions such as
tree trunks, and when mowing to the edge of
a lawn where there is no wheel support, use
the left side of the mower, giving a useful
blade ‘overhang’ for ready access to awkward
areas.