Maintaining your Mystic Mini is critical for consistent performance and durability. Aer 100 hours of
operation it is reccommended to clean the heater to avoid potential residue build up and overheat errors.
This process is also reccomended if your Mystic Mini has not been shut down properly on a consistent basis.
Using the maintenance kit included in your order, follow the directions below. It is important to follow this
procedure in well ventilated areas only.
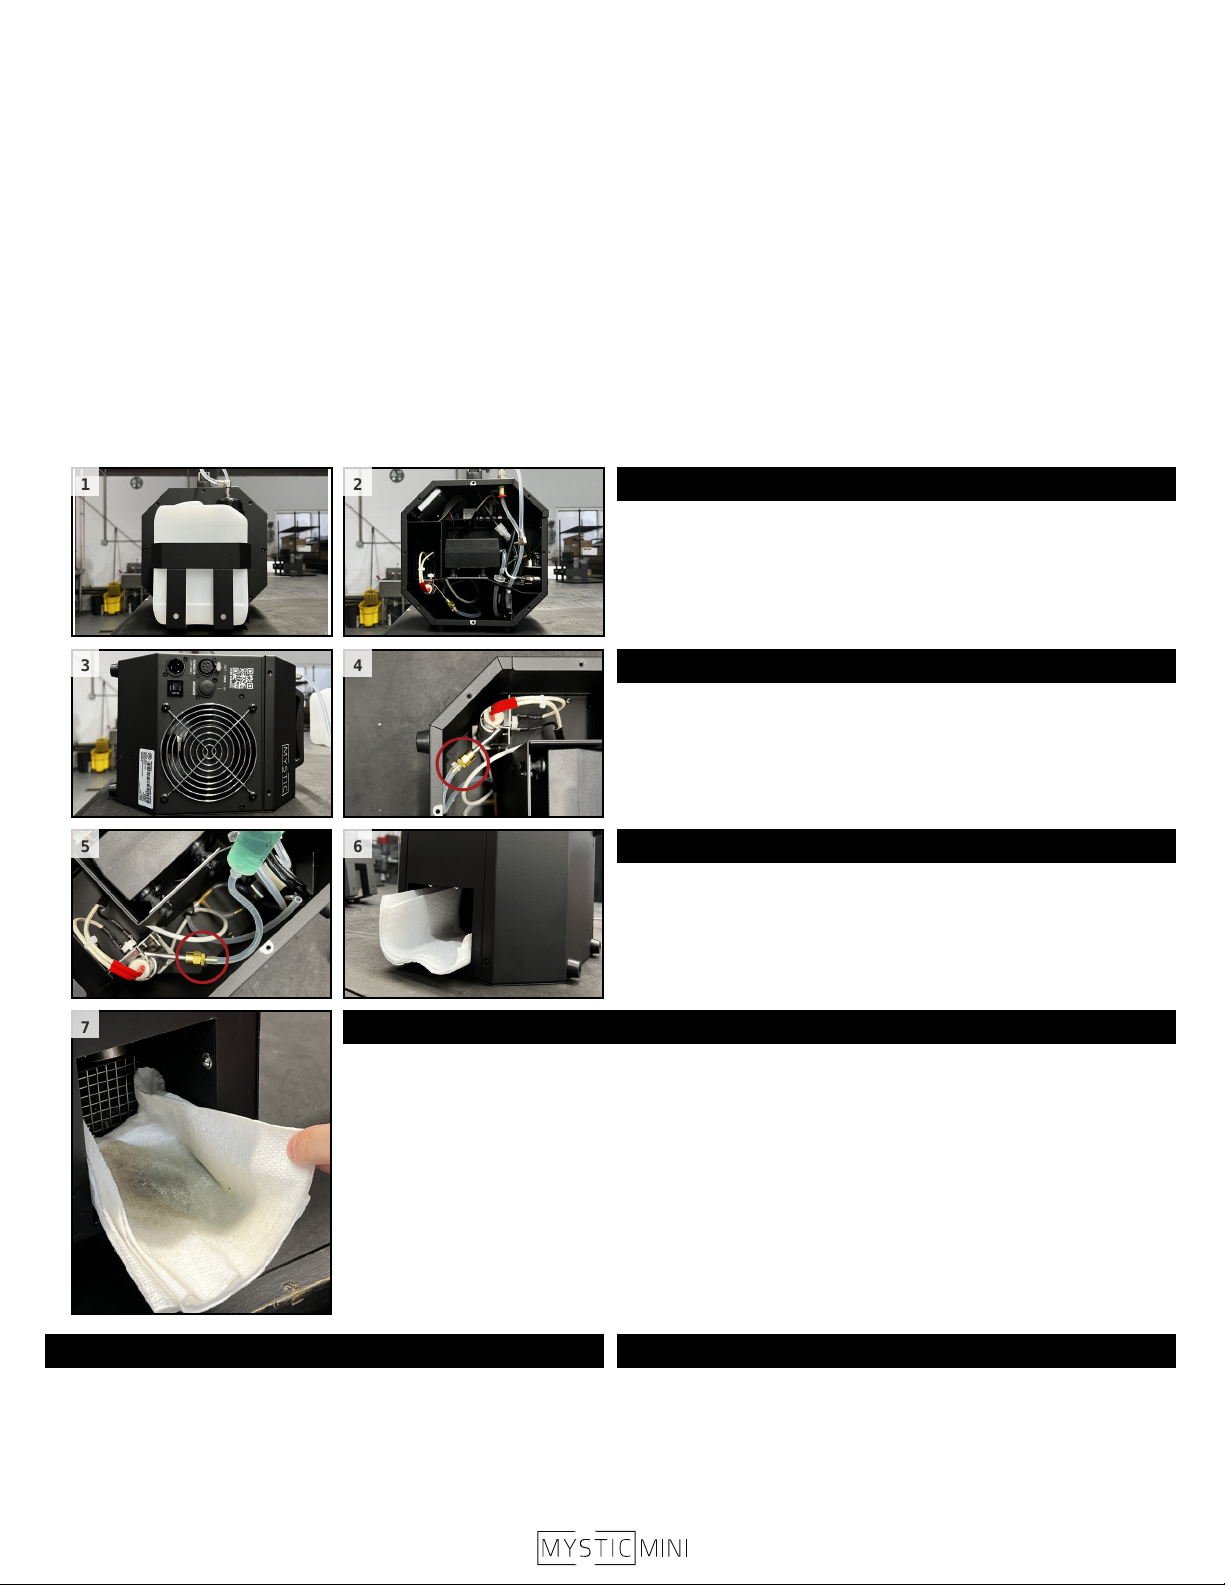
While the Mystic Mini powered o (pic 1), disconnect the fluid
container and use a T15 driver to remove the fluid cage side panel
of your Mystic Mini. (pic 2)
TOOLS REQUIRED:
□ Mystic Mainenance Fluid
□ Syringe
□ Tubing
□ T15 Torx Driver
□ Paper Towel
□ Ziptie
CAUTION: Make sure the machine has been o for more than 1
hour to avoid high temperatures and potential injury. (pic 3)
With the Mystic Mini positioned on the opposite panel side, cut the
zip tie and remove the fluid hose from the heater. (pic 4)
Connect a short hose to the syringe and fill the syringe to 30ml
with Mystic Maintenance Fluid. Connect the syringe to the heater
(pic 5). Next, place a paper towel in the output opening to collect
any potential residue (pic 6).
IMPORANT: Only clean your heater in a well ventilated area! DO NOT clean your Mystic Mini heater
in confined spaces.
Begin by powering on your Mystic Mini. Once the heat up process is complete, leave the machine
idle. Slowly press the syringe until you’ve reach the 15ml mark. Residue will begin to build to build
up on the towel (pic 7). Once the Mystic Mini has reheated, slowly press the syringe to push the
remainder of the cleaner through the heater.
NOTE: Repeat steps 3 and 4 as needed until the output runs clear. In picture 7 you will notice light
residue building up on the paper towel, this particular case would not requre a repeat of steps 3 and
4.
STEP 1: REMOVE SIDE PANEL
STEP 2: DISCONNECT FLUID HOSE
STEP 3: PREPARE CLEANER
STEP 4: CLEAN HEATER
MAINTENANCEMAINTENANCE
Remove the syringe from the heater and replace with the fluid hose
removed in step 2 Secure with a zip tie. Reinstall the fluid cage side
panel and replace the fluid container.
Run your Mystic Mini at 100% Fan and Haze output to ensure the
fluid hoses was installed correctly and there is no is remaining
residue.
STEP 5: REASSEMBLY STEP 6: HAZE
7