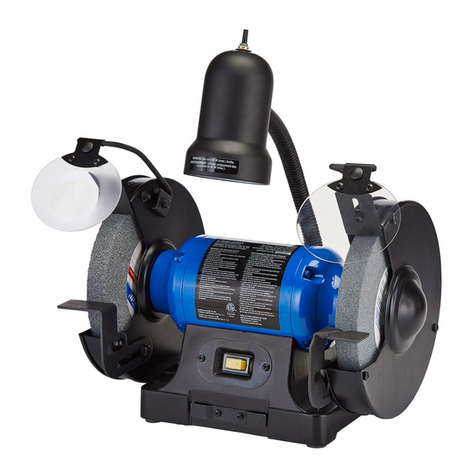
MasterCraft MAXIMUM 055-3503-6 User manual

TM
IMPORTANT:
Please read this manual carefully before using
this product, and save it for reference.
INSTRUCTION
MANUAL
Model no. 055-3503-6
Heavy-duty Bench Grinder

3
TABLE OF CONTENTS
SPECIFICATIONS 4
IMPORTANT INFORMATION
PACKAGE CONTENTS
OPERATING INSTRUCTIONS
TROUBLESHOOTING
PARTS LIST
SAFETY GUIDELINES 5–7
KEY PARTS DIAGRAM
ASSEMBLY INSTRUCTIONS
MAINTENANCE
EXPLODED VIEW
WARRANTY
8–9
10
11
17-19
12-14
15–16
20
21
22
23-24
NOTE: If any parts are missing or damaged, or if you have any
questions, please call our toll-free helpline at 1-800-689-9928.
SAVE THESE INSTRUCTIONS
This manual contains important safety and
operating instructions. Read all instructions and
follow them when using this product.

model no. 055-3503-6 | contact us 1-800-689-9928
45
SAFETY GUIDELINES
!
Failure to follow these rules may result in serious personal injury.
WARNNING !
GENERAL SAFETY GUIDELINES BEFORE USING THIS POWER TOOL
SPECIFICATIONS
• Always wear safety glasses complying with OSHA/ANSI requirements Z87.1.
• Wear a mask or respirator when dust is generated.
• Keep bystanders out of the work area while operating the tool.
• Wheel guards and eye shields must be properly adjusted and tightened
• Always make sure wheels are properly mounted.
• Stand to the side of the grinder during start-up. Switch it on and let the grinder
operate at full speed for approximately one minute so that any undetected flaws or
cracks will become apparent.
• Use only 40 W (max.) bulbs on the work light.
• Use only 6” wheels suitable for 2000 RPM or over.
• Do not operate with cracked or chipped wheels.
• Keep guards in place and working properly.
• Keep hands clear of grinding wheels.
• Never reach behind or beneath the grinding wheels.
• Unplug from power supply before adjusting or servicing. The grinding wheels continue
to rotate after the tool is switched off. Always allow wheels to stop before adjusting
or servicing.
• To avoid electric shock, DO NOT use in damp conditions or expose to rain.
• When fitting a new grinding wheel, always check that the stated maximum RPM meets
or exceeds that stated on the grinder. Also check the new wheel for damage, such as
flaws or cracks. If the wheel appears satisfactory, fit it to the grinder.
• When a new grinding wheel has been fitted, stand to one side of the grinder and
switch it on. Let the grinder operate at full speed for approximately one minute so
that an undetected flaws or cracks will become apparent.
• Use only accessories that are recommended by the manufacturer for your model.
• DO NOT attempt to cut anything with the grinding wheel.
• Grounded tools must be plugged into an outlet that has been properly installed
and grounded in accordance with all local codes and ordinances. Never remove the
grounding prong from the plug or modify it in any way. Do not use adaptor plugs. If in
doubt as to whether the outlet is properly grounded, consult a qualified electrician.
• Do not use the tool when tired or under the influence of drugs, alcohol or medication.
• Do not wear gloves, neckties, jewellery or loose clothing when using tool.
• Ensure the power switch is off prior to plugging in the tool.
• Do not overtighten spindle nuts.
• Spacing between tool rests and wheels should be set to 1/8” or less; hold workpiece
firmly against tool rest.
• Service on these tools should only be performed by an authorized, qualified
technician.
• Secure the tool when working to prevent unexpected movement.
• Failure to comply with these warnings may result in serious personal injury.
• There is a risk of injury due to accidental starting; do not use this tool in an area where
children may be present.
SPECIFICATIONS
MOTOR 120 V AC, 60 Hz, 2.5A
WHEEL SIZE 6 x 3/4" (15.2 x 1.9 cm) with 1/2" (1.27 cm) arbour
WHEEL GRIT 36- and 60-grit
VARIABLE SPEEDS 2000-3400 RPM (No load)
WEIGHT 25 lb 6 oz (11.5 kg)

6
SAFETY GUIDELINES
ADDITIONAL SPECIFIC SAFETY RULES
1. DO NOT operate this machine until it is completely assembled and installed according
to the instructions. A machine incorrectly assembled can cause serious injury.
2. OBTAIN ADVICE from your supervisor, instructor, or another qualified person if you are
not thoroughly familiar with the operation of this machine. Knowledge is safety.
3. FOLLOW ALL WIRING CODES and recommended electrical connections to prevent
shock or electrocution.
4. ALWAYS USE THE PROVIDED BLOTTER and wheel flanges to mount the grinding wheels
on the grinder shaft to prevent wheel damage or accidental separation. Separation can
result in fragments flying off the wheel at high speeds.
5. USE ONLY WHEELS suitable for the speed of the machine. Unsuitable grinding wheels
can come apart, throwing fragments out at high speeds.
6. USE ONLY WHEELS that have a bore exactly equal to the arbours of the machine. Never
attempt to machine an undersized wheel to fit an arbour. Unsuitable grinding wheels
can come apart, throwing fragments out at high speeds.
7. DO NOT overtighten wheel nut.
8. DO NOT USE A WHEEL THAT VIBRATES. Dress the grinding wheel, replace it, or
replace the bearings of the shaft. Unsuitable grinding wheels can come apart, throwing
fragments at high speeds.
9. INSPECT WHEELS before starting the machine for cracks or fragments. REPLACE
DAMAGED WHEELS immediately. Parts of the wheel can be thrown at high speeds
causing serious injury.
10. ADJUST EYE SHIELDS close to the grinding wheel, and re-adjust as the wheel wears
down. Flying sparks are dangerous and can cause fires or explosions.
11. ALWAYS MAKE SURE the eye shields are in place, properly adjusted, and secured.
12. ADJUST TOOL RESTS close to the grinding wheel (1/8"separation or less). Tighten the
tool rest securely to prevent shifting positions, and re-adjust as the wheel wears down.
The workpiece can be drawn into the wheel, causing damage to the workpiece and/or
serious injury.
model no. 055-3503-6 | contact us 1-800-689-9928 7
SAFETY GUIDELINES
13. STAND TO ONE SIDE before turning the machine on . Loose fragments or wheel parts
could fly from the wheel at high speeds.
14. NEVER GRIND ON A COLD WHEEL. Run the grinder for one full minute before
applying the workpiece. A cold wheel has a tendency to chip. Those fragments could
fly from the wheel at high speeds.
15. NEVER START THE MACHINE with the workpiece against the grinding wheel. The
workpiece can be drawn into the wheel, causing damage to the machine and/or
serious injury.
16. CLEAN THE MACHINE thoroughly when processing different types of workpieces
(wood, steel, or aluminium). Combining wood and metal dust can create an explosion
or fire hazard. DO NOT GRIND or polish magnesium. Fire will result.
17. NEVER GRIND NEAR FLAMMABLE GAS OR LIQUIDS. Sparks can create a fire or an
explosion.
18. AVOID awkward operations and hand positions. A sudden slip could cause a hand to
move into the grinding wheel.
19. KEEP ARMS, HANDS, and fingers away from the wheel. The abrasive surfaces can
cause serious injury.
20.HOLD THE WORKPIECE FIRMLY against the tool rest. Loss of control of the
workpiece can cause serious injury.
21. DRESS THE WHEEL on the face only. Dressing the side of the wheel could cause it to
become too thin for safe use.
22. GRIND A WORKPIECE using the face of the grinding wheel only. Loss of control of the
workpiece can cause serious injury.
23. NEVER APPLY COOLANT directly to the grinding wheel. Coolant can weaken the
bonding strength of the grinding wheel and cause it to fail. Dip the workpiece in water
to cool it.
24. DO NOT TOUCH the ground portion of a workpiece until it has cooled sufficiently.
Grinding creates heat.
25. PROPERLY SUPPORT LONG OR WIDE workpieces. Loss of control of the workpiece
can cause serious injury.
26. NEVER PERFORM LAYOUT, assembly , or set-up work on the table/work area when
the machine is running. A sudden slip could cause a hand to move into the wheel.
Severe injury can result.
27. TURN THE MACHINE OFF, disconnect the machine from the power source, and clean
the table/work area before leaving the machine. Lock the switch in the “OFF” position
to prevent unauthorized use. Someone else might accidentally start the machine and
cause serious injury to themselves.
!WARNING!
Read, understand and observe all instructions in this manual before using or
operating the tool for which it is written and supplied. Ensure that anyone who is to
use the tool has read and understood the instructions provided.

8
IMPORTANT INFORMATION
IMPORTANT INFORMATION-Electrical
A separate electrical circuit should be used for your machines. This circuit should not be less
than #12 wire and should be protected with a 20 A time lag fuse. If an extension cord is used,
use only 3-wire extension cords which have 3-prong grounding type plugs and matching
receptacle which will accept the machine’s plug. Before connecting the machine to the power
line, make sure the switch is in the "OFF" position and be sure that the electric current is of
the same characteristics as indicated on the machine. All line connections should make good
contact. Running on low voltage will damage the machine.
Fig. A Fig. B
gROUNDED
OUTLET BOX
CURRENT
CARRYiNg
PRONgS
gROUNDiNg BLADE
iS LONgEST OF THE 3 BLADES
gROUNDED OUTLET BOX
gROUNDiNg
MEANS
ADAPTER
model no. 055-3503-6 | contact us 1-800-689-9928 9
DANGER!
MOTOR SPECIFICATIONS
Your machine is wired for 120 V, 60 Hz alternating current. Before connecting the
machine to the power source, make sure the switch is in the "OFF" position.
GROUNDING INSTRUCTIONS
All grounded, cord-connected machines: In the event of a malfunction or breakdown,
grounding provides a path of least resistance for electric current to reduce the risk of
electric shock. This machine is equipped with an electric cord having an equipment
grounding conductor and a grounding plug.
DANGER!
DO NOT EXPOSE THE MACHINE TO RAIN OR OPERATE THE MACHINE IN
DAMP LOCATIONS.
THIS MACHINE MUST BE GROUNDED WHILE IN USE TO PROTECT
THE OPERATOR FROM ELECTRIC SHOCK.
!
DANGER!
IMPORTANT INFORMATION
The plug must be plugged into a matching outlet that is properly installed and grounded in
accordance with all local codes and ordinances.
Do not modify the plug provided–if it will not fit the outlet, have the proper outlet installed
by a qualified electrician.
Improper connection of the equipment-grounding conductor can result in risk of electric
shock. The conductor with insulation having an outer surface that is green with or without
yellow stripes is the equipment-grounding conductor. If repair or replacement of the
electric cord or plug is necessary, do not connect the equipment-grounding conductor to a
live terminal.
Check with a qualified electrician or service personnel if the grounding instructions are not
completely understood, or if in doubt as to whether the machine is properly grounded.
Use only 3-wire extension cords that have 3-pronged grounding type plugs and matching
3-conductor receptacles that accept the machine’s plug, as shown in Fig. A.
Repair or replace damaged or worn cord immediately.
IN ALL CASES, MAKE CERTAIN THE RECEPTACLE IN QUESTION
IS PROPERLY GROUNDED. IF YOU ARE NOT SURE, HAVE A
QUALIFIED ELECTRICIAN CHECK THE RECEPTACLE.
Use proper extension cords. Make sure your extension cord is in good condition
and is a 3-wire extension cord which has a 3-pronged grounding type plug and matching
receptacle which will accept the machine’s plug. When using an extension cord, be sure to
use one heavy enough to carry the current of the machine. An undersized cord will cause a
drop in line voltage, resulting in loss of power and overheating. The table shows the correct
gauge to use depending on the cord length. If in doubt, use the next heavier gauge. The
smaller the gauge number, the heavier the cord.
MINIMUM GAUGE FOR CORD SETS

10
KEY PARTS DIAGRAM
NO
FFO
L
H
1
2
3
4
5
6
7
8
910
11
12
13
No. Description Qty.
1Work light On/Off switch 1
2Work light 1
3Eye shield support 1
4Spark guard 1
5Eye shield 1
636-grit grinding wheel 1
7Right tool rest 1
8Variable speed control 1
9Coolant tray 1
10 On/Off switch 1
11 Mounting hole 1
12 Left tool rest 1
13 60-grit grinding wheel 1
model no. 055-3503-6 | contact us 1-800-689-9928 11
PACKAGE CONTENTS
Package contents
No. Description Qty.
1Bench grinder 1
2Tool rest mounting bracket 1
3Tool rest 1
4Locking knob/flat washer
Locking nut knob/flat washer
Carriage bolt
2
5Spark guards 1
6Star-head screw
Lock washer
Flat washer
4
7Right/Left eye shields 1
8Coolant tray 1
ON
OFF
L
H
1
2
3
4
5 6
78

12
ASSEMBLY INSTRUCTIONS
Mounting the Grinder to the Workbench
Before attempting to use this grinder, it must be properly mounted to a
workbench or grinding stand.
!
!
CAUTION:
• Position the grinder on the workbench.
• Mark the workbench through the two mounting holes located in the
grinder base.
• Drill holes in the workbench at the marks.
• Using two long bolts, washers, lock-washers and nuts, as shown (not
supplied), secure the grinder to the workbench.
1
2
3
4
1 2 3 4
Bolt Washer Washer Nut
Not included
INSTALLING THE COOLANT TRAY
Hang the coolant tray (1) on the clips (2).
1
2
model no. 055-3503-6 | contact us 1-800-689-9928 13
ASSEMBLY INSTRUCTION
INSTALLING TOOL RESTS
Insert the lock knob (1) through the flat
washer (2) and the right side tool rest (3)
to the right side tool rest mounting bracket
(4) as shown.
ON
OFF
L
H
ON
OFF
L
H
1
2
3
4
12
3
4
1
1
1
2
2
2
3
3
4
4
5
5
Remove the knob (1), lock washer (2) and
flat washer (3) from the carriage bolt (4) on
the lower portion of the wheel guard.
O
N
OFF
L
H
ON
OFF
L
H
1
2
3
4
12
3
4
1
1
1
2
2
2
3
3
4
4
5
5
Attach the tool rest assembly (2) to the
grinder as shown.
Replace the washers and the lock knob (1).
Repeat the procedure for the left side tool
rest.
ON
OFF
L
H
ON
OFF
L
H
1
2
3
4
12
3
4
1
1
1
2
2
2
3
3
4
4
5
5
1. Attach the right spark guard (1) to the
extended pad (2) of guard by using the
bolts (3), spring washers (4) and flat
washers (5).
2. Repeat for the left spark guard.
INSTALLING THE SPARK GUARDS
NOTE: As the wheel wears down, the spark
guards must be re-adjusted to maintain
a 1/16"(1.6 mm) distance.
ON
OFF
L
H
ON
OFF
L
H
1
2
3
4
12
3
4
1
1
1
2
2
2
3
3
4
4
5
5
Bench grinders vibrate. Grinder movement during high-
speed rotation may cause injury or damage to the
workpiece or operator. Mount the grinder securely to a
sturdy workbench or grinding stand.
CAUTION!
To avoid injury, make sure all parts are
assembled and adjusted properly before plugging the
grinder into a power outlet and turning it on.
NOTE: The grooved tool rest mounts on the
left side of grinder.

14
ASSEMBLY INSTRUCTIONS
INSTALLING THE EYE SHIELDS
INSTALLING THE BULB
1. Attach the right eye shield (1) to
the spark guard (2) by using the
locking nut knob (3), lock washer
(4) and the carriage bolt (5).
2. Repeat for left eye shield.
1
1
2
3
4
5
NOTE: Adjust eye shields to appropriate distance from tool rests to avoid
interference during operation.
The eye shield should move freely when being adjusted, but stay in place when the
locking knob is tightened.
Install the new light bulb (1) (40 W bulb
maximum) into the lampshade (2).
ON
OFF
L
H
1
2
model no. 055-3503-6 | contact us 1-800-689-9928 15
OPERATING INSTRUCTION
Using Your Bench Grinder
This Mastercraft Maximum®6" Bench Grinder is ideal for use in sharpening chisels, axes and
other wood-cutting tools. It is also useful for repairing tips on screwdrivers and drill bits or
for removing excess metal burrs from pieces of cut metal.
With the proper accessories, this tool can be used for cleaning metal surfaces using a wire
brush or for buffing and polishing using a cloth wheel.
ON/OFF
The rocker ON/OFF power switch is located on the front of the grinder.
1. Press the side marked I to turn the grinder on.
2. Press the side marked O to turn the grinder off.
3. To lock the switch in the “O” position, grasp the end, of the switch key, and pull it out.
4. With the switch key (1) removed, the switch will not operate.
5. If the switch key is removed while the grinder is running, it can be turned off but cannot
be restarted without inserting the switch key.
REMOVE
TO LOCK
I
O
L
H
ADJUSTING THE SPEED OF THE GRINDER
Your grinder is equipped with a variable speed control
knob. The speed of the grinder may be adjusted by
simply rotating the variable speed control knob (1).
1. To increase speed, rotate the variable speed control
knob (1) clockwise.
2. To reduce speed, rotate the variable speed control
knob (1) counter-clockwise.
(2) is the pointer on speed control knob.
L
H
1
2
12
CAUTION!
• To avoid injury from an accidental start, make sure the switch is in the OFF position
and the plug is not connected to a power outlet.
• To prevent injury resulting from heat of the light bulb, never touch the light bulb until
it has completely cooled.
• To prevent electric shock, never touch any part of the light bulb when the plug is
connected to a power outlet.
•It is recommended to use a vibration-resistant light bulb for this grinder.
WARNING!
Turn the power off and remove the plug from the outlet before changing the grinding
wheels. When turning the grinder on with a newly installed wheel, DO NOT STAND IN
FRONT OF THE GRINDER. Stand to the side and allow the grinder to run for at least
one minute before proceeding to use it.
!
CAUTION !
Always lock the switch off when the grinder is not in use. Remove the key and
keep it in a safe place. In the event of a power failure, blown fuse, or tripped circuit breaker,
turn the switch off and remove the key, preventing an accidental startup when the power
comes on.

16
OPERATING INSTRUCTIONS
Grinding
•Adjustthetoolresttoaccommodatelargeorunusuallyshapedworkpieces.
•Alwayskeeptheworkpiecemovingacrossthefaceofthegrindingwheel.Grinding
continuously on the same spot on the wheel will cause grooves to be worn into the
wheel. The wheel may crack or become damaged more easily, and grinding of other
objects will be difficult.
•Iftheworkpiecebecomeshot,dipitintowateroroiltocoolit.
•Alwaysgrindonthefaceofthewheel(aroundthediameter),NEVERonthesides.
Side pressure on grinding wheels can cause cracking and damage.
•Ifthefaceofthegrindingwheeliswornunevenly,becomesgrooved,orisnolonger
smooth and flat, the wheel should be reshaped with a dressing tool (not supplied).
•Ifthegrindingwheelisnolongerround,thewheelshouldbereshapedwithadressing
tool or replaced.
•Ifthesurfaceofthewheelbecomesloadedanddullwithworkpiecematerial,the
wheel should be cleaned with a dressing tool.
•Afterreshaping,alwaysreadjustthetoolrestsandsparkarrestors.
TWIST DRILL BITS
Drill bits are best sharpened on a
sharpening jig, available at most
hardware stores, but can be “dressed
up” on your grinder. Begin on one
side of the point at the existing angle,
then twist the bit while maintaining a
constant angle with grinding surface.
Sharpen only the tip. This technique
requires considerable practice, so
take your time and make a few “dry
runs” first with the grinder off. Be
sure to maintain the original cutting
edge angle as this is important to
the efficiency of your bits. One tool
rest has a V-groove that is correctly
angled for most drill bits.
COOLANT TRAY
When grinding, metal objects
become heated quickly. It is
important to keep moving the object
back and forth across the face of the
grinding wheel and to cool the object
frequently using the coolant tray.
ON
OFF
L
H
1
model no. 055-3503-6 | contact us 1-800-689-9928 17
MAINTENANCE
Maintenance
Installing or Changing the Wheel
1. Raise the eye shield (1) out of the way
and place the spark guard (6) in its
highest setting.
2. Loosen the knob (2) and remove the
tool rest assembly (3) and carriage bolt
(4).
3. Remove the two screws (5) from the
left side wheel cover and then remove
the outer cover.
ON
OFF
L
H
1
2
3
4
5
6
4. To prevent wheel rotating, place a wood
wedge (1) (not supplied) between the
wheel and the wheel cover as shown.
Remove the hex nut (2) (as shown in right
fig.
Loosen
Wood wedge
1
2
CAUTION!
Turn off and unplug the bench grinder. Use only grinding wheels that measure
6" (150 mm) in diameter. This tool has 1/2" (12.7 mm) arbours on both sides.
NOTE: Using a metal object, like a screwdriver,
is not recommended as it may damage the
grinding wheel.
Maintenance Required Frequency
Check power cord Before each use
Check wheels for cracks Before each use
Check moving parts for alignment and binding issues Before each use
Dress grinding wheels As needed
Replace grinding wheels (see manual section for specifics) As needed
Clean and vacuum dust from the motor housing and other
grinder parts
As needed
Replace work-light bulb As needed
Service beyond recommended maintenance on these tools should only be
performed by an authorized, qualified technician.

18
6. Inspect the wheel (10) for cracks, chips or any other visible damage (other than
normal wear) and discard if such damage is found. Inspect the blotter/cardboard
disc for damage. If the blotter is missing or severely damaged, replace it with a
piece of thin cardboard or blotter paper cut in the same shape.
7. Install the new wheel or other accessory. Make sure both wheel flanges (9) are in
place with the concave sides towards the wheels.
8. Place a wood wedge (7) (not supplied) between the wheel and the wheel cover
as shown
9. Replace the wheel cover and screws.
10. Adjust the tool rest to 1/8" (3.2 mm) away from the wheel and tighten securely.
11. Reattach and adjust the eye shield to a point between your eyes and the wheel.
12. Set the spark guard 1/16" (1.6 mm) away from the wheel.
NEVER USE A GRINDING WHEEL WITHOUT A BLOTTER.
NOTE: Do not overtighten the nut as this can crack the grinding wheel.
5. Remove the hex nut (8) (as
shown ), the wheel flanges
(9) and the wheel (10).
8
9
9
10
model no. 055-3503-6 | contact us 1-800-689-9928 19
WIRE WHEEL OR BUFFING WHEEL
A wire wheel or buffing wheel (not supplied)
may be used with your grinder. You will need
to add one or more spacers ( 1 ) to allow the
arbour hex nut to tighten correctly.
wire wheel : 6 x 1/2" with a maximum speed
of 4500 RPM.
1
DRESSING A GRINDING WHEEL
Bring the dressing tool (not includeD) forward on the tool rest until it touches the high
point on the face of the wheel. Dress the wheel by moving the dressing tool back and
forth. Repeat this operation until the face of the grinding wheel is clean and the corner
of the wheel is square.
NOTE: DO NOT use the wheel dressing tool on wire wheels.
WORK-LIGHT BULB REPLACEMENT
When the light bulb is worn out and will no longer work, purchase a replacement bulb.
To replace, gently push the light bulb into the socket and turn clockwise.
Uses Max 40 W anti-vibration light bulb.
MAINTENANCE
MAINTENANCE
NOTE: The nut on the right side of the grinder has a standard right-hand thread (turn
counter-clockwise to loosen). The one on the left side has a left-hand thread (turn
clockwise to loosen). Both wheel nuts tighten when turning towards the rear of the
grinder and loosen when turning towards the front of the grinder.

20
TROUBLESHOOTING
SYMPTOM PROBABLE CAUSE CORRECTIVE ACTION
Motor will not start.
Low Voltage. Check power source for proper
voltage.
Open circuit in motor or
loose connections.
Inspect all lead connection
on motor for loose or open
connections. (Send for
Servicing.)
Blown fuse or breaker.
Short circuit. (Send for
Servicing.)
Change a fuse on PC board
Motor overheats.
Motor overloaded. Reduce load on motor.
Extension cord too long
and of insufficient gauge
(weight).
Utilize an extension cord of
appropriate gauge and length or
plug tool directly into outlet.
Motor stalls (resulting in
blown fuses or tripped
circuit).
Short circuit in motor or
loose connections.
Inspect connections on motor
for loose or shorted terminals
or worn insulation. (Send for
Servicing.)
Low voltage.
Correct low voltage conditions
(for example: improper
extension cord length and/or
gauge).
Incorrect fuses or circuit
breakers in power line.
Install correct fuses or circuit
breakers or plug tool into an
appropriate circuit
Motor overload. Reduce the load on the motor.
Wavy condition on surface
of workpiece.
Machine vibrating. Ensure machine is securely
mounted on a solid surface.
Workpiece not being held
firmly.
Use a holding device to firmly
retain the workpiece.
Wheel face uneven. Dress the grinding wheel.
model no. 055-3503-6 | contact us 1-800-689-9928 21
EXPLODED VIEW
34
54
58
57
56
55
21
33
17
33
60
69
36
70
36
65
68
42
73
74 75
41
49
77
18
50
76
51
20
52
77
34
54
55
21
56
57
58
60
46
48
47
46
45
44
43
16
27
14
13
61
19
18
253
10
67
66
54
72
71
8
8
33
62
2
9
9
1
6
7
4
3
5
59
12
11
61
35
15
32
31
36
30
29
28
27
38
21
25 26
22
24
36
39
40
41
42
37
53
10
67
66
23
54
64
63

22
Item Description Qty Item Description Qty
1 Star-head screw 4 40 Right safty guard cover 1
2Philips Screw with spring
washer
6 41 Carriage bolt 2
3 Base cover 1 42 Star-head screw 4
4 Pc board 1 43 Star-head screw (white) 4
5 Star-head screw 2 44 Left end cap 1
6 Pc board cover 1 45 Wavy washer 1
7 Star-head screw 2 46 Ball bearing 2
8 Star-head Screw 4 47 Stator 1
9 Rubber foot 4 48 Rotor 1
10 Lock washer 2 49 Right end cap 1
11 Capacitor 1 50 Sensor 1
12 Base 1 51 Plate 1
13 Cord clip fixing plate 1 52 Right end cap 1
14 Cord clip 1 53 Lock nut 2
15 Star-head screw 2 54 Flat washer 4
16 Cord & plug 1 55 Eye shield mounting rod 2
17 Left Spark Shield 1 56 Eye shield 2
18 Cord bushing 3 57 Eye shield plate 2
19 Toothed lock washer 2 58 Star-head screw 4
20 Inner hex head set screw 1 59 Right spark shield 1
21 Flange hex nut 5 60 Small carriage bolt 2
22 Wire fix ring 1 61 Star-head screw (white) 3
23 Ring for brush wheel 1 62 Right safety guard 1
24 Star-head screw 1 63 Right fixed work rest 1
25 Speed controller 1 64 Right movable work rest 1
26 Switch plate 1 65 Hex nut (white) 1
27 Star-head screw 4 66 Locking knob 2
28 Speed control knob 1 67 Big flat washer (white) 2
29 Switch guard 1 68 Left safety guard cover 1
30 Star-head screw 2 69 Left safety guard 1
31 Switch 1 70 Wheel 60# 1
32 Coolant tray 1 71 Left fixed work rest 1
33 Flange hex nut 4 72 Left movable work rest 1
34 Lock nut 2 73 Lamp holder (40 w) 1
35 Coolant tray clip 1 74 Flat washer 1
36 Flange 4 75 Hex nut (white) 1
37 Wheel 1 76 Star-head screw 2
38 Rubber cover 1 77 Hex nut 8
39 Hex nut 1
PARTS LIST
model no. 055-3503-6 | contact us 1-800-689-9928
WARRANTY
23
5-Year Limited Warranty
This Mastercraft Maximum product is guaranteed for a period of 5 years
from the date of original retail purchase against defects in workmanship
and materials, except for the following component:
Component A: Accessories, which are guaranteed for a period of 1-year
from the date of original retail purchase against defects in workmanship and materials.
Subject to the conditions and limitations described below, this product, if returned to us
with proof of purchase within the stated warranty period and if covered under this
warranty, will be repaired or replaced (with the same model, or one of equal value or
costs of labour relating thereto.
These warranties are subject to the following conditions and limitations:
a) a bill of sale verifying the purchase and purchase date must be provided;
b) this warranty will not apply to any product or part thereof which is worn or broken or
which has become inoperative due to abuse, misuse, accidental damage, neglect or
lack of proper installation, operation or maintenance (as outlined in the applicable
owner’s manual or operating instructions) or which is being used for industrial,
professional, commercial or rental purposes;
c) this warranty will not apply to normal wear and tear or to expendable parts or
accessories that may be supplied with the product that are expected to become
inoperative or unusable after a seasonable period of use;
d) this warranty will not apply to routine maintenance and consumable items such as,
tune-ups or adjustments;
e) this warranty will not apply where damage is caused by repairs made or attempted by
others (i.e. persons not authorized by the manufacturer);
f) this warranty will not apply to any product that was sold to the original purchaser asa
g) this warranty will not apply to any product or part thereof if any part from another
manufacturer is installed therein or any repairs or alterations have been made or
attempted by unauthorized persons;
not limited to, scratches, dents, paint chips, or to any corrosion or discolouring by
heat, abrasive and chemical cleaners; and
of another company, which shall be covered under the product manufacturer’s
warranty, if any.
ADDITIONAL LIMITATIONS
This warranty applies only to the original purchaser and may not be transferred. Neither
the retailer nor the manufacturer shall be liable for any other expense, loss or damage,
including, without limitation, any indirect, incidental, consequential or exemplary
damages arising in connection with the sale, use or inability to use this product.

24 model no. 055-3503-6 | contact us 1-800-689-9928
WARRANTY
Notice to Consumer
This warranty gives you specific legal rights, and you may have other rights, which
may vary from province to province. The provisions contained in this warranty are not
intended to limit, modify, take away from, disclaim or exclude any statutory warranties
set forth in any applicable provincial or federal legislation.
Table of contents
Other MasterCraft Grinder manuals

MasterCraft
MasterCraft Maximum 058-8076-6 User manual

MasterCraft
MasterCraft 054-7120-4 User manual

MasterCraft
MasterCraft 54-1243-8 User manual

MasterCraft
MasterCraft 055-3521-2 User manual

MasterCraft
MasterCraft 054-7121-2 User manual

MasterCraft
MasterCraft 055-3500-2 User manual

MasterCraft
MasterCraft Maximum 054-7221-4 User manual

MasterCraft
MasterCraft 054-1245-4 User manual

MasterCraft
MasterCraft 058-7713-6 User manual

MasterCraft
MasterCraft 2902.3 User manual