Vacuum To Go #6980
12-volt wet/dry vacuum cleaner
IMPORTANT SAFEGUARDS
• Read all instructions before operating this or any electrical appliance.
• Administer close supervision when running this appliance around children.
• Unplug when not in use and before cleaning the unit.
• Do Not immerse cord or unit in water or other liquids.
• Know your Vacuum To Go vacuum cleaner. Read and understand the instructions and labels
on the vacuum before operating. Use only as described in this manual.
• Sparks inside of the motor can ignite flammable vapors or dust. To avoid fire or explosion
do not vacuum or use near flammable or combustible liquids or gases.
• Do Not vacuum anything that is burning or smoking such as cigarettes, matches or hot ashes.
• To avoid health hazards from vapors or dust, do not vacuum toxic materials.
• To avoid damage to your vacuum, store in an area where the temperature will not exceed
100ºF. To avoid injury, shock, or fire, never use a damaged vacuum or cord.
• Do Not put any object into openings. Do not use with any opening blocked. Keep free of
dust, lint, hair and anything that may reduce air flow. Keep hair, loose clothing and fingers
away from openings and moving parts.
• Do Not use without filter in place.
• To avoid falls, use extra care when cleaning on stairs.
• The use of attachments not recommended by the manufacturer may cause personal injury.
• Do Not place vacuum nozzle near face, eyes or ears during operation.
UNPACKING AND SET-UP
1. Securely insert the inlet end of the hose (the side with the longer end) into the vacuum hose
intake on the unit labeled V.
2. The filter is located on the underside of the tank cover. Ensure that the elastic is securely
attached to the lip of the filter housing.
3. Attach one of the cleaning accessories to the accessory end of the hose.
4. To attach the carrying strap, clip the strap ends to the rings on both sides of the unit.
5. Open the cord storage door and pull out the 15 ft. cord.
6. Push the 12-V DC plug on the end of the power cord into the DC receptacle in your vehicle.
7. The vacuum is ready for use.
OPERATING INSTRUCTIONS
Dry Pick-Up
1. Turn on by pressing the red ON/OFF button.
2. The green ON/OFF indicator light will illuminate to confirm that power is being supplied to the unit.
3. Vacuum using the appropriate cleaning attachment in any direction until the area is clean.
4. You can adjust the power needed by pressing the yellow HI/LOW button.
5. Press the ON/OFF button to turn the unit off.
Wet Pick-Up/Cleaning
Note: Empty tank before picking up liquid or wet debris.
1. When picking up liquid, wet debris or a combination of both, vacuum in any direction
until the area is clean.
2. To avoid spillage while vacuuming, do not suck in liquid over the MAX FILL LINE marking.
Handle with care when liquid is inside of the tank. If the tank tips and leaks it may cause
damage to the unit.
3. Wet pick-up accessories should be washed periodically with warm, soapy water.
BLOWING & INFLATING
1. Securely insert the inlet end of the hose (the side with the longer end) into the
blow/inflate hose output on the unit labeled B.
2. Attach the appropriate blower or inflator nozzel to the other end of the hose.
3. Plus in and turn on as described above.
4. Insert the inflate nozzel into inflatable, or use the blower attachment to clear debris.
5. Turn off using the ON/OFF button when done.
OPERATION IN VEHICLES
• Do not use while vehicle is moving.
• Make sure that your battery is strong and in good working condition before plugging the
Vacuum To Go into your vehicle’s 12-volt receptacle.
• Do not use the unit if your vehicle’s electrical system is weak or damaged.
• Periodically check your vehicle’s charging system for continued successful use.
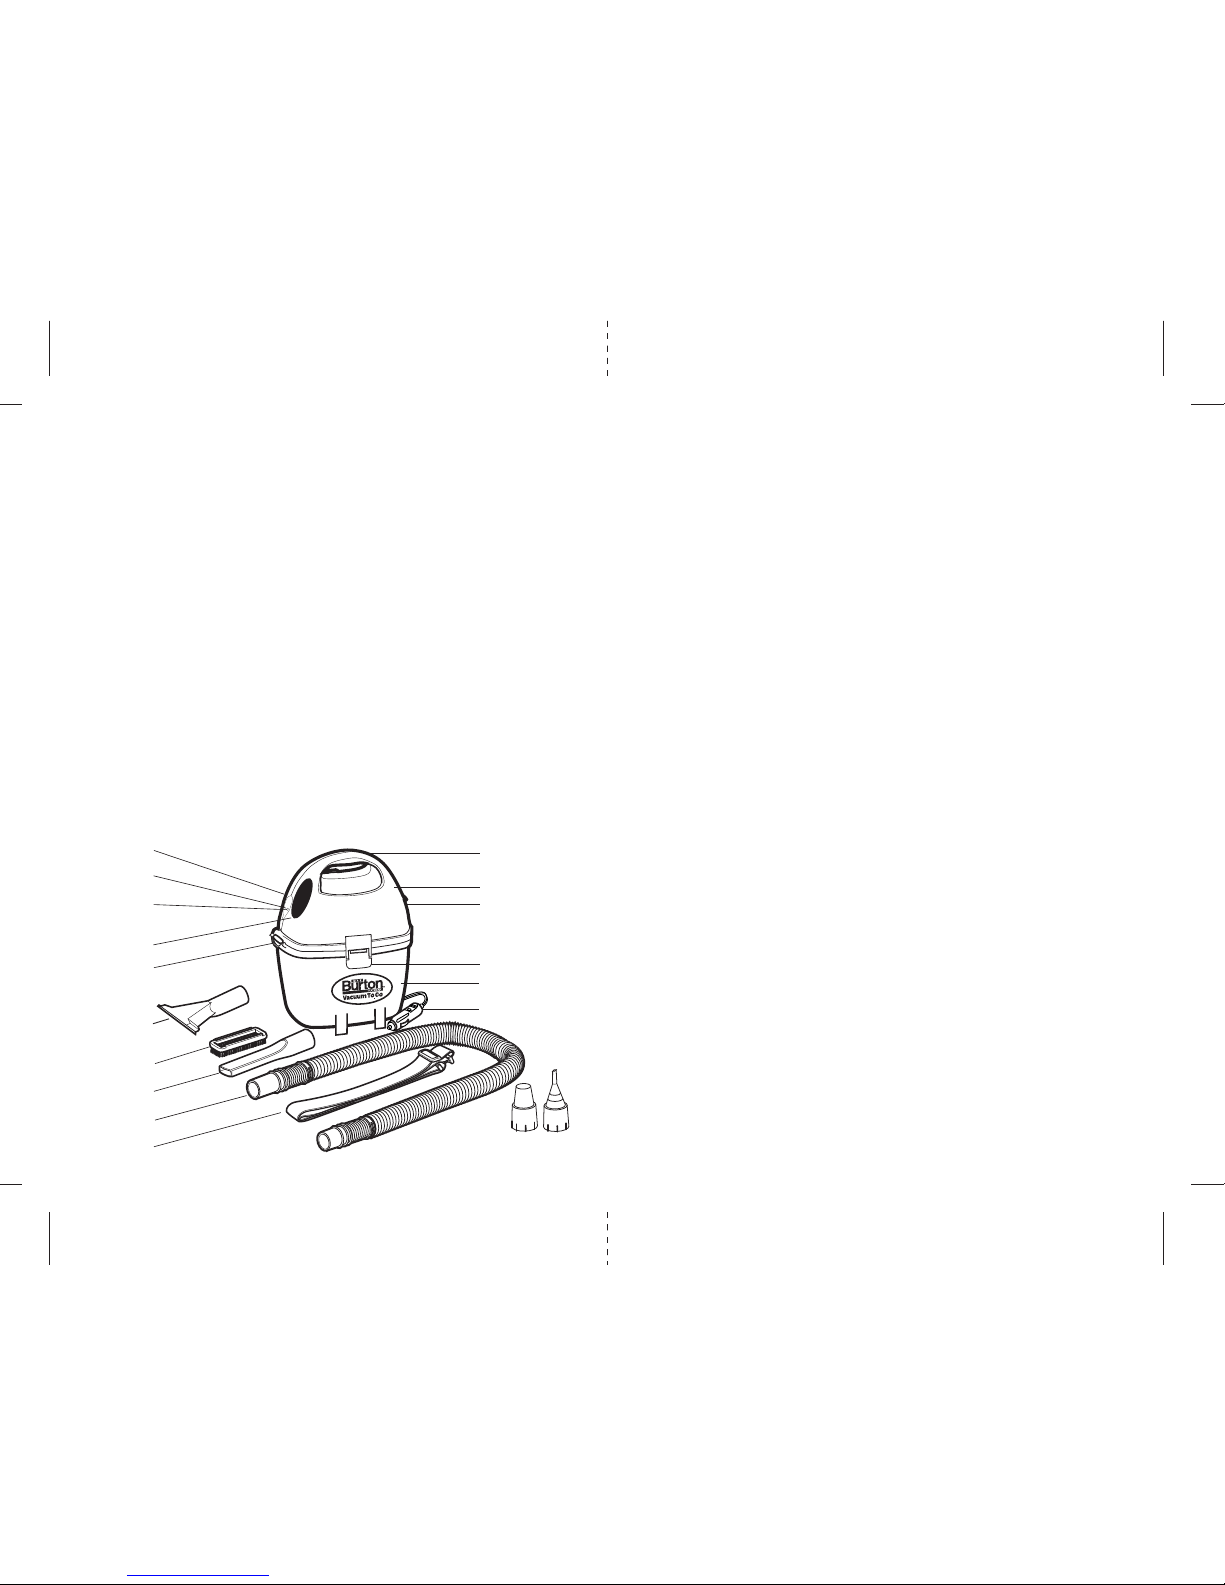
On/Off Button
Handle
Vacuum Hose Intake
Tank
Nozzle
Carpet Brush
Attachment
Crevice Tool
Hose
Carrying Strap
Tank cover
Cord Storage
Clip Lock
Blow/Inflate
Hose Output
Strap Attachment
High/Low Button
Inflator &
Blower Nozzles
12-Volt DC Plug
PARTS IDENTIFICATION