Maxxhaul 70154 Instruction Manual

Ring Mount
Tubular
Swivel Jack
Model 70154
and
Model 70155
Read and understand this entire manual before assembling,
installing, operating, or servicing this product.
SAVE THIS MANUAL
Instruction Manual
&
Parts Catalog
Copyrightc2017 by MAXXHAUL. All rights reserved. No portion of this manual or any artwork contained
herein may be reproduced in any shape or form without the express written consent of MAXXHAUL. Due
to continuing improvements, actual product may differ slightly from the product described herein. Tools
required for assembly and maintenance may not be included.

IMPORTANT SAFETY
INFORMATION
This is a SAFETY ALERT symbol.
It is used to alert you to
potential personal
injury hazards. Obey all
safety messages that follow
this symbol to avoid possible injury or death.
DANGER indicates a
hazardous situation which, if not avoided,
will result in death or injury.
WARNING indicates a
hazardous situation which, if not avoided,
could result in death or serious injury.
CAUTION indicates a
hazardous situation which, if not avoided,
could result in minor or moderate injury.
NOTICE indicates
important information which, if not followed,
may cause damage to equipment.
SAVE THIS MANUAL
Keep this manual for the safety warnings
and precautions. The manual offers impor-
tant information on how to assemble, use
and maintain this product.
Write the product’s model number and
purchase date on the cover page of this
manual.
Keep this manual (and your purchase re-
ceipt) in a safe place.
UNPACKING
The shipment should be thoroughly inspected as
soon as it is received. The signed “bill of lad-
ing” is acknowledgement by the carrier of receipt
in good condition or shipment covered by our
invoice. For your own protection, if any of the
goods called for on the bill of lading are shorted
or damaged, do not accept them until the carrier
makes a notation on the freight bill of the shorted
or damaged goods.
DANGER
WARNING
CAUTION
NOTICE
INSTRUCTION
MANUAL
WARNING concerning Risk of Eye
Injury. Wear ANSI approved eye
protection.
WARNING concerning Risk of
Hearing Loss. Wear hearing pro-
tection.
IMPORTANT SAFETY
INSTRUCTIONS
1. Read and understand all
safety warnings and in-
structions. Failure to follow the warnings
and instructions may result in serious injury
or death. Save all warnings and instructions
for future reference.
2. Personal and Work Area Safety
A. Always wear ANSI approved
safety goggles.
B. Always wear hearing protec-
tection when working in
noisy environments. Prolonged exposure
to high intensity noise can cause hearing
loss.
C. Use safety equipment. Safe-
ty shoes, hard hat and work
gloves must be used for applicable condi-
tions.
Model 70154, 70155 Page 2
D. Dress appropriately. Never wear loose
Contain long hair, and keep hair, clothing
and gloves away from moving parts.
E. Use common sense when working.
Stay alert and concentrate when assembling
and using the Swivel Jack. Never work
medications.
Notify MAXXHAUL immediately if any hidden
loss or damage is discovered after receipt.

Model 70154, 70155 Page 3
Personal and Work Area Safety (continued)
F. While assembling and using the Swivel
Jack keep work area clean and well lighted.
Keep spectators and children out of the work
area.
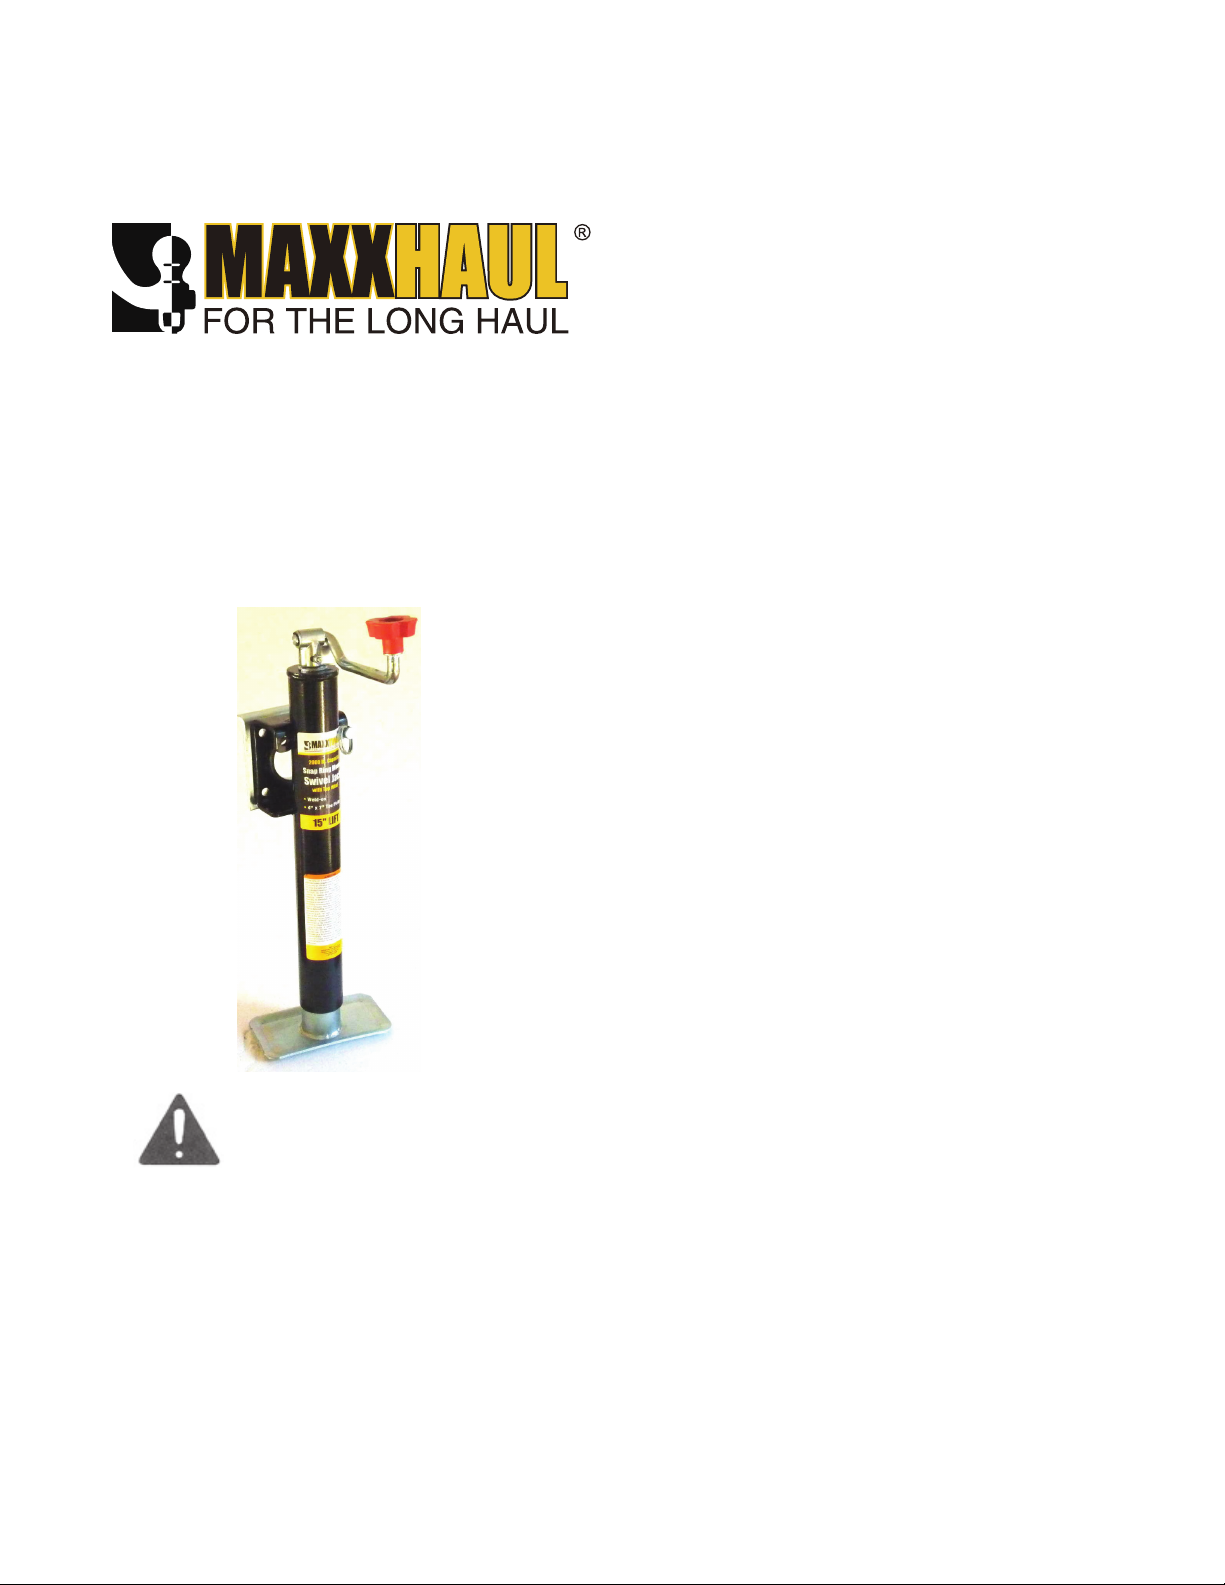
3. Use of the Swivel Jack
A. Trailer tongue weight (TW) is the down-
ward pressure that the trailer coupler places
on the hitch ball. Usually, TW is about 10%
of the Gross Trailer Weight (GTW); GTW is
the weight of the trailer when fully loaded.
Only use a Swivel Jack that has a capac-
ity that matches or exceeds the trailer
tongue weight (TW).
Do not exceed this Swivel Jack’s 2,000
Lbs. maximum capacity.
B. When assembling and setting-up the
Swivel Jack, the trailer must be on a smooth,
C. Use this product in accordance with De-
partment of Transportation (DOT) rules and
regulations. More information can be found
at www.dot.gov/regulations.html.
D. The Swivel Jack is designed to be
mounted to the trailer’s tongue and is used
when hitching and unhitching the trailer’s
hitch from the vehicle. Use of the Swivel
Jack for operations other than those intend-
ed could result in serious personal injury and
property damage. The Swivel Jack is not for
aircraft applications.
E. Frequently check and maintain the Swiv-
el Jack. Check for loose hardware, misalign-
ment or binding of moving parts and damage
to components. If the Swivel Jack needs
servicing, it should only be performed by a
F. Chock trailer wheels when setting up this
product and when using the Swivel Jack to
raise or lower the trailer tongue.
G. Keep clear of the underside of trailer, and
a safe distance from the Swivel Jack when
raising or lowering the load and when re-
positioning the trailer.
H. Swivel Jack must be locked in vertical
position before the load is applied. Make
sure the Locking Pin (10) is fully inserted
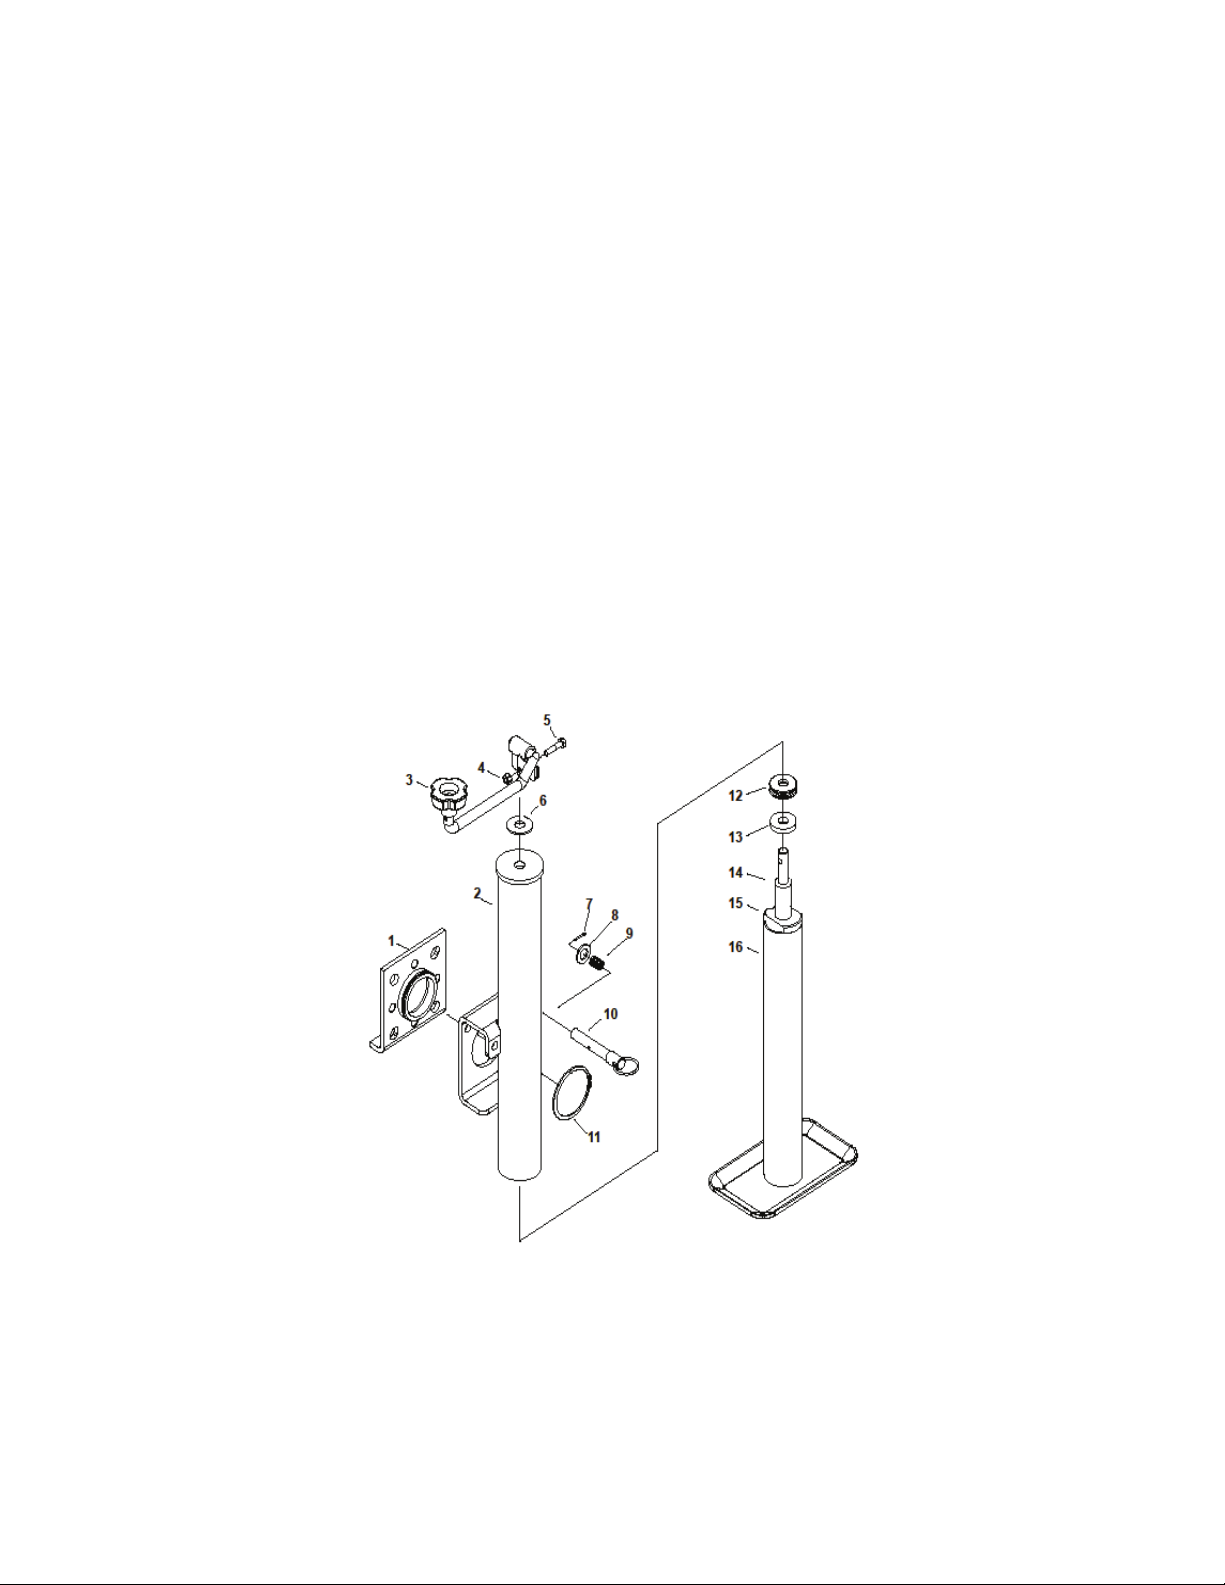
into the Swivel Plate (1). Before moving
the trailer, the Swivel Jack must be secured
properly in its horizontal position, with Lock-
ing Pin fully inserted in Swivel Plate.
I. The Swivel Plate (1) must be welded to
the trailer tongue. Never try to modify or
disassemble the Swivel Plate or the Locking
Pin (10) when Swivel Jack is under load.
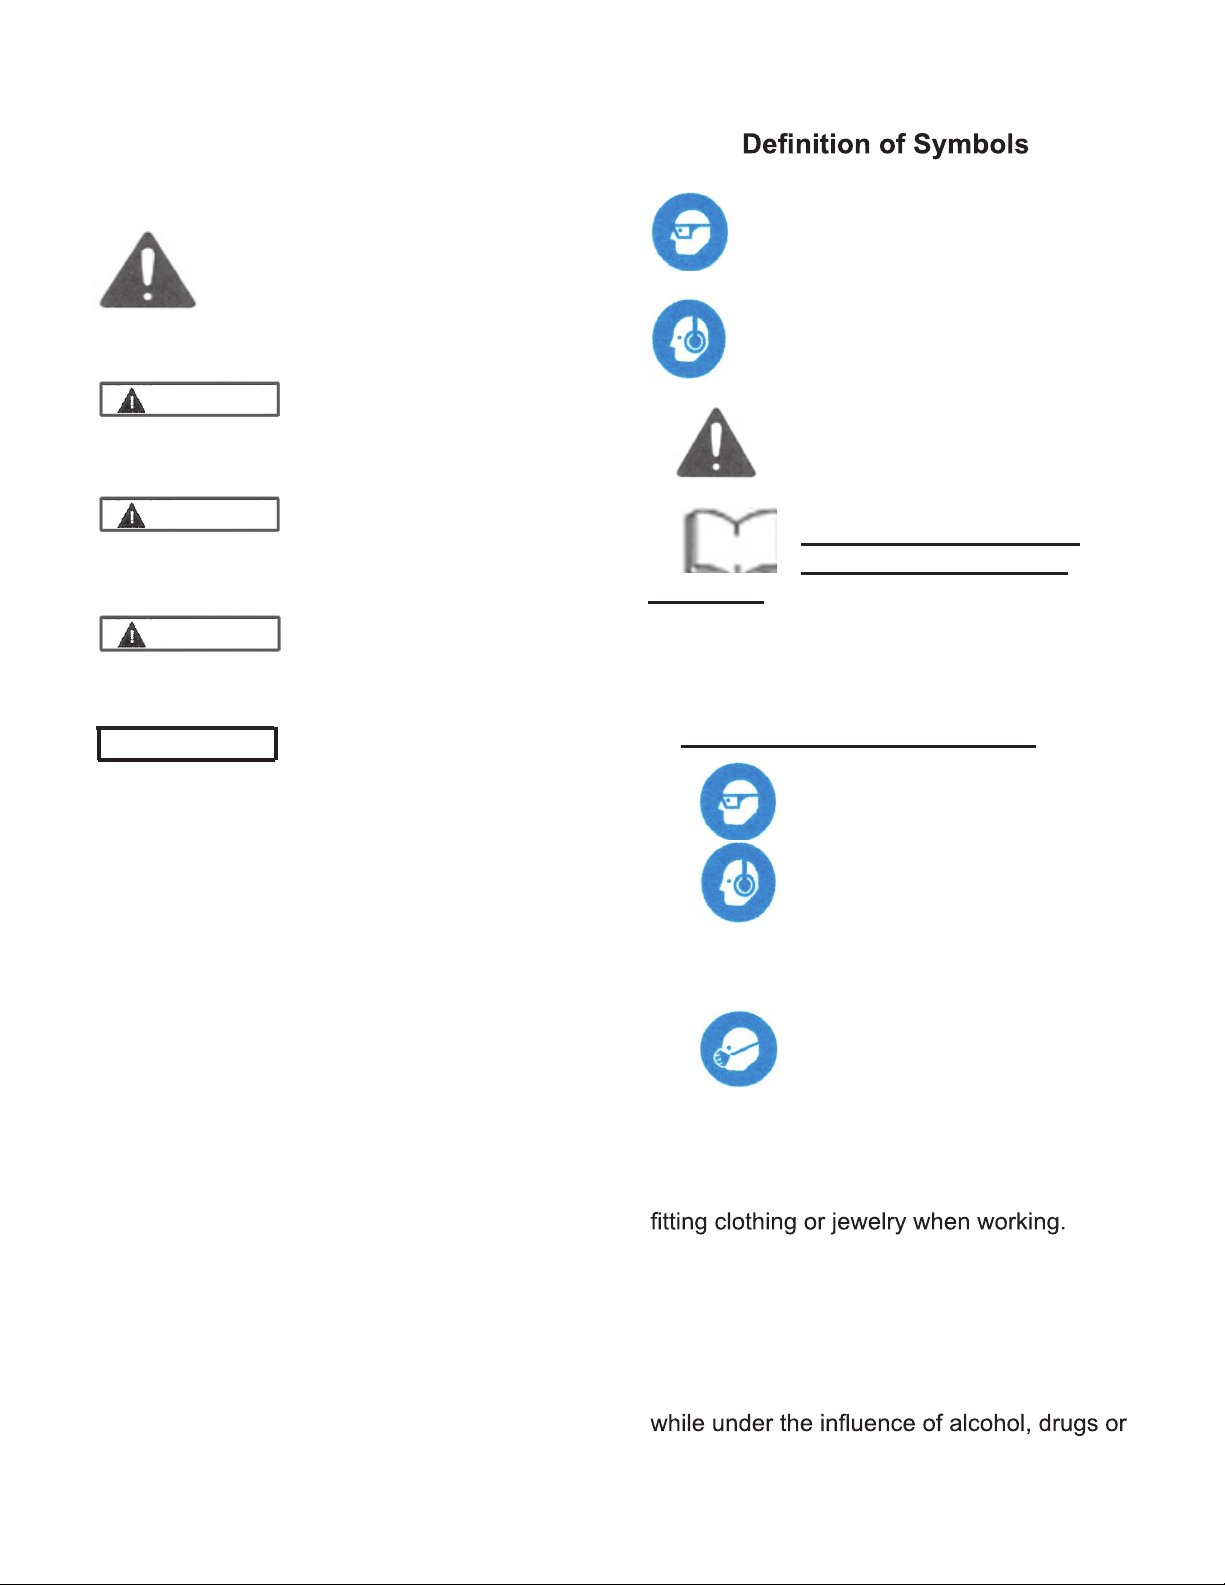
J. Always wear ANSI approved safety
glasses when mounting and using the Swivel
Jack. Keep spectators and children away
when using the Swivel Jack.
K. Be aware of the danger of “dynamic
loading”. This situation arises when a load
is dropped onto the Swivel Jack or trailer
tongue, resulting in a short term excessive
load. Dynamic loading can result in damage
and failure of the Swivel Jack and/or trailer
tongue, and personal injury to the person us-
ing the Swivel Jack.
L. If Swivel Jack is used on a boat trailer,
never disconnect the trailer from vehicle and
use the Swivel Jack to maneuver the boat
down a boat ramp.
Keep in mind that the warnings previous-
ly discussed cannot cover all possible
events and circumstances. It is impor-
tant that the person using this product
use common sense at all times.
WARNING
MAXXHAUL is not responsible for the at-
tachment or the installation of this

Mounting the Swivel Jack
1. Plan carefully where the Swivel Jack is
to be mounted. It is designed to mount to
the side of a straight trailer tongue. The
beam of the tongue must be rectangular
x 5” trailer tongues. The Swivel Jack’s
Swivel Plate (1) must be welded to the
side of the straight trailer tongue as
shown below.
2. Do not attempt to modify the trailer
tongue; making changes or drilling holes in
the trailer tongue could result in failure of this
component.
3. Never mount the Swivel Jack on a cy-
lindrical trailer tongue. The Swivel Plate
will only mount properly on a rectangular or
square tongue beam.
4. When planning the location of the Swivel
Jack, take into account that the Swivel Jack
will swing upward to a horizontal position
when not in use; allow room for this. The
handle will crank in a 360 degree rotation.
Make sure that the Swivel Jack will not inter-
fere with the trailer or vehicle when turns are
made, or when the trailer travels over speed
bumps or up and down boat ramps.
5. The best way to install the Swivel Jack is
when the trailer is attached to the tow vehi-
surface.
6. Welding of the Swivel Plate (1) to the
straight trailer tongue should only be
Prior to weld-
ing, pull the Locking Pin (10) and rotate the
Swivel Plate slightly (to isolate the tip of
Locking Pin during welding operation).
7. After the Swivel Jack has been mounted
to the trailer, test the Jack. Crank the handle
to make sure it lowers and raises the Jack.
Crank clockwise to raise Jack; counterclock-
wise to lower Jack.
Pull the Locking Pin (10) and rotate the Jack
horizontally. Reinsert the Locking Pin and
make sure it locks the Jack in the horizontal
position. Pull Locking Pin and rotate the Jack
back to the vertical position; reinsert Locking
Pin and make sure it locks the Jack in the
vertical position.
Model 70154, 70155 Page 4
Always wear ANSI approved
safety goggles.
Upper lip of
Swivel Plate (1)
Straight
trailer tongue
Note: Upper lip
of Swivel Plate
must wrap
around top
edge of straight
trailer tongue.
Locking Pin (10)
Limited Warranty. MAXXHAUL warrants to
the original retail purchaser that the product
is free of defects in material and workman-
ship at the time of shipment. This product
is warranteed for 90 days from the date of
purchase. This warranty is expressly in lieu
of all other warranties, express or implied.
Proof of purchase is required for warranty
transactions; a copy of the original invoice
or sales receipt is required.
Product. The attachment of this product is
critical and beyond the control of MAXXHAUL
It neither guarantees, nor will it be
liable for any damage resulting from
its attachment or improper use.

SPECIFICATIONS
Maximum Capacity 2,000 Lbs.
Lift Range 10” (Model 70154)
15” (Model 70155)
Crank Handle Top Wind
Model 70154, 70155 Page 5
Using the Swivel Jack
To mount trailer to tow vehicle:
1. Chock the wheels of the trailer to prevent
any trailer movement.
2. Rotate the Swivel Jack handle clockwise
to raise the trailer tongue to a level slightly
above the tow vehicle’s hitch. Move tow ve-
hicle so that the trailer’s hitch is directly over
the tow vehicle’s hitch ball.
3. Turn the Handle counterclockwise to
lower the tongue hitch onto the vehicle’s
hitch ball. Secure the trailer with the hitch
retainer.
4. Keep turning the Handle counterclock-
wise to fully retract the Swivel Jack.
5. Pull the Locking Pin (10) and swing the
Swivel Jack to the up, horizontal position.
Align holes in Swivel Plate (1) and release
Locking Pin to lock the Swivel Jack in this up
position before moving the trailer. Fold up
the handle so that the handle Knob (3) rests
against the Jack.
6. Always attach safety chains and electrical
connections between the tow vehicle and the
trailer.
To dismount trailer from tow vehicle:
1. Chock wheels of trailer.
2. Swing open the handle to its working
position. Pull on Locking Pin (10) and swing
the Swivel Jack down to the vertical position.
Align holes in Swivel Plate (1) and release
Locking Pin to lock the Swivel Jack in this
vertical position.
3. Turn the handle clockwise to extend the
Swivel Jack so that the Inner Tube (16) foot
touches the ground. Then further extend
the Swivel Jack slightly so that the weight
of trailer tongue is supported by the Swivel
Jack; this will make it easier to disconnect
the tongue hitch.
4. Disconnect safety chains and any elec-
trial wiring connecting the trailer to the tow
vehicle.
5. If needed, raise the Swivel Jack slightly
so the trailer tongue hitch completely clears
the hitch ball, and disconnect the trailer.
6. Carefully drive the vehicle away from the
trailer.
Taking Care Of The Swivel Jack:
Frequently check to make sure that all com-
ponents are in good condition. Check the
condition of the weld between the Swivel
Plate (1) and the trailer tongue.
Do not continue to use the Swivel Jack if
damage is noted.
Frequently check the Locking Pin (10) and
related springs and retaining rings; check to
make sure that Locking Pin engages prop-
erly and that it will properly lock the Swivel
Jack in the up and down position.

Model 70154, 70155 Page 6
Parts List
Part # Description Qty
1 Swivel Plate 1
2 Outer Tube 1
3 Knob 1
4 Lock Nut 1
5 Bolt 1
6 Washer 1
7 Split Pin 1
8 Washer 1
9 Spring 1
10 Locking Pin 1
11 Retaining Ring 1
12 Bearing 1
13 Washer 1
14 Screw Rod 1
15 Nut 1
16 Inner Tube 1
Assembly Diagram
Note: The Parts List and Assembly Diagram is provided as a reference tool only. Some parts are listed and shown
for illustration purposes only, and are not available as replacement parts. All repairs to this tool (including replac-
ing parts) should only be done by a qualified service technician.
Manufactured for and distributed by:
Maxx Group, LLC, Camarillo, CA 93012 USA
www.maxxhaul.com
This manual suits for next models
1
Table of contents
Popular Jack manuals by other brands

Cattini Oleopneumatica
Cattini Oleopneumatica YAK 215/P Operating and maintenance manual

Mega
Mega N10-3 Operation and maintenance instructions

Lippert
Lippert 285318 Installation and owner's manual

Pittsburgh Automotive
Pittsburgh Automotive 69642 Owner's manual & safety instructions

Hercus
Hercus HK Series Maintenance and operating instructions

King Tony
King Tony 9TY145-004A-B Operation manual