manuals.online logo
Brands
  1. Home
  2. •
  3. Brands
  4. •
  5. Maytag
  6. •
  7. Dishwasher
  8. •
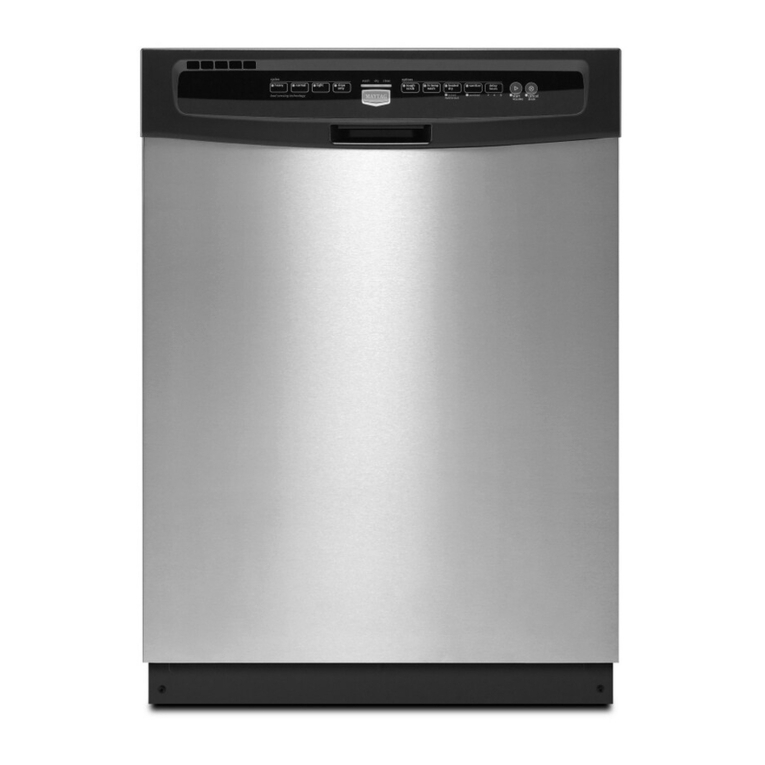
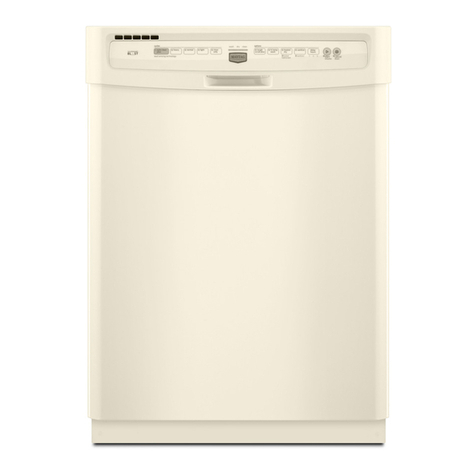
  9. Maytag MDB2400AWE Owner's manual

Maytag MDB2400AWE Owner's manual

Congratulations on the purchase of your newdishwash- AWARNING - Check with the installer to make sure
er! It is designed to handle virtually every dish you need the appliance has been properly grounded to avoid pos-
to do. For best results, we suggest reading this guide to sible electrical shock. Be sure you read the IMPORTANT
help you properly operate and maintain the appliance. PERSONAL SAFETY INSTRUCTIONS before you start to
use this dishwasher.
Please record your model and serial numbers in the
spaces provided below. These numbers can be found in In addition,keep your sales slip or cancelled check
the upper left corner of the tub opening.They are need- should any warranty service be required. Proof of origi-
ed for any correspondence or service calls concerning nal date of purchase is needed.
your dishwasher.
In our continuing effort to improve the quality of
Model Number our dishwashers, it may be necessary to make
changes to the appearance without revising this
guide.
Serial Number
Products with a ® label have been listed with 8. Be careful not to touch the heating element on the
Underwriter's Laboratories, Inc. - those with a CSA tag bottom of the tub during or at the completion of a
have been listed with Canadian Standards Association. cycle. It may be hot.
Nevertheless, as with any other equipment using elec- 9. Use only detergents and rinse additives designed for
tricity and moving parts,there is a potential hazard. an automatic dishwasher.Never use soap,laundry
detergent, or hand washing detergent in your dish-
washer. Keep these products out of reach of children.
10.Do not sit, stand on or abuse the door or dish racks
1. Read all instructions before using the dishwasher, of the dishwasher.
2. Use the dishwasher only for its intended function. 11. Under certain conditions, hydrogen gas may be pro-
duced in a hot water system that has not been used
3. Disconnect electrical power to dishwasher before for two weeks or more. Hydrogen gas is explo-
attempting to service, sive. If the hot water system has not been used for
4. To avoid electrical shock hazard, the sides and back such a period, turn on all hot water faucets and let
must be enclosed and the front panels must be the water flow from each for several minutes. This
attached before electrical power is applied to the dish- will release any accumulated hydrogen gas. As the
washer. Refer to the installation instructions for prop- gas is flammable, do not smoke or use an open flame
er grounding procedures,during this process.
5. Connect to a properly rated,protected and sized 12. Do not wash plastic items unless marked "dishwash-
power supply circuit to avoid electrical overload, er safe" or the equivalent. For plastic items not so
6. Children should never be permitted to operat e, or play marked, check the manufacturer's recommendations.
in, with, or around this dishwasher. 13.Do not tamper with controls.
7. To reduce the risk of injury when loading items to be 14. Always remove the door to the washing compart-
washed,sharp or pointed items should be located with ment when removing an old dishwasher from service
the handles up. Also, load sharp items so they are not or discarding it.
likely to damage the door seal.
SAVE THESEINSTRUCTIONS
1, _ A liquid rinse aid dispenser (select mod-
els) automatically releases a measured
For best results, the incoming water amount of rinse aid into the final rinse
1.Use Hot Water temperature should be 120-140°F. portion of each cycle.
Check thewater temperature by turning
to dissolve & activate on the hot water faucet nearest the To fill the dispenser,turn the cap coun-
detergent, dissolve dishwasher and letting it run into a terclockwise to open. Pour therinseaid
greasy food soils and glass in the sink. Place a candy ther- intothereservoir. Replace thecapand
improve drying,mometer in the glass and check the be sure it is securely in place before
closing the dishwasher door. Check
temperature onceit has stoppedrising.
2.gse a Rinse Aid If it is below 120°F have a qualified per- the dispenser monthly and refill as
needed.
regularly to improve son raisethewater heater setting.
drying results and
reduce spotting and Helpful Hints: 3.
filming.• If theoutside temperatureis unusu-
ally low, or if your water travels a Use a detergent designed specifically
3.Usethe Proper long distance from the water heater for usein anautomatic dishwasher.
Detergent Amount tothedishwasher, you may need to Other types (laundry,hand soap,etc,)
increase your home's water heater will cause over sudsing. Be sure to use
for best soil removal, setting and/or select water heating fresh detergent and store it in a cool,
good drying results options on your dishwasher, dry place (not under the sink).
and prevention of The amount of detergent to use
filming,etching, and • if you have not used hot water for depends on thewater hardness (mea-
spotting, awhile, the water in the pipes will be sured in grains per gallon-gpg) and the
cold. Turn on the hot water faucet at amount of soil on the dishes. Generally
4.Load Properly the sink and allowit to run until the detergent amounts should be increased
to ensure soiled sur- water is hot.Start the dishwasher,for harder water and heavier soil.
faces get adequate • If you've recently done laundry or A basic guideline is one teaspoon
wash action. (See run hot water for showers, your (tsp.)of detergentfor each grain of
page 3). water heater may need time to water hardness. Use a minimum of
recover before operating the dish- three teaspoons in soft water.* When
5,Select the Proper washer, using a concentrated detergent decrease
Cycle/Options the amount by half.
based on the amount 2___m[_ If the water hardness is 15 grains or
of food soilon the harder, it is difficult to achievegood
load.(See page 4). Rinse aids come in solid or liquid form. results with any dishwasher. The only
When using a solid rinse aid,fasten it to solution is a mechanical water softener
the back right cornerof the lower rack. to improve water quality, detergenl
Purchase more rinse aid when the mate- effectiveness, and to protect the dish-
rial dissolves and the container is empty,washer parts from damage that hard-
water deposits may cause.
O
4. 0 ,_ . Bottom Rack (Features vary slightly per model.)
Large items may be placed in any convenient location ir
• Scrape off bones or large food particles. Remove this rack. Keep soiled surfaces facing the center.
excessive quantities of greasy/oily substances.
• Scrape or soak items with burnt on foods as they
require more energy than the rest of the load to clean.
• If connected to a food waste disposer,make certain the
disposer is empty before starting the dishwasher. This
allows proper draining.
• Mustard, mayonnaise, vinegar,lemon and other acidic
foods can cause rust or discoloration on stainless steel.
Rinse these pieces as soon as possible.
• Starch from foods like potatoes, pasta, rice and oat-
meal, require more energy to clean than the rest of the
load.
• Place all items in the racks so they are separated and
facing center.The back of this rack accommodates a row of dinner
• Wedge flat,lightweight items next to the silverware plates or two rows of smaller plates. Serving bowls, pots
basket or along the sides and back of the racks, and pans also fit across the back of the rack.
• Load items so they do not rest over the wash tower. Small plates,saucers or shallow bowls may be loaded in
the elevated area behind the wash tower.
• Avoid blocking the upper and lower spray arms by not
allowing items to extend beyond the racks. Folding tines located on the right side, provide loading
• Place glasses in any row of the racks for proper clean- flexibility for large--shaped items.
ing and rinsing. Do not load glasses over the tines.
Top Rack (Features vary slightly per model.)
This rack is designed to hold glasses, cups, small plates,
bowls, cookware,etc. Bowls fit securely in the back right vii
half of the top rack.Small plates or saucers should be
loaded with soiled surfaces facing the center of the rack.
Removable Utensil Basket
Place flatware in the basket with
some handles up and some
down to prevent nesting.
Always load sharp or pointed
items with handles up.
0
RINSE& HOLD FF OelOyH_rs
SCRUB BOOST DRY WATER /_
ON OFF ON OFF ON OFF HEATING _ _ Dv
DELAY
START _ •
Stylingmaydiffer depending on the model you selected,
Your dishwasher offers various cycles and options to
adjust to specific load conditions. Please refer to the Cleanthecontrolpanel and frontpanels with a
chart below for a description of each. Select models lightly dampened cloth.Dry thoroughly. Do not use
feature cycles and options noted with a "*"abrasives or sharpobjectson thepanel. They can dam-
age it,
The inside normally takes care of itself,
Occasionally check the tub bottom for large food pieces
which may have collected. Periodically clean theedge of
the door liner and gasket if any food spills are noticed.
, :,;" : To remove any odor, try one ofthe following:
•Put bakingsoda in both cups. Select the normal cycle
NormatPre.Wash, 2Rln!e_and let thewater circulate for about 10 minutes.
fO_:hor.mai!y i :M_i"._a_;}_,,,_:_ Unlatchthe door and let it sit overnight. Then relatch
........... the door and let the cycle finish.
s0ited'dshes:,::':2RnnSes,,D_, ,
4I
O..... ',2 R{nSes/Wa_ ! • Select the Normal cycle and let the dishwasher fill with
Sh........ _:water. Then open the door and pour 1/4 cup of chlorine
_2R_s_D_', :_, .,,bleach into the bottom of the dishwasher. Latchthe
sodedd_st_es,', .... ' door and let it complete the cycle.
•Try a lemon scent detergent and/or rinse aid to hell:
periodically freshen the dishwasher interior.
• Run the dishwasher morefrequently. Use the Rinse &
Hold cycle (if available) to remove any food soil that
Super Scrub On* provides water temperature checks may cause an odor.
throughout the cycle. Super Scrub Off* provides a
shorLer cyclewith fewer water temperature checks.An
indicator light comes on if water is being heated and the
cycle is extended. If your dishwasher will be in storage or an unheated are_
Temp Boost* helps ensure proper water temperature exposed to freezing temperatures:
for activating detergent and dissolving greasy food soils.
Super Wash* provides a water temperature check in • Clean the dishwasher as explained in the Care an(
prewash. Cleaning section.
Heated Dry On turns theheating element on to
improve drying results. HeatedDry Off turns the ele- • Operate the drain portion twice to ensure most of thq
ment off to save energy. Towel drying may be needed water is removed. Most dishwashers begin each cych
with this option,with a drain.
Delay Hours can be used to delay the start of the cycle • Disconnect the electrical supply and prop open th
for up to 6hours. Turn the control knob to the desired door.
numberof delay hours and latch thedoor, The dish-
washer will begin when the selected amount of time has
elapsed.
Note: The dishwasher will only delay into the longest
cycle (ie: Super Scrub or Pots & Pans).t w not de aynto the Normal or Short cycles. O
Remember. It is the user's responsibility to determine if the item should be washed in a dishwasher.
0
Dishwasher
Won't Run?
Unusual Noise?
Dishes Don't Dry?
Unclean Dishes
And Flatware?
Use freshdetergent stored in a cool dry place.
, Select proper cycle'for the soil level,
i Load items so they 'do not b ock the wash arms or center tower,
Load the utensil basketwith some ha3d es up andsomedown to prevent nesting.
DonOtpa;ceglasselsover tine s :
I' ' I I ...... " I ...... f l.... I
Detergent Left In • Check that the cycle is completed.
Dispenser Cups? •Be sure dispenser isnot bocked.
• Use fresh detergenl _stored inaCool, dry place.
I I I I
Stains Or Marks On • Aluminum utensils can leave marks when theyrub against other things.
Dishes Or Tub? Leavea'slght space betweenitems.
•iron deposits in thewatercan leaveayellow, brown ororangefilm ondishes.Afilter
may be needed or periodically useRoVer Rust Remover.*
•Food soil Stains normatly requirehotterwater and moredetergent to remove
and prevent.
I I [
Dishes Chipped?
an'd stemwarewillclear the top ofthetub when you push therack into the dishwasher.
•Refertotheprevious chart on "What Canand Cannot BeWashed".
' r i [ I I
Continued on next page
O. _R,A.CONTINUED
Spots And Film On
Glasses And
Flatware?
Cloudy Glassware?
Dishwasher
Won't Drain?
Suds In The Tub?
Dishwasher Leaks?
Odor?
* Brand names are trademarks of the respective manufacturer.
6914031B _ ql_O_l __ S_,._ -._f- I_0_/_'_,Q_., _ UthoU. S.A.

This manual suits for next models

5

Other Maytag Dishwasher manuals

Maytag MDB8959SBS2 User manual

Maytag

Maytag MDB8959SBS2 User manual

Maytag MDC4809AWW User manual

Maytag

Maytag MDC4809AWW User manual

Maytag MDB-2 User manual

Maytag

Maytag MDB-2 User manual

Maytag MDB8951AWB - Jetclean II Series Fully Integrated... User manual

Maytag

Maytag MDB8951AWB - Jetclean II Series Fully Integrated... User manual

Maytag MDB4949SD User manual

Maytag

Maytag MDB4949SD User manual

Maytag MDB8600AWS Manual

Maytag

Maytag MDB8600AWS Manual

Maytag MDC4809PAB User manual

Maytag

Maytag MDC4809PAB User manual

Maytag Jetclean III MDB3700AW User manual

Maytag

Maytag Jetclean III MDB3700AW User manual

Maytag Jetclean Plus MDB7759AW User manual

Maytag

Maytag Jetclean Plus MDB7759AW User manual

Maytag DWU4915BAX User manual

Maytag

Maytag DWU4915BAX User manual

Maytag MDB8951BWS - 24 Inch Fully Integrated... Setup guide

Maytag

Maytag MDB8951BWS - 24 Inch Fully Integrated... Setup guide

Maytag MDB8959SKZ User manual

Maytag

Maytag MDB8959SKZ User manual

Maytag W10596270A User manual

Maytag

Maytag W10596270A User manual

Maytag Jetclean II MDB7851AW User manual

Maytag

Maytag Jetclean II MDB7851AW User manual

Maytag MDB6709AWQ - Jetclean Plus 24 in. Dishwasher User manual

Maytag

Maytag MDB6709AWQ - Jetclean Plus 24 in. Dishwasher User manual

Maytag MDB7749AWM User manual

Maytag

Maytag MDB7749AWM User manual

Maytag BUILT-IN DISHWASHER User manual

Maytag

Maytag BUILT-IN DISHWASHER User manual

Maytag MDB9959SKZ User manual

Maytag

Maytag MDB9959SKZ User manual

Maytag MDB6759AWW - 24 Inch Fully Integrated... User manual

Maytag

Maytag MDB6759AWW - 24 Inch Fully Integrated... User manual

Maytag W10599489A User manual

Maytag

Maytag W10599489A User manual

Maytag Jetclean 9962 User manual

Maytag

Maytag Jetclean 9962 User manual

Maytag MDB4630AW User instructions

Maytag

Maytag MDB4630AW User instructions

Maytag MDB7809AWM User manual

Maytag

Maytag MDB7809AWM User manual

Maytag 6 915555 B User manual

Maytag

Maytag 6 915555 B User manual

Popular Dishwasher manuals by other brands

Samsung DW-FN320T user manual

Samsung

Samsung DW-FN320T user manual

LG LDS 5811WW Service manual

LG

LG LDS 5811WW Service manual

Elba EDW-B1462D owner's manual

Elba

Elba EDW-B1462D owner's manual

VESTEL NOVUS Series Service manual

VESTEL

VESTEL NOVUS Series Service manual

Bosch SMS4EMW00E Instructions for use

Bosch

Bosch SMS4EMW00E Instructions for use

Global-Tek GT-CR 2 manual

Global-Tek

Global-Tek GT-CR 2 manual

Smeg Dishwasher 85028 Instructions for installation and use

Smeg

Smeg Dishwasher 85028 Instructions for installation and use

LG LD-4080W Service manual

LG

LG LD-4080W Service manual

Bauknecht GCF 625 operating instructions

Bauknecht

Bauknecht GCF 625 operating instructions

Sharp QW-HX13F47EI-EU user manual

Sharp

Sharp QW-HX13F47EI-EU user manual

Asko D5536XLFI operating instructions

Asko

Asko D5536XLFI operating instructions

Modena WP 7134 WVM User manual book

Modena

Modena WP 7134 WVM User manual book

Beko DFN39340X instruction manual

Beko

Beko DFN39340X instruction manual

AEG FAVORIT 65050 VI1P user manual

AEG

AEG FAVORIT 65050 VI1P user manual

Siemens SN23HI37VE user manual

Siemens

Siemens SN23HI37VE user manual

Hotpoint Ariston LL 42 Instruction book

Hotpoint Ariston

Hotpoint Ariston LL 42 Instruction book

Siemens SN45ZW56CS user manual

Siemens

Siemens SN45ZW56CS user manual

Asko DFI766UXXL.AU user manual

Asko

Asko DFI766UXXL.AU user manual

manuals.online logo
manuals.online logoBrands
  • About & Mission
  • Contact us
  • Privacy Policy
  • Terms and Conditions

Copyright 2025 Manuals.Online. All Rights Reserved.