STEP 2 HOSE
RETAINER
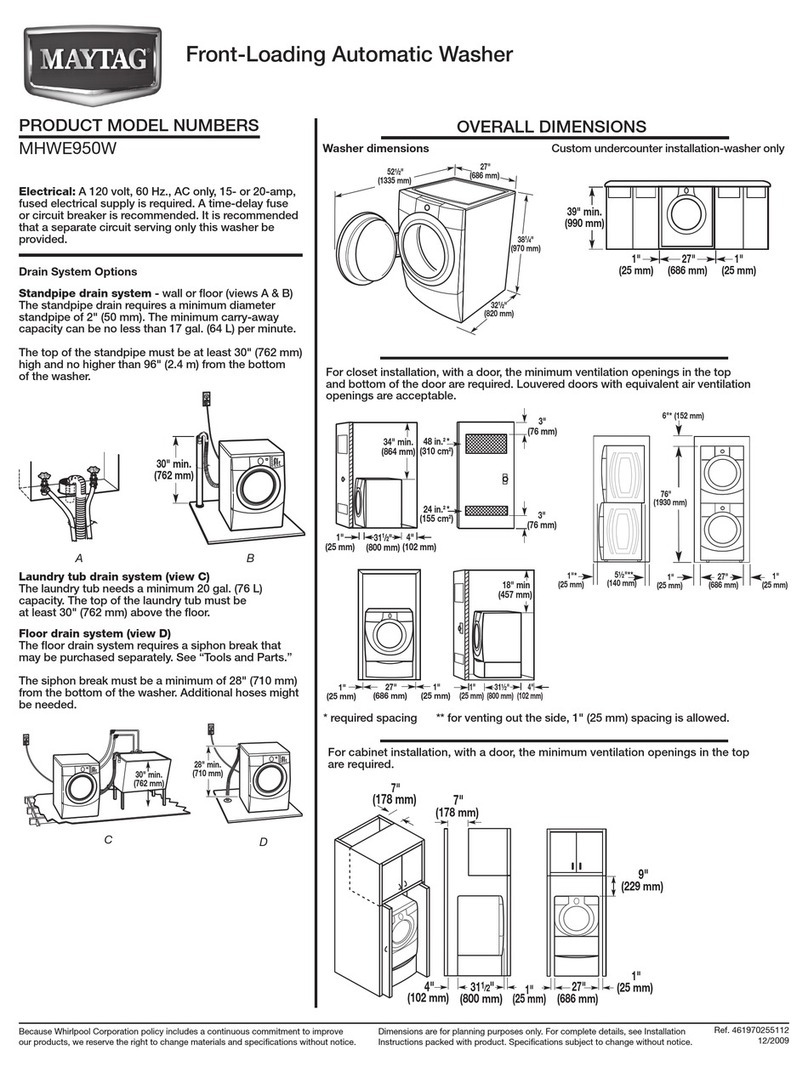
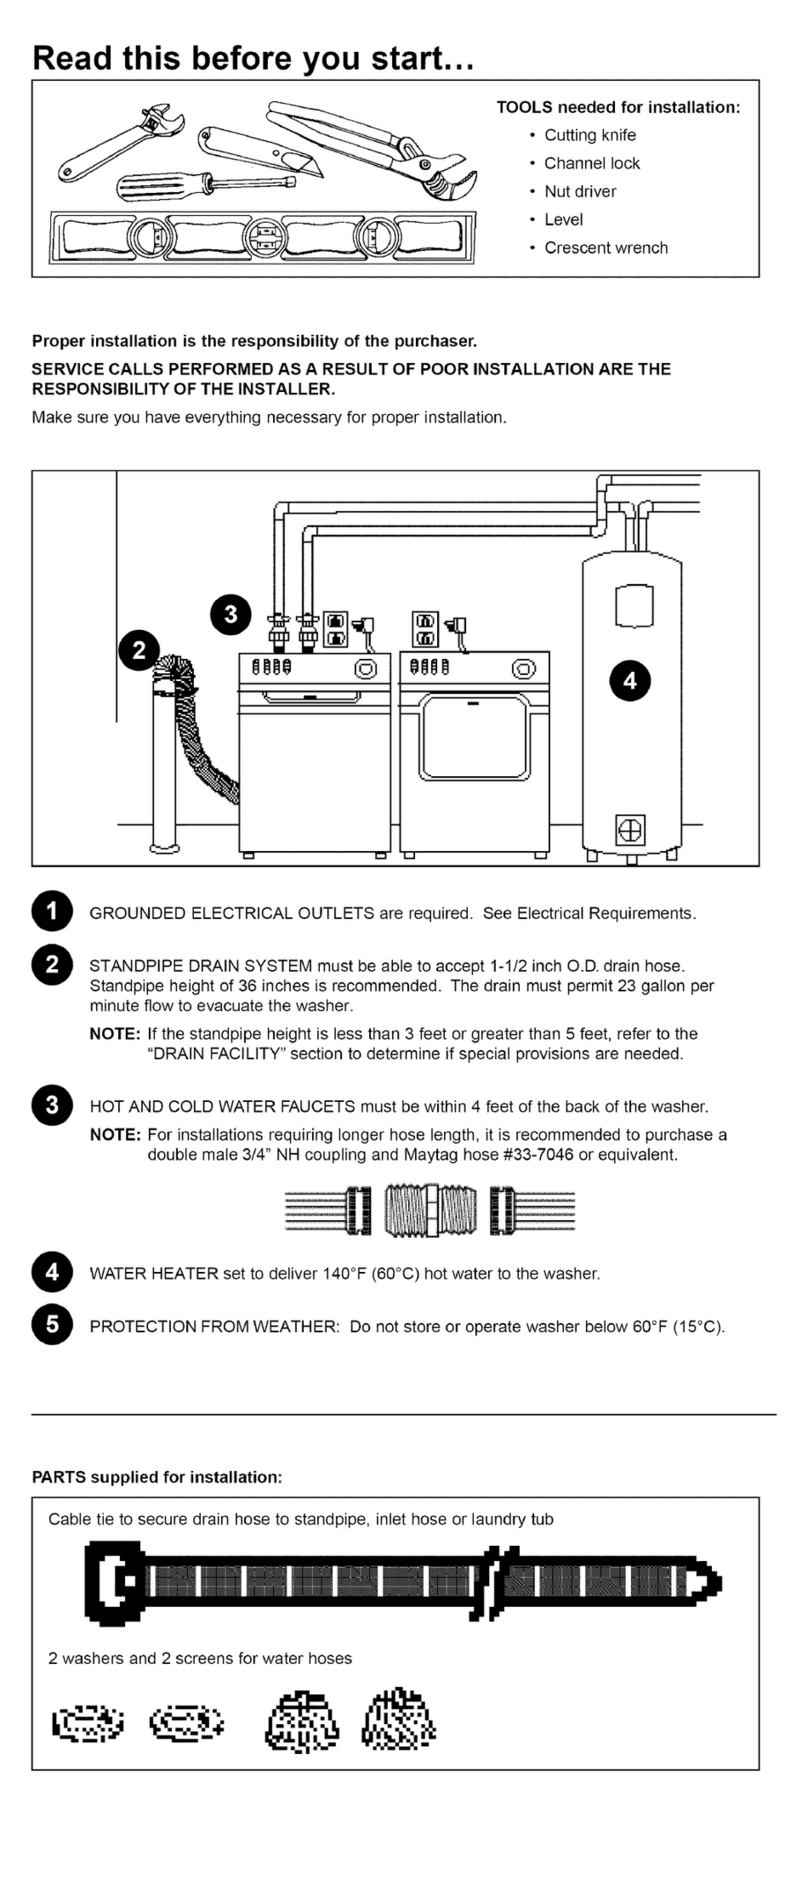
1. Placethe drain hosein the drain facility. Tochangedrain hosedirection or prevent
hosefromcollapsingor becomingdamaged,turn the end of the hosewhile holding
the baseof the hosestationary.
Be surean air-tightconnectionis NOTmade betweenthe drain hose and the
standpipe. Standpipemust be at least 24" high. 36"height is recommended.
NOTE: If drainstandpipe is in excessof 5 feetabovefloor level,a _UNDRY
drain hoseextensionkit (Part#12001660)will needto be installed. / _-,.--_;7_/_-Jr _HosE ST,_ANDPIPE
If ' RETANER
dra,nstandp,pe,s ,n excessof 10feet abovefloor level,a pump _//60"IMAX_JR
accessorykit (Part #12001674)may need to be installed. _'___""_,,E,_I_ I
I
NOTE:Cautionmustalwaysbe exercisedto avoid collaDsinaor "SI_'I_ "-_60"MAX.
damaging the drain hose.For best performancethe drain hose _ _ 36,, giN.
shouldnot be restrictedin anyway,throughelbows,couplings orexcessivelengths. [r_.
Routedrainhosethroughthe drain hose clip onthe rear wall ofwasher. I __!
Forinstallationswherethedrainhosecannotbeconvenientlyelevatedtoat least24",
thedrainhosemustbesupportedby thedrainhosecliponthebackofthewasher.
2. Installonescreenstrainerandwasherontheinsideofeach fillhoseat the
faucet. Thedomeonthescreenstrainermustpointtowardsthefaucet. _o_-_ _L.TI7ETA,.ERi'
Installonerubberwasheratthemachineend insideeachfillhose.
3. Threadthe inlet hoseswith the screenwasherto the HOTand COLD
faucetconnections. Makesure the hose marked"HOT"isattachedto_\_"E-_ T,E
STRAP
the HOTfaucet.Tightenby hand untilsnug andthen 2/3 of a turn SERVICE\\"_ ._I'
with pliers. DONOTOVERTIGHTEN. Repeatstepfor the machine UNIT \\ 1
connectionson the backof the unit. /li_t_ c_ /1
Turnon "HOT"and"COLD"watersupplyand checkall connectionsat the _--___
watervalveand the faucetfor leaks. _
NOTE: Accessoryinlethoses areavailablein variouslengthsup to 10feet. _"__
4. Plugpowercord intoa grounded120 volt60 Hz approved ] _1 c_ __ _ _
electricalservice protectedby a 15ampfuse or comparable
circuitbreaker. This washeris groundedthroughthe third
prongof the powercord when pluggedinto a three prong
groundedreceptacle.
5. Slide washerintoposition.Makesurethe drain hoseremainsroutedstraight through the drain hose
clip without collapsing or damaging.NOTE: the washer must be leveled on aft 4 sides. Toproperly
level a machine, the top cover and the front panel must be securely fastened. A carpenter's level
should be used on all 4 corners of the top cover. It's a
good idea to check for level again after the first dozen
washes and re-level ff necessary.
6.Levelwasherby turning the levelinglegs in or out as necessary.
Whenthe washeris level,tighten the levelingleglocknuts
up againstthe baseof the washer.
Page 3
