MB QUART Nautic GMR-2 User manual

NAUTIC GMR-2
Marine & Powersports Source Unit
PRIMARY FEATURES
MUSIC.DEFINED.
R
Thank you for choosing the MB Quart Nautic GMR-2 Marine & Powersports
Source Unit. With proper installation, you are on the path to experiencing
your music in a way you only imagined possible. Here at MB Quart, we call it
“Music. Defined”.
As with any high end technology packed product, we highly recommend
choosing an authorized installation facility, which is properly trained with the
necessary tools required to ensure many years of enjoyable operation.
Marine & Powersports Source Unit
AM/FM Radio
160 Watts Peak Power
Pre Amplifier Unbalanced Line Outputs
Gauge Mount
Splash Proof Liquid Crystal Display with Clock
Add up to 2 wired remotes (GMRWDR)
MB Quart Bluetooth Connect
Bluetooth Connection
USB Input
Auxiliary RCA Input
Installation & Specification Information
4 channels x 40 watts (160 Watts Peak Power)
2-7/8” / 73.02mm Total Mounting Depth
3-3/16” / 80.962mm Cut Out Diameter

GMR-2
1
As with all high quality audio products, we recommend professional installation by an
authorized MB Quart dealer. Your dealers knowledge and experience can ensure a
problem free and cosmetically integrated installation.
If you choose to install the device yourself, please read the entire manual very carefully.
Installation & Mounting Location Tips
The first step is thorough planning before the installation begins.
The GMR-2 chassis requires a 3-3/16” or 81mm mounting hole diameter and 2-7/8” or
73mm total mounting depth.
It will also require you to be able to access the area behind the chosen mounting loca-
tion in order to connect the wires and fasten the GMR-2 mounting bracket with screws.
Precautions:
1. Be sure there is adequate clearance behind the mounting location to ensure there
are no wires, fuel lines, moving parts or obstacles that will prevent the unit from fitting
properly or from being damaged during drilling of the opening.
2. Be sure the chosen mounting location is a flat surface with no curves to ensure a
flush water tight fit.
3. To help prevent the possibility of radio interference and damaging heat, choose a
location as far away from the engine compartment as possible.
4. Disconnect the battery to ensure there will be no shorted wires during the installation
procedure.
Installation Procedure:
1. Drill a 3-3/16” or 81mm mounting hole.
2. At this point, you may choose to connect the wires and cables prior to placing the
GMR-2 into the mounting hole or mount the GMR-2 first, and then connect the wires
behind the mounting location.
3. Connect the wires from the GMR-2 to all required operational wires per the wiring
diagram on page 2. We strongly recommend soldering all wires and insulate with shrink
tubing or a high quality electrical tape.
4. After placing the GMR-2 into the mounting hole, securely fasten with the “U” bracket
and mounting screws provided.

GMR-2
2
Radio Antenna
GMR-WR connection
USB Connector
Red RCAOutput (R)
Red RCAInput (R)
White RCAInput (L)
WhiteRCAOutput (L)
Accesory
Red
+12Volts
Yellow
Remote output Blue
White
Black
White
White/Black
Gray
Gray/Black
Green
Green/Black
Purple
Purple/Black
Black
Front Left +
Front Left -
Front Right +
Front Right -
Rear Left +
Rear Left -
Rear Right +
Rear Right -
Ground -
U-Bracket
Mounting Surface
Break Joints
Wiring Diagram
Mounting

GMR-2
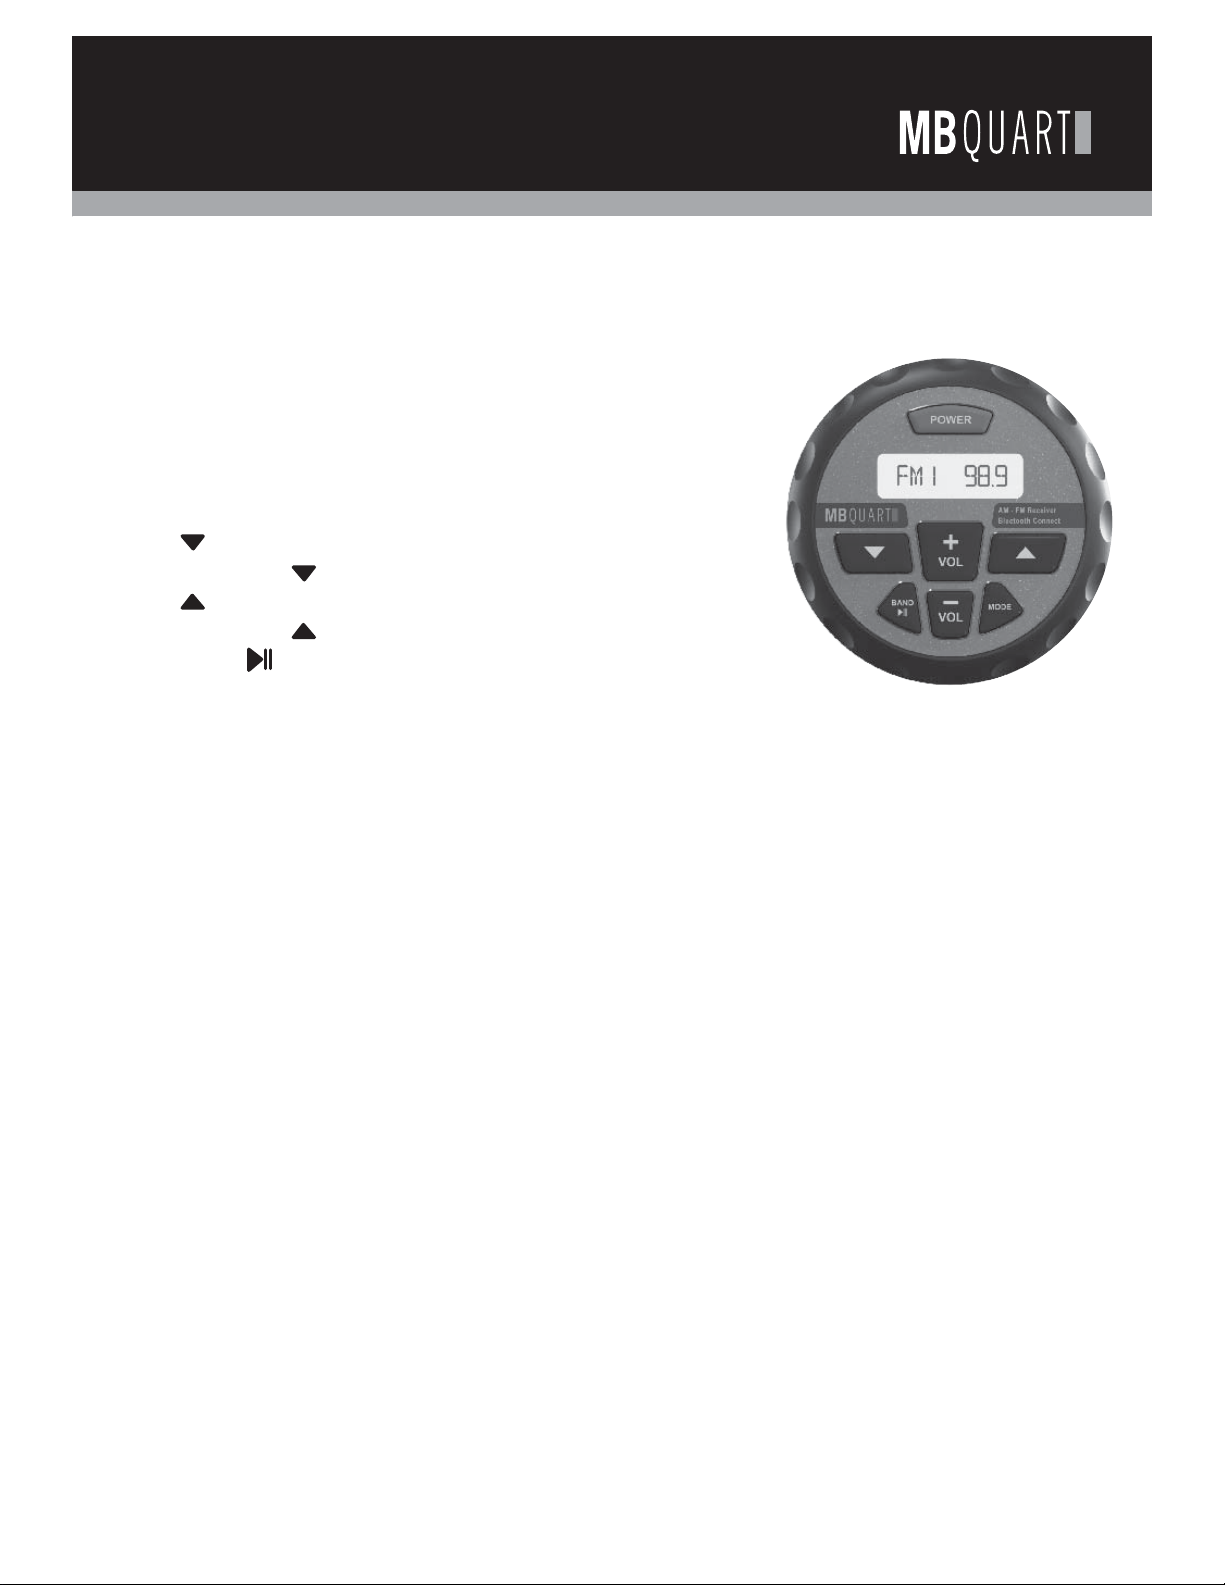
1. Radio (AM/FM) Operation
Press BAND button to switch between AM & FM.
Auto Seek tuning Up / Down: Press buttons less than 2 seconds to automatically seek the
next/previous strong stations.
Manual Tuning Up/Down: Press and hold any of the buttons for more than 2 seconds to seek
stations up/down step by step.
2. USB/MP3 Operation
A. Insert a USB stick and the unit will read the music files automatically.
B. Press or button to play previous/next song.
C. Press and hold or for more than 2 seconds to fast backward/forward the song.
D. Press button to pause/resume the current song.
3. Bluetooth Operation
This unit supports Bluetooth for wireless music streaming from mobile device.
Connections steps are as follows:
-Press Mode button to switch to the “BT Play”.
-Turn on the Bluetooth on your device.
Scan for the unit (Bluetooth name “Car Kit”) by using your Bluetooth device.
-Select the unit “Car Kit” and the connection will then be made automatically.
Notice: Some Bluetooth devices require inputting a pass code for connection. Please input code
“0000” and the connection will be made automatically.
Bluetooth Audio Function:
-Press or button for previous/next song.
-Press the VOL+ or VOL- button for tuning up/down the volume.
Once the unit has made a connection with your Bluetooth device for the first time, the unit can then
connect to your Bluetooth device automatically within a valid range.
4. Clock Display & Adjustment
-Press and hold the BAND button for 2 seconds to display the clock.
-When the clock is displayed, press and hold the BAND button until the hour number is flashing,
then use the VOLUME buttons to adjust the hour.
-Once hour is set, press the BAND button until the minutes begin flashing.
5. EQ
-Use the VOLUME buttons to select EQ as FLAT, CLASSIC, POP or ROCK. Default setting is
“OFF”.
6. Area Tuning
-This option allows you to select the appropriate frequency spacing for your location (USA or
Europe).
-Use the VOLUME buttons to switch between USA and Europe frequencies.
7. Time Format
-Use the VOLUME button to switch between 24 hour (Europe) or 12 hour (USA) clock.
3
Operation

GMR-2
4
Controls
1. Power Button
- Press the POWER button
- Press the POWER button to mute the audio
- Press and hold the POWER button to turn off the power
2. VOL + Button
- Press the VOL+ button to increase the volume
3. VOL - Button
- Press the VOL- button to decrease the volume
4. Button
- Press the button to track down
5. Button
- Press the button to track up
6. BAND Button
- Press BAND button to switch between FM & AM in radio mode
- Press BAND button to play pause in USB mode
7. MODE Button
- Press MODE button to switch between FM / BT / USB /AUX IN
8. Bass / Treble / Balance / Fader / Loud / EQ / Area tuning / Time 12-24 hour mode
- Press and hold the MODE button for two seconds and then press the MODE button
to switch between BAS / TRE / FAD / LOUD / EQ / AREA / TIME MODE
9. BASS Level
- Use the volume buttons to adjust the Bass Level range from -7 to +7
10. TREBLE Level
- Use the volume buttons to adjust the Treble level range from -7 to +7
11. Balance Control
- Use the volume buttons to adjust the Balance Level between left and right
12. FADER Control
- Use the volume buttons to adjust the Fader Level between front and rear
13. LOUD Control
- Use the volume buttons to select the Loudness between on and off

5
GMR-2
Troubleshooting
Problem Cause Solution
No power 1. Incorrect wiring
2. Fuse is blown 1. Re-check wiring
2. Replace fuse
No sound 1. Volume is too low
2. Speaker connection
is loose or wired
incorrectly
3. Damaged output
1. Increase volume
2. Double check
connection and re-
attach
3. Contact MBQuart
No reception 1. Antenna cable is not
connected
2. The signal is too
weak
1. Re-check antenna
connection
2. Select a station
manually
USB drive not reading 1. Music file is incorrect
format 1. Use MP3 or WMA
format
Distorted sound using
AUX input 1. Volume may be too
high on external device 1. Decrease output of
external device
Media device does not
work through USB jack 1. USB input only for
use with memory sticks
and drives

6
GMR-2
Notes

GMR-2 MUSIC.DEFINED.
R
AM/FM Section:
1. USA Frequency: FM87.9 - 107.9MHz AM Frequency: Am530 - 1710 kHz
Europe Frequency: FM87.5 - 108MHz AM Frequency: AM522-1620kHz
2. Intermediate Frequency: 10.7MHz
3. Noise Limit Sensitivity: >5uV
4. Intermediate Frequency Rejection: 50dB
MP3 Section:
1. Signal to Noise Ratio: >55dB
2. Frequency Response: 20Hz - 20KHz
3. A/D Conversion Filter: 16BIT
Audio & Other Sections:
1. Power Output: 4 x 40 Watts Maxx
2. Power: DC +12 Volt Battery
3. Load Impedance: 4-8 Ohms / Channel
GMRWDR (Optional Wired Remote)
1.GMR-2 Will accommodate up to
two (2) optional wired remotes
Warranty:
All MB Quart products are warrantied for 12 months from the date of purchase against
manufacturing defects to the original purchaser with a valid receipt of purchase from an
authorized reseller of the products. There is no warranty for Unauthorized Internet Sales
For additional information contact customer service at
847.540.7700, or visit www.Maxxsonics.com
Specifications
Check out our videos of new products, events
and technical tutorials at
www.youtube.com/maxxsonicsusainc
GMR-2 rev1
Table of contents
Other MB QUART Car Stereo System manuals
Popular Car Stereo System manuals by other brands

Pioneer
Pioneer DMH-ZF9350BT quick start guide

Panasonic
Panasonic CQ-CP134AU operating instructions

Alpine
Alpine PSU-300CVC installation manual

USASPEC
USASPEC PA15-HON3 owner's manual

Audiosystem
Audiosystem MFIT VW T6.1 EVO 2 user manual

Blaupunkt
Blaupunkt CASABLANCA CD52 7 642 285 310 operating instructions

Alpine
Alpine CDE-183BT Quick reference guide

Blaupunkt
Blaupunkt AUSTIN AUSTIN CD41 user manual

TEN Technology
TEN Technology D-3500 MP3 instruction manual

Ready2Talk
Ready2Talk PA 5AV Installation and setup manual

Kenwood
Kenwood 08AO6-4E2-200 operating instructions

Sony
Sony GT520 - CDX Radio / CD Specifications