Meaco Sefte 10 Pro User manual

MeacoFan
Sefte®10”Pro
Table Air Circulator
Instruction Manual

Thank you for
choosing Meaco
Thank you for choosing Meaco, we really appreciate it. We built
the Sefte® range of air circulators after years of research and
customer feedback, engineering the perfect cooling product for
you and your family. This product not only provides you with
enhanced cooling, but is functional in its design and ts into your
home.
This manual contains important information on the use and care
of your air circulator. Please take some time to read this manual
to take full advantage of your air circulators’ many benets and
features.
[EN]

Contents
Safety information .......................................
Register your Meaco warranty ....................
Meaco App ..................................................
What’s included ..........................................
Product identication .................................
Operation ....................................................
Battery mode ..............................................
Maintenance ..............................................
Storing .......................................................
Troubleshooting ..........................................
Meaco customer care ................................
Specications .............................................
Warranty terms & conditions ......................
1
3
4
5
6
7
10
12
14
14
15
15
16
[EN]

Safety information
Important safety instructions
This air circulator must not be used in rooms under the following conditions: potentially explosive
atmosphere, aggressive atmospheres, featuring a high concentration of solvents or an extremely high
ratio of dust.
Magnets: The remote control contains magnets. Please note the following: Pacemakers and
debrillators may be aected by magnets. If this aects you, please do not put the remote control in
a pocket and warn anyone who is likely to use the air circulator or the remote that it has a magnet.
Credit cards and data cards can also be aected by magnets and should not be placed near to the air
circulator remote.
Keep children away: Do not allow children to play with or around this unit, as it could result in injury.
Be sure the unit is inaccessible to children when not attended. This appliance is not intended for
use by persons (including children) with reduced physical, sensory or mental capabilities, or lack of
experience and knowledge, unless they have been given supervision or instruction concerning use of
the appliance by a person responsible for their safety.
Protect mains adaptor from damage: Never operate a unit with a damaged mains adaptor, as this
may lead to electrical or re hazards. If the mains adaptor is damaged, it must be replaced by a mains
adaptor of the same type and amperage rating.
Extension cords: Extension cords must be grounded and able to deliver the appropriate voltages to
the unit.
Handle with care: Do not drop, throw or crash the air circulator. Rough treatment can damage the
components or wiring and create a hazardous condition.
Run on a stable surface: Always operate the air circulator on a stable, level surface, for example the
oor or a strong counter, so that the air circulator cannot fall and cause injury.
Keep electrical components dry: Never allow water inside the air circulator’s electrical components.
If these areas become wet for any reason, thoroughly dry them before using the air circulator. If in
doubt, do not use the air circulator and consult a qualied electrician or a Meaco approved engineer.
The operator must make the operating instruction available for the user and make sure that the user
understands the manual.
[EN]1

Instructions about the WEEE
Correct disposal of this product
(Waste Electrical & Electronic Equipment)
This marking indicates that this product or accessories should not be disposed of with other
household waste at the end of their working life. To prevent possible harm to the environment or
human health from uncontrolled waste disposal, please separate these items from other types of
waste and recycle them responsibly. Users should contact either the retailer where they purchased
this product, or their local government, for details of where and how they can take these items for
environmentally safe recycling.
Declaration of conformity
Hereby, Meaco declares that this radio equipment is in compliance with Directive 2014/53/EU and
with the relevant statutory requirements. The full text of the EU declaration of conformity and the UK
declaration of conformity is available at the following internet address:
www.meaco.com/pages/compliance-data.
[EN] 2
Register your Meaco warranty
Your Meaco air circulator comes with a free three year warranty. Simply register your details online and
you’ll be covered for parts and labour for three years from the date of purchase, subject to the terms
and condition of the warranty.
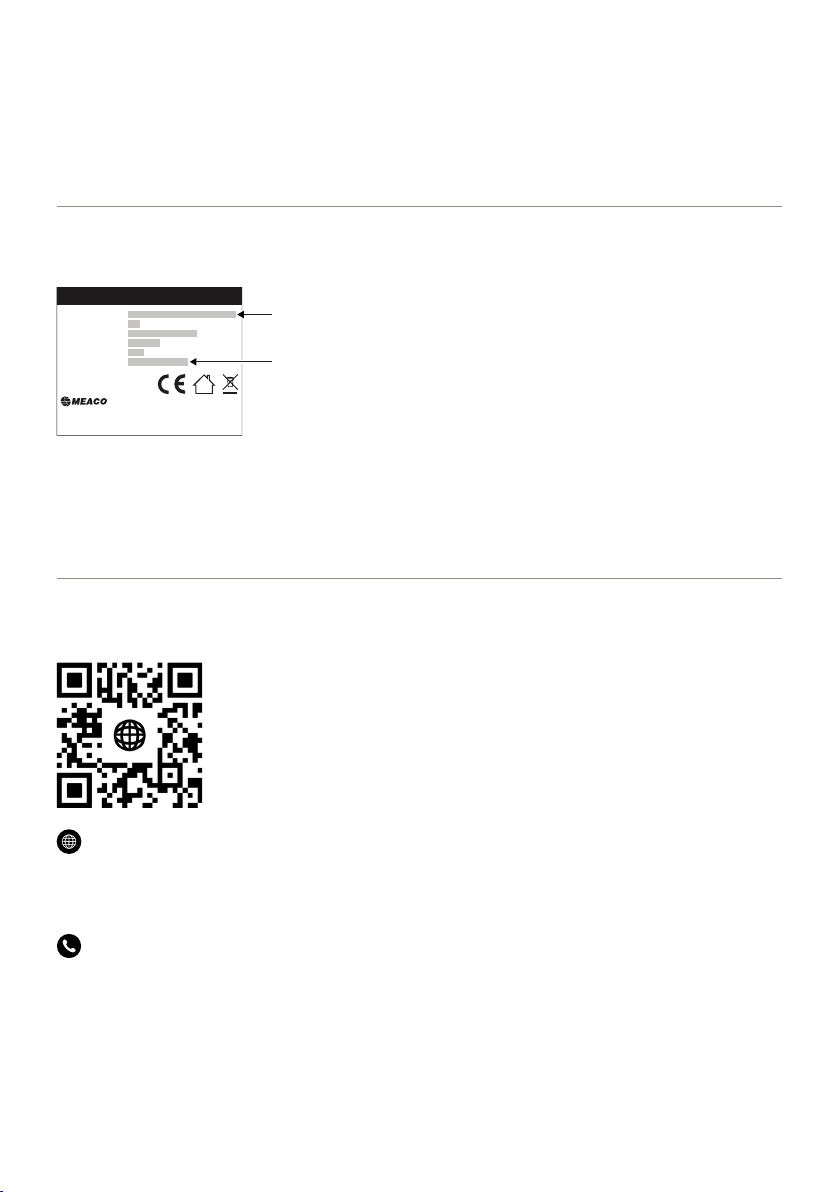
Where to nd your air circulators serial number
The serial number can be found on the rating label underneath the base of your air circulator.
Remember to keep a copy of your purchase receipt safe, you will need to show this to our Customer
Service team should you need to make a warranty claim.
Ways to register your Meaco warranty
Register online
Visit our website to register your free three year warranty online:
https://www.meaco.com/pages/register-your-warranty
Register by phone
Call our Customer Service team to register your free three year warranty over the phone: 01483 234900
Opening times: Monday - Friday 9am - 5:30pm
Contact number 0861 388 878
:
Serial number:
Model
Imported and distributed by Meaco (U.K.) Limited
Meaco House, Parklands, Guildford, England, GU2 9JX
Made in P.R.C
Product name
Serial number
[EN]3

Meaco App
Control your new air circulator with the Meaco app.
Scan the QR code to install the Meaco app or download the Meaco app from the App store
or Google Play.
Open the app and follow the instructions to create a new account and pair your air circulator.
Connecting your air circulator to your Meaco app
1. Plug the air circulator into the mains via the mains adaptor and press the Power button.
2. Hold the Mode button on the air circulator interface for 3 seconds.
3. The air circulator will beep and a Wi-Fi symbol will ash on the display.
4. In the Meaco app, press the + button in the top right hand corner and then ‘Add device’.
5. The app will search for nearby devices and your air circulator will appear, click ‘Add’.
6. Once the air circulator is successfully connected to Wi-Fi, the Wi-Fi symbol will stop ashing.
[EN] 4

What’s included
Carefully unpack the air circulator. Keep all packaging materials away from children. We recommend
at packing and keeping hold of the box should you need it in the future.
1. Meaco Sefte® 10” Pro Table Air Circulator
2. Mains adaptor
3. Remote control
4. Instruction manual
321
4
[EN]5

Product identication
1. Front grill
2. Locking cap
3. Blades
4. Display
5. Interface
6. Handle
7. Back grill
8. Battery compartment cover
9. Mains adaptor input
10. Battery compartment cover release button
11. Remote control
12. Mains adaptor
1 2 3
6
7
9
11
10
4
5
8
12
[EN] 6

Operation
When the air circulator is plugged into the mains, the air circulator will beep once, the air circulator is in
Standby mode.
Interface
Power button: Press the power button once to turn the air circulator on and press the power
button again to turn the air circulator o. To turn the air circulator power o, unplug it from
the mains.
Mode: Press the mode button to move through 3 modes: Normal, Night and ECO.
Hold the mode button down for more than 3 seconds to enable a Wi-Fi connection. For
further instructions see page 4.
Normal The air circulator will run as normal on the selected fan speed between 1
and 12.
Night The interface will turn o and the buttons will no longer beep when
pressed. The fan speed will reduce by 1 step every half an hour until it
reaches fan speed 1. When changing a setting (e.g. the fan speed) the
display will turn on briey until set and then turn o again.
ECO The fan speed will automatically change depending on the room
temperature.
[EN]7
Room
temperature < 19°C 20°C 21°C 22°C 23°C 24°C 25°C 26°C 27°C 28°C 29°C > 30°C
Fan speed 1 2 3 4 5 6 7 8 9 10 11 12

Increase fan speed: Press the + fan speed button to increase the fan speed between 1 and
12. When 12 is reached, pressing this button again will take you back to 1.
Decrease fan speed: Press the - fan speed button to decrease the fan speed between 1
and 12. When 1 is reached, pressing this button again will take you back to 12.
Vertical oscillation: There are 3 angles of vertical oscillation. Press the vertical oscillation
button to move through narrow (1), medium (2) and wide (3) oscillation. Once selected, the
display will revert back to displaying the room temperature. To turn o vertical oscillation,
press the vertical oscillation button until 0 appears on the display. The moment 0 is reached,
the fan will remain in that angled position.
Pause: Press the button to pause oscillation at any point during oscillation modes 1, 2 or 3,
and press again to resume oscillation at any time.
Horizontal oscillation: There are 3 angles of horizontal oscillation. Press the horizontal
oscillation button to move through narrow (1), medium (2) and wide (3) oscillation. Once
selected, the display will revert back to displaying the room temperature. To turn o
horizontal oscillation, press the horizontal oscillation button until 0 appears on the display.
After a setting is adjusted, the interface will revert back to displaying the room temperature and the set
mode (unless in Night mode where the interface will turn o).
Oscillation type Display Degree of vertical
oscillation
Degree of horizontal
oscillation
Narrow 120° 30°
Medium 230° 75°
Wide 365° 120°
[EN] 8

Remote control
• Before using the remote control, remove the plastic tab.
• The remote control is magnetic and can be attached to the centre of the air circulator face.
• The remote control has a range of approximately 4 metres.
The following functions are only available via the remote control or the Meaco app. For instructions
on how to use Power button, Mode, Fan speed, Oscillation or Pause buttons, see pages 7 and 8.
Timer: Use the timer button to set an ON or OFF timer. To remove either the ON or OFF
timer, press the timer button until you reach ‘00 hrs’.
Light: Press the light button to turn o the display. Press again to turn back on.
Mute: Press the mute button to silence the buttons on the air circulator. The air circulator will
beep when the mute button is pressed and then will no longer beep when any other buttons
are pressed. Press the mute button again to unmute. Hold the mute button down for more
than 5 seconds to change the temperature on the display between °C and °F.
Timer on When the air circulator is in standby mode, use the timer button to move
between 1 and 12 hours in which the air circulator will turn on. When you
reach the desired number of hours on the display, pause, and then the air
circulator will beep twice to lock in your selection. The interface will display
the number of hours in which the air circulator will turn on e.g. ‘03 hr’.
Timer o When the air circulator is on, use the timer button to move between 1 and
12 hours in which the air circulator will turn o. When you reach the desired
number of hours on the display, pause, and then the air circulator will beep
twice (unless in Night Mode) to lock in your selection.
[EN]9
Battery mode
The air circulator can be used in battery only mode, meaning the mains adaptor is not required.
• Battery not included.
• Battery type required: 9200 mAh Li-ion rechargeable battery.
Battery installation
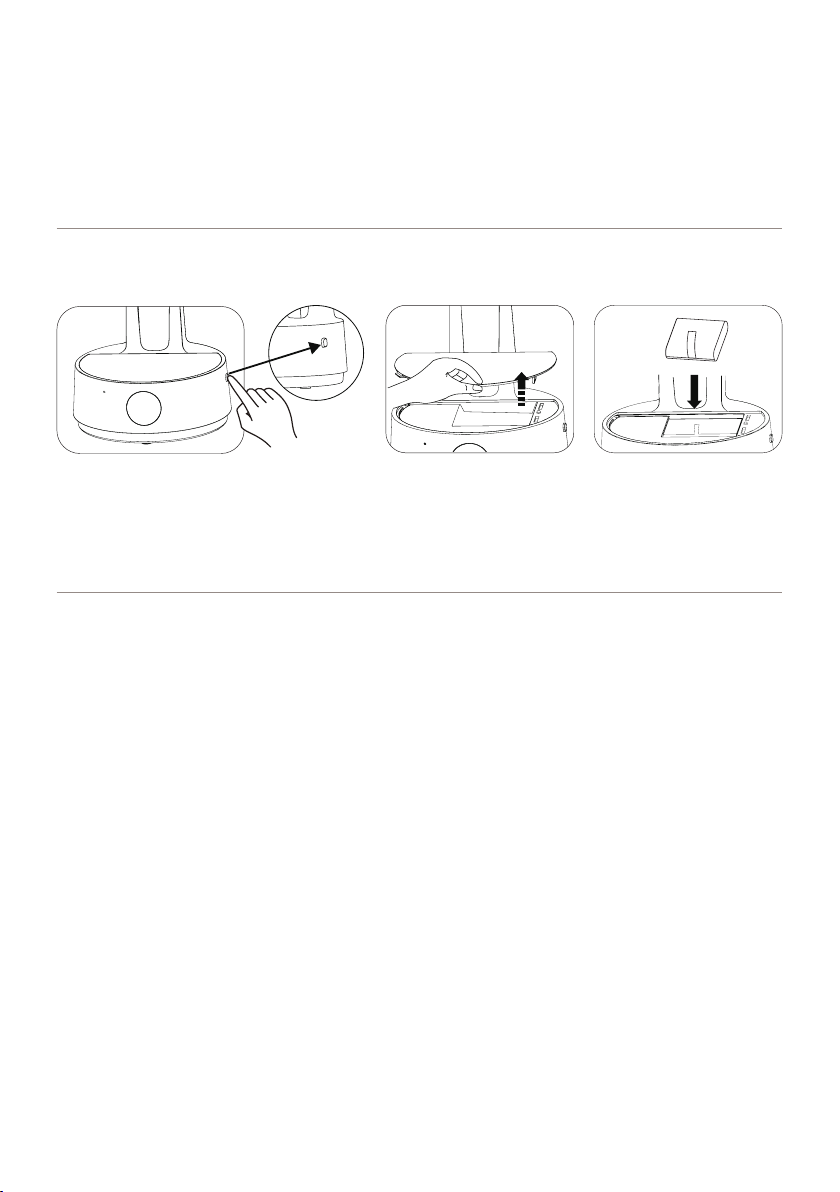
1. Press the button on the right hand side of the air circulator to release the lid.
2. Remove the battery pack compartment cover.
3. Insert the battery pack into the battery compartment.
4. Put the battery pack compartment cover back in place.
Charging the battery
When charging the battery, actual energy consumption can be greater than the values in the
Specications section.
Charging the battery to 100% will take approximately 3.5 hours.
To charge the battery, simply make sure the battery is in place in the air circulator (as per the
instructions above) and plug the air circulator into the mains using the mains adaptor.
[EN] 10

Battery status
Above the power button on the air circulator interface is a LED light showing the battery status.
Please note the LED display will not be visible when the device is on night mode.
Battery life
See the table below for the approximate battery life while using dierent fan speeds.
Solid white Fully charged
Flashing white Charging - less than 100% charge
Solid red Less than 20% charge
Flashing red Less than 10% charge
Fan speed No oscillation Full oscillation
140 hours 11 hours
235 hours 10 hours
333.5 hours 9.5 hours
427.5 hours 9.5 hours
525.5 hours 9 hours
621.5 hours 8.5 hours
719 hours 8.5 hours
816.5 hours 7.5 hours
914 hours 7 hours
10 12 hours 6.5 hours
11 10 hours 6 hours
12 10 hours 5.5 hours
Battery life
[EN]11

Battery disclaimer
Lithium-ion batteries are designed to go through a continuous cycle of being recharged - if this
happens consistently they will continue to perform at their best. If the battery is not recharged for a
period of more than 3 months the battery performance will reduce by 50%. Due to the nature of our
products, it is more than likely the battery will not be recharged over the winter period and therefore
suer a performance decrease. We therefore recommend you recharge your fan every 3 months for
2 hours. If you forget to do this and nd the performance of the battery has been reduced, you can
purchase a new lithium-ion battery.
The batteries used in our fans are the most up to date form of lithium battery, so the performance
decrease indicated above is simply the nature of this type of battery. We use lithium-ion batteries as
they are the most ecient battery. They are rechargeable and charge in the shortest amount of time
keeping energy costs to a minimum. We therefore believe the positives of using lithium-ion batteries
outweigh the negatives.
Maintenance
Cleaning your air circulator
• Always unplug your air circulator from the mains before cleaning.
• Do not allow the air circulator to get wet.
Use a soft dry cloth to clean the external and internal parts of the air circulator. To access the fan
blades, follow the steps below:
1. Using a screwdriver, unscrew the screw at the bottom of the air circulator head and ensure the
circulator is switched o.
2. Hold the grill on the left and right side of the air circulator and rotate anti-clockwise to remove the
grill from the head.
3. Unscrew the locking cap in the centre of the air circulator in a clockwise motion to remove the fan
blades.
4. Reverse the steps above to put the air circulator back together. Make sure the locking cap is
tightened securely.
[EN] 12

Replacing the remote control battery
If the remote control fails to work within 4 metres of the air circulator, replace the battery. Battery type:
CR2025 or CR2032. To replace the battery follow the steps below:
1. Push the safety release (below the Mode button) with the end of a paper clip to release the battery
compartment.
2. Replace the battery making sure the polarity is correct.
3. Push the battery and battery compartment back into the remote control.
Keep batteries away from children!
[EN]13

Storing
When the air circulator is not going to be used for more than 3 months, we recommend charging the
battery for 2 hours and then removing it from the air circulator to prevent a reduction in the battery’s
performance. 2 hours will not charge the battery to 100%, it will charge the battery to 50% which is
the optimum charge to prevent a reduction in performance. Repeat the charging process once every 3
months. Store the battery in a cool, dry place away from children.
Store the air circulator in a clean, dry place in its original box. Alternatively, a custom storage bag can
be purchased from meaco.com.
Tip! The air circulator can also be used in winter to help distribute warm air more eectively within a
room. It can also be used in conjunction with a dehumidier to circulate dry air and dry your laundry
faster.
Troubleshooting
If you come across a problem with your air circulator, check the table below and try the suggestions. If
the problem persists, contact Solenco.
Error Action
Fan blades not moving Check the adaptor is connected correctly
Increased noise level Clean the fan blades
Make sure the locking cap is tightened securely
E1 Contact Solenco
E2 Contact Solenco
[EN] 14

Meaco customer care
If you have a question about your Meaco air circulator, contact our Customer Service team who will be
happy to help. Make sure you have your serial number and details of where and when you purchased
your air circulator.
Meaco contact details
Website: www.meaco.com/pages/contact-us
Email: [email protected]
Phone: 01483 234900
Address: Meaco House, Parklands, Railton Road,
Guildford, Surrey GU2 9JX, United Kingdom
Specications
Some specications will dier depending on how your air circulator is powered: by mains adapter or
by battery. The specications below are for when the air circulator is powered by mains adapter. For
the full list of specications visit meaco.com.
*Measurement Standard for Service Value (all items*): EN 50564:2011
Maximum air ow 19.18 m³ / min
Maximum air velocity © 7.07 m / sec
Voltage 12 volts
Power consumption 8 - 26 watts
Standby power consumption 0.73 watts
Noise level From 25 dB
Service value 0.7 (m³ / min) / watt
Fan power input 26 watts maximum
Maximum fan ow rate 19.18 m³ / min
Dimensions (HWD) 342 x 305 x 227 mm
Nett weight 3.2 kg
Wi-Fi 802.11b/g/n
Lithium-ion battery Rated capacity: 9200mAh
Cell capacity: 4600mAh
Solenco contact details
Website: www.solenco.co.za/pages/contact
Email: [email protected]
Phone: 0861 388 878
[EN]15

16
Warranty terms and conditions
There is a three-year manufacturer’s warranty on your air circulator from the date of delivery. Within the
three-year warranty all manufacturing defects will be repaired free of charge.
The following applies:
1. Any repair or replacement of your air circulator or its components during the warranty period will
not result in an extension of the warranty period.
2. If your air circulator has been opened or tampered with or not genuine components have been
tted by yourself or anyone other than a Meaco engineer, your warranty is invalid. This does not
include removing the air circulator grill to clean the fan blades.
3. Components subject to normal wear and tear, the Li-ion battery, remote control and mains adaptor
are not covered by the warranty.
4. The warranty is only valid on presentation of the original, unaltered and date-stamped purchase
receipt. If you are unable to produce proof of purchase, the warranty on your air circulator is invalid.
5. The warranty does not cover damage caused by actions that deviate from those as described in
the instruction manual or by neglect.
6. The warranty does not cover faults caused by dirt or by third-party products.
7. Using a third-party switching device that turns the air circulator on or o via the mains will
invalidate the warranty, for example, a Smart Plug.
8. The warranty does not cover accidental damage.
9. All claims for compensation, including consequential damage, will not be entertained
For the full list of the warranty terms and conditions please visit: www.meaco.com/warranty-terms.
[EN]

Version: SA01
Meaco (U.K.) Limited
Meaco House, Parklands, Railton Road, Surrey GU2 9JX
meaco.com
Table of contents
Other Meaco Fan manuals

Meaco
Meaco MeacoFan 260C User manual

Meaco
Meaco MeacoFan 260C User manual

Meaco
Meaco MeacoFan 360 User manual

Meaco
Meaco MeacoFan 650 User manual

Meaco
Meaco MeacoFan 650 User manual

Meaco
Meaco MeacoFan 1056P User manual

Meaco
Meaco MeacoFan 360 User manual

Meaco
Meaco MeacoFan 1056 User manual

Meaco
Meaco MeacoFan 260C User manual

Meaco
Meaco MeacoFan 1056P User manual


Popular Fan manuals by other brands


Harbor Breeze
Harbor Breeze FLANAGAN II 42477 manual

Kichler Lighting
Kichler Lighting 300260/60-GENT Series instruction manual

Fanimation
Fanimation VINTERE LP8350LAZ instructions

Inspire
Inspire Farou NT44301 Assembly, Use, Maintenance Manual

Antari
Antari AF-5 user manual

Casablanca
Casablanca Aris 59123 Owner's guide and installation manual


