MEAN MOTHER MAXI 4X4 III User manual

PART No.
MMACM3
MMACA4
SAVE THIS MANUAL: Keep this manual in a safe place for future reference. This manual
contains useful information relating to the safe use of an air compressor.
Powerful 110 Litres Per Minute Free Air Delivery
(29 Gallons Per Minute / 6,700 Cubic Inches Per Minute)
55 Minute Duty Cycle @ 40 PSI (276 kPa)
Thermal Cut Out and Auto Reset Circuit Protection
45mm (1.8”) Diameter Cylinder
Built-in Air Filter
0.65HP (0.48kW) Permanent Magnet Motor
5m (16.5’) Rubber Air Hose with Quick Connectors
Dual Control - Wireless (via Remote) and Manual
Powerful 180 Litres Per Minute Free Air Delivery
(47.5 Gallons Per Minute /11,000 Cubic Inches Per Minute)
45 Minute Duty Cycle @ 40 PSI (276 kPa)
Thermal Cut Out and Circuit Breaker Protection
0.73HP (0.54kW) Permanent Magnet Motor
60mm (2.4”) Diameter Cylinder
Built-in Air Filter
5m (16.5’) Rubber Air Hose with Quick Connectors
Dual Control - Wireless (via Remote) and Manual

BAR & PSI Pressure Gauge
5m (16.5’) Rubber Air Hose
Multiple Valve Attachments
Air Bleed-Off Button
High Quality Fittings
Additional Inflation Adaptors
Durable Battery Clamps
Wireless Remote Control
Carry Bag with Zipper
Copyright © 2020 Haigh Australia Pty Ltd
FCC ID: 2AKJ8-MMACRC
This device was tested after assembly and complies with Part 15 of the FCC Rules.
Operation is subject to the following two conditions: (1) this device may not cause
harmful interference, and (2) this device must accept any interference received,
including interference that may caused undesired operation.
Due to continuing improvements, actual product may differ slightly from the product described.
Items described such as tools and hardware within this operation manual may not be included.
Images and drawing are for illustrational purposes only. Instructions in this manual are a guide
only as individual requirements and/or circumstances may be different.
COMPRESSOR FEATURES
Page 01
TO PREVENT SERIOUS INJURY, PLEASE READ AND UNDERSTAND
ALL WARNINGS AND INSTRUCTIONS BEFORE USE.
WARNING!

Time (Minutes, Seconds)
1 Min, 42 Sec
3 Min, 24 Sec
5 Min, 24 Sec
7 Min, 30 Sec
Time (Minutes, Seconds)
0 Min, 48 Sec
1 Min, 30 Sec
2 Min, 24 Sec
3 Min, 15 Sec
Air Flow (L/Min)
110 L/Min
105 L/Min
80 L/Min
68 L/Min
60 L/Min
55 L/Min
Motor Amp Draw
18 Amps
22 Amps
24 Amps
28 Amps
31 Amps
33 Amps
PSI (kg/cm²)
0 PSI (0 kg/cm²)
14.2 PSI (1 kg/cm²)
28.4 PSI (2 kg/cm²)
42.6 PSI (3 kg/cm²)
56.8 PSI (4 kg/cm²)
71.0 PSI (5 kg/cm²)
110 Litres Per Minute (29 Gallons Per Minute / 6,700 Cubic Inches Per Minute)
12 Volt DC
55 Minutes at 40 PSI (276 kPa)
0.65HP (0.48kW)
40 Amp
150 PSI (1,034 kPa)
45mm (1.8”)
60°C (140°F)
-40°C (-40°F)
Active at 105°C (220°F)
Cooling Fins
2.4m (7.8’) with Durable Battery Clamps
ON/OFF Toggle Switch & Premium Wireless Remote System
2.4GHz <5.5dBm (3.6mW) - Powered by 1 x 12V 23A L1028 Alkaline Battery
40 Amp Auto Reset Circuit Breaker
0.5m (1.65’) Rubber Hose with Quick Connectors, Pressure Gauge & Air Bleed-Off Button
5m (16.5’) Rubber Air Hose with Quick Connectors
1 x Screw-On Fitting & 1 x Thumb Lock Quick Connector
0-150 PSI (0-10 BAR / 0-1,034 kPa)
27cm x 14.5cm x 19cm (10.6” x 5.7” x 7.5”)
5.6kg (12.3lb)
Metal Sand Tray with Rubber Feet - Can be Permanently Mounted to a Vehicle
Carry Bag with Zipper
Inflation Adaptors for Camping & Equipment
Tyre - 205/60 R16 Tyre - 275/70 R16
PSI (kg/cm²)
14.2 PSI (1 kg/cm²)
28.4 PSI (2 kg/cm²)
42.6 PSI (3 kg/cm²)
56.8 PSI (4 kg/cm²)
*As tested at DC13V, individual results may vary depending on each compressor and environmental conditions.
Maximum Air Flow
Voltage
Duty Cycle
Motor Output Power
Maximum Current
Maximum Pressure
Cylinder Diameter
Max. Ambient Temperature
Min. Ambient Temperature
Thermal Cut Out Protection
Cooling
Power Cables
Controls
Wireless Remote Control
Electrical Current Protection
Adaptor Hose
Extension Hose
Valve Connectors
Pressure Gauge
Overall Dimensions (L x W x H)
Net Weight
Solid Base Plate
Storage
General Accessories
Operation Time vs Pressure (Tyre Inflation)*
General Information
Flow Rate (L/M) vs Amp Draw vs Pressure (Continuous Operation)*
PSI (kg/cm²)
14.2 PSI (1 kg/cm²)
28.4 PSI (2 kg/cm²)
42.6 PSI (3 kg/cm²)
56.8 PSI (4 kg/cm²)
Copyright © 2020 Haigh Australia Pty Ltd
Page 02

Tyre - 205/60 R16 Tyre - 275/70 R16
Time (Minutes, Seconds)
0 Min, 36 Sec
1 Min, 12 Sec
1 Min, 48 Sec
2 Min, 30 Sec
PSI (kg/cm²)
14.2 PSI (1 kg/cm²)
28.4 PSI (2 kg/cm²)
42.6 PSI (3 kg/cm²)
56.8 PSI (4 kg/cm²)
Time (Minutes, Seconds)
1 Min, 18 Sec
2 Min, 36 Sec
4 Min, 00 Sec
5 Min, 30 Sec
PSI (kg/cm²)
14.2 PSI (1 kg/cm²)
28.4 PSI (2 kg/cm²)
42.6 PSI (3 kg/cm²)
56.8 PSI (4 kg/cm²)
Maximum Air Flow
Voltage
Duty Cycle
Motor Output Power
Maximum Current
Maximum Pressure
Cylinder Diameter
Max. Ambient Temperature
Min. Ambient Temperature
Thermal Cut Out Protection
Cooling
Power Cables
Controls
Wireless Remote Control
Electrical Current Protection
Adaptor Hose
Extension Hose
Valve Connectors
Pressure Gauge
Overall Dimensions (L x W x H)
Net Weight
Solid Base Plate
Storage
General Accessories
180 Litres Per Minute (47.5 Gallons Per Minute / 11,000 Cubic Inches Per Minute)
12 Volt DC
45 Minutes at 40 PSI (276 kPa)
0.73HP (0.54kW)
45 Amp
150 PSI (1,034 kPa)
60mm (2.4”)
60°C (140°F)
-40°C (-40°F)
Active at 105°C (220°F)
Cooling Fins
2.4m (7.8’) with Durable Battery Clamps
ON/OFF Toggle Switch & Premium Wireless Remote System
2.4GHz <5.5dBm (3.6mW) - Powered by 1 x 12V 23A L1028 Alkaline Battery
Circuit Breaker with Reset Button
0.5m (1.65’) Rubber Hose with Quick Connectors, Pressure Gauge & Air Bleed-Off Button
5m (16.5’) Rubber Air Hose with Quick Connectors
1 x Screw-On Fitting & 1 x Thumb Lock Quick Connector
0-150 PSI (0-10 BAR / 0-1,034 kPa)
32.5cm x 15cm x 26.5cm (12.8” x 5.9” x 10.4”)
8.7kg (19.2lb)
Metal Sand Tray with Rubber Feet - Can be Permanently Mounted to a Vehicle
Carry Bag with Zipper
Inflation Adaptors for Camping & Equipment
Air Flow (L/Min)
180 L/Min
140 L/Min
117 L/Min
100 L/Min
85 L/Min
73 L/Min
Motor Amp Draw
27 Amps
35 Amps
37 Amps
39 Amps
40 Amps
40 Amps
PSI (kg/cm²)
0 PSI (0 kg/cm²)
14.2 PSI (1 kg/cm²)
28.4 PSI (2 kg/cm²)
42.6 PSI (3 kg/cm²)
56.8 PSI (4 kg/cm²)
71.0 PSI (5 kg/cm²)
*As tested at DC13V, individual results may vary depending on each compressor and environmental conditions.
Operation Time vs Pressure (Tyre Inflation)*
General Information
Flow Rate (L/M) vs Amp Draw vs Pressure (Continuous Operation)*
Page 03
Copyright © 2020 Haigh Australia Pty Ltd

Mean Mother Air Compressors have many uses
when 4wdriving, camping, fishing, caravanning as
well as around the home. It is important for the
safety and performance of any vehicle, trailer or car-
avan that the tyre pressures are regularly checked
and maintained. For the 4WD traveller tyre pressure
will need to be varied depending on the terrain
travelled. Highway and bitumen roads require high
pressures, whereas terrains such as sand will require
a low pressure to increase the 4WD’s tyre traction.
By travelling with a Mean Mother Air Compressor
you will have the ability to adjust the tyre pressure
safely and reliably according to the terrain travelled,
as well as inflate tyres that have been repaired after
a puncture.
NOTE: This compressor is not designed for quick
inflation of high volume low pressure items such
as air beds or inflatable boats. A more suitable
item for this application would be a 12 Volt high
volume air pump such as the Dr Air AC100.
Mean Mother Air Compressors are designed for
reliability, performance, versatility, and ease of
operation. We are so confident in our product we
offer a limited 5 year warranty............................................
UNPACKING
When unpacking, please check to ensure all parts are included. Refer to colour box
packaging for included accessories. Should any part be missing or broken, please call
your local distributor where you purchased this compressor from as soon as possible.
IMPORTANT: This compressor is designed for
operation on a 12 Volt electrical system / supply
ONLY.
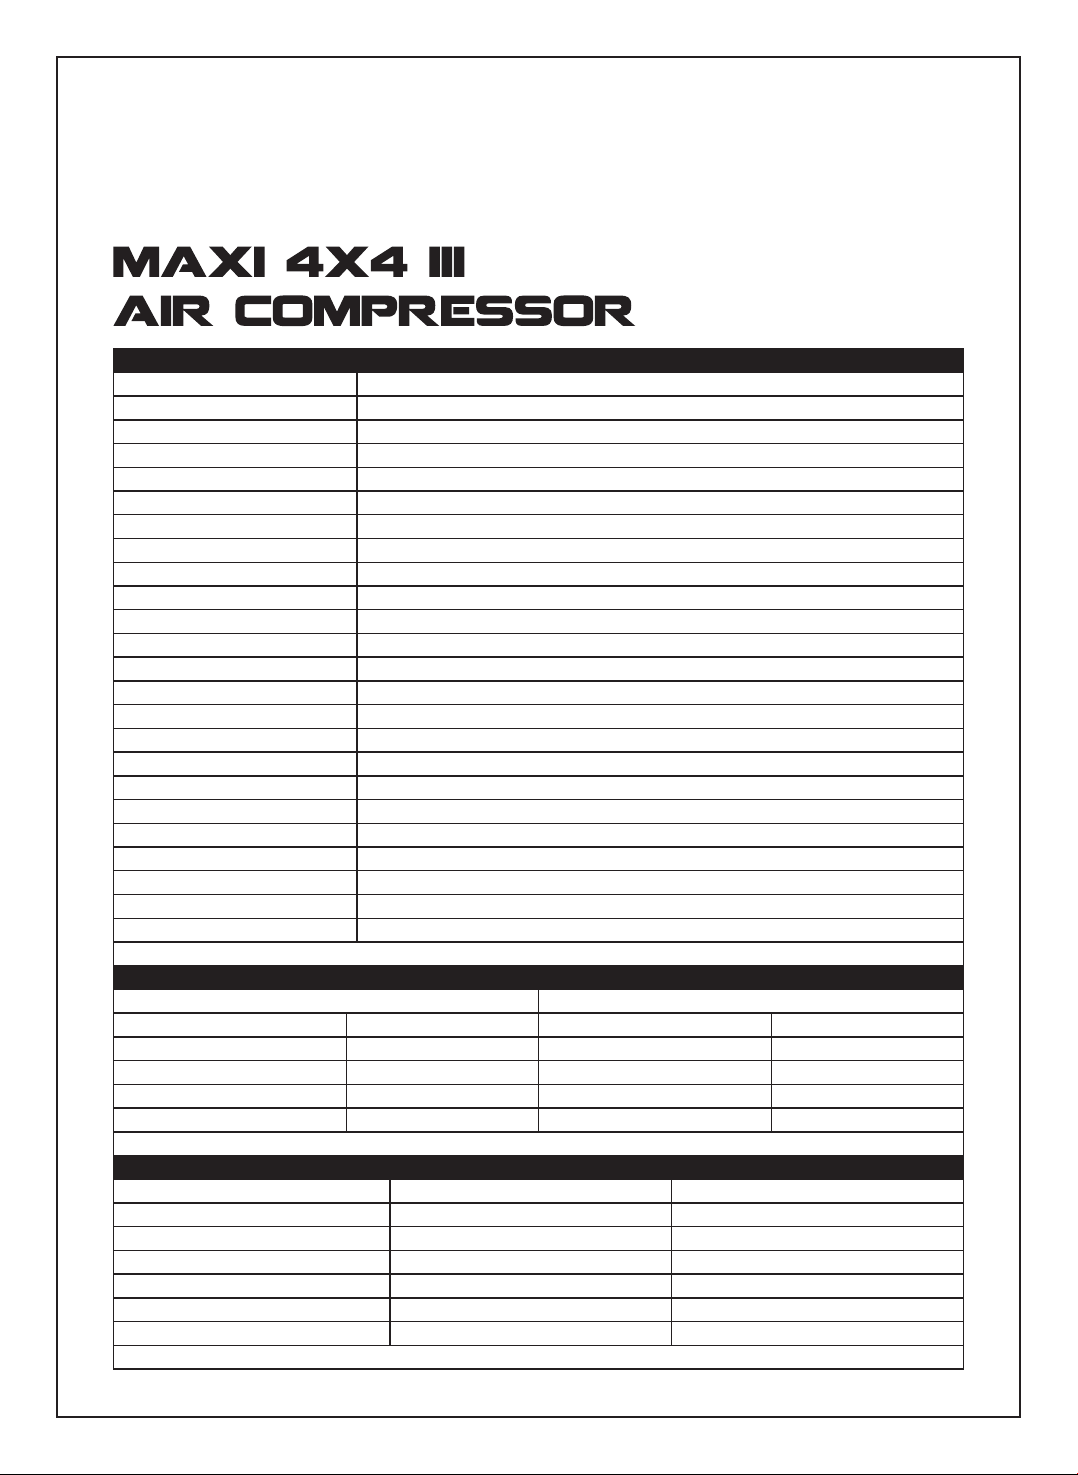
F.A.D. (FREE AIR DELIVERY) RATING:
OPERATING RATING:
POWER CONSUMPTION:
OVERHEATING PROTECTION:
F.A.D. (Free Air Delivery) rating is the actual quantity
in Litres per Minute, Gallons Per Minute and Cubic
Inches Per Minute of compressed air that is
discharged at 0 PSI from the compressor unit.
The Litres per Minute, Gallons Per Minute and Cubic
Inches Per Minute ratings and inflation times vary
according to how much pressure is in the tyre being
inflated. The lower the pressure in the tyre results
in a greater Litres per Minute, Gallons Per Minute
and Cubic Inches Per Minute capability.
A Mean Mother Air Compressor operates off your
vehicle’s battery system or 12 Volt power supply. Air
compressors can consume a lot of power, for
maximum performance the battery system or
power supply must be in excellent condition. Where
possible you should have your vehicle engine run-
ning to maintain a charging current to the battery.
The compressor will still operate if the engine is not
able to be switched on, so long as the battery is in
excellent condition. During operation monitor your
battery voltage so it does not get too low to restart
the vehicle. Please refer to the front of this manual
for full details on the compressor’s amperage (amp)
draw details. All details in this manual are based on
a continuous operation cycle.
Mean Mother Air Compressors F.A.D. (Free Air
Delivery) have been rated at 0 PSI. Please refer to the
front of this manual for full details of the compressor
performance at varying pressure levels.
This air compressor is equipped with an automatic
thermal cut out protection device. If the compressor
reaches an unsafe operating temperature, a protec-
tion circuit will cut the power to prevent damage. If
Page 04
COMPRESSOR PRINCIPLES
Copyright © 2020 Haigh Australia Pty Ltd

SAFETY WARNING &
OPERATING PRECAUTIONS
the protection circuit activates, immediately discon-
nect the unit from the power source and allow it to
cool.
The compressor should take approximately 15 min-
utes to cool depending on ambient conditions. The
compressor protection circuit will automatically
reset when the temperature returns to a safe opera-
ting level.
NOTE: The thermal cut out will operate when
the motor reaches 105°C. The cylinder head will
operate at a higher temperature.
POWER CONNECTION:
SAFE HANDLING:
INFLATION:
STOPPING AND RESTARTING:
Use caution when connecting the unit to a power
source, as batteries can vent explosive gasses. Avoid
connections that could produce a spark. Consult
your vehicle’s manual or a qualified mechanic for
proper connection procedures.
Only move and hold the unit by the carry handle.
NEVER carry the air compressor by the hose or
power cords................................................................................
Only inflate the tyres to the manufacturer’s recom-
mended pressure (consult your vehicle’s manual or
check for a sticker inside the driver’s door frame or
glove box for vehicle manufacturer specifications).
DO NOT over inflate, as tyre failure or serious injury
could occur.................................................................................
Turning the air compressor “ON” at high pressure can
overload the unit and result in blowing the fuse or
tripping the circuit breaker. If starting at a higher
inflation pressure, it is a good idea to turn the com-
pressor “ON” first before attaching the hose to the
NOTE: This air compressor is not fitted with a
pressure relief valve.............................................
IMPORTANT: Please refer to the front of this
manual for full details on the maximum duty
cycle of the air compressor. Always allow your
compressor to cool before reuse...........................
WARNING
Mean Mother Air Compressors generate a
lot of heat so wear appropriate gloves to
protect your hands. DO NOT touch the unit
with bare hands after operation, use the
carry handle. Always allow the compressor
to cool completely before storage.
When using this air compressor, safety precautions should always be followed to reduce the risk of
personal injury and damage to the air compressor.
WORKING AREA CONDITIONS:
KEEP CHILDREN AWAY:
USE LEATHER GLOVES:
USE SAFETY GLASSES:
CORRECT USE OF COMPRESSED AIR:
Keep the working area well lit. DO NOT use this air
compressor in the presence of flammable gases or
liquids. Use the air compressor in dry conditions
only to avoid potential risk of electrical shock..............
Keep children away from working area. NEVER let
children operate the air compressor.................................
When handling the air compressor, always use hand
protection to eliminate the possibility of burns.
Always wear approved safety glasses when working
with compressed air from your air compressor.
NEVER aim the air stream at anyone’s eyes or skin.
DO NOT use the air compressor for pumping, comp-
ressing or transferring any gas or liquid other than
tyre valve. If you are stopping the air compressor and
restarting during an inflation operation, then you
should remove the hose from the valve once you
have turned the air compressor “OFF”, then turn the
air compressor “ON” and reconnect to the tyre valve.
Page 05
Copyright © 2020 Haigh Australia Pty Ltd

air. This air compressor is NOT designed for use as a
source of breathable air.
FREE AIR FLOW:
STEP 1: Place the compressor on a dry level surface near the 12 Volt vehicle battery or power source.
STEP 2:
STAY ALERT:
This air compressor is designed for continuous air
flow. Never block the flow of the air with any device
or accessory. Damage to the air compressor or seri-
ous injury may occur and void the manufacturer’s
warranty.
Watch what you are doing. Use your common sense.
DO NOT use this air compressor when you are tired,
OPERATING YOUR
AIR COMPRESSOR
Note: If your tyres are within reach, it is possible to use the 0.5m adaptor hose with gauge independ-
ent of the 5 metre air hose using the same procedure as described above.Note: ....................................
REPLACEMENT PARTS & ACCESSORIES:
WARNING LABELS AND STICKERS:
MODIFICATIONS:
SMALL ITEMS:
The air compressor is permanently lubricated during
manufacture. It is not necessary to lubricate this
unit.
DO NOT discard or remove any warning labels or
name plates on this air compressor. These contain
important safety information. If unreadable please
contact your nearest distributor to arrange replace-
ment stickers..............................................................................
Never drill or modify this air compressor in any way.
This will void the manufacturer’s warranty....................
Extra caution should be taken when inflating
small objects such as small tyres, bicycle tyres and
sporting balls as rapid inflation will occur. Pay close
attention to the pressure gauge and be prepared to
stop the air compressor when desired or manufac-
turer’s recommended pressure.
stressed or WHEN UNDER THE INFLUENCE OF
DRUGS, ALCOHOL OR MEDICATION..................................
Only genuine replacement parts should be used
when repairing or servicing the unit. Never use an
air compressor that shows any signs of damage..........
Before operating the air compressor check that you are in a safe location away from busy roads and
traffic, inspect the compressor and accessories for any sign of damage. If there are signs of damage
do not use the air compressor and replace damaged parts.
1. Slide the retaining ring back on the female air hose quick connector on the hose and hold.
Connect the 5 metre air hose to the air compressor using the quick connector, then attach the
0.5m adaptor hose with gauge. To use the quick connector, follow these steps:.........................................
2. Connect the 5 metre air hose to the air compressor by firmly inserting the male quick connector
located on the air compressor unit into the female quick connector..........................................................
3. Release the retaining ring to lock the connectors in place.
Page 06 Copyright © 2020 Haigh Australia Pty Ltd

STEP 3:
STEP 4:
STEP 5:
STEP 6:
NOTE: The air compressor body “ON/OFF” switch and the “ON/OFF” button on the wireless remote
control work in unison. That means you can switch the air compressor “ON” with one power supply
switch and “OFF” with the other or just use one power activation source to control the power of your
air compressor........................................................................................................................................
CAUTION: Direct the hose away from yourself or any persons nearby when testing the air compressor.
Our specially designed hose system with its integrated dial pressure gauge and quick connect point
allows you to inflate and check pressures accurately without needing to turn the air compressor OFF.
While the air compressor’s motor is running, carefully disconnect the 0.5m hose from the 5m hose.
The one-way valve in the 0.5m hose will not allow air to escape, and will give you an accurate pressure
reading on the dial gauge now that the air is not passing through from the air compressor. If you read
the gauge and require more air, with the air compressor still running simply reconnect the hose and
add more air, if you need to reduce the air simply press the deflation button located on the bottom of
the gauge and set to your desired pressure.
NOTE: The pressure gauge can often read higher during the inflation process due to the air flow
through the hose, once the air compressor is turned “OFF” you may find the actual pressure is not
quite enough and you may need to turn the compressor back “ON” to add some more air. If you have to
turn the compressor back “ON” to add more pressure then you should follow the above inflation note.
IMPORTANT INFLATION NOTE: Turning the air compressor “ON” at high pressure can overload the
unit and result in blowing the fuse or tripping the circuit breaker. If starting at a higher inflation
pressure, it is a good idea to turn the compressor “ON” first before attaching the hose to the tyre
valve. If you are stopping the air compressor and restarting during an inflation operation, then you
should remove the hose from the valve once you have turned the air compressor “OFF”, then turn the
air compressor “ON” and reconnect to the tyre valve.............................................................................
Choose whether you wish to use the screw type connector or the thumb lock adaptor. The screw
type connector will give you the best results.............................................................................................................
Connect the RED battery alligator clip to your 12 Volt battery or power source’s POSITIVE (+) terminal.
Connect the BLACK battery alligator clip to your 12 Volt battery or power source’s NEGATIVE (-)
terminal....................................................................................................................................................................................
Test the connections and air flow by switching the compressor ON with the “ON/OFF” switch
located on the body of the compressor or with the “ON/OFF” button located on the wireless remote
control.
a) The screw type connector is already attached to the 0.5 metre adaptor hose (with gauge) and is
ready for use.
b) If you choose the thumb lock adaptor, simply screw the end of the thumb lock adaptor into the
screw type connector on the 0.5 metre adaptor hose (with gauge); ensure a good seal is made.
The thumb lock adaptor is now ready to connect.............................................................................................
a)
Inflating the tyre. Connect the air hose to the tyre by removing the valve cap (if equipped) from the
tyre valve system.
If using the screw type connector. Screw the brass inflator onto the tyre valve system (finger
tight only)..........................................................................................................................................................................
b) If using the thumb lock adaptor, using your thumb press and hold the lever down, firmly press
onto the tyre valve system to create a good seal, now release the lever...................................................
Inflate the tyre by switching “ON” the compressor unit with the “ON/OFF” switch located on the
body of the air compressor or with the “ON/OFF” button located on the wireless remote control.
Watch the pressure gauge closely to monitor the tyre pressure. Once the correct or preferred pres-
sure has been reached, turn the air compressor “OFF”............................................................................................
Refit the valve cap after you have completed the inflation process.
Page 07
Copyright © 2020 Haigh Australia Pty Ltd

STEP 7:
COMPRESSOR OPERATING TIPS
TIP 1: It is always good practice to confirm the tyre pressure with a separate gauge.
TIP 2:
TIP 3:
TIP 4:
TIP 5:
TIP 6:
TIP 7:
MAINTENANCE
1.
2.
3.
4.
Allow your compressor to cool before stowing away. Place cooled compressor neatly into the bag
supplied and close ready for the next use. Store the compressor in a dry location...................................
If starting at a higher inflation pressure, it is a good idea to turn the compressor “ON” first before
attaching the hose to the tyre valve. This reduces the unnecessary strain applied to the compressor,
maximising the life and reliability.......................................................................................................................................
Use the “deflation button” located on the back of the gauge on the 0.5m adaptor hose to accurately
adjust the tyre pressure while the hose is still connected.........................................................................................
The 0.5m adaptor hose can be use to deflate the tyres before entering terrain which requires a lower
tyre pressure (This is a very slow process).......................................................................................................................
If you are stopping the air compressor and restarting during an inflation operation, then you should
remove the hose from the valve once you have turned the air compressor “OFF”, then turn the air
compressor “ON” and reconnect to the tyre valve. This reduces the unnecessary strain applied to the
compressor, maximising the life and reliability.............................................................................................................
If your tyres are within reach, it is possible to use the 0.5m adaptor hose with gauge independent of
the 5 metre air hose.................................................................................................................................................................
When inflating small objects such as small tyres, bicycle tyres and sporting balls as rapid inflation will
occur. Pay close attention to the pressure gauge and be prepared to stop the air compressor when
desired or manufacturer’s recommended pressure.....................................................................................................
All moving parts within the air compressor have been permanently lubricated during manufacture. It is
not necessary to lubricate this unit............................................................................................................................................
Check the air filter regularly, maybe every six months. Simply remove the cover and clean the air filter. To
clean the filter gently wash in mild soapy water and rinse well. Replace if worn (Adventurer IV only).........
Page 08
Check battery cables, fuse and electrical connections regularly, making sure that they are in good
condition...............................................................................................................................................................................................
Before and after each use, carefully inspect the compressor unit and hoses for signs of damage.
Copyright © 2020 Haigh Australia Pty Ltd

Compressor does not operate under normal conditions:
– Check wiring connection is correct as per instruction within this manual.
–
–
– Only the power cables supplied with this compressor should be used, any other cable may not be of a
high enough specification to supply sufficient power to the compressor.– ...................................................................
– Check the deflator button is completely out and in good condition.
– Inspect for any leaks in the hoses.
– Check the hoses are connected properly.
Compressor stops during operation:
–
– Check the vehicle battery or power source it should be in good working order and fully charged.
– Check the circuit breaker, reset if necessary (Adventurer IV model).
Air is leaking from the hoses:
–
– Check the O-Ring inside the screw type and thumb lock connectors are in good condition.
– Check the thumb lock adaptor is connected onto the valve correctly and has a good seal.
– Check the screw type fitting is threaded onto the valve correctly and has a good seal.
TROUBLESHOOTING
– Vehicle battery or power source should be in good working order and fully charged.
This should be used as a guide only; we recommend you seek professional advice should you experience any
technical issues.......................................................................................................................................................................................
Compressor operates but the tyre is not inflating:
Check all the electrical connections and cables are in good condition, free from corrosion and connected
properly..................................................................................................................................................................................................
Check all the quick connectors are secured properly, and the outer retaining rings have been locked in
place.........................................................................................................................................................................................................
Earth power cable should be connected directly to the earth terminal on the battery or power source not
the vehicle chassis..............................................................................................................................................................................
This air compressor is equipped with an automatic thermal cut out protection device. If the compressor
reaches an unsafe operating temperature, a protection circuit will cut the power to prevent damage. If the
protection circuit activates, immediately disconnect the unit from the power source and allow it to cool.
Page 09
Copyright © 2020 Haigh Australia Pty Ltd

PRODUCT WARRANTY
WARRANTY CLAIMS
WARRANTY
Haigh Australia Pty Ltd (ACN 005 065 298) (“Haigh Australia”)
provides the following warranty in relation to its Mean
Mother Adventurer IV and Maxi 4X4 III Air Compressors. The
benefits of this warranty are in addition to any rights and
remedies imposed by Australian State and Federal legisla-
tion that cannot be excluded. Nothing in this warranty is to
be interpreted as excluding, restricting or modifying any
State or Federal legislation applicable to the supply of goods
and services which cannot be excluded, restricted or
modified.
Haigh Australia warrants that, subject to the exclusions and
limitations below, the Adventurer III and Maxi 4X4 III Air
Compressors (“Product”) will be free from defects in mater-
ials and workmanship for a period of 5 years from date of
purchase. This warranty is not transferable to a subsequent
customer if the Product is sold by the original customer
during the warranty period. If a defect appears in the manu-
facture or assembly of the Product before the end of the
warranty period and Haigh Australia finds the Product to be
defective in materials or workmanship, then Haigh Australia
will, in its sole discretion, either:
Haigh Australia reserves the right to replace defective parts
of the Product with parts and components of similar quality,
grade and composition where an identical part or compon-
ent is not available. Goods presented for repair may be
replaced by refurbished goods of the same type rather than
being repaired. Refurbished parts may be used to repair the
goods.
1.
2.
3.
4.
EXCLUSIONS:
HAIGH AUSTRALIA PTY LTD (ACN 005 065 298)
a) replace or repair the Product or the defective part of
the Product free of charge; or
b) have the Product or the defective part of the Product
to be replaced or repaired by a qualified repairer free
of charge.
If a fault covered by warranty occurs, the customer must
first contact Haigh Australia at the contact address listed
below, or the retailer from which the Product was
purchased.
Any warranty claim must be accompanied by: (a) proof
of purchase; (b) full details of the alleged defect.
The customer must make the Product available to Haigh
Australia or its authorised repair agent for inspection
and testing. If such inspection and testing finds no
defect in the Product, the customer must pay Haigh
Australia’s usual costs of service work and testing.
The customer must bear the cost of the transport of the
Product to and from Haigh Australia or the authorised
repair agent to make the warranty claim, and all insur-
ance of the Product.
The warranty will not apply where:
a)
b)
c)
d)
e)
f)
g)
the Product has been repaired, altered or modified
by someone other than Haigh Australia or an autho-
rised repair agent;
the alleged defect in the Product is within acceptable
industry variances;
Haigh Australia cannot establish any fault in the
Product after testing and inspection;................................
the Product has been used other than for the pur-
pose for which it was designed;...........................................
the defect in the Product has arisen due to the cus-
tomer’s failure to properly install, use or maintain the
Product;
the Product has been subject to abnormal conditions,
including environment, temperature, water, fire,
humidity, pressure, stress or similar; or
the defect has arisen due to abuse, misuse, neglect
or accident...................................................................................
The warranty does not extend to:
Our goods come with guarantees that cannot be excluded
under the Australian Consumer Law. You are entitled to a
replacement or refund for a major failure and for compensa-
tion for any other reasonably foreseeable loss or damage.
You are also entitled to have the goods repaired or replaced
if the goods fail to be of acceptable quality and the failure
does not amount to a major failure.
LIMITATIONS
Haigh Australia makes no express warranties or representa-
tions other than set out in this warranty. The repair or
replacement of the Product or part of the Product is the
absolute limit of Haigh Australia’s liability under this express
warranty.
CONTACT
Haigh Australia Pty Ltd Head Office
PO Box 3200
DARRA QLD 4076
Ph: +61 7 3713 9345
Email: [email protected]
Website: www.meanmother.com.au
h)
i) Compressor finish;
j) Hoses, connectors, accessories, gauge and bag; or
k) Commercial/industrial applications;
Damage or defects caused by normal wear and tear;
Page 10 Copyright © 2020 Haigh Australia Pty Ltd

User Manual
FCC ID: 2AKJ8-MMACRC
Wireless Remote Control (FCC ID: 2AKJ8-MMACRC):
Operating Instruction: The main product (air compressor) is operated by 12V
DC battery or power supply. By pressing the ON/OFF button of the wireless remote
control, it will launch a signal in 2.4GHz band. This will turn the relay in the main
product (air compressor) ON or OFF for tyre inflation after received the signal.
1 x 12V 23A Size
L1028 Alkaline Battery
Magnet
Wireless Remote
Control ON/OFF
Button
Red LED
Indicator
This device was tested after assembly and complies with Part 15 of the FCC Rules. Operation is subject to the
following two conditions:
(1) this device may not cause harmful interference, and
(2) this device must accept any interference received, including interference that may caused undesired operation.
This device was tested after assembly and complies with Part 15 of the FCC Rules. Operation is subject to the
following two conditions:.................................................................................................................................................
Note: This product has been tested and found to comply with the limits for a Class B digital device, pursuant to Part
- Reorient or relocate the receiving antenna.
- Increase the separation between the equipment and receiver.
- Connect the equipment into an outlet on a circuit different from that to which the receiver is connected.
- Consult the dealer or an experienced radio/TV technician for help.
Note: This product has been tested and found to comply with the limits for a Class B digital device, pursuant to Part
15 of the FCC Rules. These limits are designed to provide reasonable protection against harmful interference in a
residential installation. This product generates, uses, and can radiate radio frequency energy and, if not installed
and used in accordance with the instructions, may cause harmful interference to radio communications. However,
there is no guarantee that interference will not occur in a particular installation. If this product does cause harmful
interference to radio or television reception, which can be determined by turning the equipment off and on, the user
is encouraged to try to correct the interference by one or more of the following measures:
Attention that changes or modification not expressly approved by the party responsible for compliance could void
the user’s authority to operate the equipment................................................................................................................
Antenna
Frequency Range:
Antenna Type:
Antenna Gain:
Transmission Power:
Remote Control Distance:
Ambience Temperatures:
2.4GHz
PCB Antenna
+1.6dBi
< -1dBm
> 10M
-40°C to 85°C
This manual suits for next models
3
Table of contents
Popular Air Compressor manuals by other brands

Klutch
Klutch 1230080 owner's manual

Doosan
Doosan 9/235HA Operation & maintenance manual

Comprag
Comprag D Series operating manual

ULTIMATE SPEED
ULTIMATE SPEED UMK 10 C2 Operation and safety notes

Gardner Denver
Gardner Denver L Series Operating and service manual

Sullair
Sullair 900XH Operators manual and parts lists