MediaSonic HW210AX User manual

HW210AX
DVD PLAYER
To ensure that the product is operating at its best, please read this user’s manual before use and
keep it for future reference.

Danger! Caution! This symbol alerts you of dangerous voltage
inside. To prevent electric shock, do not open the enclosure.
Important! This warning sign alerts you of important
instructions accompanying the product.
This symbol for CLASS II (Double Insulation) indicates that the
equipment has been designed with double insulation surrounding
live parts.
This product utilizes a Class 1 laser to read discs. This DVD Player
is equipped with safety switches to avoid exposure when the disc
tray is open and the safety interlocks are defeated. Invisible laser
radiation is present when the DVD Player’s lid is open and the
system’s interlock has failed or been defeated. It is very important
that you avoid direct exposure to the laser beam at all times.
Please do not attempt to defeat or bypass the safety switches.
WARNING: sihtesopxetonod,kcohscirtceleroeriffoksirehtecuderoT
equipment to rain or moisture.
tonod,edisnistnenopmocegatlovhgihhtiwtcatnoctneverpoT
attempt to open the equipment.
deifilauqybdecivrestievahylnO.flesruoytinuehtriapertonoD
personnel.
CAUTION: tnemecalpereht,drocrogulprewops’tinuehtgnicalpernehW
must be exactly the same or one recommended by the
manufacturer. Do not replace the plug or cord yourself!
tneverpotylluftitresnidnaylreporpgulprewopehtngil
A
electric shock.
,slortnocfoesU.tnenopmocresalasesutcudorpsihT
adjustments or performance of procedures other than those
specified herein may result in hazardous radiation exposure.
DANGER:
Safety Instructions
1
Both visible and invisible laser radiation will beam out when
opened. Avoid direct exposure. Do not open the unit.

Front panel
Back panel
1 DVD Tray
2 Remote Sensor
3 Display
4 USB port
5 Open/Close
6 Play/Pause
7 Stop
8 Power On/Off
9 2 x Audio Output ports
tuptuOXAOC01
teltuOelbaCrewoP11
tuptuOIMDH21
tuptuOoediV31
MODEL:HW210AX
POWER CONSUMPTION:10W
POWER SOURCE:100-240V~50/60Hz
AUDIO OUT/VIDEO OUT
HD OUT
R CO AX
L VIDE O
DV D PLAYER
2

3
Starting up
Connection Diagram
MODEL:HW210AX
POWER CONSUMPTION:10W
POWER SOURCE:100-240V~50/60Hz
AUDIO OUT/VIDEO OUT
HD OUT
R COAX
L VIDEO
DV D PLAYER
• Connect the DVD Player to your TV and/or amplifier as illustrated above.
• Turn TV on and select appropriate input port: HDMI or AV.
• Plug DVD Player to an AC outlet.
• Press POWER on front panel or on remote control. “Read” or “No Disc”
will be displayed on TV with or without a loaded disc.
• Press OPEN/CLOSE on front panel or remote, the tray will come
out/back in automatically.
• With a loaded disc, disc type will be shown on the upper left corner of
the screen.
• Press POWER on front panel or remote to switch the unit into standby
mode.
4
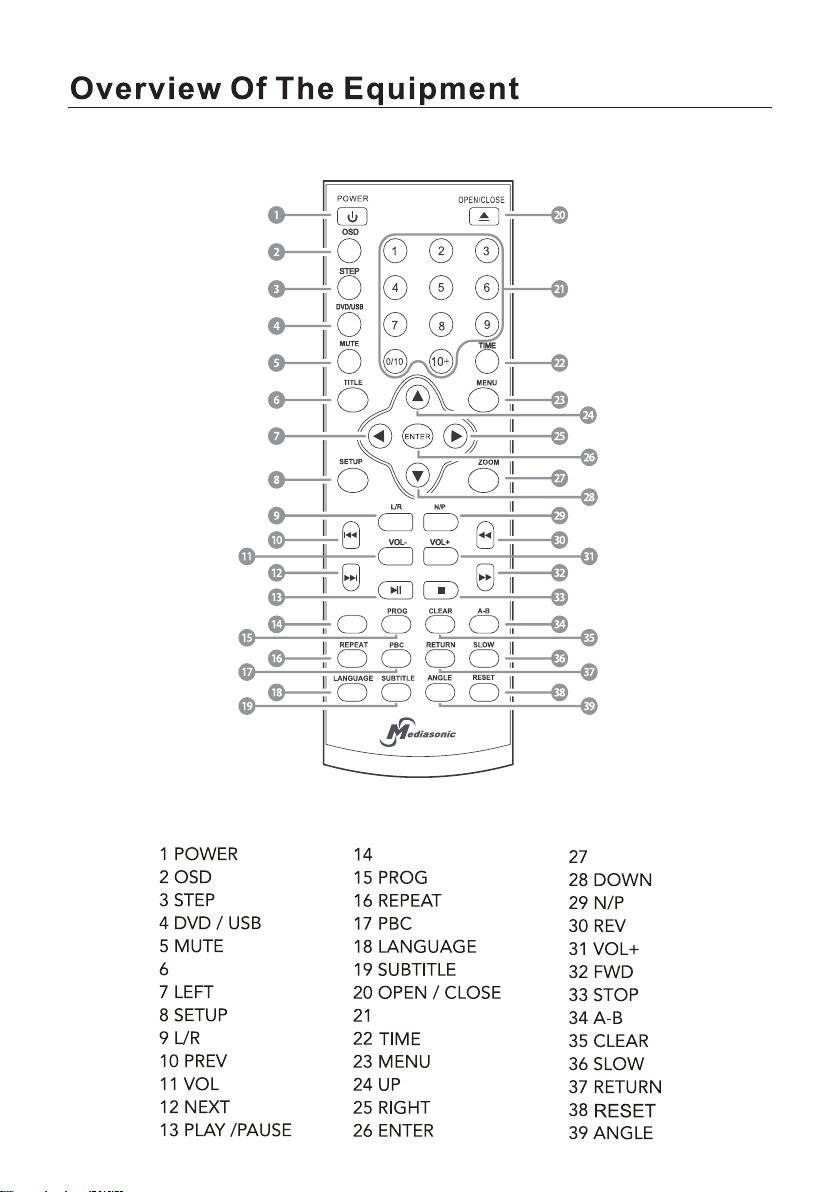
Remote Control Unit
COPY
COPY ZOOM
TITLE
0-10/10+
Notes
Playing a disc
NOTE: for composite only
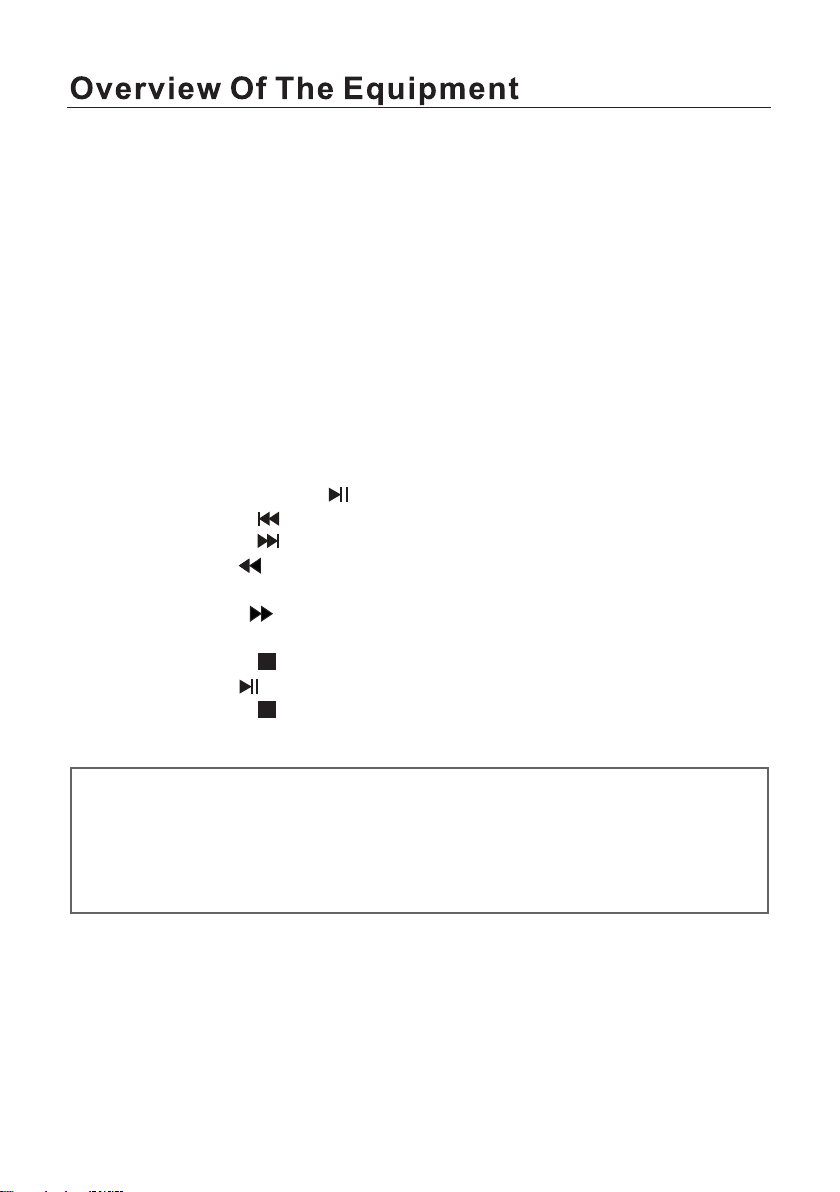
Basic playback controls
• Press the PLAY/PAUSE button to play or pause the disc.
• Press the PREV button to skip backward to the previous title/chapter.
• Press the NEXT button to skip forward to the next title/chapter.
• Press the REV button to fast reverse the disc 2x, 4x, 8x, 20x or back to
normal playback speed.
• Press the FWD button to fast forward the disc 2x, 4x, 8x, 20x or back
to normal playback speed.
• Press the STOP button ONCE to stop the disc playing; press the
PLAY/PAUSE button to resume playback from the last played location.
• Press the STOP button TWICE to stop playback completely.
Once a disc is loaded, the player will start playing automatically.
• If the disc is a DVD, the player will show the DVD menu or title menu.
• If the disc is a VCD 2.0, the player will activate PBC playback control
status.
• If the disc is a CD, the player will start playing the CD in sequence.
If the screen is black/white or scrolling up and down, press N/P on
remote to toggle between NTSC and PAL.
Unless otherwise indicated, use remote control to operate the features
described throughout this manual.
5
On-screen display (OSD)
• In DVD playback: press OSD on the remote control to display single
elapsed time, single remaining time, total elapsed time, total remaining
time and other information about the disc.
• In VCD playback: press OSD on the remote control to display single
elapsed time, single remaining time, display off and other information
about the disc.

Subtitles
Press SUBTITLE to display the subtitles when watching movies/
recordings on multi-subtitle encoded discs. You can choose from 32
languages. (This function only works with multi-subtitle encoded discs.)
For example, to select language 1 (English) from 8 options, press the
SUBTITLE button and select “English”. If you do not want subtitles
displayed, select “Subtitle off”.
Angle
Language
Press LANGUAGE to display the languages for selection when
watching movies/recordings on multi-subtitle encoded discs. You can choose
from 32 languages. (This function only works with multi-subtitle encoded
discs.)
Play mode (N/P): for composite only
Press N/P to toggle between NTSC, PAL and AUTO.
6
Press ANGLE repeatedly to view the same image from different angles
when watching sports, musical or theatrical programs on multi-angle
encoded discs. (This function only works with multi-angle encoded discs.)
Numerical Keys
Press numerical keys to select pictures or tracks.
Title
Press TITLE to display the title menu when watching movies/recordings on
multi-title encoded discs. (This works with multi-title encoded discs.)
Menu/PBC
MENU/PBC will return you to the main DVD playback menu. (This works with
multi-chapter encoded discs.)
• When playing VCD 2.0, press RETURN to return to the PBC playback
menu.
• When playing SVCD, press MENU/PBC to display the menu on screen.
After loading the disc, the unit will enter PBC ON automatically.
• When playing VCD 1.1, CD-DA and MP3, press MENU/ PBC and PBC
OFF will be displayed on TV screen. In this mode, the menu will not
display on the screen; press numerical button to select the track.

7
Direction keys
On playing discs, use UP/DOWN/LEFT/RIGHT arrow to select options in the
title, menu or setup.
Time
Press TIME and follow corresponding numerical keys to navigate to specific
title, chapter or time.
Channel (L/R)
When playing discs in SVCD, VCD or CD format, press L/R to select one
of the following options: Stereo, Mono L, Mono R, Mix Mono.
Volume and mute
• Press VOL+ to increase the volume and VOL- to lower the volume
• Press MUTE to switch the sound on/off.
Repeat
• When playing DVD discs, press REPEAT and select one from the
options: repeat chapter, repeat title, repeat all, repeat off.
• When playing VCD discs, press REPEAT and select one from the
options: repeat track, repeat all, close repeat.
• When playing audio CDs, choose the particular song you want to be
repeated, then press REPEAT and choose one from the options: repeat
single, repeat folder, cancel repeat.
Repeat from A-B
Press A-B ONCE to set the initial starting point (A); press it again to set the
end point (B). The unit will now repeat playback from your set points (A) to (B).
Pressing A-B a third time, it will cancel the repeat setting.
Zoom
To watch a particular action or still picture in close-up (up to 4 times maxi-
mum), press ZOOM repeatedly, up to 6 times, and choose the zoom level
from the following options: 2x, 3x, 4x, 1/2, 1/3, 1/4. Press the button once
more to return to normal playback mode.

8
Program (PROG)
During playing back: press PROG to enter program status, then enter the
track numbers desired; for example, 2, 4, 6 and 8. (If you enter a wrong
number, you can press CLEAR to remove the numbers.) Use arrow keys to
move the cursor to the Play icon, then press ENTER to start playing. To exit,
simply press PROGRAM again.
Slow
Press SLOW repeatedly to choose a level of slow motion from the following
options: 1/2, 1/3, 1/4, 1/5, 1/6, 1/7 or Normal.
Clear
When using the programming or GoTo feature, press CLEAR to clear the
input number.
Step
Press STEP when DVD is playing, will advance the movie frame by frame,
with no sound. Press PLAY to return to normal playback.

9
Setup options
System setup
TV system: for composite only
Based on TV hardware, select proper options: NTSC, PAL or AUTO.
Default is NTSC.
Setup options on System, Language, Audio, Video, Speaker and Digital can
be accessed from the main setup menu.
• Press SETUP on the remote control to display the main menu.
• Use UP/DOWN arrows to move up or down in the menu. Then press
ENTER to confirm the selection and move to submenu.
• Use LEFT/RIGHT arrows to move the cursor and UP/DOWN
arrows to the desired option, then press ENTER to confirm.
• Press LEFT arrow to return to the previous menu. The setup options for
this function are now finished.
• To end the setup, press the SETUP button again.
Screen Saver
Use this option to turn the screen saver ON or OFF

10
Resolution
On HDMI, select one of the following video output resolution: OFF, 720P,
1080I, 1080P.
Video setup
Your video settings must correspond with the type of connection to your
TV or other equipment.
Aspect Ratio
Use this submenu to select the aspect ratio.

11
NOTE:
• Irrespective of what screen format you have selected, if your screen
displays in 4:3, the picture will be shown in that format regardless.
• For DVDs, the screen format is convertible.
• If your screen displays in 4:3, when a DVD with 16:9 display format is played
back, the picture will be flattened.
TV Screen/
Film Format
4/3 16:9
Normal Full View Mailbox Wide Screen
4:3
16:9
Password
Use the numerical keys to set your personal 4-digit password. The default and
master password is “0000”.
Parental Control
Use this option to set an appropriate rating to restrict viewing for children.
The options available correspond to the film ratings on the disc.

12
Resume
Default
Use this option to restore the default factory settings.
If this option is set to “ON” and the power is turned off, the player will
remember where it stopped and when the power is resumed, it will continue
to play from that point.
Select a language to be used on on-screen display and setup menu.
Language setup
Select options for your on-screen and menu language and subtitles.
OSD language
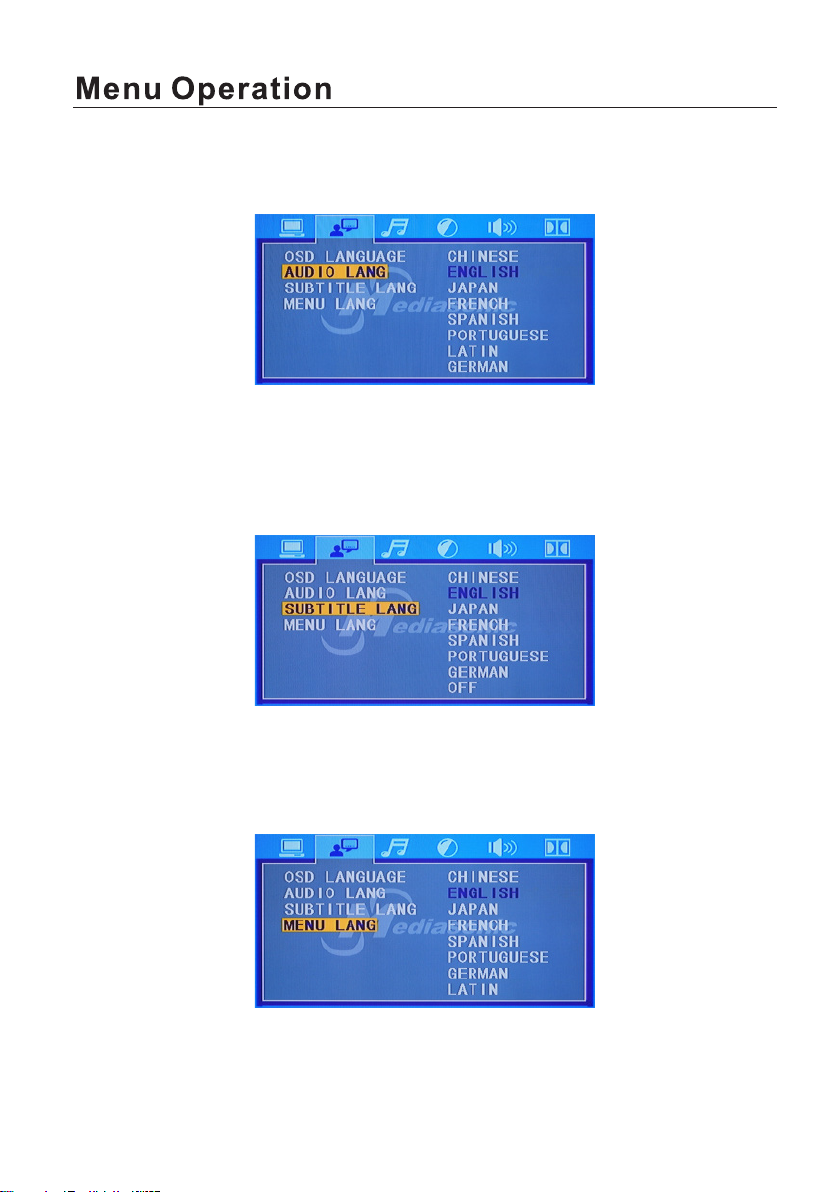
13
Audio language
Use this option to set the audio (dubbing) language.
Subtitle language
Use this option to set the subtitle language, or choose ‘off’ to hide the
subtitles.
Menu language
Use this option to set the film’s menu language.

14
Audio setup
Audio out
Use this menu to select your audio output.
Key
Use UP/DOWN arrows to adjust the key.
Use UP/DOWN arrows to adjust the brightness.
Video setup
Under this menu you can select options for your image output.
Brightness

15
Use UP/DOWN arrows to adjust the contrast.
Contrast
Hue
Use UP/DOWN arrows to adjust the hue.
Saturation
Use UP/DOWN arrows to adjust the saturation.

16
Use UP/DOWN arrows to adjust the sharpness.
Sharpness
Speaker setup
Select options including downmix, subwoofer, center delay, rear delay and
size of front, center and rear speakers.
Downmix This setting is for Home Theater. If two channels is
required, select the Stereo option.
Digital setup
Use this menu to select digital setup options including OP, dynamic range
and dual/mono.

17
OP mode
Dynamic range
Dual mono
Choose this option to set up the left (L) and right (R) mono output; there are
four modes in this option.
When LINE OUT is selected, use this setting to adjust the line out ratio for a
different effect. The audio signal peak value will be at the minimum when set to
Full; peak value will be at the maximum when set to Off.
• For nighttime playing, select LINE OUT to set volume at a lower level.
• For daytime playing, select RF REMOD to set volume at a higher level.

NOTE:
• In the OPTIONS menu (see Fig.1) you
can select a different speed or bitrate, or
create or cancel a playlist.
• In the TRACKS menu you can view the
length of the tracks. Press the arrow
buttons to select a track, then press
ENTER to confirm your selection. To
select (or ‘unselect’) all tracks, move the
highlight to the box on top of the track box
(see Fig. 2) and press the ENTER button.
• In the START menu (see Fig. 3) you can
follow the progress of CD-ripping. Press
the ENTER button to start the process.
The screen will display the progress
(Fig. 4). To cancel or change the speed,
press the ENTER button.
• At the end of the process, the screen will
display RIPPING COMPLETE (Fig.5). Use
the DOWN arrow button to select QUIT,
then press ENTER to exit.
Fig. 1
Fig. 2
Fig. 3 Fig. 5
Fig. 4
Audio CD ripping
• The CD, MP3 disc must be in good condition with no scratches or marks in
order to be played smoothly.
• The destination USB device must be compatible with the DVD Player and
have enough space.
In CD playback mode, press the COPY/DEL button on the remote control to
display the CD ripping interface. Use the arrow buttons (UP, DOWN, LEFT,
RIGHT) to move around on the screen and select the options. Then press the
ENTER button to enter the option/submenu or confirm your choice.
18
Table of contents


