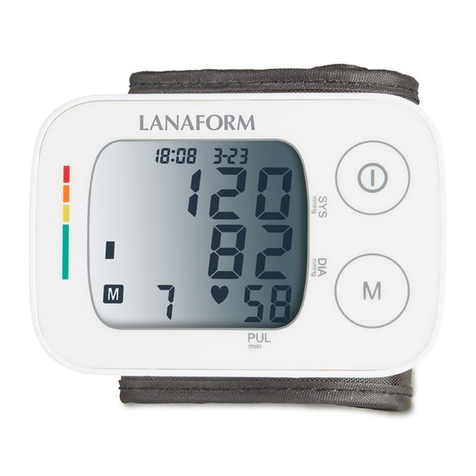
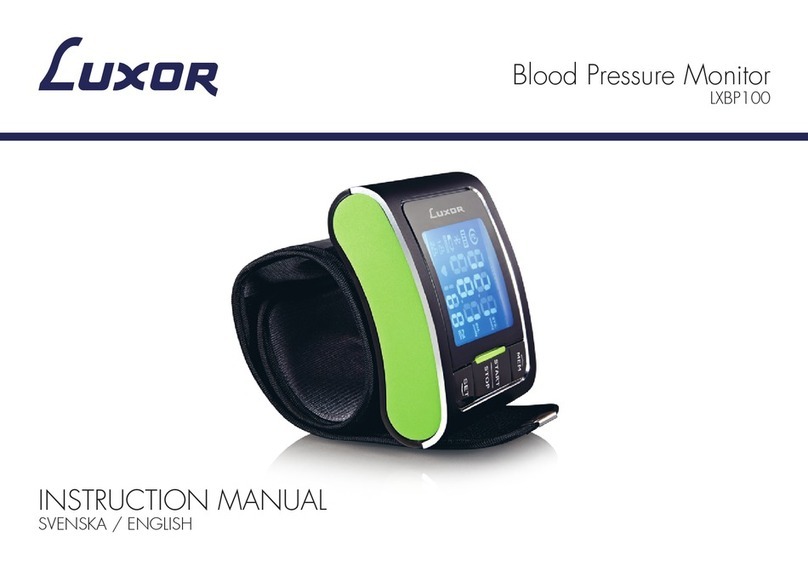
Mediblink M505 User manual

EN
Mediblink Wrist Blood Pressure Monitor M505
INSTRUCTIONS FOR USE
Please read the instructions for use carefully before using the product
SLO
Mediblink zapestni merilnik krvnega tlaka M505
NAVODILA ZA UPORABO
Prosimo, da pred uporabo izdelka v celoti preberete navodila za uporabo
CRO
MediblinktlakomjerzazapešćeM505
UPUTE ZA UPOTREBU
Pažljivo pročitajte upute prije upotrebe uređaja

EN
TABLE OF CONTENTS
1. Introduction 5
1.1 Features of M505 5
1.2 Important information about self-measurement 5
2. Important Information on the Subject of Blood-Pressure and
Its Measurement 6
2.1 How does high/low blood-pressure arise? 6
2.2 Which values are normal? 6
3. The Various Components of the Blood-Pressure Monitor 8
4. Putting the Blood-Pressure Monitor Into Operation 9
4.1 Inserting the batteries 9
4.2 Reading the set date 9
5. Carrying Out a Measurement 13
5.1 Before the measurement 13
5.2 Common sources of error 13
5.3 Fitting the cu 14
5.4 Measuring procedure 14
5.5 Discontinuing a measurement 15
5.6 Memory – storage and recall of the measurements 15
5.7 Memory – cancellation of all measurements 15
6. Error Messages/Malfunctions 16
7. Care and Maintenance, Recalibration 18
8. Service Life 18
9. Battery Life 18
10. Safety, Care and Disposal 19
11. Reference to Standards 20
12.TechnicalSpecications 20
13. Manufacturer’s Declaration 22
14. Warranty 26

SLO
VSEBINA
1. Uvod 28
1.1 Funkcije merilnika M505 28
1.2 Pomembne informacije o samomerjenju 28
2. Pomembne informacije o krvnem tlaku in njegovem merjenju 29
2.1 Kaj je vzrok za visok/nizek krvni tlak? 29
2.2 Katere vrednosti so normalne? 29
3. Različnekomponentemerilnikakrvnegatlaka 31
4. Pred uporabo merilnika krvnega tlaka 32
4.1 Vstavljanje baterij 32
4.2 Branje nastavljenega datuma 32
5. Izvajanje meritve 36
5.1 Pred meritvijo 36
5.2 Pogosti viri napak 36
5.3 Nameščanje manšete 36
5.4 Postopek merjenja 37
5.5 Prekinitev merjenja 37
5.6 Pomnilnik – shranjevanje in priklic meritev 38
5.7 Pomnilnik – preklic vseh meritev 38
6. Sporočilaonapakah/okvare 38
7. Negainvzdrževanje,ponovnoumerjanje 41
8. Življenjskadoba 41
9.Življenjskadobabaterije 41
10. Varnost, nega in odstranjevanje 42
11. Sklicevanje na standarde 43
12.Tehničnipodatki 43
13. Izjava proizvajalca 45
14. Garancija 49

CRO
SADRŽAJ
1. Uvod 51
1.1 Značajke modela M505 51
1.2 Važne informacije o mjerenju krvnog tlaka kod kuće 51
2. Važneinformacijeokrvnomtlakuinjegovommjerenju 52
2.1 Kako dolazi do visokog/niskog krvnog tlaka? 52
2.2 Koje su normalne vrijednosti krvnog tlaka? 52
3. Dijelovi tlakomjera 54
4. Početakupotrebetlakomjera 55
4.1 Umetanje baterija 55
4.2 Čitanje postavljenog datuma 55
5. Mjerenje krvnog tlaka 59
5.1 Prije mjerenja 59
5.2 Najčešći uzroci pogrešaka 59
5.3 Namještanje manžete 60
5.4 Postupak mjerenja 60
5.5 Prekid mjerenja 61
5.6 Memorija: spremanje i pregled rezultata 61
5.7 Memorija: poništavanje svih mjerenja 61
6. Poruke o pogreškama/kvarovima 62
7. Čišćenje,održavanje,rekalibracija 64
8. Vijek trajanja 64
9. Vijek trajanja baterije 64
10. Sigurnost, briga i odlaganje na otpad 65
11. Referentni standardi 66
12.Tehničkespecikacije 66
13.Izjavaproizvođača 68
14.Jamstvo 72

5
EN
SADRŽAJ
1. Introduction
1.1 Features of M505
The blood-pressure monitor Wrist Blood Pressure Monitor M505 (with integrated time/
date display) is a fully automatic, digital blood-pressure measuring device for use
on the wrist, which enables very fast and reliable measurement of the systolic and
diastolic blood-pressure as well as the pulse frequency by way of the oscillometric
method of measuring. The device offers a very high and clinical tested measurement
accuracy and has been designed to provide a maximum of user-friendliness. The
device is intended for self-use at home.
Before using, please read through this instruction manual carefully and then keep it
in a safe place. For further questions on the subject of blood-pressure and its meas-
urement, please contact your doctor.
Attention!
1.2 Important information about self-measurement
•Substitution of a different component might result in measurement error.
•Do not use with neonatal patients.
• Too frequent measurements can cause injury to the patient due to blood flow
interference.
• The application of the cuff over a wound can cause further injury.
•The application of the cuff and its pressurization on any limb where intravascular
access or therapy, or an arteriovenous (A-V) shunt, is present because of tempo-
rary interference to blood flow and could result in injury to the patient.
•Do not let the cuff and its pressurization on the arm on the side of a mastectomy
•The need to check that operation of the automated sphygmomanometer does not
result in prolonged impairment of patient blood circulation.
•Not intended to be used together with HF surgical equipment.
• Do not forget: self-measurement means control, not diagnosis or treatment. Unu-
sual values must always be discussed with your doctor. Under no circumstances
should you alter the dosages of any drugs prescribed by your doctor.
•The pulse display is not suitable for checking the frequency of heart pacemakers!

6
EN
•In cases of cardiac irregularity (Arrhythmia), measurements made with this instru-
ment should only be evaluated after consultation with the doctor.
Electromagnetic interference
The device contains sensitive electronic components (Microcomputer). Therefore,
avoid strong electrical or electromagnetic fields in the direct vicinity of the device (e.g.
mobile telephones, microwave cookers). These can lead to temporary impairment of
the measuring accuracy.
2. Important Information on the Subject of
Blood-Pressure and Its Measurement
2.1 How does high/low blood-pressure arise?
The level of blood-pressure is determined in a part of the brain, the so-called circulato-
ry center, and adapted to the respective situation by way of feedback via the nervous
system. To adjust the blood-pressure, the strength and frequency of the heart (Pulse),
as well as the width of circulatory blood vessels is altered. The latter is effected by way
of fine muscles in the blood-vessel walls. The level of arterial blood-pressure changes
periodically during the heart activity: During the »blood ejection« (Systole) the value
is maximal (systolic blood-pressure value), at the end of the heart’s »rest period«
(Diastole) minimal (diastolic blood-pressure value).The blood-pressure values must
lie within certain normal ranges in order to prevent particular diseases.
2.2 Which values are normal?
Blood pressure is too high if at rest, the diastolic pressure is above 90 mmHg and/
or the systolic blood-pressure is over 160 mmHg. In this case, please consult your
doctor immediately. Long-term values at this level endanger your health due to the
associated advancing damage to the blood vessels in your body.
Should the systolic blood-pressure values lie between 140 mmHg and 160 mmHg
and/or the diastolic blood-pressure values lie between 90 mmHg and 100 mmHg,
likewise, please consult your doctor.
Furthermore, regular self-checks will be necessary.

7
EN
With blood-pressure values that are too low, i.e. systolic values under 100 mmHg and/
or diastolic values under 60 mmHg, likewise, please consult your doctor.
Even with normal blood-pressure values, a regular self-check with your blood-pressure
monitor is recommended. In this way you can detect possible changes in your values
early and react appropriately. If you are undergoing medical treatment to control your
blood pressure, please keep a record of the level of your blood pressure by carrying out
regular self-measurements at specific times of the day. Show these values to your doctor.
Never use the results of your measurements to alter independently the drug
doses prescribed by your doctor.
Table for classifying blood-pressure values (unit: mmHg) according to World Health
Organization:
Range
Systolic
Blood-pressure
Diastolic
Blood-pressure Measures
Blood pressure
optimum
between 100 and
120 between 60 and 80 Self-check
Blood pressure
normal
between 120 and
129 between 80 and 84 Self-check
Blood pressure
slightly high
between 130 and
139 between 85 and 89 Consult your doctor
Blood pressure
too high
between 140 and
159 Between 90 and 99 Seek medical advice
Blood pressure far
too high
between 160 and
179
Between 100 and
109 Seek medical advice
Blood pressure
dangerously high Higher than 180 Higher than 110 Urgently seek
medical advice!
Further information
•If your values are mostly standard under resting conditions but exceptionally high
under conditions of physical or psychological stress, it is possible that you are
suffering from so-called »labile hypertension«. Please consult your doctor if you
suspect that this might be the case.
• Correctly measured diastolic blood-pressure values above 120 mmHg require
immediate medical treatment.

8
EN
3. The Various Components of the Blood-Pressure
Monitor
Time and Date
Systolic Value
Diastolic Value
Trac Light Display
User
Pressure Unit
Pulse
Memory Value No
Heart Arrhythmia Indicator
(Irregular Heart Beat)
Heart Symbol
Battery Warning Symbol
Memory Symbol
User Button
Wrist cu
Battery cover
Time/setting button
Memory button
ON/OFF button

9
EN
4. Putting the Blood-Pressure Monitor Into Operation
4.1 Inserting the batteries
a) Insert the batteries (2 x size AAA 1.5V), thereby observing the indicated polarity.
b) If the battery warning appears in the display, the batteries are empty and must
be replaced by new ones.
Attention!
• After the battery warning appears, the device is blocked until the batteries
have been replaced.
• Please use »AAA« Long-Life or Alkaline 1.5V Batteries. The use of 1.2V Accumu-
lators is not recommended.
• If the blood-pressure monitor is left unused for long periods, please remove the
batteries from the device.
4.2. Reading the set date
Please press the TIME button, the date will be shown in the display.
User selection:
This advanced blood pressure monitor allows you to track blood pressure readings
for 2 individuals independently.
a) Before measurement, make sure you set the unit for
the intended user. The unit can track results for 2
individuals (User 1, User 2).
b) Press the TIME button for at least 3 seconds. The
display now indicates the set user, during which the set
user blink. To confirm, press ON/OFF button.
Heart Arrhythmia Indicator
(Irregular Heart Beat)

10
EN
c) Click the MEMORY button to select User.
d) We suggest the first person to take their pressure to be
User 1.
Setting the time, date
This blood-pressure monitor incorporates an integrated clock with date display. This
has the advantage, that at each measurement procedure, not only the blood-pressure
values are stored, but also the exact moment of the measurement.
After new batteries have been inserted, the clock begins to run from the following
setting: 2018-01-01 12:00 O’clock.
You must then re-enter the date and current time. For this, please proceed as follows:
1) Press the TIME button for at least 3 seconds firstly,
user icon blinks. Then press TIME button again, and
the display now indicates the set year, during which
the four characters blink.
2) The correct year can be entered by pressing the
MEMORY button.
3) Press the TIME button again. The display now
switches to the current date, during which the first
character (month) blinks.

11
EN
4) The corresponding month can now be entered by
pressing the MEMORY button.
5) Press the TIME button again. The last two characters
(day) are now blinking.
6) The corresponding day can now be entered by
pressing the MEMORY button.
7) Press the TIME button again. The display now
switches to the current time, during which the first
character (Hour) blinks.
8) The corresponding hour can now be entered by
pressing the MEMORY button.

12
EN
9) Press the TIME button again. The last two characters
(Minutes) now blink.
10)The exact time can now be entered by pressing the
MEMORY button.
11) How to select pressure unit, switchable of mmHg and
kPa. Finished the whole setting process mentioned
above, press the TIME button again,
Display »mmHg« is blinking;
Pressing »MEMORY« button can switch pressure unit
between »mmHg« and »kPa«;
Pressing the TIME button selects pressure unit.
12)Now after all settings have been made, press the TIME
button once again. The date is briefly displayed and
then the time. The input is now confirmed and the clock
begins to run.
Further Information
With each press of the button (TIME, MEMORY) one input
is made (e.g. switching over from hours to minutes mode,
or altering the value by +1).

13
EN
However, if you keep the respective button depressed, you can switch more quickly
to find the desired value respectively.
5. Carrying Out a Measurement
5.1 Before the measurement:
• Avoid eating, smoking as well as all forms of exertion directly before the meas-
urement. All these factors influence the measurement result. Try and find time to
relax by sitting in an armchair in a quite atmosphere for about ten minutes before
the measurement.
• Measure always on the same wrist (normally left).
• Attempt to carry out the measurements regularly at the same time of day, since the
blood-pressure changes during the course of the day.
5.2 Common sources of error:
Comparable blood-pressure measurements always require the same condi-
tions! These are normally always quiet conditions.
• All efforts by the patient to support the arm can increase the blood-pressure. Make
sure you are in a comfortable, relaxed position and do not activate any of the
muscles in the measurement. Use a cushion for support if necessary.
• The performance of the automated sphygmomanometer can be affected by ex-
tremes of temperature, humidity and altitude.
• If the wrist artery lies considerably lower (higher) than the heart, an erroneously
higher (lower) blood-pressure will be measured! (Each 15cm difference in height
results in a measurement error of 10 mmHg!)
• A loose cuff causes false measurement values.
• With repeated measurements, blood accumulates in the respective wrist which
can lead to false results. Correctly executed blood-pressure measurements should
therefore first be repeated after a 5 minute pause or after the arm has been held
up in order to allow the accumulated blood to flow away (after at least 3 minutes).

14
EN
5.3Fittingthecu
a) Remove all eventual objects and jewellery (e.g. wristwatch)
from the wrist in question. Draw the cuff over the wrist.
b) The distance between the cuffandthehandshould be approx.
10 mm
c) Secure the cuff with the Velcro fastener, so that it lies
comfortably and not too tight, whereby no space should
remain between the cuff and the wrist.
d) Sit up straight, hold the left arm in front of the chest, with
the palm inward. The cuff should be at the same height
as the heart. Take care that the cuff lies free. Remain
so for 2 minutes sitting quietly, before beginning with the
measurement.
e) Let legs uncrossed, feet flat on the floor, back and arm
supported.
5.4 Measuring procedure
After the cuff has been appropriately positioned, the measurement can begin:
a) Press the ON/OFF button, the pump begins to inflate the cuff. In the display, the
increasing cuff-pressure is continually displayed.
b) After reaching the inflation pressure, the pump stops and the pressure slowly falls
away. The cuff-pressure (large characters) is displayed during the measurement.
When the device has detected the pulse, the heart symbol in the display begins to
blink for every pulse beat.
c) When the measurement has been concluded, The measured
systolic and diastolic blood-pressure values as well as the
pulse frequency are now displayed.
Example (Fig.): Systole 118, Diastole 73, Pulse 75
The measurement results are displayed, until you switch the de-
vice off. If no button is pressed for 3 minutes, the device switches
automatically off, to save the batteries.

15
EN
5.5 Discontinuing a measurement
If it is necessary to interrupt a blood pressure measurement for any
reason (e.g. the patient feels unwell), the »ON/OFF« button can be
pressed at any time. The device then immediately lowers the cuff-pres-
sure automatically.
5.6 Memory – storage and recall of the measurements
The blood-pressure monitor automatically stores each of the last 120 measurement
values. By pressing the MEMORY button, an average value of the last 3 measure-
ments as well as the last measurement (MR1) and the further last 119 measurements
(MR2, MR3 ..., MR120) can be displayed one after the other.
(MR1: Values of the last measurement)
(MR2-MR120: Values of the measurement before MR1)
5.7 Memory– cancellation of all measurements Attention!
Before you delete all readings stored in the memory, make sure
you will not need refer to the readings at a later date. Keeping a
written record is prudent and may provide additional information
for your doctor’s visit. In order to delete all stored readings,
depress the MEMORY button for at least 5 seconds, the dis-
play will show the symbol »CL« and then release the button.
to permanently clear the memory, Press the MEMORY button
while »CL« is flashing.

16
EN
6. Error Messages/Malfunctions
If an error occurs during a measurement, the measurement is
discontinued and a corresponding error code is displayed
(Example: Error No. 2).
Error No. Possible cause(s)
ERR 1 No pulse has been detected.
ERR 2 Unnatural pressure impulses influence the measurement result.
Reason: hand was moved during the Measurement (Artefact).
ERR 3 1) The inflation takes too long. The cuff is not correctly seated.
2) Positioning Detection error.
ERR 5
The measured readings indicated an unacceptable difference
between systolic and diastolic pressures. Take another reading
following directions carefully. Contact you doctor if you continue to
get unusual readings.
ERR 8 Pressure in cuff is over 290 mmHg.
Other possible malfunctions and their elimination
If problems occur when using the device, the following points should be checked and
if necessary, the corresponding measures are to be taken:
Malfunction Remedy
The display remains empty
when the instrument is
switched on although the
batteries are in place.
1. Check batteries for correct polarity and if
necessary insert correctly.
2. If the display is unusual, re-insert batteries or
exchange them.

17
EN
The device frequently
fails to measure the blood
pressure values, or the
values measured are too
low (too high).
1. Check the positioning of the cuff.
2. Measure the blood-pressure again in peace
and quiet under observance of the details made
under point 5.
Every measurement
produces a dierent value
although the instrument
functions normally and
the values displayed are
normal.
1. Please read the following information and the
points listed under »Common sources of error«.
Repeat the measurement.
Please note: Blood pressure fluctuates
continually so successive measurements will
show some variability.
Blood pressure measured
diers from those values
measured by the doctor.
1. Record the daily development of the values and
consult your doctor.
Please note:
Individuals visiting their doctor frequently
experience anxiety which can result in a
higher reading at the doctor than obtained at
home under resting conditions.
Further Information
The level of blood-pressure is subject to fluctuations even with healthy people. Im-
portant thereby is, that comparable measurements always require the same con-
ditions (Quiet conditions)!
If, in spite of observing all these factors, the fluctuations are larger than 15 mmHg,
and/or the arrhythmia symbol is in the display, please consult your doctor. For
licensing, the device has been subjected to strict clinical tests, by which the computer
program used to measure the blood-pressure values was tested by experienced spe-
cialist doctors in Germany. The same computer program is used in every individual
device, and has thus also been clinically tested. The manufacture of the devices takes
place according to the terms of the European standard for blood-pressure measuring
devices. You must consult your local distributor if there are technical problems with
the blood-pressure instrument. Never attempt to repair the instrument yourself!
Any unauthorised opening of the instrument invalidates all guarantee claims!

18
EN
7. Care and Maintenance, Recalibration
a) Do not expose the device to either extreme temperatures,
humidity, dust or direct sunlight.
b) The cuff contains a sensitive air-tight bubble. Handle this
carefully and avoid all types of straining through twisting or
buckling.
c) Clean the device with a soft, dry cloth. Do not use petrol,
thinners or similar solvent. Spots on the cuff can be removed
carefully with a damp cloth and soapsuds. The cuff must not
be washed!
d) Do not drop the instrument or treat it roughly in any way.
Avoid strong vibrations.
e) Never open the device! Otherwise the manufacturer calibra-
tion becomes invalid!
8. Service Life
5 years.
9. Battery Life
300 times measurement with 2- size »AAA« alkaline Batteries.

19
EN
10. Safety, Care and Disposal
Safety and protection
•This instrument may be used only for the purpose described in this booklet. The
manufacturer cannot be held liable for the damage caused by incorrect application.
•
This instrument comprise sensitive components and must be treated with caution. Observe
the storage and operating condition described in the
»
Technical specifications« section!
• Protect it from:
- water and moisture
- extreme temperatures
- impact and dropping
- contamination and dust
- direct sunlight
- heat and cold
• The cus are sensitive and must be handled with care.
• Only pump up the cu once tted.
• Do not use the instrument close to strong electromagnetic elds such as mobile
telephones or radio installations.
•Do not use the instrument if you think it is damaged or notice anything unusual.
•If the instrument is not going to be used for a prolonged period the batteries should
be removed.
•Read the additional safety instructions in the individual sections of this booklet.
•Ensure that children do not use the instrument unsupervised: some parts
are small enough to be swallowed.
•Must use the recognized accessories, detachable parts and materials, if the use
of other parts or materials can degrade minimum safety.
•A warning to remove primary batteries if the instruments is not likely to be used for
some time.
Instrument care
Clean the instrument only with a soft, dry cloth.
Disposal
Batteries and electronic instruments must be disposed of in accordance with
the locally applicable regulations, not with domestics waste.

20
EN
11.Reference to Standards
Device standard: Device corresponds to the requirements of the European standard
for non-invasive blood- pressure monitor.
Standard
IEC60601-1-6:2010+A1:2013/ EN60601-1-6:2010+A1:2015
IEC60601-1:2005+A1:2012/EN606011:2006+A11:2011+A1:2013+A12:2014
IEC60601-1-2:2014/ EN60601-1-2:2015
IEC/EN60601-1-11:2015
IEC80601-2-30:2009+A1:2013/EN80601-2-30:2010+A1:2015
The stipulations of the EU-Guidelines 93/42/EEC for Medical Products Class IIa have
been fulfilled.
12.TechnicalSpecications
Model / REF: BP606W / M505
Measurement
Procedure:
Oscillometric, corresponding to Korotkoff method:
Phase I: systolic, Phase V: diastolic
Display: Digital display
Measuring range: Pressure: 30 to 280 mmHg (in 1 mmHg increment)
Pulse: 40 to 199 beat/minute
Static accuracy: Pressure: ±3 mmHg
Pulse: ±5% of reading
Measuring resolution: 1 mmHg
Ination: Automatic ination by internal pump
Table of contents
Languages:
Other Mediblink Blood Pressure Monitor manuals


