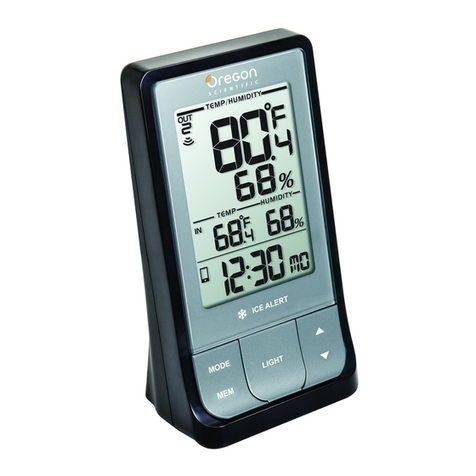
Melink Positiv User manual

Melink Corporation
5140 River Valley Road, Milford, OH 45150
513-965-7300 melinkcorp.com
Installation Manual
Rev 1.5

PositiV® Installation Manual 2
Table of Contents
Step 1
Unboxing and Powering On ................................................................................................................ Page 3
Step 2
Scouting ....................................................................................................................................................... Page 5
Step 3
Configuration .............................................................................................................................................Page 6
Step 4
Calibration ............................................................................................................................................... Page 10
Step 5
Troubleshooting & FAQ...................................................................................................................... Page 11

PositiV® Installation Manual 3
Step 1: Unboxing and Powering On
1.1 Remove the contents from the PositiV® shipping box:
1Indoor PositiV® Unit
1Outdoor PositiV® Unit
1Pipe Clamp
2Sheet Metal Screws
2Masonry / Concrete Screws (5/32” bit will be needed for pilot holes)
1Instructional Packet
1.2 Power on the indoor PositiV® unit by pulling the clear tab from the top of the unit and
tightening the screws on the back of the unit.
1.3 Power on the outdoor PositiV® unit by first unscrewing the 5 screws on the unit’s back.
PositiV® Indoor Unit
PositiV®
Outdoor
Unit

PositiV® Installation Manual 4
Outdoor Unit Battery
1.4 Once the screws are removed, pull the front cover from the outdoor unit to expose
the inside circuitry.
Note: The solar panel is connected to the circuitry. Pull with caution. Additionally, pulling the cover from the
base can be difficult.
1.5 Connect the outdoor unit’s battery connector to the receiver on the circuit board.
Note: After this step, leave the cover off the exterior unit.

PositiV® Installation Manual 5
Step 2: Location Identification
2.1 Identify a suitable installation location for the indoor unit. Key attributes:
Minimal airflow interference
Minimal impact from nearby
equipment
Out of reach of occupants
Sufficient ambient light (>200 Lux)
Central location in the building
2.2 Identify a suitable installation location for the outdoor unit. Key attributes:
South facing with direct sunlight
Available space on (a.) exhaust vent / permanent pipe, (b.) RTU, or (c.) masonry
As clear as possible line of sight from the indoor unit to the outdoor unit (30-50’)
Do not install the outdoor unit on a gas pipe
Do not install the outdoor unit in a shaded area

PositiV® Installation Manual 6
Step 3: Configuration
3.1 Download the “Melink PositiV®” app from the Google Play Store.
3.2 With the indoor and outdoor units next to each other, press the Bluetooth button on
the circuit board of the outdoor unit.
3.3 Screw the cover onto the back of the outdoor unit.
Note: Ensure (a.) the rubber gasket is flush with the cover, (b.) there are no twists in the gasket, and (c.) no wires
are being clamped between the base and cover of the outdoor unit.

PositiV® Installation Manual 7
Backplate
Hook
Release Tab
3.4 With the units still next to each other, press and release the Bluetooth button on the
indoor unit.
3.5 On your phone, turn Bluetooth “On” and open the Melink PositiV® app.
3.6 When prompted to “Choose a Device” select the PositiV® device with the serial number
that matches the serial number on the back of your indoor unit.
Note: The indoor unit label is found behind the backplate on the indoor unit. The PositiV® system may take up to a minute to be located on
the app.

PositiV® Installation Manual 8
3.7 Once the proper unit has been selected, you will be prompted to “Enter Pair Code.”
Enter the BLE# found on the back of your outdoor PositiV® unit.
3.8 You should now see that the selected device is connected. On your phone, select the
connected device and choose “RSSI Test.” Begin the RSSI test. Verify that the
connection between the units is greater than -95 dBi.
Note: If device connectivity is less than -95 dBi, reevaluate the installation locations. Ensure the line of sight is as
clear as possible and the distance between the units is minimized. If required, identify new installation locations
and reconfigure the devices.

PositiV® Installation Manual 9
3.9 With both units, walk to the desired installation location of the outdoor unit. Mount the
outdoor unit by either (a.) banding the unit to an exhaust vent using the provided pipe
clamp, (b.) screwing the unit to an RTU / air handling equipment, or (c.) screwing the unit
to concrete or masonry.
Note: A 5/32” drill bit will be required to drill the pilot hole for the masonry screws.
(a.) (b. or c.) (b. or c.)
(Please note the correct orientation of the outdoor unit in the image above.)
3.10 Once the outdoor unit is mounted, take the indoor unit to the desired installation
location of the indoor unit.
3.11 At the desired installation location, verify that the connection between units is
sufficient (> -95 dBi) using the RSSI Test from Step 3.8.
Note: If device connectivity is less than -95 dBi, reevaluate the installation locations. Ensure the line of sight is as
clear as possible and the distance between the units is minimized. If required, identify new installation locations
and reconfigure the devices.
3.12 If the device connection is sufficient, mount the indoor unit’s backplate to the wall by
peeling the double-sided tape and pressing it to the wall for 15-30 seconds.
Note: Clean the wall to ensure proper adhesion.
Backplat
Hooks
Release Tab

PositiV® Installation Manual 10
Step 4: Calibration
4.1 Click “Pressure Calibration” on the Melink PositiV® app.
4.2 Follow the steps as described on the Melink PositiV® app.
4.3 After calibration has completed, clip the indoor unit to the backplate as shown.
(Please note the correct orientation of the PositiV® indoor unit in the image above.)
Backplate
Hook

PositiV® Installation Manual 11
Step 5: Troubleshooting & FAQ
What do I do if my PositiV® system shows no connectivity or signal strength?
Reevaluate the installation locations. Ensure the line of sight is as clear as possible
and the distance between the units is minimized. If required, identify new installation
locations and reconfigure the devices.
What do I do if my PositiV® system does not show up when I open the Melink PositiV®
app?
Verify that Bluetooth is enabled on your phone. Then, close and reopen the app. It
may take up to a minute for the PositiV® units to appear on the app.
Is it necessary to install the outdoor unit on the roof?
It is not necessary but recommended. If there is an installation location on the
exterior of the building that meets all outdoor unit installation requirements, then it
can be installed there.
Who do I contact for further help and support?
Melink’s PositiV® team can be reached at 513-965-7300 (M-F, 8 a.m. – 5 p.m.
Eastern).
Other manuals for Positiv
1
Table of contents


