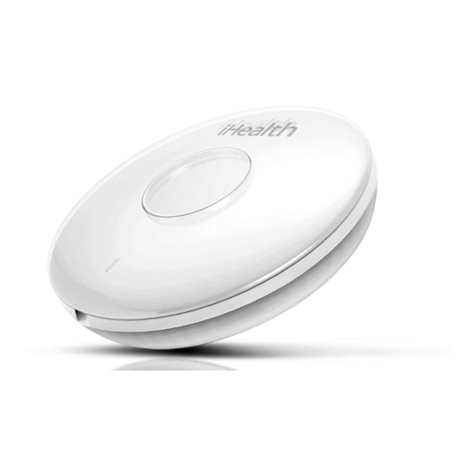
Melink Positiv User manual

Melink Corporation
5140 River Valley Road, Milford, OH 45150
513-965-7300 melinkcorp.com
Installation Manual
Revised June 2020
Rev 1.11

2
PositiV Installation Manual
Table of Contents
Compatibility & Installation Preparation ................................................................................................3
Installation Overview .......................................................................................................................................4
Technical Specifications...................................................................................................................................5
Part 1: Setup & Preparation
Step 1: Unboxing and Powering On ............................................................................................................ 6
Step 2: Location Identification........................................................................................................................8
Part 2: Configuration, Installation & Calibration
Step 3: PositiV Cx App Configuration and Device Installation ....................................................... 9
Step 4: Calibration ............................................................................................................................................ 15
Troubleshooting & FAQ................................................................................................................................ 16

3
PositiV Installation Manual
Compatibility
Before installing PositiV®, it’s important to verify its compatibility with your site. Because
PositiV is a wireless, self-powered device, there are certain parameters that must be met
for it to be considered a good fit for your facility. Please review the compatibility criteria
prior to installation:
•A relatively clear line of sight and distance must be maintained between the indoor
and outdoor PositiV devices. This means minimizing the quantity of materials
between the two devices; the less material between the devices, the stronger the
signal will be. Similarly, depending on the type of material between the devices, the
distance between the indoor and outdoor devices should be less than 75 ft.
•Light levels at the indoor unit installation location should be >400 Lux and the
outdoor unit should be south facing, receiving direct sunlight.
•An Android or Apple device is required to download the PositiV Cx app from
Google Play or the App store. The app is required for configuration and calibration
of the PositiV system. The app is free to download.
•To access building health data tracked by the PositiV system, user log-in
credentials will be provided by Melink Corp to grant access to the Melink Portal.
Google Chrome is the recommended browser to access the Melink Portal.
Installation Preparation
Before beginning installation and setup, please review the Compatibility section. This will
help the installer understand what to look for when installing PositiV.
During the setup and preparation of PositiV, the installer will be unboxing, powering on
the units, and scouting installation locations. This step is expected to take about 10
minutes. The installer should become familiar with both the indoor and outdoor PositiV
units and the criteria for analyzing potential installation locations.

4
PositiV Installation Manual
Installation Overview
Installation of PositiV is typically completed within one hour and consists of four main
steps in two parts.
Part 1: Setup & Preparation
Step 1: Unboxing and Powering On
First, both the indoor and outdoor PositiV units will need to be unboxed and powered on.
Step 2: Location Identification
Next, the installer should attempt to identify installation locations for the indoor units. It
is best to use the determined installation location of the outdoor unit to identify the best
installation location of the indoor unit; the closer the units are to each other, the better.
Part 2: Configuration, Installation & Calibration
Step 3: PositiV Cx App Configuration & Device Installation
This step consists of configuring the indoor and outdoor PositiV devices and ultimately
installing them at the identified locations from Step 2. For this step, the PositiV Cx app will
need to be downloaded from the Google Play or App Store, respectively using an Android
or Apple device.
Step 4: Calibration
Lastly, the PositiV system will need to be calibrated by following the appropriate steps as
outlined on the PositiV Cx app.

5
PositiV Installation Manual
Technical Specifications
PositiV Indoor Unit Weight: 0.38 lb.
PositiV Outdoor Unit Weight: 1.18 lb.
PositiV Indoor Unit Power & Lighting Requirements: 400 lux for 12 hours per day
PositiV Indoor Unit Operating Temperature: 0 oC —+50 oC
PositiV Outdoor Unit Operating Temperature: -40 oC —+80 oC
Wireless Communication: FCC ID’s: S9NSPBTLERF, MCQ-XBEE3, MCQ-XB3C1,
RI7XE866A1NA
Sustainability: Shipping packaging is 100% recyclable and certified by the Sustainable
Forestry Initiative.
Support & Limited Warranty: Visit https://melinkcorp.com/terms for related terms and
conditions.
In the Box
1Indoor PositiV Unit
1Outdoor PositiV Unit
1Pipe Clamp
2Sheet Metal Screws
2Masonry / Concrete Screws (5/32” bit will be needed for pilot holes)
2Dry Wall Screws
1Welcome Card
Suggested Tools
1Philips Head Screwdriver
1Android or Apple Device
15/16” Crescent Wrench (If mounting the outdoor unit using the attached bracket
PositiV Outdoor Unit
PositiV Indoor Unit

6
PositiV Installation Manual
Step 1: Unboxing and Powering On
1.1 Remove the contents from the PositiV shipping box.
1.2 Pull the clear tab from the top of the indoor unit. This will power on the unit. Once the
tab is pulled, tighten the screws on the back of the unit.
1.3 Unscrew the 5 screws from the back of the outdoor PositiV unit.
PositiV® Indoor Unit
PositiV® Outdoor Unit

7
PositiV Installation Manual
Outdoor Unit Battery
1.4 Once the screws are removed, pull the front cover from the outdoor unit to expose
the inside. Once the cover is separated from the base, place it to the right of the base
(solar collector down) as shown in step 1.5.
Note: The solar collector is connected to the circuitry. Be sure to pull the cover with caution. Additionally,
pulling the cover from the base may be difficult.
1.5 Connect the outdoor unit’s battery connector to the receiver on the circuit board.
Note: After this step, leave the cover off the exterior unit.

8
PositiV Installation Manual
Step 2: Location Identification
2.1 Identify a suitable installation location for the indoor unit.
Key compatibility attributes:
•Minimal airflow interference
•Limited impact from nearby equipment
(Radio frequencies, IoT, metal fixtures and equipment, etc.)
•Installed away from high-traffic areas where damage from occupants or employees
could occur
•Sufficient ambient light (400 Lux)
•Centrally located within the facility, if possible
2.2 Identify a suitable installation location for the outdoor unit.
Key compatibility attributes:
•South facing with direct sunlight (ideally)
•Available space on (a.) exhaust vent / permanent pipe, (b.) RTU, or (c.) masonry
•As clear as possible line of sight from the indoor unit to the outdoor unit
Note: Approx. 75 ft. max distance depending on building materials and line of sight clarity.
•Do not install the outdoor unit on a gas pipe.
•Do not install the outdoor unit in a shaded area.

9
PositiV Installation Manual
Step 3: PositiV Cx App and Configuration
During this step, the installer will be using his or her phone to configure the PositiV
system. During configuration, the installer will enable Bluetooth communication between
the devices; sync the devices; range test the connectivity strength between the indoor
and outdoor PositiV units; and, ultimately, install the units at their tested locations.
3.1 Download Melink Corporation’s PositiV Cx app from the Google Play Store or App
Store.
3.2 With the indoor and outdoor units next to each other, press the Bluetooth button on
the circuit board of the outdoor unit.

10
PositiV Installation Manual
3.3 Screw the cover onto the back of the outdoor unit.
Note: Ensure (a.) the rubber gasket is flush with the cover, (b.) there are no twists in the gasket, and (c.) no wires
are being clamped between the base and cover of the outdoor unit. Without overtightening, ensure there is no
gap between the base and cover. The cover is tight enough when there is no longer a gap between the base and
cover. Do not overtighten.
3.4 With the units still next to each other, press and release the Bluetooth button on the
indoor unit.
3.5 On your phone, turn Bluetooth “On”and open the PositiV Cx app.

11
PositiV Installation Manual
3.6 A. When prompted to “Choose a Device”, select the PositiV device with a serial number
(S/N) that matches the serial number on the back of the outdoor unit (circled in blue).
B. Chose the option “Cell Diagnostics”. Then, when asked to “Enter the Pair Code,” enter
the BLE # on the back of the outdoor unit (circled in green).
A.
B.
3.7 On the Cell Diagnostics page, scroll to the bottom and click “Attempt Remote Access”.
You will see a message asking if you are sure, click “Yes”.
Note: It may take several minutes for the device to run the cellular diagnostics

12
PositiV Installation Manual
3.8 When the outdoor device reappears on the “Device Listing” screen, signaling that the
process is complete, click into the “Cell Diagnostics” tab on the outdoor device again.
Successful diagnostics will show no errors. If the cell diagnostics show fields such as Cell
Access Status Code, Last HTTP Error Code, Last Timeout Error Code, or Power Loss, the
test is considered unsuccessful. Reference the Cellular Diagnostics Troubleshooting
Guide for possible remedies to the error.
3.9 Go back to the “Device Listing” screen and select the PositiV device with the serial
number that matches the serial number on the back of your indoor unit.
Note: The indoor unit label is found behind the backplate on the indoor unit. The PositiV system may take up to a
minute to be located on the app.
Backplat
e
Hoo
ks
Release Tab
Successful: No Errors Shown
Unsuccessful: Additional field are shown.
Cell Access Status Code contains an error.

13
PositiV Installation Manual
3.10 On your phone, select “RSSI Test.”You will then be prompted to “Enter Pair Code.”
Enter the BLE# found on the back of your indoor PositiV unit (circled).
3.11 You should now see that the selected device is connected. Begin the RSSI test. Verify
that the connection between the units is greater than -95 dBi.
Note: If device connectivity is less than -95 dBi, reevaluate the installation locations. Ensure the line of sight is as
clear as possible and the distance between the units is minimized. If required, identify new installation locations
and reconfigure the devices.

14
PositiV Installation Manual
3.12 With both units, walk to the desired installation location of the outdoor unit. Mount the
outdoor unit by either (a.) banding the unit to an exhaust vent using the provided pipe
clamp, (b.) screwing the unit to an RTU / air handling equipment, or (c.) screwing the unit
to concrete or masonry.
Note: A 5/32” drill bit will be required to drill the pilot hole for the masonry screws.
(a.) (b. or c.) (b. or c.)
(Please note the correct orientation of the outdoor unit in the image above.)
3.13 Once the outdoor unit is mounted, take the indoor unit to its desired installation
location.
3.14 At the desired installation location, verify that the connection between units is
sufficient (> -95 dBi) using the RSSI Test from Step 3.11.
Note: If device connectivity is less than -95 dBi, reevaluate the installation locations. Ensure the line of sight is as
clear as possible and the distance between the units is minimized. If required, identify new installation locations
and reconfigure the devices.
3.15 If the device connection is sufficient, click the “End” button in the RSSI Test, and mount
the indoor unit’s backplate to the wall by peeling the double-sided tape and pressing it
to the wall for 15-30 seconds.
Note: To ensure proper adhesion, clean the wall and mount the backplate to the wall before reattaching the
indoor unit. Attempting to press the adhesive to the wall with the indoor unit mounted to the backplate could
result in poor adhesion or damage to the solar collector.
Backplate
Hooks
Release Tab

15
PositiV Installation Manual
3.16 If the device connection is NOT adequate (<-95 dBi), reevaluate the installation
location of both the indoor and outdoor units. Ensure they are as close together as
possible, and their line of sight is as clear as possible.
3.17 Once the indoor and outdoor PositiV units are mounted, click into the “Properties”tab
and select the “ALL”option to set up site name, store number, address, block, city,
state, zip code, and time zone.

16
PositiV Installation Manual
Step 4: Calibration
4.1 Click “Pressure Calibration”on the PositiV Cx app.
4.2 Follow the steps as described on the PositiV Cx app.
4.3 After calibration has completed, clip the indoor unit to the backplate as shown.
Please note the correct orientation of the PositiV indoor unit in the image above.
Backplate
Hook
s

17
PositiV Installation Manual
Troubleshooting & FAQ
What do I do if my PositiV system shows no connectivity or signal strength?
Reevaluate the installation locations. Ensure the line of sight is as clear as possible and the
distance between the units is minimized. If required, identify new installation locations
and reconfigure the devices.
If PositiV signal strength is undetectable, but the units have a clear line of sight and are
less than 50’ apart, there could be interference from on site IoT equipment. If this is the
case, it can be best to set up the PositiV system during unoccupied or ‘closed’ hours when
radio frequency interference is less noticeable.
What do I do if my PositiV system does not show up when I open the PositiV Cx app?
Verify that Bluetooth is enabled on your phone. Then, close and reopen the app. It may
take up to a minute for the PositiV units to appear on the app.
What do I do if my PositiV Cx app crashes during installation?
Ensure the app is fully closed out after the crash. Re-open the PositiV Cx app and continue
from the beginning of the step where the crash occurred.
Is it necessary to install the outdoor unit on the roof?
It is not necessary but recommended. If there is an installation location on the exterior of
the building that meets all outdoor unit installation requirements, then it can be installed
there.
Who do I contact for further help and support?
Melink’s PositiV team can be reached at 513-965-7300 (M-F, 8 a.m. –5 p.m. EST/EDT).
Other manuals for Positiv
1
This manual suits for next models
1
Table of contents

