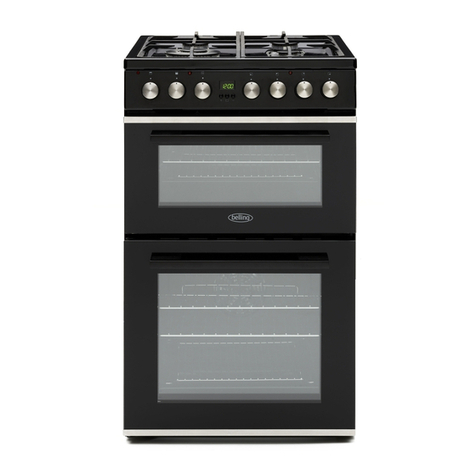
Memak STELLA COMBINE User manual

INSTALLATION AND USER MANUAL FOR STELLA COMBINE OVEN I1

2I memak.com
2I memak.com

INSTALLATION AND USER MANUAL FOR STELLA COMBINE OVEN I3
STELLA COMBINE FIRIN KURULUM VE KULLANIM KILAVUZU I3

4I memak.com
INSTALLATION AND
USER MANUAL
INTRODUCTION 6
Warning Signs Used 7
Warranty 8
Manufacturer Company 9
Product Information 9
About the Machine 10
Manufacturing Site Design 11
Product Dimensions 12
Product Technical Detail 13
PRODUCT COMMISSIONING 14
General Rules on Unpacking the Machine 14
Rules on Stockpiling the Machine 16
Load Structure 16
General Rules for Lifting and Transporting the Machine 17
PRODUCT INSTALLATION 20
Fresh Water Installation 21
Waste Water Installation 22
Electrical Connection Rules 23
OPERATING THE OVEN 24
Intended Use and Place of the Oven 24
Conditions Not to Use the Oven 24
Conditions Required for Correct Machine Operation 25
Pre-operation Control Areas 25
Initial Operation 26
TOUCH CONTROL PANEL SIGNALS 27
Device Definition 28
Manual Cooking 29
Stone Base 32
Yeast Chamber Interface Definition 34
Recipe Interface Definition 36
Recipe Creating Display 38
Language Option 40
Failure Reporting 41
Phase Sequence Failure 41

INSTALLATION AND USER MANUAL FOR STELLA COMBINE OVEN I5
Phase Thermal Failure 42
Fuse Failure 43
Settings Window 44
Settings> User Window 44
Settings> Oven Window 45
Settings> Cooking Window 46
Settings> Power Window 47
Settings> Aspirator Window 48
Settings> Yeast Window 49
SAFETY 50
PERSONNEL PROTECTIVE EQUIPMENT 51
GENERAL CLEANING 52
Cleaning Rules 52
Hygienic Areas 52
Food Areas 52
Spray Areas 52
Out of Food Area 52
Water Installation Cleaning 53
Basket Removal and Cleaning 53
Periodic Cleaning Calendar 55
MAINTENANCE AND SETTING 56
Cooking Period and Temperature Setting 56
Steam Injection Setting 56
Periodic Maintenance 56
Routine Procedures 57
Supply Water Filter Cleaning 57
Steam Injection 57
Oven Glass Replacement 58
Itermediate Level (Stone Base) Glass Replacement 59
Yeast Chamber Glass Replacement 60
Door Seal Replacement 61
Door Mechanism Lubricating 62
Lamp Replacement 63
Door Lock Replacement 64
PERIODIC MAINTENANCE CALENDAR 65
POSSIBLE FAILURES AND CAUSES 65

6I memak.com
Introduction
Manual
• Installation instructions are part of the device and
contain information for the safe device use.
• Installation instructions must be fully read before
installation.
• Installation instructions must always be ready to be
accessed by the installer at the installation site.
• Installation instructions must be maintained along the
device service life.
• MEMAKMAKİNA shall not be held responsible for the
problems arising from unintended use of the oven.
• Installation instructions must be delivered device’s
subsequent operators.
Figures
• All figures given in this manual are exemplary.
• It may show dierences according to the current device.
The company reserves its rights for technical modifications for
development!
©2018 MEMAK TECHNICAL SERVICE. All Rights Reserved. Transfer of
product-specific information to third parties is prohibited.

INSTALLATION AND USER MANUAL FOR STELLA COMBINE OVEN I7
Ths way up Move n a manner as the drecton looks upwards wth the
arrow sgn.
Fragle Handle the package wth care
Keep t dry Packed so as not to contact wth open ar.
CE Mark The machne meets the basc safety requrements.
Center of Weght Indcates the pont where the machne should be lfted.
Hanger Pont Indcates where to attach ropes or chans.
Warnng A hazardous stuaton, t may result n severe njury and
death.
Fre Fre hazard!
Hgh Voltage Attenton, Death Rsk
Hgh Temperature Door, glass and ts vcnty reach hgh temperatures when
the oven s operatng.
Operating
Mechanical Parts
Do not perform mantenance or repar work on movng
parts.
Warning Signs Used

8I memak.com
Warranty
MemakMakine provides opportunity for material or parts replacement
as a result of investigation for the problems arising from material or
workmanship.
Manufacturer provides 2 (two) year warranty from the date of installation
according to the contract of sale and the legal conditions in force except
the ones to be specified below.
Those not covered under warranty;
• Glass damage, bulbs and seals
• Violating the intended use of the device,
• Amendments or technical modifications to the device by persons and
persons not authorized by the manufacturer,
• Manufacturer’s original parts are not used,
• Damage caused by mechanical impacts that may occur from the
dispatch of the oven by the customer.
• Damage caused by insucient supply of all mains supplying the
oven.
• Faults that may occur due to users’ neglect of the oven.
• No one other than authorized personnel or authorized service
personnel should interfere with the repair and modification of the
device.
• Due to malfunctions in electric motors.
• Due to malfunctions in all electrical equipment.
• If the settings on the oven are tempered and broken.
• Failure to comply with the rules specified in the instructions for use.
• MemakMakine cannot be held responsible for failures or problems
caused by the use of the oven by a person who does not know how
to use the oven.

INSTALLATION AND USER MANUAL FOR STELLA COMBINE OVEN I9
Manufacturer Company Information
Manufacturer: MEMAK PLASTİK GIDA MAKİNA SAN. TİC. A.Ş
Address: 4.Organize Sanayi Böl. Kayacık Mah. 103. Cad.
No: 10 Selçuklu/KONYA/TÜRKİYE
Telephone: +90 332 345 36 16
Fax: +90 332 345 36 26
Web: www.memak.com
E-Mail: [email protected]om
Product Information
LABEL INFORMATION
1. Manufacturer company information
2. Machine type
3. Machine weight
4. Machine model
5. Production date
6. Serial number
7. CE mark
8. Operating voltage
9. Operating frequency
10. Operating power

10 I memak.com
About the Machine
Our Combine series ovens manufactured by MEMAK MAKİNA are electric convection rotary type ovens
used in restaurants, hotels and patisseries.
Compact designed for narrow use areas, prescription recording and easy operation with touch control
panel. It provides easy cleaning with internal evenings.
It is also used for the baking of frozen products in the central production of baked goods chains and
tempered glass cover which prevents heat loss.
Because it is designed in dierent sizes and can meet the needs of small, medium and large enterprises.
The specially designed air recirculation system provides stable distribution of hot air to every point of
the cooking chamber and provides stable leavening, volume and cooking.
PLEASE DO NOT INTEND TO OPERATE THE MACHINE WITHOUT READING USER MANUAL.
MEMAKMAKİNA shall not be held liable for damages to the human and the environment due to
the failure to fulfill the instructions in this manual or the incorrect use of the machine.
MEMAKMAKİNA reserves the right to make changes in the properties and dimensions of the
oven.

INSTALLATION AND USER MANUAL FOR STELLA COMBINE OVEN I11
Production Area Design
1. In the entire area, there should be some room to allow for inspection and cleaning when
manufacturing equipment is installed.
2. When placing the machines, all connections must be closed so that there are no openings.
3. The floor on which the machines are placed should be accessible from the point of view of the
cleaning operation or should be completely closed.
4. In cases where equipment passes through sections such as ceiling, floor, wall, sucient floor
should be provided between equipment and wall for cleaning or machine should be mounted on
the wall not to permit any gap.
5. Auxiliary equipment must be removable and can be reassembled to facilitate cleaning.
6. Production base should be covered with hard, smooth, easy to clean and non-absorbent material.
7. For insulation, non-absorbent materials should be used. These surfaces should be accessible.
8. Stacking should be made on palettes to let minimum 100 mm distance with the floor when
storing the products.
9. Vessels used to collect waste products and waste water should be made of easy to clean materials
and should have sucient volume.
10. Doors and windows opening out of the plant should be isolated to prevent any outsourced
contamination.
11. Sucient ventilation should be ensured in the washing rooms.
12. Water and water vapor that come into direct contact with the products should be of drinkable
quality.
13. Pipes, valves and fittings used for liquid materials: Either “on-site cleaning” programs should be
implemented for these sections or systems allowing easy disassembly and assembly should be
used.
14. All fixed pipes should be isolated to prevent condensation.
15. Drainage systems for wastewater must be installed in areas where cleaning is required.
16. Floor slope should be such as to prevent water accumulation on the surface.
17. Illumination lamps should be protected as to prevent falling and breaking.
18. Power cables should be stabilized (their contact with the ground should be prevented)
19. Machine’s electrical components should be closed to prevent dust formation. Water should be
prevented from entering electrical panels.
20. Machine parts such as fan, motor should be accessibly mounted.
21. Motor and other auxiliary equipment should be placed not to touch the floor.

12 I memak.com
COMBİNE
DEPTH ( A ) mm / inc
(A1) mm / inc
1291
1560
WIDTH ( B ) mm / inc 995
( H ) mm / inc
HEIGHT (H1) mm / inc
(H2) mm / inc
715
384
1150
Machine’s dimensions are as follows (Figure 1)
(Figure1)
Product Dimensions

INSTALLATION AND USER MANUAL FOR STELLA COMBINE OVEN I13
ROTARY CHAMBER
MODEL TYPE COMBİNE
Tray Sze cm 40*60
Number of Trays pcs 6
Dstances Between Trays cm 8,5
Cookng Area m21,44
Door Entry cm 48,5
Steam Shaft Ext Ø 120
Water Inlet nch ½’’
Power Sources Electrcal
Weght kg 350
Electrcal Connecton 380v/50-60hz/3 phase
Control System Computerzed touch panel
Connecton Power kw 15
FERMENTATION CHAMBER
MODEL TYPE COMBİNE
Tray capacty for 80*60 sze cm 6
Tray capacty for 60*40 sze cm 12
Electrcty Power kw 4
Weght kg 100
STONE BASE ROOM
MODEL TYPE COMBİNE
Celng capacty for 60*40 sze cm 2
Cookng area m20,5
Layer dmensons cm 60*80
Layer entry dmensons cm 60*21
External dmensons 100*130*33
Electrcal power kw 5,2
Weght kg 145
Product Technical Details

14 I memak.com
PRODUCT COMMISSIONING
• Installation is carried out by the manufacturer’s personnel or by the personnel authorized by the
manufacturer.
• Manufacturer is not responsible for any failure caused by unauthorized personnel. Manufacturer
is not responsible for any malfunctions caused by unauthorized personnel during the installation,
despite the labor guarantee.
• Manufacturer cannot be held responsible for the place and technical and legal suitability of the
machine.
• All operations must be carried out in accordance with the directives of a sole authorized person.
• Operators and people under their command must wear protective clothing in compliance with
the operation.
Manufacturer is not liable for accidents, damage and machine failures caused by the failure to comply
with the rules in this section.
General Rules on Unpacking the Machine
• Inspect the machine for damages during transportation before unpacking. Check that all parts
listed in the shipping documents are present. If there are missing parts, manufacturer must be
informed within 24 hours.
• Dispose of the packaging material in accordance with the applicable legal regulations when the
machine is fully installed.
• Store the materials used for lifting the machine in a suitable place for future use.
Unpacking procedure is illustrated in (Figure 2).

INSTALLATION AND USER MANUAL FOR STELLA COMBINE OVEN I15
PLEASE CHECK THE CASE OF PACKAGING CAREFULLY BEFORE RECEIVING THE PRODUCT.
DO NOT EVER ACCEPT PRODUCTS WITH DAMAGED, CRUSHED, STRIPED PACKAGE.
ALSO IF SUCH EVENT OCCURS PLEASE TAKE A PHOTOGRAPH AND WRITE A BRIEF NOTE
BRIEFING THE SITUATION AND NOTIFY TO THE MANUFACTURER COMPANY.
(Figure2)

16 I memak.com
Rules on Machine Storage
• Store the machine in a confined space away from dust, moisture, and heat.
• The permissible ambient values for storage are as follows: Temperature: -5 C to 45 C
• Maximum humidity: 60%
• where the machine is stored; there is no risk of collision with the vehicle.
• Check the guarded parts regularly.
• Do not stack machines on top of each other.
• If the machine is stored unpacked, it should be raised from the ground with the help of wooden
pallets. Cover the product to protect from dust and dirt.
Load Structure
Machine can be shipped in form as stated below:
• Completely assembled;
• Partially assembled;
• Not completely assembled; parts are stacked on the pallet or optionally on top of any wooden
structure.
The vehicle to be transported must have the required lifting capacity. (Please see machine’s technical
information chart.). Furthermore, vehicle’s minimum loading areas should be as follows.
Lifting device used to raise the machine; should have sucient lifting capacity and fork length.

INSTALLATION AND USER MANUAL FOR STELLA COMBINE OVEN I17
General Rules on Lifting and Transporting the Machine
• •Before starting the operation, designate and inspect the entire transport area, the parking area
of the vehicle carrying the transport and the area where the machine will be installed. Ensure
there is no hazardous situation.
• Make sure that the vehicle to carry out the machine’s lifting and transport procedure of the
machine has sucient lifting capacity. Weights are stamped on the packaging and / or are
available in this manual.
• Check that the hoisting ropes and chain types are approved and that the capacity instructed by
the manufacturer is clearly written on the ropes. Check whether there is a damage and corrosion
with the lifting ropes before use.
• Do not knot or twist the lifting ropes and follow the rules written in this manual by the
manufacturer. Same rules apply to chains and belts.
• Particular attention should be paid for lifting the machine centrally.
• Do not climb over and pass under when the machine is loaded and moving.
• Care must be paid that unauthorized personnel are not in the loading area.
• In order not to cause any accident and injuries; all operators must stand at a safe distance when
lifting the machine.
• Special care must be paid to keep the system stable when realizing machine lifting procedure.
Moving from Lifting Point;
• Take the necessary precautions during transport! Make sure the hooks are fully inserted and start
lifting.
• Pay particular attention to lifting the machine centered.
• Do not bend or twist the hoisting ropes and follow the rules specified in this book by the
manufacturer. The same rules apply to chains and belts.
• When the machine is loaded and moving, do not climb over or pass under.
• Make sure that the lifting capacity of the machine is sucient for the lifting and transport of the
machine.
Machine lifting operation is illustrated under (figure 3) and (figure 4).

18 I memak.com
WARNING: Take necessary cautions during transport! Start with the lifting procedures after ensuring
that hangers are fully installed.
(Figure3)
(Figure4)

INSTALLATION AND USER MANUAL FOR STELLA COMBINE OVEN I19
Transport on pallets;
• Use of a forklift;,
• Place the forklift forks on the bottom of the pallet and make sure that the fork is at least 20 cm
from the opposite side.
• Use a forklift with sucient lifting capacity and a fork.
• Slowly transport and transport safely.
• Check that the oven (material on the pallet) rests well on the forks.
Transport on the pallet (Figure 5) and (Figure 6) are also shown.
Lifting device used to lift the machine; should have sucient lifting capacity and fork length.
The packaging structure of the product is made according to the world and European norms. It is made
ready for the shipping procedure by placing into cases packed with nylon and design in compliance
with standards by compressing with nylon with bubble pack.
(Figure5) (Figure6)

20 I memak.com
PRODUCT ASSEMBLY
Ready assembled machine:
The machine comes pre-assembled and requires special installation settings.
Unassembled or semi-assembled machine:
If the machine has not been installed or has been semi-assembled; The assembly operation must be
performed by the personnel authorized by the manufacturer.
If there is no previous layout of the furnaces, the oven is placed properly.
IMPORTANT: Between the oven and the wall should be at least 500 mm (half meter). (figure 7)
NOTE: The machine is taken on the scale after its distances have been adjusted. (Figure 8)
(Figure7)
Table of contents
