MEMOTRON m2k User manual

MEMOTRON
m2k
OS v1.3
User Manual


Preface
Many thanks for purchasing the Memotron m2k. The Memotron m2k enables you to reproduce the
famous sound of the original vintage instrument with highest authenticity. Thanks to latest digital
technology, the Memotron m2k is easy to use and most reliable in every stage and studio situation.
To become quickly familiar with the Memotron m2k’s capabilities, we recommend you to take a break
and study and internalize...) this manual first.
Enjoy your Memotron m2k!
Your Manikin team
The Memotron m2k development team:
Thorsten Feuerherdt : Hardware, Housing, Design, User Manual
Markus Horn : Software, Design, User Manual
Klaus Hoffmann-Hoock : Sound library, Beta testing, User Manual
Axel Jungkunst : Beta testing
Version : March 2016
Note
Manikin Electronic will not assume any responsibility for errors which may occur in this manual. The
content of these instructions is subject to change without prior notice. When this manual was created,
good care was taken to exclude any mistakes and contradictions. Manikin Electronic will not accept
any guarantees for this manual except those provided by commercial law.
No part of this user manual is allowed to be reproduced without the expressly written consent of the
manufacturer.
Manikin Electronic, Lipaer Straße 5, D-12203 Berlin, Germany

Table of contents
Introduction..................................................................................................................1
About this manual...................................................................................................................1
Symbols used.....................................................................................................................1
Marking of parameters........................................................................................................1
General safety instructions......................................................................................................2
Suitable location.................................................................................................................2
Mains connection................................................................................................................2
Operation............................................................................................................................2
Maintenance....................................................................................................................... 2
Proper use..........................................................................................................................2
Controls & Connectors...............................................................................................3
Top.......................................................................................................................................... 3
Rear Panel.............................................................................................................................. 3
etting Up.....................................................................................................................4
Unpacking............................................................................................................................... 4
Installation...............................................................................................................................4
Connections............................................................................................................................ 4
Basic Operation...........................................................................................................5
Power On................................................................................................................................ 5
Power Off................................................................................................................................ 5
Realtime Sound-manipulation Functions.................................................................................5
Menu-driven Functions............................................................................................................6
Track Menu...................................................................................................................8
Selecting Tracks...................................................................................................................... 8
Initializing Tracks.....................................................................................................................8
Frame Menu.................................................................................................................9
Loading Frames ..................................................................................................................... 9
Saving Frames .....................................................................................................................10
Creating a Default Frame .....................................................................................................10
Deleting Frames ................................................................................................................... 11
Initializing Frames .................................................................................................................11
Internal Mem..............................................................................................................12
Importing Tracks.................................................................................................................... 12
Importing Directories.............................................................................................................13
Deleting Tracks .................................................................................................................... 13
Deleting the Internal Memory................................................................................................14
Memory Information..............................................................................................................14
ound ettings..........................................................................................................15
Blending Tracks Mix)............................................................................................................16
Positioning Tracks ................................................................................................................17
Effect etup................................................................................................................18
Effect Block 1: Amplifier Modeling.........................................................................................18

Effect Block 2: Modulation / Delay.........................................................................................19
Effect Block 3: Reverb / Echo................................................................................................20
MIDI etup..................................................................................................................21
Update.........................................................................................................................22
Appendix....................................................................................................................23
Product Support....................................................................................................................23
Technical data.......................................................................................................................24
Disposal................................................................................................................................ 24
MIDI Implementation Table....................................................................................................26
Glossary................................................................................................................................ 27

Introduction
About the Memotron m2k
The Memotron m2k is an advanced sample playback based musical instrument. It can emulate the famous,
specific and genuine sound in highest audio quality. Thanks to its digital technology, the Memotron m2k is
most reliable and easy to use. Features are:
Access to up to three sounds simultaneously
Fully polyphony
Internal, adjustable effect processor
Complete MIDI implementation
Internal data storage, import of new sounds by means of an external memory card SD card)
Compatible with G-Media M-Tron® sound library
The special characteristics of the original have been carefully emulated. This includes a maximum duration
of a played note of about 8 seconds about 16 seconds at HALF SPEED).
The Memotron m2k supports standard data structures of memory cards. This compatibility enables you to
create and organize your own Memotron m2k sound library with your PC.
The Memotron m2k is fully compatible with G-Media’s M-Tron® plug-in and can play its sounds
recognizable at the ending .cpt). The Memotron m2k is not compatible with the newer M-Tron Pro® plug-in.
About this manual
This manual is intended to make the first steps of using the Memotron m2k easier for you. Moreover it also
provides support and hints to the experienced user for his/her daily work.
Symbols used
To ensure a better overview, this manual uses standardized spelling and symbols which are explained below.
Important notes are highlighted in bold print.
!Attention – Pay special attention to this note to avoid malfunctions
•ome short additional information is given
Instructions – Mind these instructions to execute the requested function
Marking of parameters
All designations of buttons, controllers and parameters of the Memotron m2k in the text are highlighted in
bold print.
Example: Press the ESC button
The value range permitted for a parameter setting is highlighted by indicating the maximum and minimum
values in italics, separated by three dots. Settings, which can not be represented by a value range, are
separated by a comma.
Example: Rx Channel 01... 16, omni
1 Memotron m2k OS v1.3 User Manual

General safety instructions
Please read the safety instructions below very carefully. They comprise some basic rules for the use of
electronic devices. Please read all the notes before you start using the device.
Suitable location
•Only operate the device in closed rooms.
•Never operate the device in humid environments such as bathrooms, washing rooms or swimming pools.
•Do not operate the device in extremely dusty or dirty environments.
•Ensure unhindered air supply to all sides of the device. Do not place the device in close proximity of heat
sources such as radiators.
•Do not expose the device to direct sunlight.
•Do not expose the unit to heavy vibration.
Mains connection
• Only use the supplied connection cable or the supplied power supply.
• If the supplied mains connector does not fit into your socket you should consult a qualified electrician.
• Disconnect the mains connector from the socket if you do not use the device for a longer period of
time.
• Never touch the mains connector with wet hands.
• When disconnecting, always pull the connector and never the cable.
Operation
Never place any vessels containing liquids on top of the device.
Ensure that the device cannot move during operation. We recommend to install it into a 19'“rack or to put
it on a sturdy pad.
Ensure that no objects can get inside the device. Should this happen against all odds, switch the device
off, disconnect it from the mains and contact a qualified technician.
Maintenance
•Do not open the device. Any repair or maintenance should be done by qualified tech-personnel only.
There are no parts inside the device that could be maintained by the user. You will also lose your right to
claim warranty if you open the device.
•Only use a dry, smooth cloth or brush for cleaning the device. Do not use any alcohol, solvents or similar
chemicals that will damage the surfaces.
Proper use
This device is exclusively intended for creating audio signals and creating / processing control signals
according to the MIDI standard. Any other use is not permitted and will exclude any warranty claims towards
Manikin Electronic.
Memotron m2k OS v1.3 User Manual 2

Controls & Connectors
Top
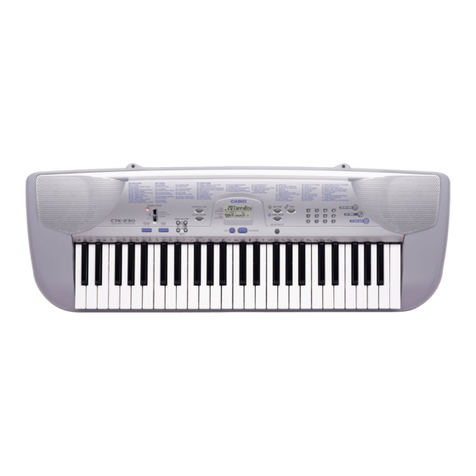
DATA: Encoder with click function to edit menu-driven functions
ESC: Exits the current menu page, cancels a function
HALF PEED: Simulates the halving of the tape speed
A B C: Simulates the track selector for shifting the tape heads from sound to sound
PITCH: Pitch alteration by +/- 3 halftones
TONE: Changes the sound by means of a 12 dB lowpass filter
VOLUME: Master volume
Rear Panel
OUTPUT Phones: Headphones output jack
OUTPUT Left / Right: Audio output jacks, line level, unbalanced
PEDAL Volume: Socket for a volume pedal
LCD: Contrast control for the LC-display
CARD: Card slot for insertion of an external memory card SD card)
MIDI In: MIDI-Data input jack
MIDI Out: MIDI-Data output jack
MIDI Thru: Data coming in on MIDI-In jack is transmitted to the MIDI-thru jack
AC In: Power supply socket 110V – 240VAC & 50Hz / 60Hz)
3 Memotron m2k OS v1.3 User Manual

Setting Up
Unpacking
When unpacking, please check if all parts are included. If something should be incomplete, please contact
your local Manikin dealer immediately.
The Memotron m2k box contains:
•the Memotron m2k
•power cable
•this user manual
•one memory card SD card)
•one DVD packed with sounds
We recommend to keep the original box for further transportation – or better – purchase a suitable case.
Installation
Set up the Memotron m2k on a clean and smooth pad. For this purpose four stable feet are provided
underneath the Memotron m2k.
Connections
You require a mains outlet and a suitable audio system or at least headphones.
The Memotron m2k automatically adapts to your local power system (110V – 240V AC& 50Hz / 60Hz)
How to hook up the Memotron m2k:
Make sure that both the Memotron m2k and your audio system are powered OFF.
Connect the included power cable to the Memotron m2k’s AC socket and to a suitable power outlet.
Connect the audio outputs of the Memotron m2k to the line-level inputs of your audio system.
Use shielded high quality 6,3 mm mono jack cables.
If you wish to play the Memotron via a suitable external MIDI-keyboard or –sequencer e.g. the
Manikin Schrittmacher), please connect the MIDI input of the Memotron m2k with the MIDI
output of a master keyboard, a computer or a sequencer like the Manikin Schrittmacher) using
only fitting MIDI cables.
Power ON the Memotron m2k and subsequently your audio system !)
Proceed with the chapter “Basic Operation” on the next page.
Memotron m2k OS v1.3 User Manual 4

Basic Operation
Power On
Push the Power switch on the rear to switch on the Memotron m2k. The Memotron m2k will need some seconds to
initialize and will then be ready or use.
!Attention – First power ON the Memotron m2k and then power ON your audio system in order
to avoid a cracking noise.
•After powering ON the Memotron m2k and the initiali ation, settings that were stored in
a “Default Frame” might be loaded automatically.
Power Off
Push the Power switch to switch off Memotron m2k.
!Attention – To avoid a cracking noise, first power OFF your audio system and then switch OFF
the Memotron m2k.
!By switching OFF the Memotron m2k, all settings will be lost. Thus save your settings as a
'Frame' on a memory card before you switch OFF!
Realtime ound-manipulation Functions
Up to three sounds here called tracks) can simultaneously be selected and played in the Memotron m2k. By
means of several controls on the top that can not be stored and only serve your performance, the sound of
the selected tracks can be processed.
A B C cross-fades the tracks by turning the knob, simulating the Tron's tape heads shifting from sound to
sound.
PITCH shifts the pitch 3 halftones up and 3 halftones down. This will slightly affect the maximum duration
of a played note.
TONE changes the sonic character with help of a passive 12 dB lowpass filter.
HAL SPEED emulates the halving of the tape speed. The playback-pitch will be lowered by one octave
and the duration of a played note of about 8 seconds is doubled. Using HALF SPEED results in a slight
reduction of the audio quality, especially in higher frequency ranges.
VOLUME defines the total output volume.
5 Memotron m2k OS v1.3 User Manual

Menu-driven Functions
All other functions of the Memotron m2k are controlled via the menus with the help of the display and the
DATA knob. These functions are:
Load, save and delete frames sound selection and effect settings) in the Frame Menu
Select and initialize tracks sounds) in the Track Menu
Set the sound parameters in the Sound Settings
Set the effect parameters in the Effect Setup
Configure the MIDI interface in the Midi Setup
Import and delete sound data in the Internal Mem Menu
Update the operating system with Update.
Basic access to menu-driven functions:
1. Move the DATA knob to place the CURSOR in the desired position. Menus may cover several
display pages – simply turn the DATA knob...
2. Click the DATA knob to select a function or to enter a deeper menu level.
3. Move and click the DATA knob to select a parameter and to enable a parameter value change.
4. Move the DATA knob to alter the value of the selected parameter.
5. Press the E C button to cancel a function and / or return to a higher menu level.
Memotron m2k OS v1.3 User Manual 6

The menu overview shows all menu-driven functions of the Memotron m2k.
7 Memotron m2k OS v1.3 User Manual

Track Menu
The Memotron m2k makes use of sound sample data here called tracks) that can be stored in and loaded
from the internal memory. Up to three tracks can be selected and played in the Memotron m2k.
electing Tracks
With the DATA knob you navigate through the menu levels to the Sound Settings. By pressing the DATA
knob, you select which track shall be loaded into one of the sound slots A, B, C). Subsequently you are
automatically prompted to the Track Menu where you switch by “Select Track” into the data system of the
internal memory.
In the data system, directories and data can easily be selected. Pressing the DATA knob, enables the
change into a sub-directory. Choose “..” to get back to the next higher level. By pressing the E C button you
can leave the data system without selecting any track.
Press the DATA knob to select the corresponding track. To make things easier, a selected track will then be
replaced and without warning all its sound parameters will be initialized. After the completion of the selection
process the Sound Settings appear again.
Initializing Tracks
This feature allows to initialize one of the three selected tracks. The track and all its sound parameters will be
reset while the effect settings are retained.
Please select from the Sound Settings A, B, C) the track to be initialized. Now enter the Track Menu and
select “Init Track”. To cancel the function, choose “No” or hit the E C button and jump back into the Track
Menu. Choose “Yes” to initialize the selected track. When the initialization is done, the display jumps back to
the Sound Settings.
!The finished initiali ation can not be made undone!!!
Memotron m2k OS v1.3 User Manual 8

Frame Menu
Frames offer the possibility to save and manage on an external memory card complete setups consisting of
the selected tracks, the associated sound parameters and the effect settings. To this end, these functions are
available in the Frame Menu: Load, Save, Delete and Initialize.
!In a frame, only the names of the tracks are stored, but not the sound data itself. This
enables more rapid storage and saves space on the memory card. However, when loading a
frame, the selected tracks must be installed in the internal memory.
Loading Frames
If you want to load a frame, first make sure that the desired memory card is in the Memotron m2k. If this is
not the case, please insert the appropriate SD card into the card slot on the rear panel.
Use the DATA knob to navigate through the menu levels to the Sound Settings. Here, select "F:" and enter
the Frame Menu. By selecting the menu item "Load Frame", you switch to the file system of the external
memory card.
Navigate through the file system and select the desired frame. By pressing the E C key, the file system will
be left without loading a frame.
Pressing the DATA knob loads the tracks specified in the frame with all associated sound parameters and
effect settings. When the loading is completed, the Sound Settings reappear automatically.
!If two or more tracks of the frame are not installed, the frame can not be loaded.
9 Memotron m2k OS v1.3 User Manual

aving Frames
If you want to save a frame, first make sure that there is the desired memory card in Memotron m2k. If this is
not the case, please insert the appropriate SD card into the card slot on the rear panel.
Use the DATA knob to navigate through the menu levels to the Sound Settings. Here, select "F:" and enter
the Frame Menu. After selecting the menu item "Save Frame", you must first name the frame.
By turning the DATA knob, letters and characters can be selected which are appended to the name by
pressing the DATA knob. By choosing [Backspace], it is possible to delete the last character. After entering
the name, the frame can be saved with [ AVE].
If a frame with the specified name already exists on the external memory card, a confirmation dialog will be
displayed, asking if the existing frame should be overwritten. After the saving procedure, you will
automatically return to the Sound Settings.
•Frames can not be saved in the internal memory.
Creating a Default Frame
If a Frame is named "Default" on the external memory card, it is automatically loaded when you start the
Memotron. Upon delivery, such a default Frame is already on the supplied SD card.
To create your own Default Frame, just save your Frame under the name "Default". Alternatively, you can
select [DEFAULT] at the character selection.
If you already have a Default Frame on the external memory card, a confirmation dialog will be displayed
here.
Memotron m2k OS v1.3 User Manual 10

Deleting Frames
With this function, a frame can be deleted from the external memory card. If you merely want to reset the
active Frame, then please see the "Initializing Frames" section.
To delete a frame from the external memory card, first navigate, using the DATA knob, through the menu
levels to the Sound Settings. Here select "F:" and enter the Frame Menu. By selecting the menu item "Delete
Frame", you change to the file system of the external memory card.
Navigate through the file system and select the desired Frame. By pressing the E C key, you can exit the file
system at any time without deleting a frame.
Pressing the DATA knob, the frame will be deleted from the external memory card after a security check.
Then the Sound Settings will reappear automatically.
!A deleted Frame can not be restored!!!
Initializing Frames
With this feature, the selected tracks together with the associated sound parameters and effect settings can
be reset.
In the Frame Menu, a prompt is displayed after selecting the menu item "Init Frame". Select "No" or press
the E C key to return to the Frame Menu. When you select "Yes", the frame is initialized. After the
initialization, the system returns to the Sound Settings.
!The initiali ation of a Frame can not be undone!!!
11 Memotron m2k OS v1.3 User Manual

Internal Mem
The Memotron m2k features an internal memory from which the tracks will be played. On delivery, the
hundred tracks of the Basic Collection are preinstalled here. To use other tracks, they first must be imported.
Besides its own Memotron sample files file extension ".mtk"), also sample files of the plug-in M-Tron® of G-
Media file extension "cpt") can be used. With G-Media's newer M-Tron Pro® plug-in, the Memotron m2k is
not compatible.
•On a Windows® PC installed M-Tron® sample files can not be used in the Memotron m2k as
these were converted during the installation of the plug-in. Use the original sample files of
the M-Tron® CD-Roms instead.
With the following functions you can import individual tracks or all tracks of a directory, remove individual
tracks or erase all internal memory of the Memotron m2k. In addition, the info page gives information on the
number of installed tracks, the remaining capacity for other tracks and the maximum number of installable
tracks.
Importing Tracks
This function allows you to import individual tracks from an external memory card to the internal memory. If
you want to import a complete Sound Collection or more tracks, then please see the "Importing Directories"
section.
To import a single track into the internal memory of Memotron m2k, go first to the "Internal Mem" menu. By
selecting the menu item "Import Track", you change to the file system of the external memory card.
Navigate through the file system and select the track you want to import. By pressing the E C key, you can
exit the file system at any time without importing a track.
After selecting the desired track, the Memotron m2k starts the import which takes a few seconds to
complete. After a successful import, you are returned to the file system of the external memory card and can
now select another track. If you do not want to import any other track, you return by pressing the E C key to
the "Internal Mem" menu. With one more press on the E C key, you return to the main menu.
•If a Memotron sample file (“.mtk“) is not too big (some original samples were recorded longer
than others!), the first two keys (F & F#) will be interpolated during the import and the track
can then be played with the full keyboard range.
Memotron m2k OS v1.3 User Manual 12

Importing Directories
If all tracks of a sound collection shall be imported to the internal memory of Memotron m2k, the function
"Import Dir" is very useful. With this function, all tracks within a directory can be imported from an external
memory card to the internal memory of the Memotron m2k.
To start the import, first switch to the "Internal Mem" menu. By selecting the menu item "Import Dir", you
change to the file system of the external memory card.
Navigate through the file system and select the directory that contains the tracks you want to import.
Depending on the amount of tracks, the import of multiple tracks from a directory can take a few minutes to
complete. The current import can be cancelled at any time by pressing the E C key.
Deleting Tracks
To delete individual tracks from the Memotron m2k's internal memory, first go to the "Internal Mem" menu. By
selecting the menu item "Delete Track", you switch to the file system of the internal memory.
The track to be deleted can now be selected and deleted after confirming a confirmation prompt. To cancel
the operation, select in the prompt "No" or press the E C key. After the deletion, you will automatically return
to the Sound Settings.
!The deleted track can only be restored by importing it again!!!
13 Memotron m2k OS v1.3 User Manual

Deleting the Internal Memory
This feature deletes the Memotron m2k's entire internal memory. To do this, switch to the "Internal Mem"
menu and select the menu item "Delete All".
The internal memory can be deleted after confirming a confirmation prompt. To cancel the operation, select
"No" in the prompt or press the E C key. After the deletion, you will automatically return to the Sound
Settings.
!Deleting the internal memory can not be undone. To use the Memotron m2k again, tracks
have to be imported with the "Import Track" or "Import Dir".
Memory Information
This function provides an overview of the way the internal memory is used. First change to the “Internal
Mem" menu and select the menu item "Info".
On the Info Page, the number of the already installed, the free and the maximum installable tracks appears.
You leave the Info Page by pressing the E C key and return to the "Internal Mem" menu. One more press on
the E C key brings you back to the main menu.
!The maximum amount of installable tracks depends on the built-in internal memory card and
may therefore differ from the displayed amount.
Memotron m2k OS v1.3 User Manual 14

Sound Settings
The Sound Settings contain Frame and track names as well as various parameters to tailor each track to
your personal needs.
The following parameters can be adjusted on each of the three tracks:
Parameter Value Range Description
Volume 0 ... 127 Volume of a track
Attack 0 ... 127 Fast or slow attack phase of the sound
Release 0 ... 127 Fast or slow decaying of the sound after the key release
Panorama L64 ... C00... R63 Stereo panning
Velocity -63 ... 0 … 63 Touch response max. inverted … off … max. active)
Mix Off, A, B, C Blending of tracks
Place Place, First, Last Positioning of tracks
All Sound Setting parameters can be accessed by turning the DATA knob. A selected parameter can be
edited by pushing the DATA knob. The cursor will turn into a pointer. Turning the DATA knob, will now alter
the parameter values. Pushing the DATA knob again, will confirm the value changes and by turning the
DATA knob, another parameter can be selected for tailoring.
By pressing the E C button, you can leave the Sound Settings and return to the main menu.
15 Memotron m2k OS v1.3 User Manual
Table of contents
