manuals.online logo
Brands
  1. Home
  2. •
  3. Brands
  4. •
  5. Mercedes-Benz
  6. •
  7. Automobile
  8. •
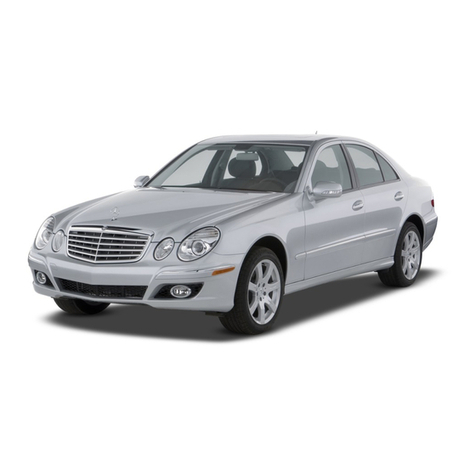
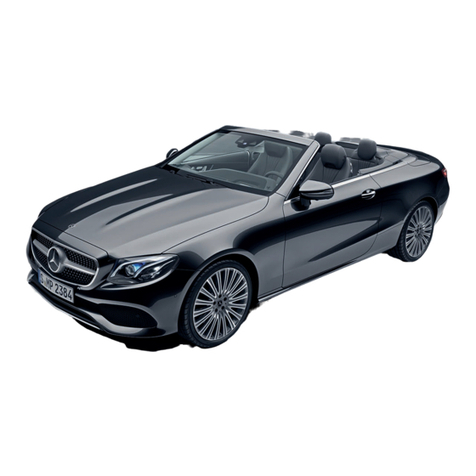
  9. Mercedes-Benz E-Class 2009 Series User manual

Mercedes-Benz E-Class 2009 Series User manual

Mercedes-Benz USA, LLC
One Mercedes Drive Montvale, NJ 07645
1-800-FOR-MERCEDES
MBUSA.com
© 2008 Mercedes-Benz USA, LLC. All illustrations and specications contained in this document are based
on the latest product information available at the time of publication. Mercedes-Benz reserves the right
to make changes at any time, without notice, in colors, materials, equipment, specications, and models.
Any variations in colors shown are due to reproduction variations of the printing process. Illustrations may
include test situations. Some vehicles are shown with optional equipment.
Always refer to the Operator’s Manual for detailed information on all items and for safety warnings.
Printed in U.S.A. 2008
P-RG-211-09A
RADIO
01 Press the “Radio” key repeatedly to select your waveband (eg. FM/AM/WB/SAT Radio)
02 Using the cursor keys, navigate to the “Presets” function on the bottom area of the screen
and select by pressing the “OK” button
03 To save a station in yourpresets, press and hold a numeric key until an audible signal confirms
that the selected frequency has been stored in the numeric position
01, 07 Use these dials to set the desired temperature for driver and passenger
02 The windshield defroster button will override all other settings and concentrate air flow
and temperature on the windshield — Press again to deactivate the defroster function
03, 12 These buttons control the air output speed
04 The display field shows the selected air output speed and air flow direction
05, 10 These buttons control the air flow for driver and passenger
06 The rear window defroster will operate for a certain period of time and switch
off automatically
08 When you turn MAX COOL on, the climate control will automatically cool the vehicle
as fast as possible
09 This button will turn the air conditioning compressor on or off — We recommend
leaving the air conditioning turned on at all times
11 This button turns the climate control off
13 In areas of high outside pollution you can switch on the recirculating function which
cuts off outside air from entering the interior
14 The “Auto”function controls air f low and output tomaintain t he set temperature
CD/DVD CHANGER
01 Press the “Eject” button on the CD/DVD Changer
to open the changer menu
02 Use the cursor keys to select an empty CD/DVDslot
and press the “OK” button
03 Insert the disc when prompted to do so
The last inserted disc will start to play automatically
MP3
01 When you insert a disc containing MP3 files or folders into the CD/DVD slot in the COMAND head
unit, the “MP3-CD” sub-menu will be activated to allow access to MP3 files and folder structures
02 The “Folder” sub-menu allows you to select a specific folder on your MP3 disc and access music
files contained in this folder directly
SATELLITE RADIO
01
From the "Audio" menu on the top
menu selection panel, you can access
the satellite radio functions
02 You can navigatewit h the cursor keys
within and across categories
03
The cursor buttons allow you to scroll
left and right through the channel
content — You can assign a station to
one of the number buttons on the right
side of the screen by pressing and
holding it until a sound confirms the
station is stored
TO USE NAVIGATION FEATURE
01 Select the "NAVI" button from the left side of the screen
02 Use the cursor keys to select "Destination" from the lower menu bar on the screen
03 Use the “Address Entry” function to enter yourdestination
04 Use the cursor keys to enter the name of your destination city
05 Enter the street name followed by the house number
06 When finished, select the “Start” option on the bottom of the screen to start route guidance
TO ADJUST TIME

The time displayed in your instrument cluster and
COMAND screen is automatically set by the Global
Positioning System (GPS) in your vehicle. You can access
the "System" menu in COMAND to set the accurate time
zone and select Standard or Daylight Savings time. Please
see your COMAND manual for additional information.
TO MAKE AN EMERGENCY CALL
01 Release the “SOS” cover
Press the red "Emergency Call" button
The response center will be contacted for assistance
This function is only available if you subscribe to the Tele Aid program and phone coverage
is available
THE ROADSIDE ASSISTANCE BUTTON
The "Roadside Assistance" button as well as the "Information" button are located in the center console
01 Roadside Assistance Button
Press the "Roadside Assistance" button to establish a connection with the response center
to request assistance
THE EMERGENCY CALL BUTTON
The "Emergency Call" button can be found on the overhead control panel
THE 2009 E-CLASS
Vehicle RefeRence Guide
AUTOMATIC 4-ZONE CLIMATE CONTROL COMAND INTRODUCTION NAVIGATION & PRACTICAL HINTS USEFUL FEATURES
01
04
02 03 0605 07
02
03
14
09
08
12 11
13
03
10
01
01
01
01
01
02
03
03
01
01
02
03
05 06
04
02
02
01
04
1 Initial setup required.
01 Fuel Gauge
02 Clock
03 Speedometer with Multifunction Display
04 Tachometer
05 Coolant Temperature Gauge
01 Multifunction Display
02 Call Functions
03 Volume Controls
04 Menu Controls
01 Window Controls
02 Mirror Adjustment
03 Headlamp Switch
04 Garage Door Opener1
05 Multifunction Display
06 CD/DVD Changer
07 COMAND Display
08 Automatic Climate Control
09 Overhead Control Panel
DRIVER'S VIEW INSTRUMENT CLUSTER & MULTIFUNCTION STEERING WHEEL
SEAT ADJUSTMENT & SEAT MEMORY
ADJUSTMENT STALKS LIGHTING GEAR SELECTOR
TO ADJUST SEAT POSITION
01 Seat forward/back
02 Backrest tilt
03 Seat height
04 Leg support
05 Headrest height
TO ADJUST CRUISE CONTROL
01 Push lever up to activate
Push lever up to accelerate
02 Push lever down to decelerate
03 Push lever as shown to cancel
04 Pull lever as shown to recall last
cruise control setting
CORNER-ILLUMINATING LAMPS

The corner-illuminating lamps will
automatically turn on when you activate
the turn signal at a certain speed and the
steering wheel is turned

The corner-illuminating lamps will then
illuminate the area in which you
are turning
GEAR SELECTOR POSITION
01 The gear selector position currently in use
is displayed in the multifunction display
NOTE: Please see all applicable
information and adhere to the warnings
in the Operator’s Manual.

While in Drive, you can also manually
shift through the gears by pressing the
shift paddles (if equipped) behind the
steering wheel on the left (downshift) or
right (upshift)
HEADLAMP SWITCH POSITIONS
01 Standing lamps left mode
This position will activate the driver side
standing lamps
02 Standing lamps right
This position will activate the passenger
side standing lamps
NOTE: The standing lamp feature is
helpful at night to alert other motorists
of your vehicle.
03 Off / daytime running lamp mode
When you switch off the vehicle
the headlights are turned off

When daytime running lamp mode is
activated, the headlamps are turned
on when the ignition is switched on
04 Automatic headlamp mode

This position automatically turns
on the headlamps in certain
lighting conditions
This function is deactivated in daytime
running lamp mode
05 Parking lamps mode
The parking lamps on both sides of
the vehicle are activated
This position is only suggested for
short stops
06 Low beam mode

The low beam headlamp position is
the standard position for driving with
headlamps turned on
07 Front fog lamps
In position 06 pull on the switch once
to turn on the front fog lamps
08 Rear fog lamps
In position 05 or 06 pull on the switch
twice to turn on the rear fog lamps
PPark

When leaving the vehicle also apply the
parking brake and, on inclines, turn the
wheels toward the curb
RReverse
Place the gear selector lever in reverse
only when the vehicle is stopped
NNeutral

The neutral position is used when towing
the vehicle or when using a conveyor type
car wash
DDrive
This position is the standard
driving position
SWITCHING GEARS

The gear selector lever allows you
to chose the transmission setting of
the vehicle
The vehicle can only be started while in
park (position P) or neutral (position N)

To move the selector leverout of park,
the ignition must be switched on and you
must step firmly on the brake pedal
TO ADJUST STEERING WHEEL POSITION
01 To extend or retract the steering wheel
move stalk forward or back
02 To raise or lower the steering wheel move
the stalk up or down
TO ADJUST WINDSHIELD WIPER SETTINGS
01 Rotate windshield wiper switch
counter-clockwise to 1 of 4 settings
0Off position
Slow intermittent wiping
Faster intermittent wiping
Constant slow wiping
Constant fast wiping
NOTE: The rain sensor in the windshield
controls the intermittent wiping settings.
02
You can press on the tip of the
adjustment stalk once to wipe
with washer fluid
STORING POSITIONS INTO MEMORY
Adjust the seat to the desired position
On the driver’s side adjust the steering
wheel and the exterior rear view mirrors
Press memory button "M"

Release memory button "M" and press one
of the memory position buttons within
3 seconds

To recall a previously savedposition
simply press and hold the memory
position button
NOTE: All the settings are stored with the
selected position. To recall a previously
saved position simply press the memory
position button (1, 2, or 3).
LUMBAR SUPPORT ADJUSTMENT & EXTERIOR MIRROR ADJUSTMENT
TO ADJUST OUTSIDE MIRRORS
Switch on the ignition
Select the mirror to be adjusted
01 Driver side mirror
02 Passenger side mirror
Adjust the mirror to desired position
using button 03
TO ADJUST LUMBAR (lower back)SUPPORT
Adjust lever back and forth until you are
comfortable with the adjustment
03
06
05
08
09
07
04
03
03
03
03
04
A
A
C
B
B
C
04
04
01
05
01
01
02
01
02
02
02
01
01
03
04
05
02
02
04
01
08
02
02 04
03
03
05
06
07
01
01
01
02
02

Other Mercedes-Benz Automobile manuals

Mercedes-Benz 190 E2.3 1985 User manual

Mercedes-Benz

Mercedes-Benz 190 E2.3 1985 User manual

Mercedes-Benz S-Class 2019 User manual

Mercedes-Benz

Mercedes-Benz S-Class 2019 User manual

Mercedes-Benz CLA User manual

Mercedes-Benz

Mercedes-Benz CLA User manual

Mercedes-Benz 320 SE User manual

Mercedes-Benz

Mercedes-Benz 320 SE User manual

Mercedes-Benz 2001 M-Class User manual

Mercedes-Benz

Mercedes-Benz 2001 M-Class User manual

Mercedes-Benz A-Class Series User manual

Mercedes-Benz

Mercedes-Benz A-Class Series User manual

Mercedes-Benz SLS AMG GT Coupe User manual

Mercedes-Benz

Mercedes-Benz SLS AMG GT Coupe User manual

Mercedes-Benz A-Class 2015 User manual

Mercedes-Benz

Mercedes-Benz A-Class 2015 User manual

Mercedes-Benz S-Class User manual

Mercedes-Benz

Mercedes-Benz S-Class User manual

Mercedes-Benz C-Class 2014 User manual

Mercedes-Benz

Mercedes-Benz C-Class 2014 User manual

Mercedes-Benz 2008 ML 320 CDI User manual

Mercedes-Benz

Mercedes-Benz 2008 ML 320 CDI User manual

Mercedes-Benz 560 SL 1986 User manual

Mercedes-Benz

Mercedes-Benz 560 SL 1986 User manual

Mercedes-Benz GLK-Class User manual

Mercedes-Benz

Mercedes-Benz GLK-Class User manual

Mercedes-Benz C CLASS 2020 User manual

Mercedes-Benz

Mercedes-Benz C CLASS 2020 User manual

Mercedes-Benz 2007 CLS 550 User manual

Mercedes-Benz

Mercedes-Benz 2007 CLS 550 User manual

Mercedes-Benz CLA 2022 User manual

Mercedes-Benz

Mercedes-Benz CLA 2022 User manual

Mercedes-Benz AMG GT S User manual

Mercedes-Benz

Mercedes-Benz AMG GT S User manual

Mercedes-Benz 2016 GLC User manual

Mercedes-Benz

Mercedes-Benz 2016 GLC User manual

Mercedes-Benz AMG GLE Coupe Series User manual

Mercedes-Benz

Mercedes-Benz AMG GLE Coupe Series User manual

Mercedes-Benz 420 SEL 1989 User manual

Mercedes-Benz

Mercedes-Benz 420 SEL 1989 User manual

Mercedes-Benz S-Class 2020 User manual

Mercedes-Benz

Mercedes-Benz S-Class 2020 User manual

Mercedes-Benz C-CLASS CABRIOLET User manual

Mercedes-Benz

Mercedes-Benz C-CLASS CABRIOLET User manual

Mercedes-Benz 2000 C-Class User manual

Mercedes-Benz

Mercedes-Benz 2000 C-Class User manual

Mercedes-Benz 2006 E 320 CDI User manual

Mercedes-Benz

Mercedes-Benz 2006 E 320 CDI User manual

Popular Automobile manuals by other brands

Mitsubishi LANCER owner's manual

Mitsubishi

Mitsubishi LANCER owner's manual

Cadillac 2001 Eldorado owner's manual

Cadillac

Cadillac 2001 Eldorado owner's manual

Volvo V70 SPORT owner's manual

Volvo

Volvo V70 SPORT owner's manual

Volvo S90 2020 quick guide

Volvo

Volvo S90 2020 quick guide

Fiat 1986 Panda Van Owner's handbook

Fiat

Fiat 1986 Panda Van Owner's handbook

PEUGEOT 207 CC user guide

PEUGEOT

PEUGEOT 207 CC user guide

Chevrolet COLORADO 2011 owner's manual

Chevrolet

Chevrolet COLORADO 2011 owner's manual

RADICAL SR8 owner's manual

RADICAL

RADICAL SR8 owner's manual

Abarth 595 Owner's handbook

Abarth

Abarth 595 Owner's handbook

Toyota AVALON HYBRID 2013 Quick reference guide

Toyota

Toyota AVALON HYBRID 2013 Quick reference guide

Toyota Prius HSD 2006 operating manual

Toyota

Toyota Prius HSD 2006 operating manual

Volvo STD 101-0001 Standard

Volvo

Volvo STD 101-0001 Standard

Kia 2014 rondo owner's manual

Kia

Kia 2014 rondo owner's manual

BMW 2008 3 Series owner's manual

BMW

BMW 2008 3 Series owner's manual

BMW 323i owner's manual

BMW

BMW 323i owner's manual

Hyundai BC3 owner's manual

Hyundai

Hyundai BC3 owner's manual

Jeep Wrangler 1999 Electronic Service Manual

Jeep

Jeep Wrangler 1999 Electronic Service Manual

Volkswagen 2013 Jetta quick start guide

Volkswagen

Volkswagen 2013 Jetta quick start guide

manuals.online logo
manuals.online logoBrands
  • About & Mission
  • Contact us
  • Privacy Policy
  • Terms and Conditions

Copyright 2025 Manuals.Online. All Rights Reserved.