Mercury Rollback 23 User manual

Mercury Rollback 23 Instructions
INTRODUCTION
The mercury Rollback 23 is an homage to the classic era of rollfilm: from the early 20th century
until the post-WWII industrial boom, medium format cameras made use of an ingenious,
ine pensive system for film advancing and frame counting. Numbers were printed on the film's
backing paper (something not possible with cartridge-based film systems). Precisely positioned
windows would reveal e actly the numbers that corresponded to the camera's frame size. Rather
than a comple geared system automatically advancing to the correct point for each shot, and
another comple geared system advancing a counter, the photographer would do the advancing,
peering through a red-tinted window. Whatever number appeared in the window was the current
frame's number. It was like using a magical window that revealed the inner workings of the
mysterious Film Camera. Well, because Mercury Works is all about magic windows, we chose to
revive this system in a 3D printed variant. Finally you can actually make use of those numbers
that are still, to this day, printed on the back of every reputable roll of 120 film. Yes, they are
really there: take a look!
It should be noted that this back is neither simple nor cheap to manufacture, and in most cases,
you're probably better off with one of the e cellent metal, geared-advance Graflok 23 backs
available on the used market from Grafle , Mamiya, or Horseman. However, those with a
penchant for more manually-driven photography and magic windows will appreciate the Mercury
Rollback. For some, depending on local availability of vintage backs, it may be cost effective as
well, given that our two models represent two fairly rare film sizes (most vintage metal backs are
6 7).
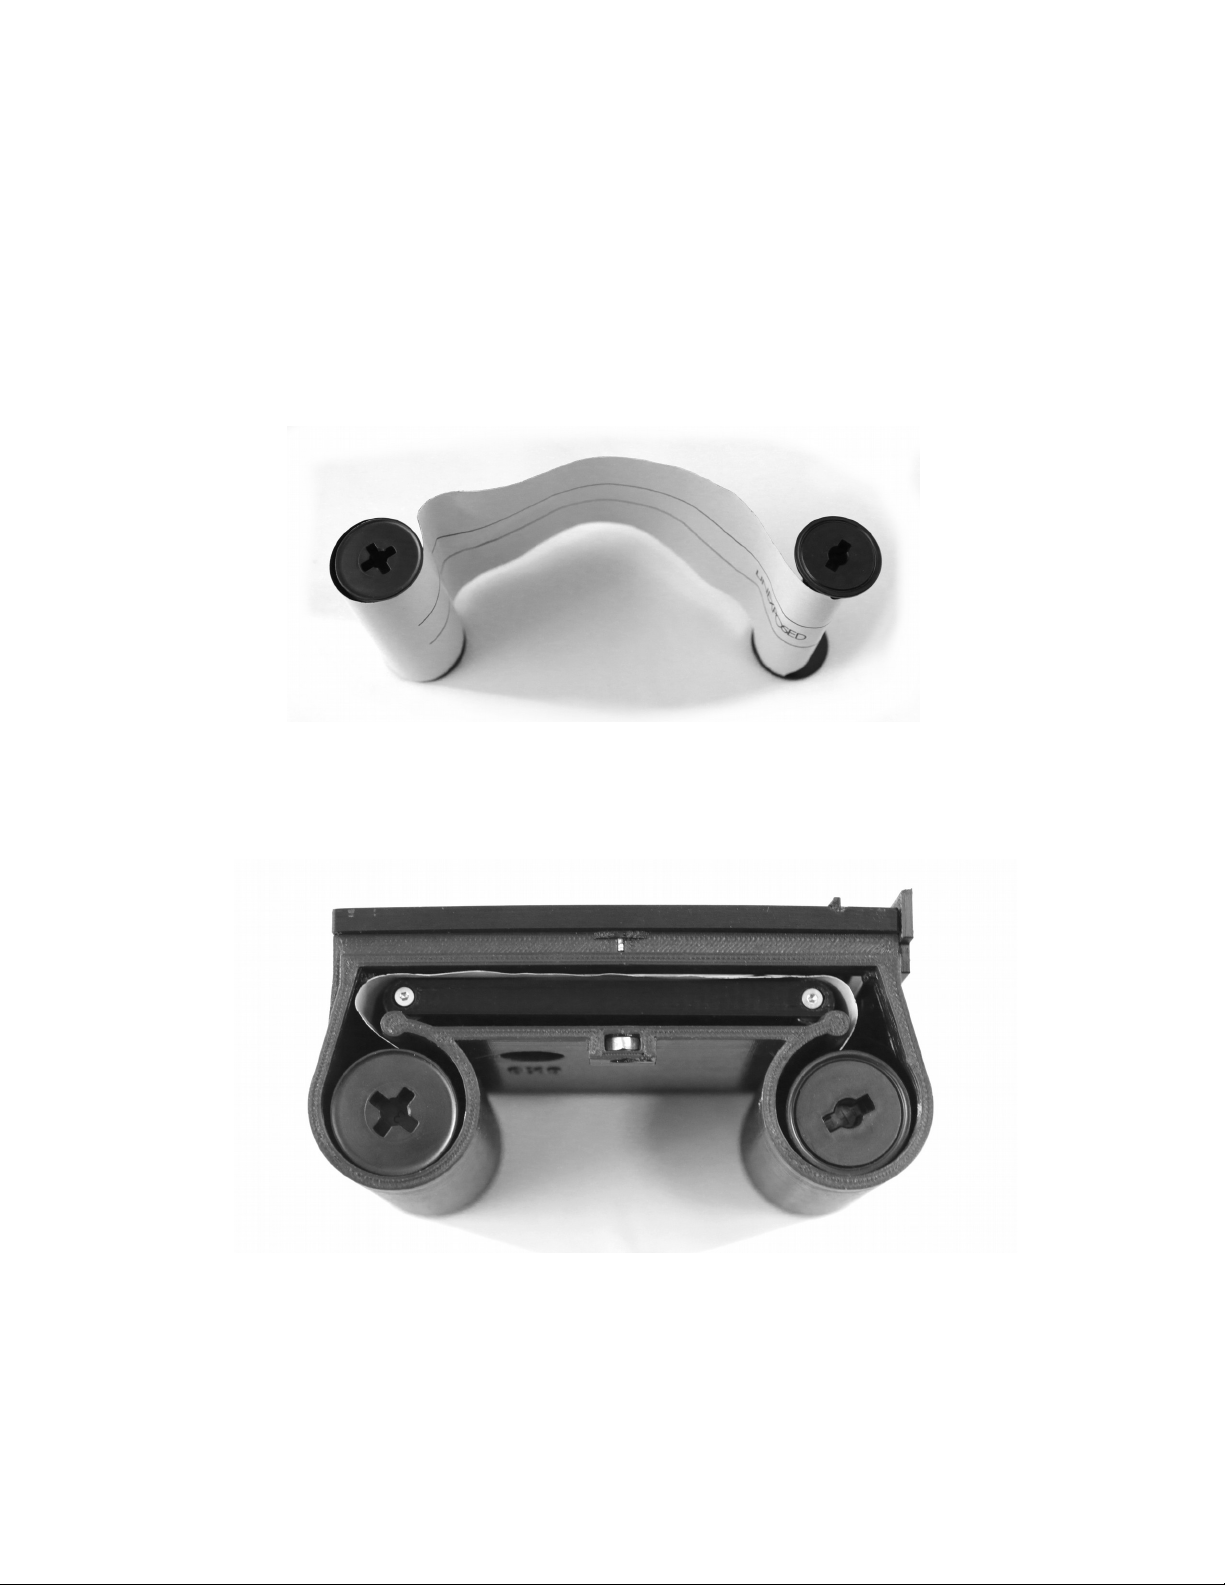
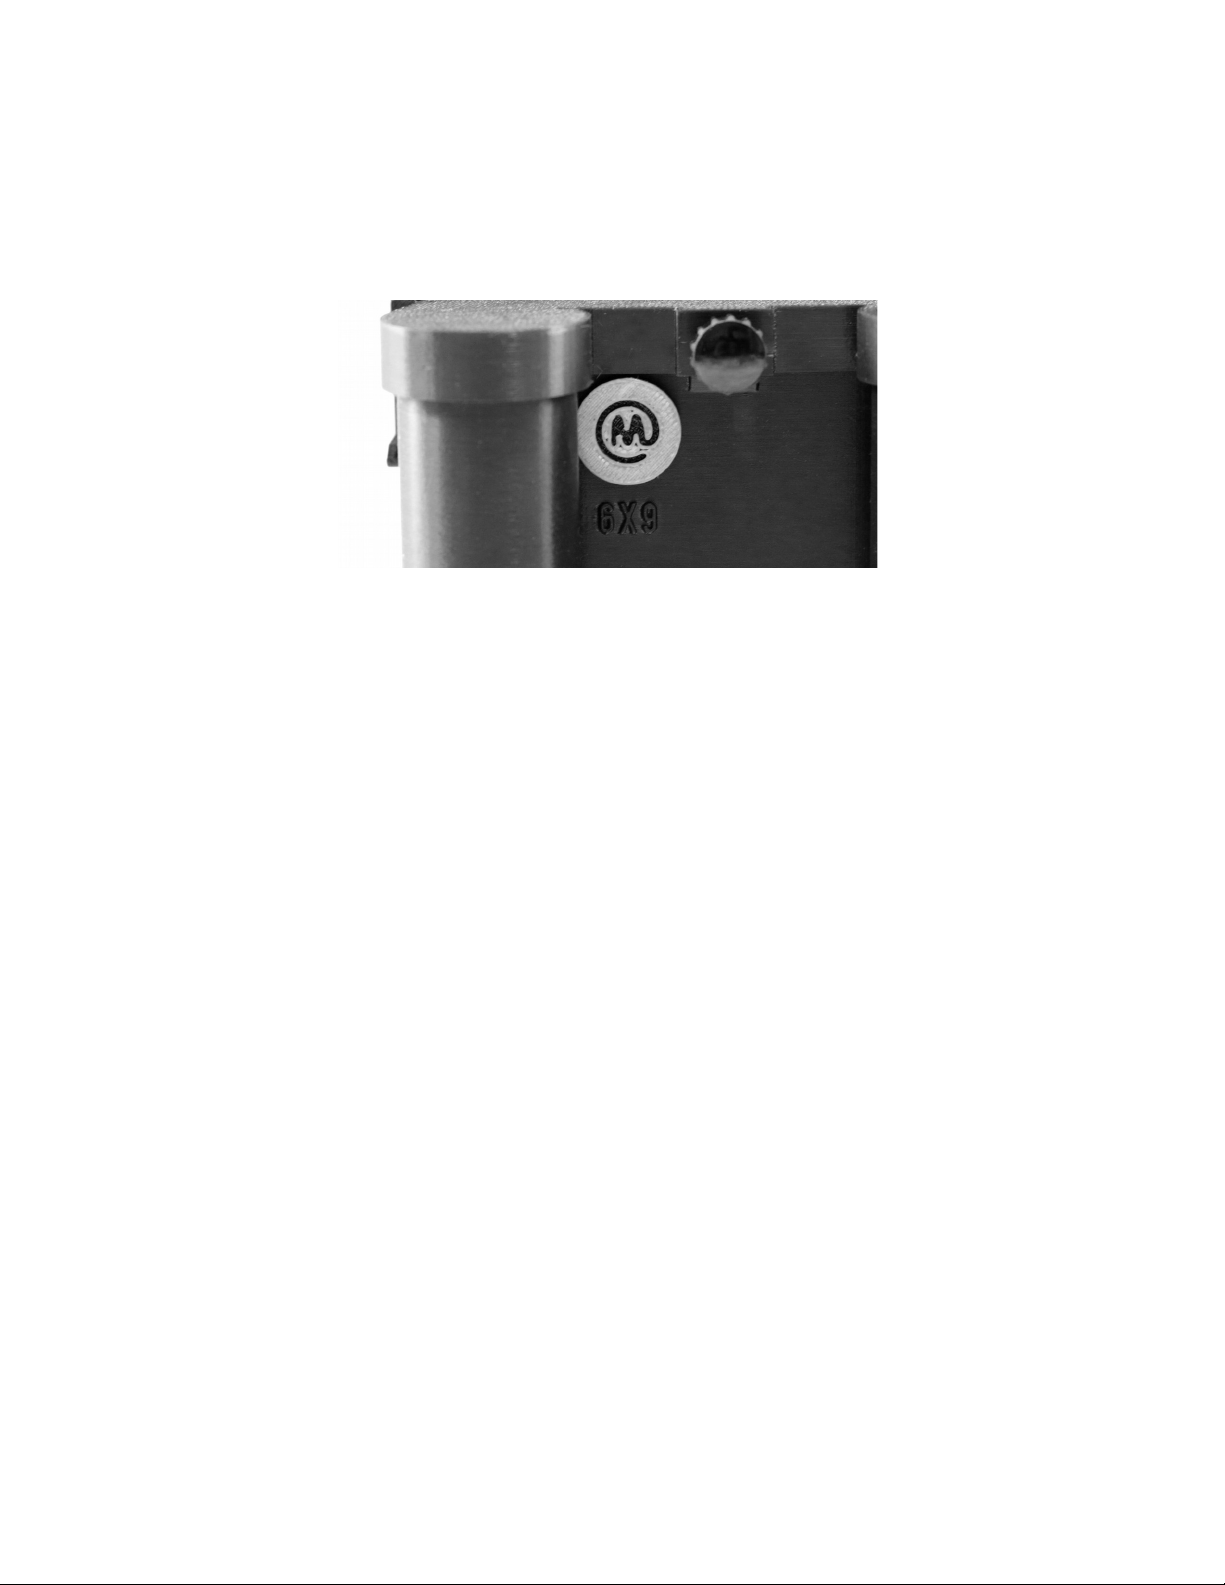
Our Rollback comes in two versions: 6 9 and 6 6. Operation is identical between the two. Note
that neither version contains a darkslide system. This is the Rollback's greatest limitation. This
means that you will not be able to change lenses or film backs once you have advanced your film
to the first frame, until you finish the roll. Plan accordingly, intrepid photographer!
Like many of the best things in life, there may appear to be a lot of steps in what follows, but
operation is actually rather intuitive. It is important to carefully read these instructions the first
time you use the back. After that, you will probably find operation to be quite simple.

LOADING (this can be one in sub ue light)
1. Remove the Mercury Rollback Cap from the top of the unit and remove any film spools that
are inside. To load a roll of film, you'll need to unroll a bit of the backing paper and tape it to
the empty takeup spool while it is still outside of the Rollback. The film should be oriented
as follows. Note that the takeup spool will turn counter-clockwise. We recommend inserting
the end of the backing paper through the spool's spindle and then taping it with a piece of
tape. When attaching to the takeup spool you should always keep pressure on the fresh film
roll, as it tends to unravel when pressure is released.
2. Keeping the film orientation as above, insert the two spools into their receptacles in the
Rollback. The film itself (or actually, backing paper) should be wound around the pressure
plate (which should be loose inside the Rollback shell; if it is pressed to the front, simply
push it back into the main cavity).
3. Be sure that the film has slid all the way down to the bottom of the shell. Check this on the
film side of the Rollback, sliding the film in the direction of the arrows below if necessary. If
you can't grip the film, you can hold a piece of tape, using it to grip the film and pull it down.

4. The goal is to slide the film down so that it can be pushed, along with the pressure plate, until
the front section of the film back. Don't do this until the film is flush with the top of that
section. Then push the entire pressure plate forward until it “locks” into place in the forward
section, pushing the film into position. It can sometimes happen that the bottom of the
pressure plate, which can't be reached with your fingers, doesn't snap as easily in place as the
top. In this case you can insert a long, flat object such as a small screwdriver or table knife to
press the bottom into position. You can also depending on the Foam Plate (Step 5) to press
the bottom into place, but we recommend doing this before moving on to the ne t step.

5. Insert the Foam Plate into the cavity that the Pressure Plate previously occupied. Depress the
full length of the foam strips with your fingers before inserting, or it won't fit. Be
particularly careful of the very bottom of the foam strips, which are inserted first. Failing to
push the foam down and into the cavity could cause their adhesive to fail. Once Foam Plate
has been safely started, it will typically press all the way in without problem. It is all the way
in when its top is flush with the top of the Rollback shell.
6. Insert the included Film Crank into the top of the takeup spool. Slowly
and evenly, wind the film by turning in a counterclockwise direction.
The backing paper should advance evenly. It takes some pressure to
advance, but it should not be jammed. If it is, remove the foam plate and
check that the Pressure Plate is properly seated in the center of the opening and that the
backing paper/film is in the proper position. Assuming that the film is advancing, only turn
the crank for about one rotation (slightly more is okay). Optionally, you can advance the film
until the starting arrow becomes visible in the location indicated below. The crucial element
is simply that you ensure that everything is advancing properly, but that you don't wind too
much onto the takeup spool.
Start Arrow

7. Place the Rollback Cap on the top of the shell. You are going to press it down over the top,
but as you do so you need to hold the Advance Knob on top and turn it slightly as you press
down until the winder blade on the inside locks into the top of the takeup reel. Once you feel
it lock into place, you can press down all the way. You'll know the cap is in its proper place
when the hole in its center back lines up with the threaded nut in the shell.
8. Once the cap is in place, turn the
Advancing Knob a small amount while
watching the film side of the back to
ensure that it is still advancing
smoothly. Note: the Advancing Knob
will sometimes have slack. This is not
a problem: just turn it until it becomes
firm; then it should advance normally.
It takes a fair amount of pressure to
advance; this is normal. However, if
the film appears to be jammed and not
moving, do not force it, or you will
break your winder.
9. To hold the Cap in place and ensure that it doesn't accidentally pop off during use, screw the
included Thumbscrew into the threaded hole in the back. Do not overtighten this screw. It's
purpose is to prevent the Cap from lifting; it can cause damage if screwed too tight.

10. Mount the Rollback onto your Mercury camera. Ensure that your lens is in place and your
shutter is closed. You will now e pose the film to the inside of your camera, so you will not
be able to change lenses or film backs from this point on without e posing at least one frame
of film. We recommend not removing your lens or back until your entire roll is e posed and
has been removed from the back.
11. Turn the Advance knob (always in the direction indicated: counterclockwise) while watching
the film's backing paper through the red window. You will need sufficient light to see it
clearly. You can use a dim flashlight if you have a hard time seeing the markings on the
backing paper—this is especially recommended when you use the Rollback for the first time.
Advance the knob until you see some markings (usually several circles) which indicate that a
frame number is approaching, then slow down and look for a number “1”. When “1” is
visible in the red window, you are on frame 1. You are now ready to shoot!
1

Place the Window Cap over the red window to block any stray light. You can remove this cap at
any time to check your frame number or to advance to the ne t frame, but it is a good idea to keep
it in place when you don't need to see through the window, especially if shooting in bright
daylight.

SHOOTING
Shooting with the Rollback is easy. Just remember to advance to the ne t frame after you have
e posed your current image. We recommend doing this immediately, to protect your e posed
image in case of any accidental second e posure, lens removal, back removal, etc. Remember
that because the Rollback 23 doesn't have a darkslide system, you must not remove your lens,
open your shutter, or remove your back until you have e posed your entire roll of film and
unloaded it.
To advance to the ne t frame, simply remove the Window Cap and
turn the Advance Knob slowly (do not apply e treme, sudden
pressure, or you may break your winder), while watching the
backing paper through the red window. When the ne t frame
number appears, stop advancing. Your ne t frame is queued up.
UNLOADING
Once you have e posed your final frame (#8 in the 6 9 back, #10 in the 6 6 back), turn the
Advance Knob until the backing paper disappears completely from the red window, then a little
further, until you feel no more resistance.
You may now unscrew the thumbscrew and pop off the Rollback Cap. Turn the back upside down
to empty your takeup spool from the back. Pull the backing paper tight around the spool and seal
it closed. Put somewhere dark and safe for developing.
To remove the Foam Plate, in order to prepare to load another roll of film, you may need to insert
an object, from the front, into the hole at the top of the plate, in order to pry it up and out of the
shell. We recommend a key or thin screwdriver.
Table of contents