Merrithew At Home SPX Standard User manual

Please review this important assembly, safety and warranty information about your new
Merrithew™equipment and keep it handy for future reference.
OWNER’S MANUAL
en français
voir page 21
en español
ver página 41
For video assembly
instructions, visit
merrithew.com/
eq-assembly
At Home
SPX®Reformers
Standard and Elevated Models
At Home SPX Reformers Owner’s Manual2
User Guidelines
When used appropriately, this equipment can facilitate many
Pilates exercises safely and effectively. However, care and
caution must be taken as there are some inherent dangers
when using any exercise equipment, especially when spring
resistance is involved.
For inexperienced or rst-time users, this equipment
should only be used under the supervision of a
This manual includes general guidelines for setup and usage.
To get the most out of this equipment, Merrithew™offers
instructional DVDs and manuals. Personalized training is
offered through our Licensed and Host Training Centers.
merrithew.com for more information.
SPX REFORMER OWNER’S MANUAL
CAUTION IMPROPER USE OF EXERCISE EQUIPMENT MAY CAUSE SERIOUS BODILY INJURY.
TO REDUCE RISK, PLEASE READ THE FOLLOWING:
Before starting any exercise program, consult a physician.
pain, feel faint, have difculty breathing or experience
Before using equipment, read and follow the safety
instructions in this manual and obtain thorough instruction
from a qualied trainer. Use equipment for intended
exercises only.
Do not use if equipment appears worn, broken or damaged.
For optimal performance, allow at least two feet of clear
space on either side of a Merrithew Reformer. Before
moving a Reformer, ensure ropes do not drag, springs are
attached and carriage is secure.
Ensure the equipment is properly adjusted for your
Keep body, clothing and hair free from all moving parts.
This equipment is to be used by one person at a time.
Do not allow children to use or be around equipment
The maximum weight limit of an At Home SPX Reformer
WARNING: As with any athletic activity, the use of
exercise equipment involves risk of injury, damage
and/or death.
By choosing to use Merrithew equipment, you assume
responsibility for that risk, not the organizations that
IMPORTANT!
This manual contains important assembly, safety and
warranty information. Read the manual carefully
before using your new equipment and keep the
manual on hand for future reference.
UNSAFE OR IMPROPER USE OF THIS EQUIPMENT
It is impossible to predict every situation and
condition that may occur while using this equipment.
Merrithew™
safe use of any exercise equipment that cannot be
predicted or avoided.
PLEASE DO NOT ATTEMPT TO ASSEMBLE ON YOUR
OWN. SOME OF THESE STEPS REQUIRE TWO PEOPLE.
Merrithew recommends cautious assembly and
Care and Cleaning
For day-to-day cleaning, wipe vinyl surfaces using warm
water with mild soap, and rinse with clear water. Ensure
soap does not leave an oily residue, or make surfaces slippery.
Clean channels, rails and rollers daily with a damp cloth.
CAUTION: We do not recommend using chemical-
based products. Chemical-based cleansers used around
placing a non-slip mat under the machine.
IMPORTANT
Replace all springs every 24 months and spring clips
every 12 months, or as needed within that period.
FAILURE TO PERFORM RECOMMENDED SAFETY
CHECKS, OR USING EQUIPMENT WITH IMPROPERLY
ADJUSTED, BROKEN OR WORN PARTS, COULD RESULT

3
STOP! Before getting on, ensure the carriage stopper is inserted and at least one spring is securely attached to the gearbar.
Standing or Kneeling Positions
The carriage is a moving platform. Special attention must
1. Before beginning, ensure carriage stopper is inserted and
2.
may be used to prevent slipping. (See optional accessories,
page 10).
3. Place other foot carefully onto the wooden standing platform.
Never attempt to get on the SPX Reformer by stepping on
the wooden standing platform. Never stand with both
Secure Hands and Feet
When placing hands or feet on the footbar, shoulder rests or
headrest, ensure they do not slip. Gripper mats may be used.
Sitting or Lying on a Box
Supine Position (lying on back)
1. Sit on Reformer carriage, legs off to one side.
2. Reach hand nearest the footbar across your body and
place it onto the shoulder rest.
3. Tuck opposite shoulder under arm and roll onto back
4. Bring legs up, place feet on footbar, lower arms by sides.
Mechanical Safety Check
Proper maintenance and timely replacement of your equipment or component parts is your responsibility.
Conduct a regular inspection of the following:
Daily
Wipe rails with a damp cloth using water only.
Clean xed and oating rollers using a soft, damp cloth.
Ensure carriage stopper is fully inserted in one of the
Ensure shoulder rests are fully inserted on carriage.
Ensure footbar is securely fastened.
Ensure chrome adjuster bar is securely seated in cradle.
Inspect retractable rope system to conrm ropes are in
position and threaded bolts of the cleats and pulley blocks
are secure.
Clean upholstery after each use, using a soft cloth and
gentle cleanser.
Weekly
Ensure all nylon locknuts, spring bolts and spring balls
Ensure feet are securely attached with the at side
Ensure footbar and chrome adjuster bar are
Ensure pulley post star knobs are securely tightened.
Inspect rollers for excessive wear and replace as needed.
Sit on carriage and test rollers, listening for any thumping
Inspect all springs for wear and damage and replace
immediately as needed.
Clean rails and rollers with a damp cloth.
Monthly
Check ropes and straps for wear and replace as necessary.
Check that spring bolts and spring balls are securely
fastened.
Check all spring clips to ensure proper fastening.
Check wear on star knobs threads and replace as necessary.
Yearly Replace all spring clips.
Every Two Years Replace all springs.
SAFETY & USAGE
1
3
2
4

At Home SPX Reformers Owner’s Manual4
Front End
1 2 5 6 7 18 19179 10 12 13 14 15 161183 4
PART IDENTIFICATION
At Home SPX®Reformers
1Star Knobs 1/2"
2Accessory Board Receptacles
3Easy-Roll Wheels
4Wooden Standing Platform
5Gearbar Slots [g. B]
6Springs [g. B]
7Footbar
8Chrome Adjuster Bar
91/4" Socket Head Cap Screws
10 Spring Sleeves
11 Footbar Adjustment Cradles
12 Spring Holder [g. E]
13 Small Swing Arm Bars
14 Large Swing Arm Bars
15 Aluminum Rails
16 Carriage
17 Adjustable Headrest
18 Shoulder Rests
19 Double Loop Straps [g. F]
20 Serial Number Sticker
21 Star Knobs 3/8" [g. C & G]
22 Traditional Ropes
23 Traditional Pulleys
24 Stand Up Pulley Springs
25 Pulleys
26 Gearbar [g. B]
27 Rope Guide Tubes [g. C]
28 5/8" Bronze Bushings [g. D]
29 Floating Rollers [g. D]
30 Fixed Rollers [g. E]
31 Rubber Carriage Stopper [g. A]
32 Carriage Stopper Positions [g. A]
33 Stopper Plates [g. G]
34 Pulleybar Receptacles [g. G]
Note: Parts may not be exactly as shown.
At Home SPX Reformer Standard model (pictured)
measures 10" tall (25.4 cm)

Back End
15
32
31
30
2220 21 24 2523
12
21
27
6
5
26
29
28
33
34
19
21
Required Tools
Phillips Screwdriver
1/4" (6 mm) Hex Key (supplied)
1/8" (3 mm) Hex Key (supplied)
Open-End Wrench 1/2" x 7/16"
5
B
A
C D
E F
G
At Home SPX Reformer
Elevated model
(not pictured) measures
All other features and parts
At Home SPX Reformers Owner’s Manual6
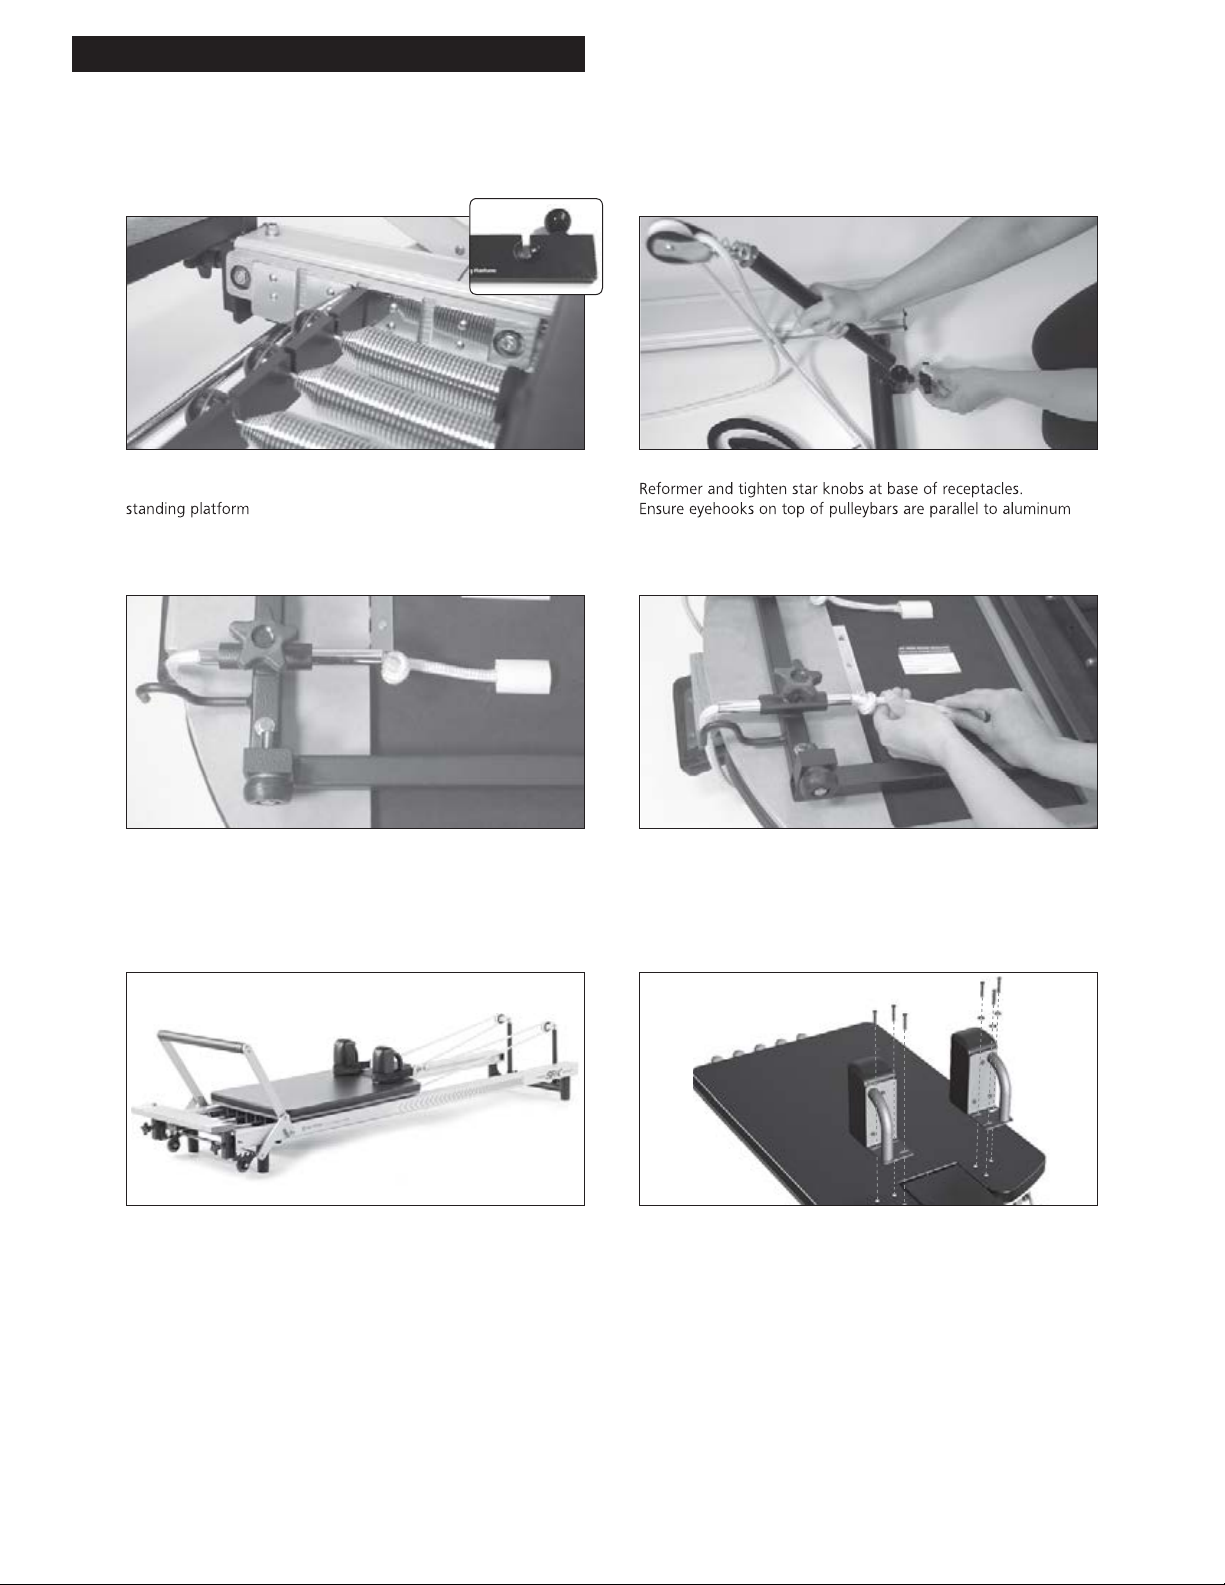
Assembling the SPX Reformers
STOP! Read these instructions completely before beginning or refer to our online assembly video at: merrithew.com/eq-assembly
1. Insert gearbar [26] into middle gearbar slot [5] with the
caution sticker and concave indentations facing wooden
[4].
2. Insert pulleybars [23] into receptacles [34] at rear of
rails [15] and that star knobs are fully tightened so there is no
movement of the pulleybars.
3. With two people, tilt Reformer onto one side.
As one person steadies Reformer, the second person inserts
free ends of ropes [22] through back of pulleys [25], then
through rope guide tubes [27] underneath carriage.
4. Tie a knot leaving a 6-8" tail to prevent ropes from passing
back through rope guide tubes.
5.Return Reformer to upright position. 6. Position shoulder rests directly over pre-drilled screw holes.
ASSEMBLY & SET-UP
7
7. Ensure shoulder rest handles are positioned to the outside of
the shoulder rest frames.
8. Place 1/4" black washers over the shoulder rests screw
9. Insert 1/4" x 1-1/4" screws through washers and into top of
screw holes.
10. Use the 1/8" Allen key provided to tighten, ensuring the
shoulder rests are secure.
11. To determine correct length of ropes, set carriage stopper in
second hole from footbar. Engage a spring [6] into the gearbar [5]
ensuring carriage [16] does not move.
12. Place double loop straps [19] on carriage so D-rings on straps
line up with back of metal plate of shoulder rests.
Subtle adjustments can be made to length of ropes by sliding
rope guide tubes [27]. Secure by tightening star knobs [21].
At Home SPX Reformers Owner’s Manual8
2
1
3
5 26 34 1
Setting Up the Reformer
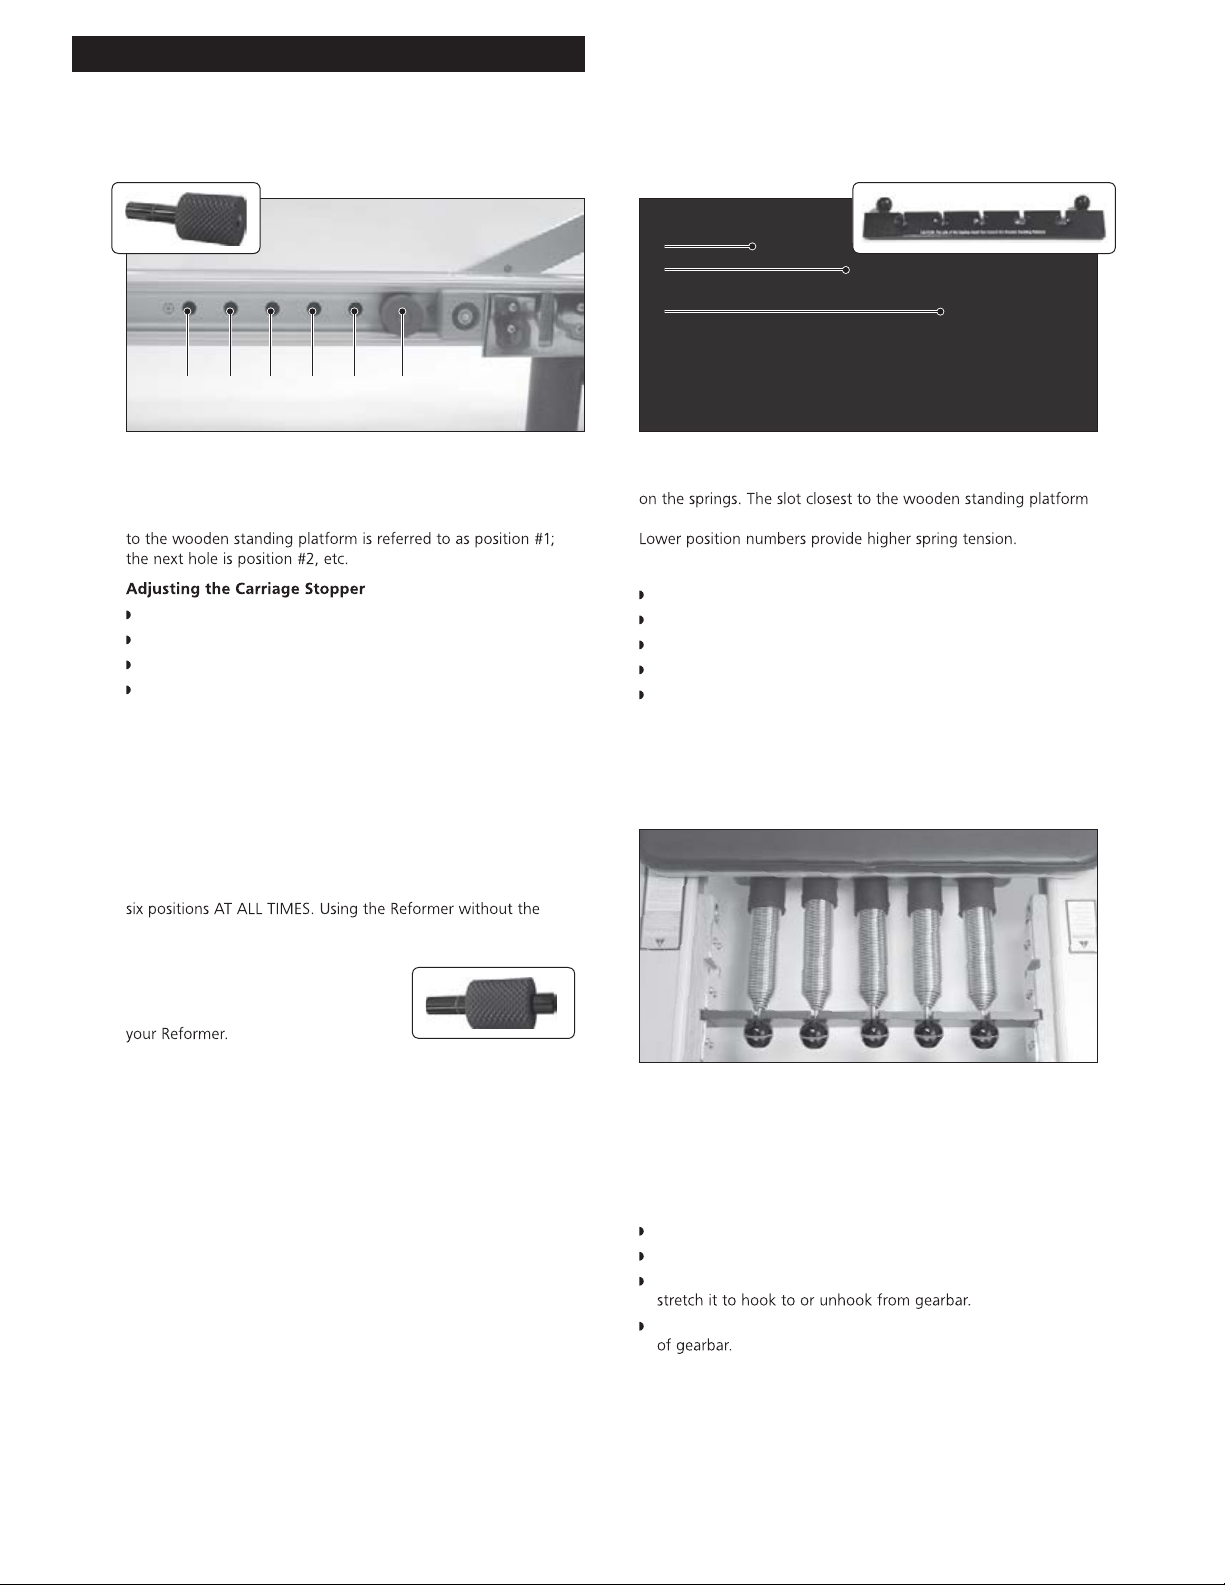
Carriage Stopper
The carriage stopper position determines how close the carriage
slides in toward the wooden standing platform and dictates the
range of motion required of the body’s joints. The hole closest
Do not sit on carriage while adjusting.
Remove all springs from gearbar.
Insert carriage stopper in one of six positions.
Be sure carriage stopper is completely
inserted in the hole and is not loose.
The carriage stopper position should usually be selected so that
when lying supine (on your back), with heels on the footbar,
there is a 90° angle of exion at the hip joint when the carriage is
against the carriage stopper. If injury, disease or other limitations
restrict exion at the hips or knees, adjust the carriage stopper
by placing it farther out. Adjustments can also be made for the
exercise being performed.
NOTE: The carriage stopper must be inserted in one of the
carriage stopper may cause damage to the gearbar assembly,
rollers or spring holder.
CAUTION: Replace carriage stopper as
required. Using a broken, damaged or
defective carriage stopper may damage
Gearbar
The gearbar position determines the amount of initial tension
is position #1; the next is position #2; the next is position #3.
Adjusting the Gearbar
Do not sit on carriage while adjusting.
Remove all springs from gearbar.
Place gearbar in desired position.
Ensure gearbar slides fully into slots.
Ensure caution message and concave indentations
face toward footbar.
Position gearbar relative to the carriage to create initial tension
on the springs, i.e. the gearbar should not be in position #3 if the
carriage stopper is in position #1 or #2 as there will not be any
spring tension.
Springs
Replace all springs every 24 months.
The number of springs attached to the gearbar determines the
total amount of resistance. SPX®Reformers are equipped with
four 100%-tension springs, and one 50% spring.
Adjusting Springs
Take care when attaching and detaching springs from gearbar.
For safety, place one hand on gearbar.
Firmly grasp spring (not the ball on the spring) and
Ensure ball end rests securely in concave indentations
ASSEMBLY & SET-UP
9
1 2 3 4
Headrest
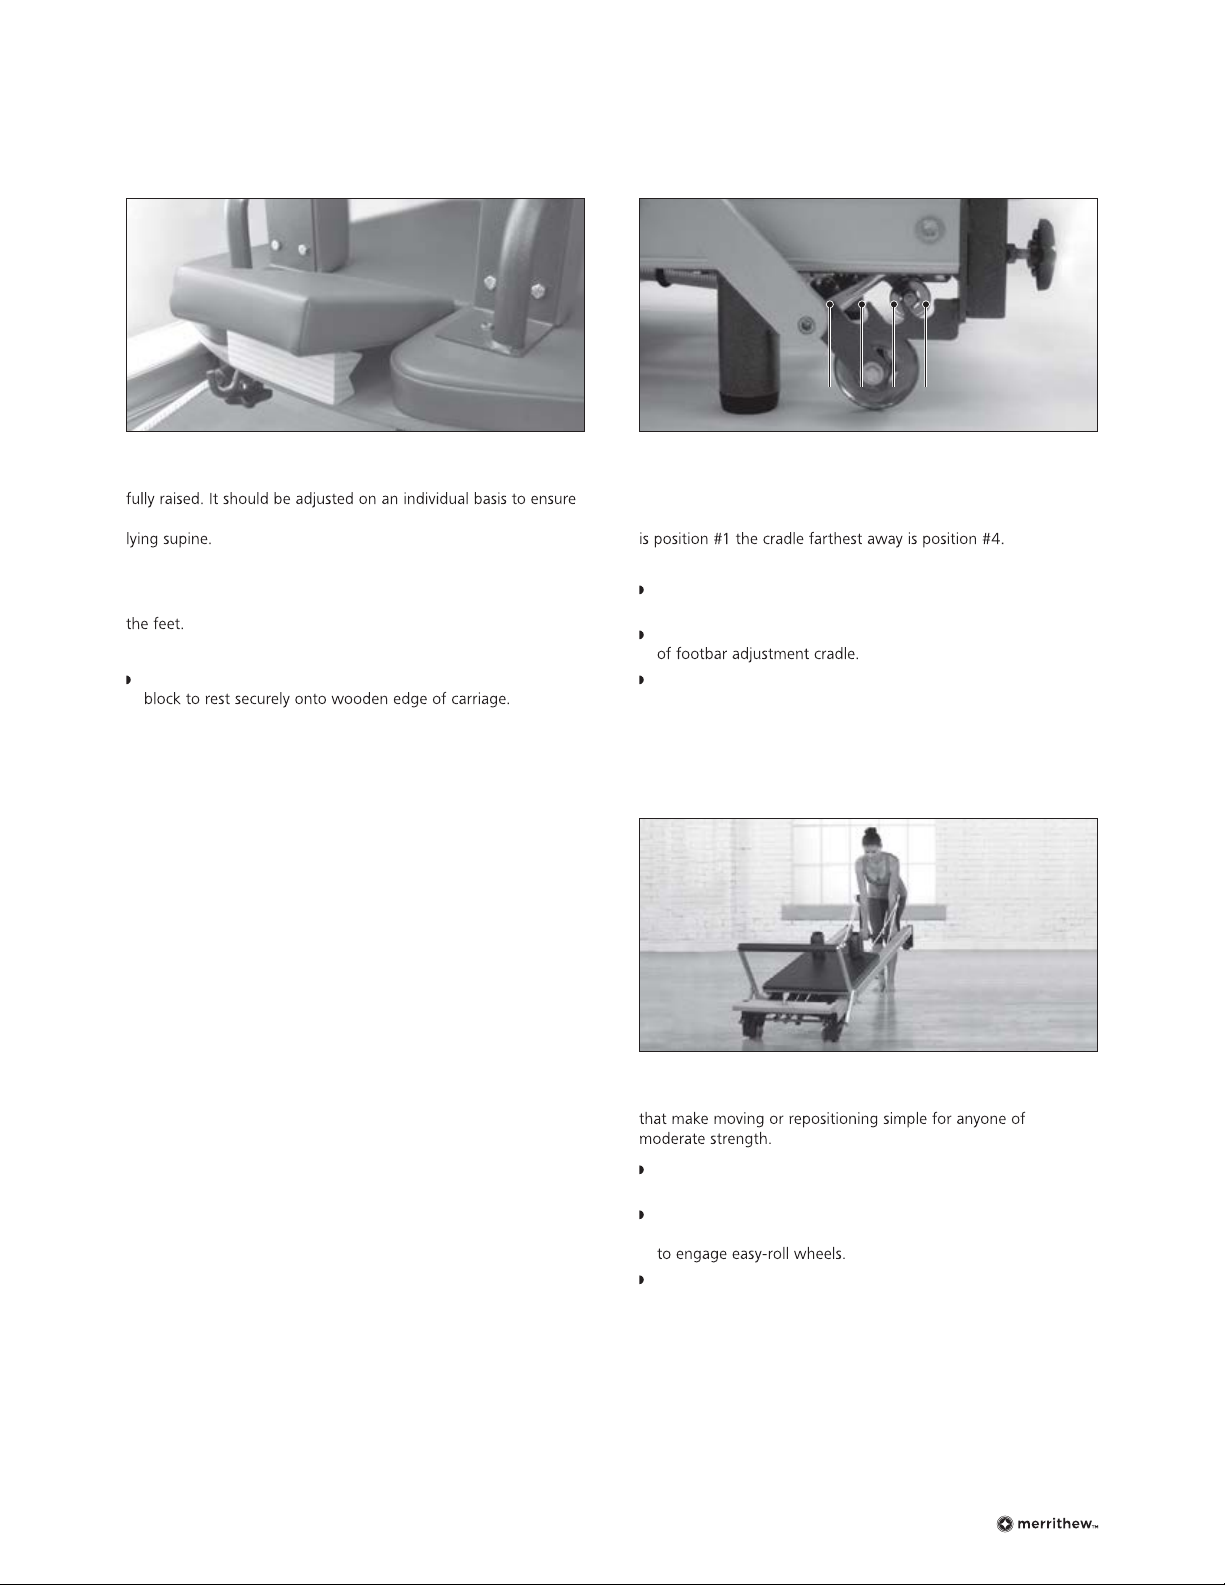
The headrest adjusts to three positions: at, half-raised or
neck and shoulders are comfortable and tension-free when
In exercises where the hips are lifted higher than the shoulders,
headrest should be at – even when beginning from a supine
position. In some exercises it is raised to provide a brace for
Adjusting the Headrest
With no weight on headrest, lift it and hinge adjustment
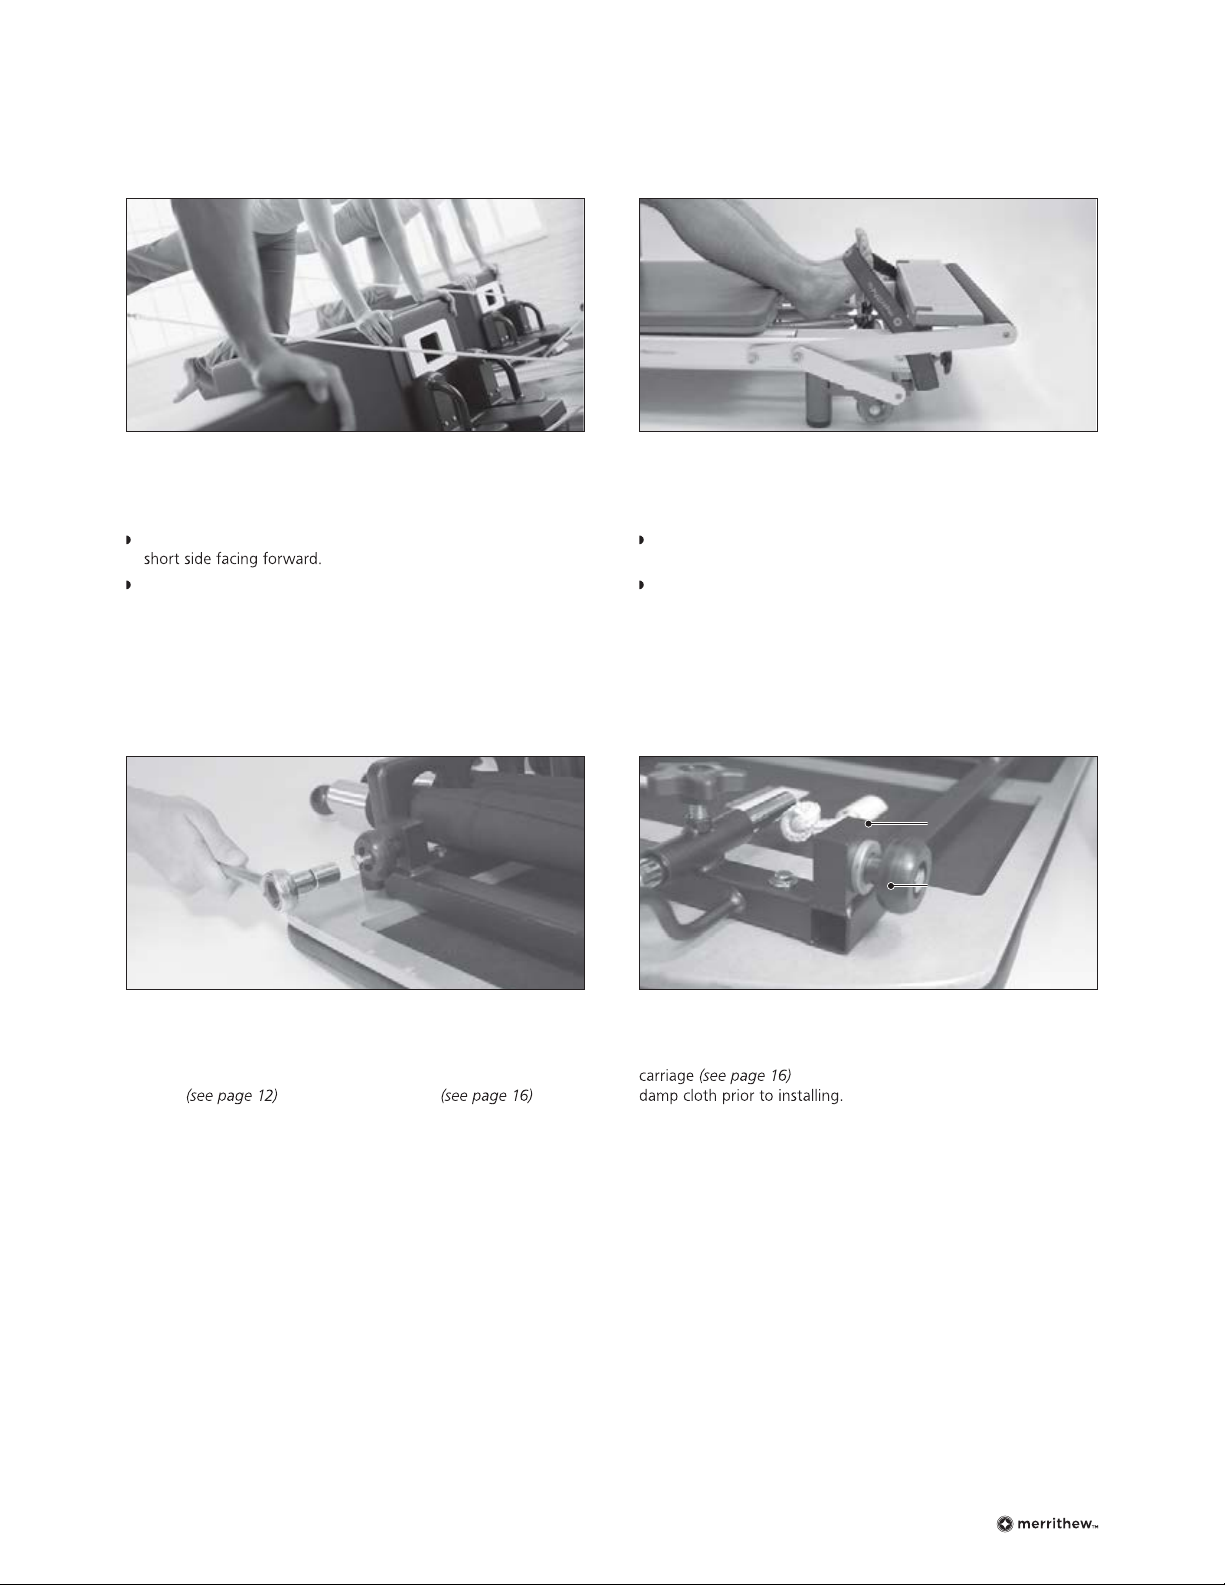
Moving Reformers
The front end of all Reformers have a set of easy-roll wheels
Ensure springs are attached so carriage is secure, and
ropes do not drag.
Stand at the back of Reformer, grasp the horizontal
metal bar, and gently lift. Lift Reformer high enough
Keep Reformer at waist-height or lower. Do not lift higher
as this may result in damage to oor surface.
Footbar
The footbar can be set at four different heights to facilitate
various Reformer exercises and to accommodate physical
differences and abilities. The cradle closest to the gearbar
Adjusting the Footbar
The footbar can be adjusted while standing beside the
Reformer or sitting on the carriage.
Gently pull footbar up and lift chrome adjuster bar out
Lift or lower footbar to the desired height and place chrome
adjuster bar securely into nearest footbar adjustment cradle.
NOTE: It is highly recommended that the Reformer be placed on
some type of non-skid material to prevent slipping and/or damage
to ooring or carpet.

At Home SPX Reformers Owner’s Manual10
Optional Reformer Accessories
Padded Platform Extender
Extends the wooden standing platform to accommodate a variety
of exercises, providing added comfort and safety. Can also be
used on the carriage to bring the pelvis and spine to a neutral
position when sitting.
Remove footstrap (if applicable) and lower footbar completely.
Place desired springs in gearbar.
Place padded platform extender in a stable position on rails
ensuring it is rmly in place against the wooden standing
platform and does not move.
Gripper mats may be used.
NOTE: Always step onto or stand directly in the center of the
padded platform extender to avoid tipping.
Gripper Mats
Versatile non-slip mats are handy to increase traction and prevent
slipping or sliding.
Roll-Up Pole, Metal
Perfect to provide added scapular awareness, it can be used
Maple Roll-Up Pole also available.
Mat Converter
Adding a mat converter covers the springs and creates a safe,
stable surface for Matwork.
Installing the Mat Converter
Remove footstrap (if applicable).
Place footbar down and disconnect springs.
Slide carriage back against pulleybars, ensuring ropes
Insert mat converter ensuring it is pressed completely
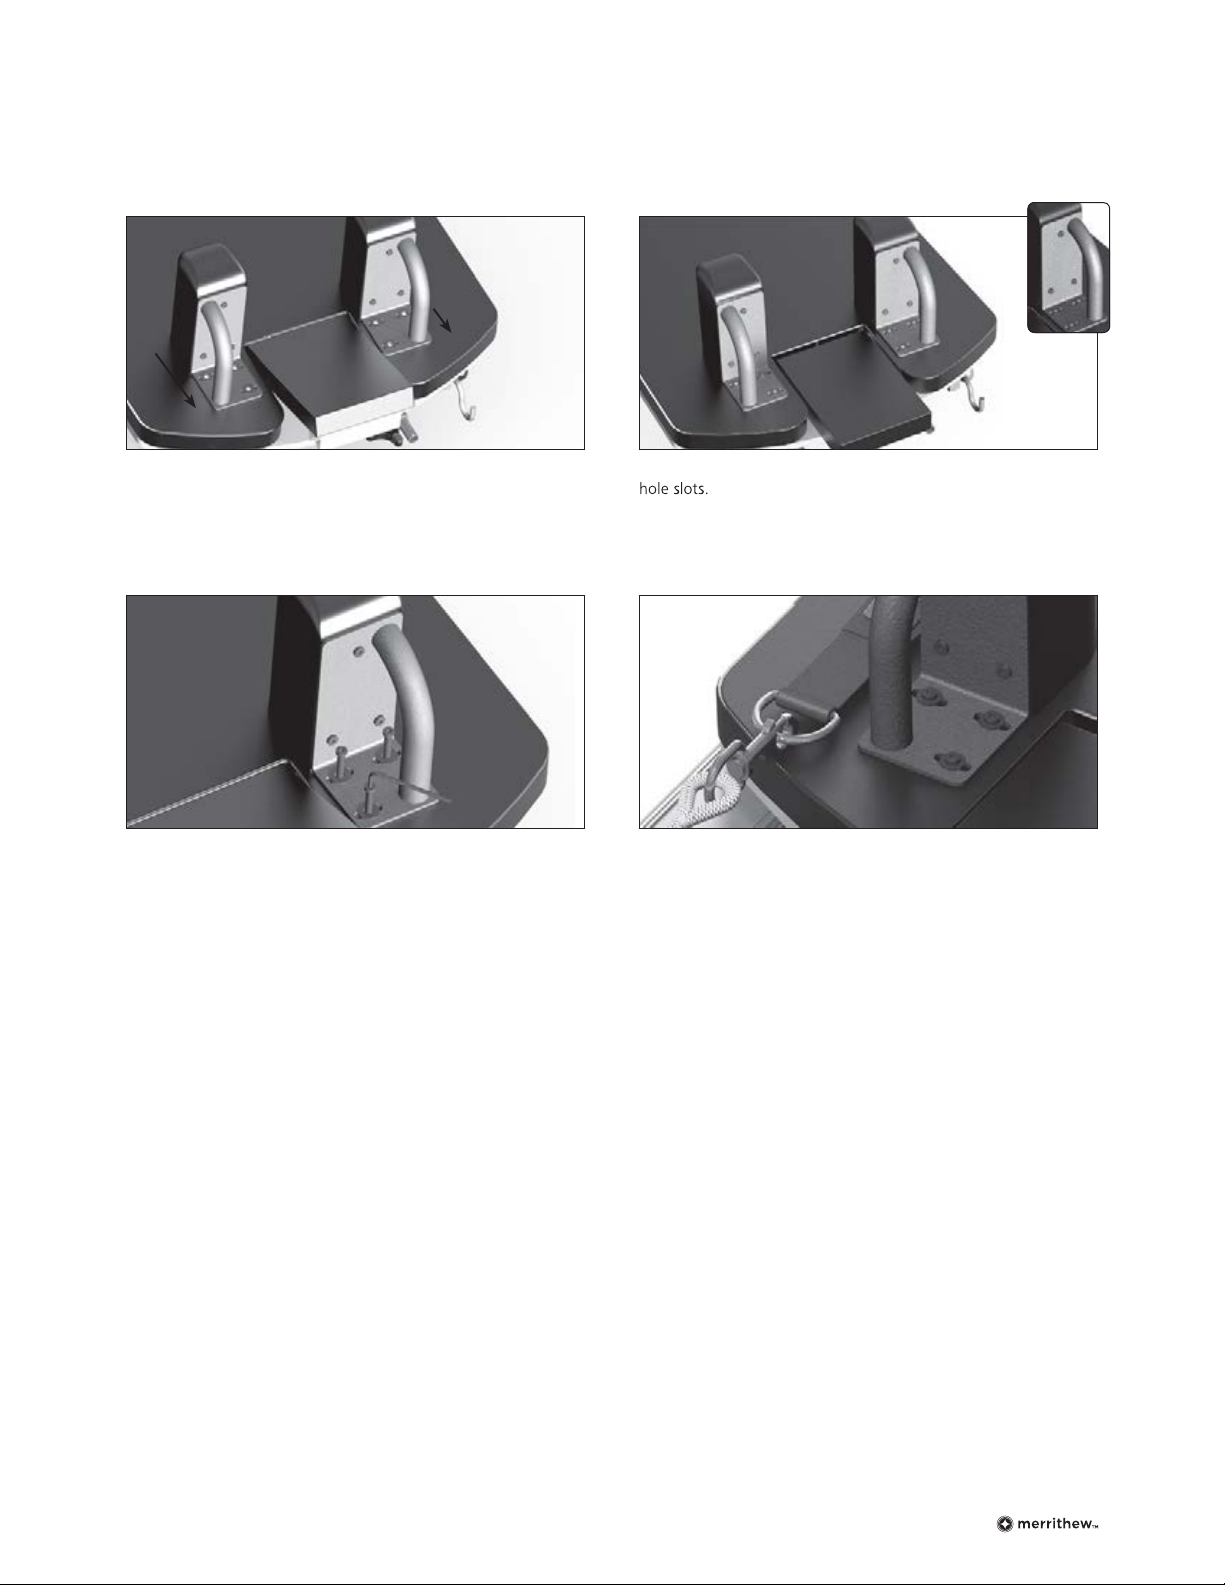
Accessory Boards
Optional accessory boards can be added to SPX Reformers to
further increase exercise options.
Jumpboard™and Cardio-Tramp™for plyometric and
Rotational Diskboard™allows greater range and asymmetrical
movements when working in controlled internal and
Soft footbar accommodates sensitive feet.
Installing Accessory Boards
Lower footbar to lowest position.
Insert accessory board into receptacles in wooden standing
platform and ensure it slides down fully.
Tighten star knobs located under wooden standing platform.
NOTE: Never use an accessory board without ensuring the
SET-UP OF ACCESSORIES & REPLACEMENT PARTS
11
Floating Roller
Bronze Bushing
Replacement Parts
Fixed Rollers
With carriage removed from rails, attach xed roller with the
aid of a ratchet and 12 mm (15/32") socket attachment. Ensure
xed rollers are securely fastened. Follow directions on removing
carriage and replacing carriage .
Clean new rollers with a soft, damp cloth prior to installing.
Floating Rollers
With carriage removed from rails, slide oating rollers
into bronze bushings. Then follow directions for replacing
. Clean new rollers with a soft,
CAUTION: Never use oil lubricants as they may damage rollers.
Traditional Spring Package, 5 Springs ST-05057
High-Precision Spring Package, 5 Springs ST-05058
Power Up Spring Package, 5 Springs ST-05098
Carriage Stopper ST-06012
Fixed Rollers, pair ST-06013
Floating Rollers, pair ST-06014
Foam-Grip Handles, pair ST-02007
Footbar, SPX (Double) ST-05085
Footstrap ST-02018
Gripper Mat ST-02022
Maple Roll-Up Pole ST-06008
Mat Converter, SPX – Black ST-02075
Mat Converter, SPX – Blue ST-06279
Padded Long Spine Straps, pair ST-02016
Padded Platform Extender, SPX – Black ST-02074
Padded Platform Extender, SPX – Blue ST-06271
Reformer Box, SPX – Black ST-02000
Reformer Box, SPX – Blue ST-06273
Soft Reformer Loops, pair ST-02009
Shoulder Rest Pads, pair – Black ST-02023
Shoulder Rest Pads, pair – Blue ST-05140
Spring Sleeve ST-05070
Spring Clip ST-02020
Traditional Ropes, pair – Black ST-06289
Traditional Ropes, pair – White ST-06016
Visit merrithew.com/shop/replacement-parts for these replacement parts and optional accessories
Reformer Box
Reformer boxes can be used to facilitate or modify exercises.
Positioning the Reformer Box
Place Reformer box on top of carriage with either long or
Box can be placed over or against shoulder rests
in the “short box” position.
Footstrap
Footstrap is included with purchase of a Reformer box.
Attaching the Footstrap
Loop footstrap around wooden standing platform and adjust
the length by attaching spring clip to one of the three D-rings.
Footstrap should be adjusted so that there is tension with
knees slightly exed. It is important to keep feet hooked
securely under footstrap.

At Home SPX Reformers Owner’s Manual12
Removing the Carriage
1.To remove carriage, remove pulleybars and place on the oor,
on either side of the aluminum rails.
3.Carefully slide carriage out of the aluminum rails keeping
carriage level until completely free of rails. Turn carriage over
ensuring rollers are secure and do not come in contact with
NOTE: Requires two people.
2.Using a Phillips screwdriver, remove stopper plates.
4.Place carriage face-down on the ground.
NOTE: Ensure carriage is placed on a soft surface that will not
Required Tool
Phillips Screwdriver
MAINTENANCE & REPLACING PARTS

13
Fixed Cube Nut
Spring Anchoring Bar
Removing the Springs
1.With 7/16" wrench, hold xed cube nut in place.
3.Remove spring from spring anchoring bar.
5.Repeat steps 1 to 4 on remaining springs.
2.Using second 7/16" wrench on opposite side of spring
anchoring bar, loosen nylon locknut. This may require exerting
NOTE: Discard used nylon locknuts and washers. (New nylon
locknuts and washers are provided with new springs.)
4.Pull spring out of the spring holder.
6.Remove spring sleeves from old springs and slide onto
Required Tools
2x Open-End Wrenches
1/2" x 7/16" (13 mm x 11 mm)
At Home SPX Reformers Owner’s Manual14
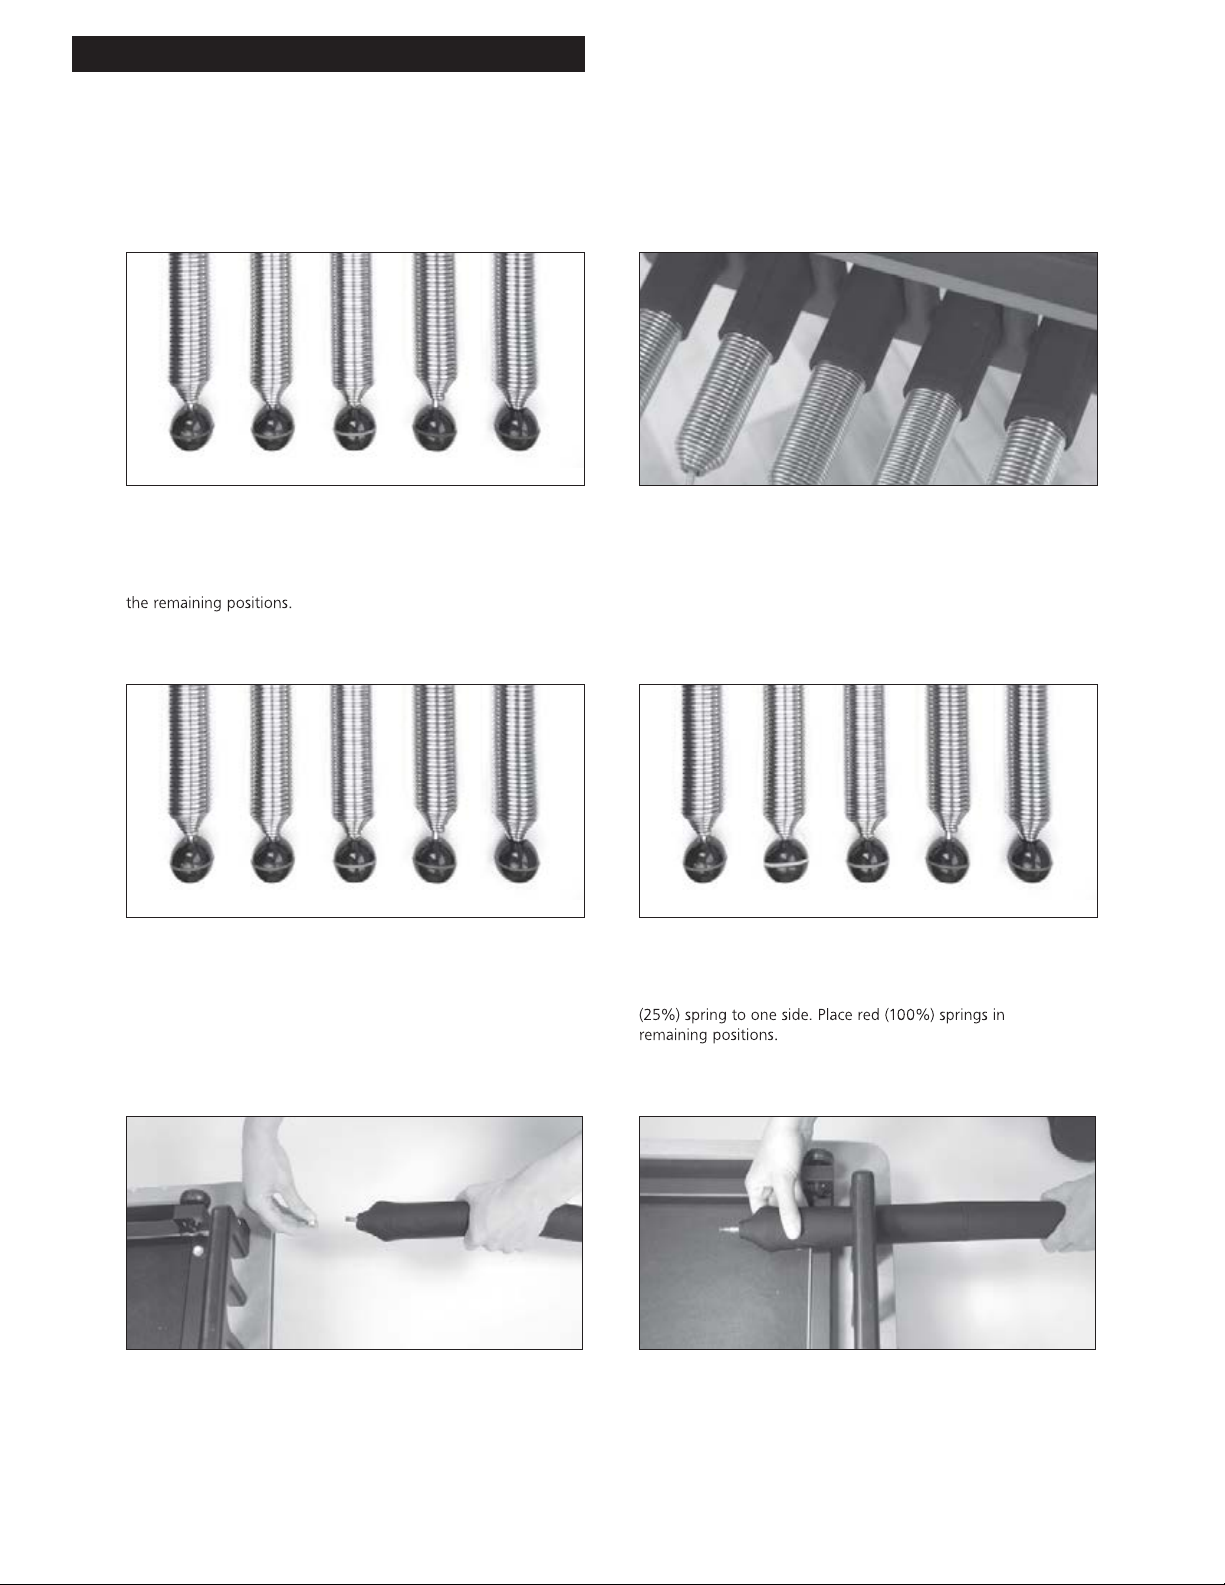
black blue red black black
red red blue red red red white blue red red
Replacing the Springs
Power Up Spring Package
3 × 125%, 1 × 100%, 1 × 50% arrange as follows:
Place the red (100%) spring in the center, and the blue
(50%) spring to one side. Place black (125%) springs in
Traditional Spring Package
4 × 100%, 1 × 50% arrange as follows:
Place the blue (50%) spring in the center and two red (100%)
springs on either side.
NOTE: Spring sleeves are required for proper function
of the Reformer if it features a molded spring holder.
High-Precision Spring Package
3 × 100%, 1 × 50%, 1 × 25% arrange as follows:
Place the blue (50%) spring in the center, and the white
1.Starting with spring #1 from your spring package, remove the
nylon locknut and washer from bolt end of spring.
2.Start at one end of the carriage. Thread bolt end of spring #1
through rst hole of molded spring holder.
Determine desired replacement spring package.
Springs balls are color-coded. Black = 125%, Red = 100%, Blue = 50%, White = 25%
NOTE: SPX®Reformers arrive with the Traditional Spring Package.
MAINTENANCE & REPLACING PARTS

15
3.Insert spring bolt through the corresponding hole on spring
anchoring bar.
5.Hold xed cube nut in place with 7/16" wrench.
Using second wrench, tighten the new nylon locknut.
CAUTION: Do not overtighten.
7.Repeat steps 1 to 6 for remaining springs.
4.Add washer and thread nylon locknut onto spring bolt.
NOTE: Do not reuse old nylon locknuts or washers.
6.Both nylon locknut and xed cube nut should be snug against
the spring anchoring bar. Once secure, give the nylon locknut an
additional 1/4 turn clockwise.
CAUTION: Do not overtighten.
8.Afx the sticker provided with your spring replacement
package to the underside of the Reformer carriage.
within that period.
Required Tools
1x Phillips Screwdriver
2x Open-End Wrenches
1/2" x 7/16" (13 mm x 11 mm)
At Home SPX Reformers Owner’s Manual16
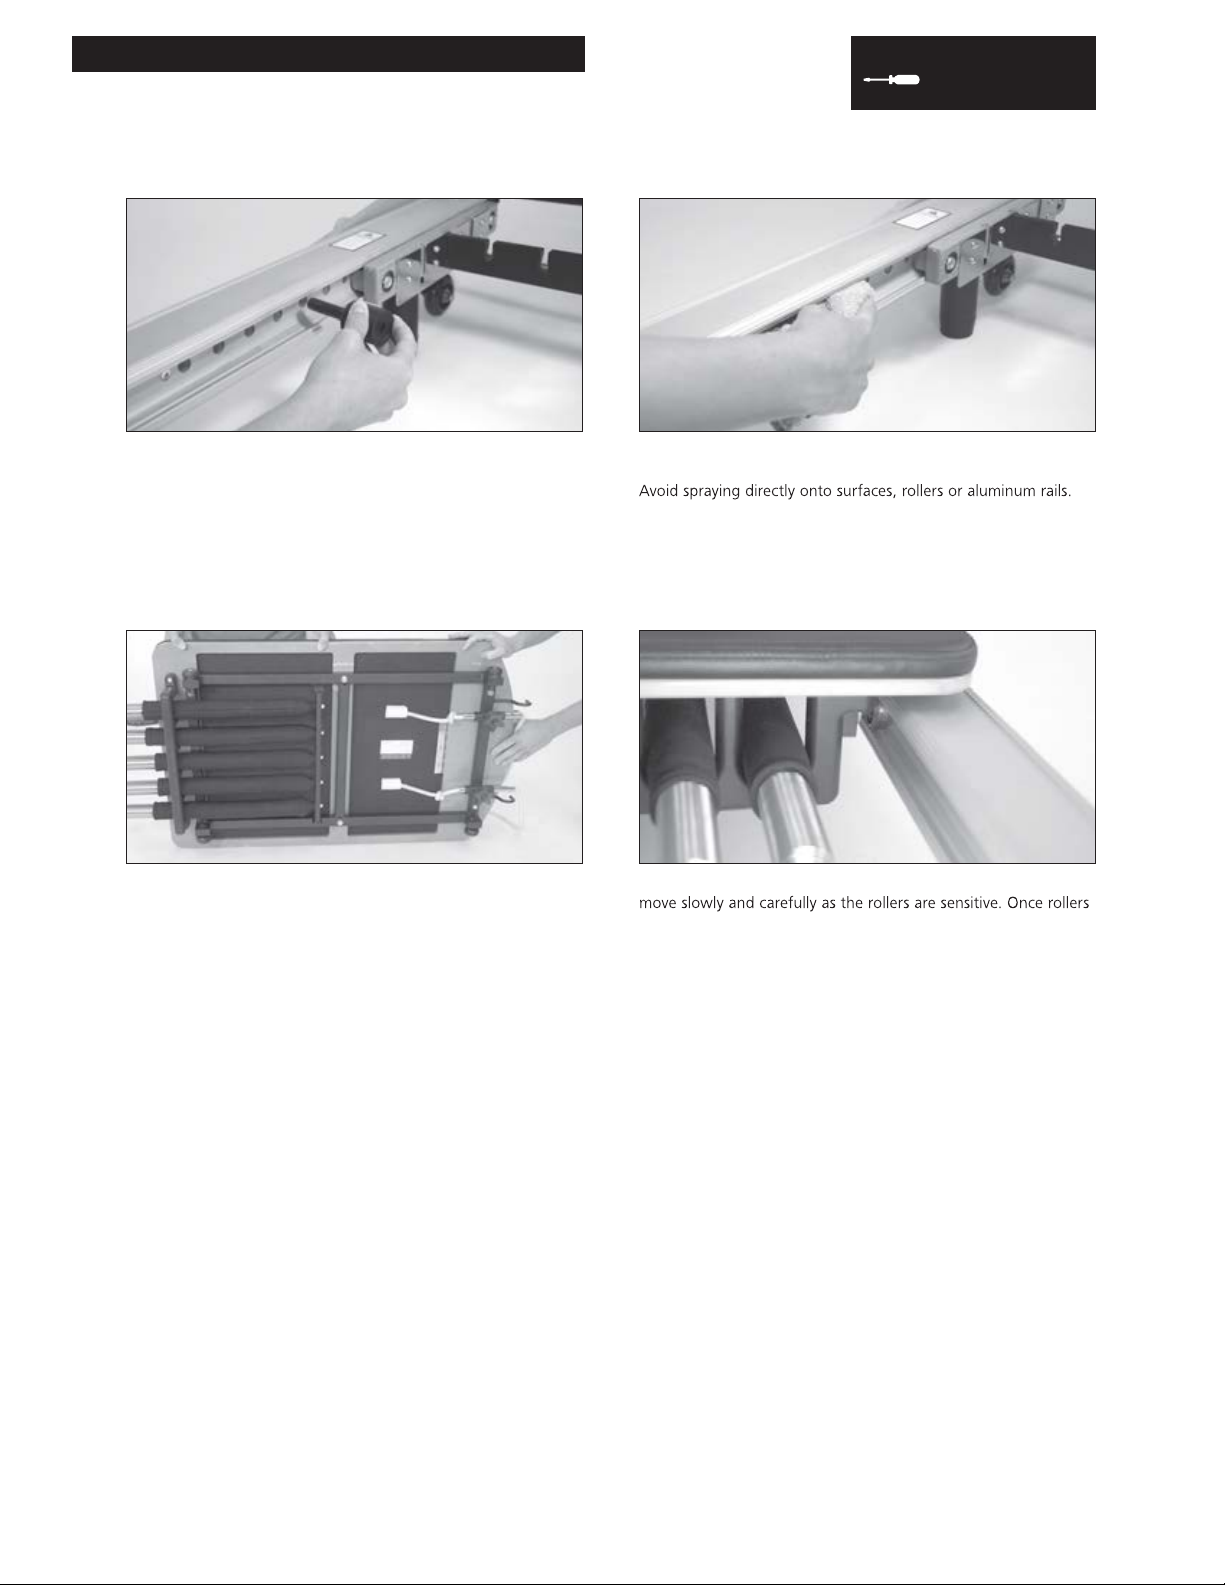
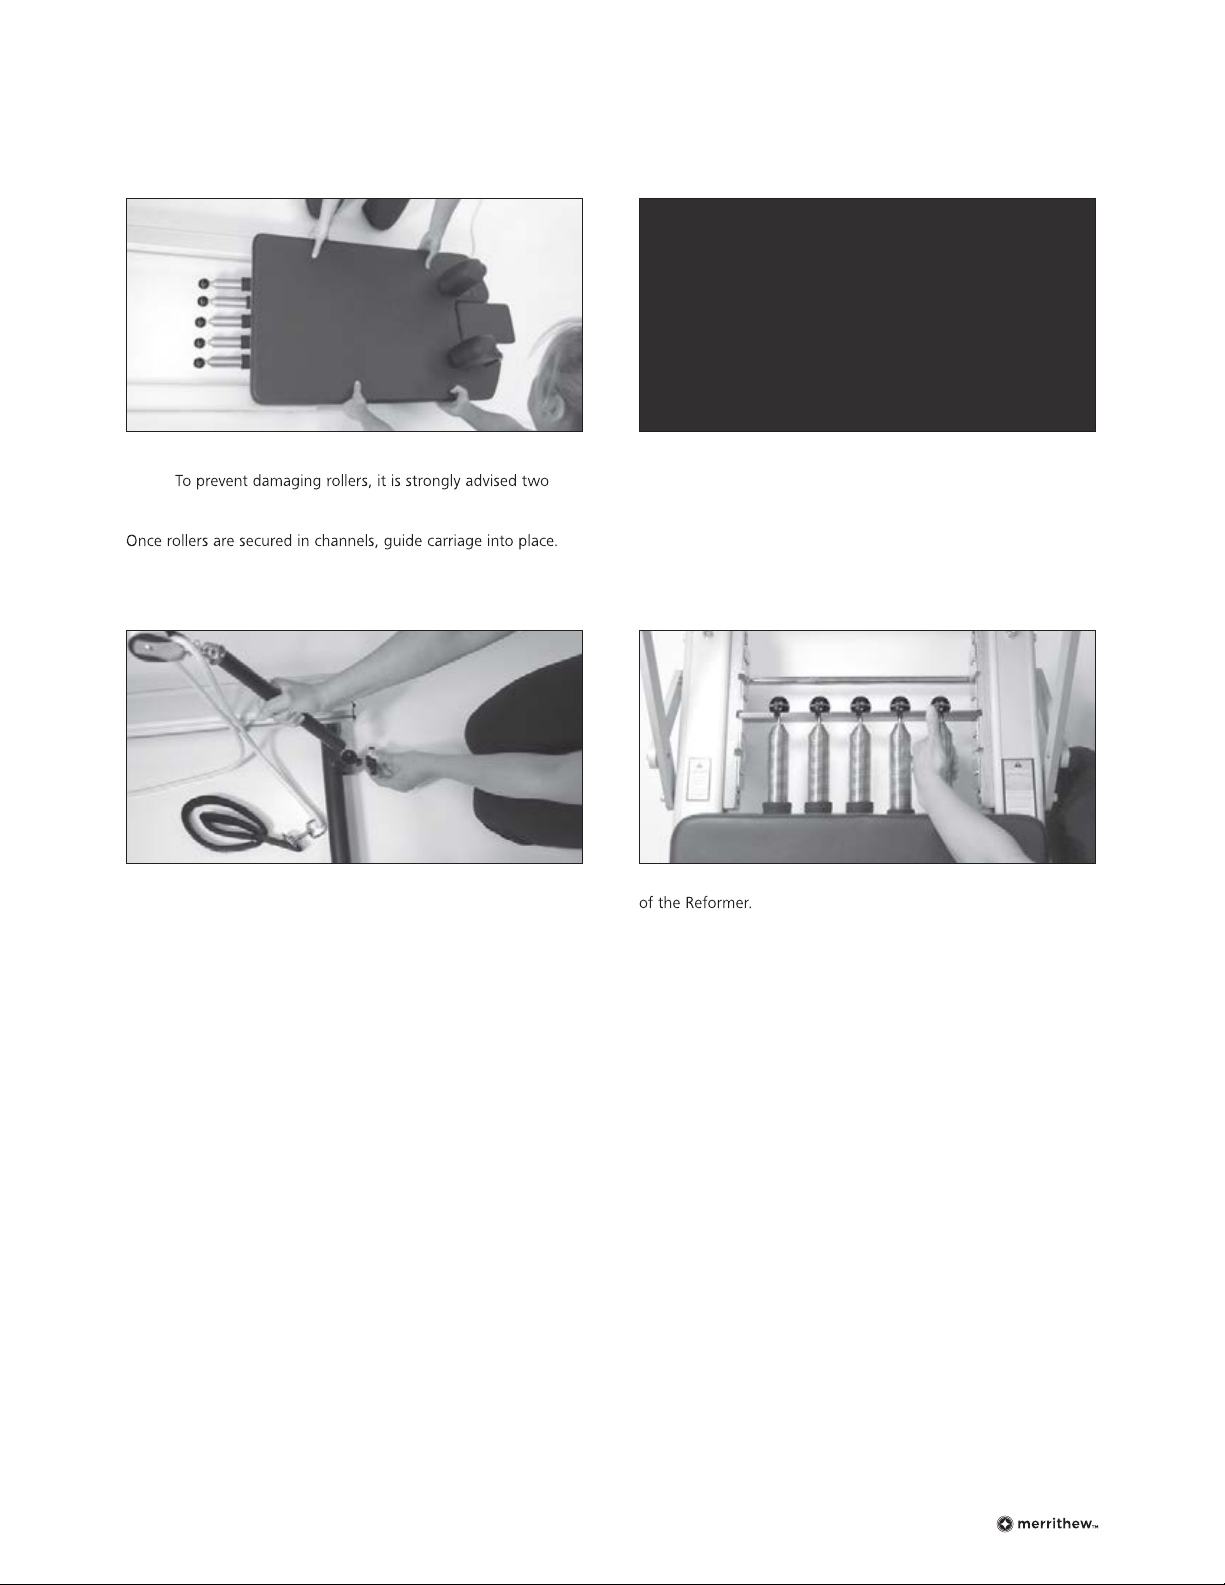
Replacing the Carriage
3.Ensure that pulleybars are still on the oor on either side of
aluminum rails. Carefully turn carriage to its side while ensuring
rollers never come in contact with the oor. Now, prepare for
another person to take hold of opposite side of the carriage.
1.Remove carriage stopper.
4.CAUTION: When guiding carriage straight into aluminum rails,
are within rails they are protected.
2.Wipe inside of aluminum rails with a dry cloth to remove
dust or dirt. If using a damp cloth, spray cleaner onto cloth rst.
Insert carriage stopper in one of six positions.
Required Tool
Phillips Screwdriver
MAINTENANCE & REPLACING PARTS
17
5.Slide rollers into c-channels.
NOTE:
people hold carriage. One person guides rollers carefully into
channels while the other supports opposite side of carriage.
7.Insert pulleybars into receptacles at rear of Reformer and fully
tighen star knobs so pulleybars are secure. Ensure eyehooks on
top of pulleybars are parallel to aluminum rails.
8.Replace gearbar and engage springs before resuming use
6.Using a Phillips screwdriver, replace stopper plates.
At Home SPX Reformers Owner’s Manual18
THE FINE PRINT
Warranty
Merrithew™warrants that all new equipment is free of manufacturing defects in workmanship and materials, subject to the terms below.
It is the purchaser’s responsibility to notify the Company of any change of contact information. This ensures, that in the unlikely event
This warranty applies to equipment only:
While it remains in the possession of the original purchaser and
If claims are made within the part-specic warranty period
If upgrades are made as required by Merrithew
This warranty shall be null and void if:
Equipment failure is a result of improper assembly,
The equipment is used for any other purpose other than as
intended, or is stored or used outdoors, or in environments
without adequate climate/humidity controls
This warranty does not cover damage to the nish of any equipment
nor shipping charges, customs clearance fees (if applicable), or any costs
incurred in installing repaired or replacement parts shipped under the
provisions of this warranty.
Failure to change springs every two (2) years may void warranty.
Limited Lifetime Warranty
Merrithew will, at its option, repair or replace any of the parts listed below,
Aluminum rails
Components of the frame and related welding
Gearbar
Footbar mechanism (Includes swing arms, chrome adjuster bar
Two (2) Year Limited Warranty
Merrithew will, at its option, repair or replace all other components that
fail for any reason, provided such failure is reported to Merrithew within a
period of two years from the invoice date of the original purchase.
One (1) Year Limited Warranty
post receptacle sleeves, comfort footbar, carriage stopper and traditional
Reformer feet. We recommend that spring clips (including those attached
90-Day Upholstery Fabric Warranty
The vinyl fabric upholstery and spring sleeves will be replaced if they
fail to give normal wear for 90 days after delivery. Proof of damage
may be required. This warranty does not cover cuts, burns, stains,
chemical cleansers. If the identical fabric is not available, Merrithew will
Repair or replacement of defective parts is your exclusive remedy under
the terms of this limited warranty. In the event of parts availability issues,
Merrithew will not be responsible for any consequential or incidental
damages arising from the breach of either this limited warranty or any
applicable implied warranty, or for failure or damage resulting from acts
of parts by anyone other than Merrithew, misuse, transportation, abuse,
hostile environments (inclement weather, acts of nature), improper
installation or installation not in accordance with local codes or
This limited warranty is the sole express warranty given by
Merrithew. No product performance, specication or description
set forth in this limited warranty. Any implied warranty protection
implied warranty of merchantability or tness for a particular
Neither distributors, dealers, web resellers, nor the retailers selling this
product have any authority to make any additional warranties or to
promise remedies in addition to, or inconsistent with those stated above.
Merrithew’s maximum liability, in any event, shall not exceed the purchase
IMPORTANT
Please keep this manual in a safe place.
If you have questions, issues or are missing parts:
Do NOT return this unit to your local retailer,
please contact the manufacturer directly.
customercare@merrithew.com
416.482.4050 |1.800.910.0001 |0800.328.5676 UK |ext. 0907

19
Make the Most of Merrithew Equipment
As Leaders in Mindful Movement™, Merrithew is committed to developing unique, top-quality tness programs
based on the latest in exercise science and research. Our signature STOTT PILATES®education is unparalleled,
and we bring the same expertise and passion to our full range of branded programs, including CORE™Athletic
Conditioning and Performance Training™, ZEN·GA®, Total Barre®and Halo®Training. Join our global community
of elite tness professionals. Merrithew courses and workshops are offered worldwide.
Find courses and workshops near you at merrithew.com/education/training
Contact Us 416.482.4050 | 1.800.910.0001 | 0800.328.5676 UK | ext. 300
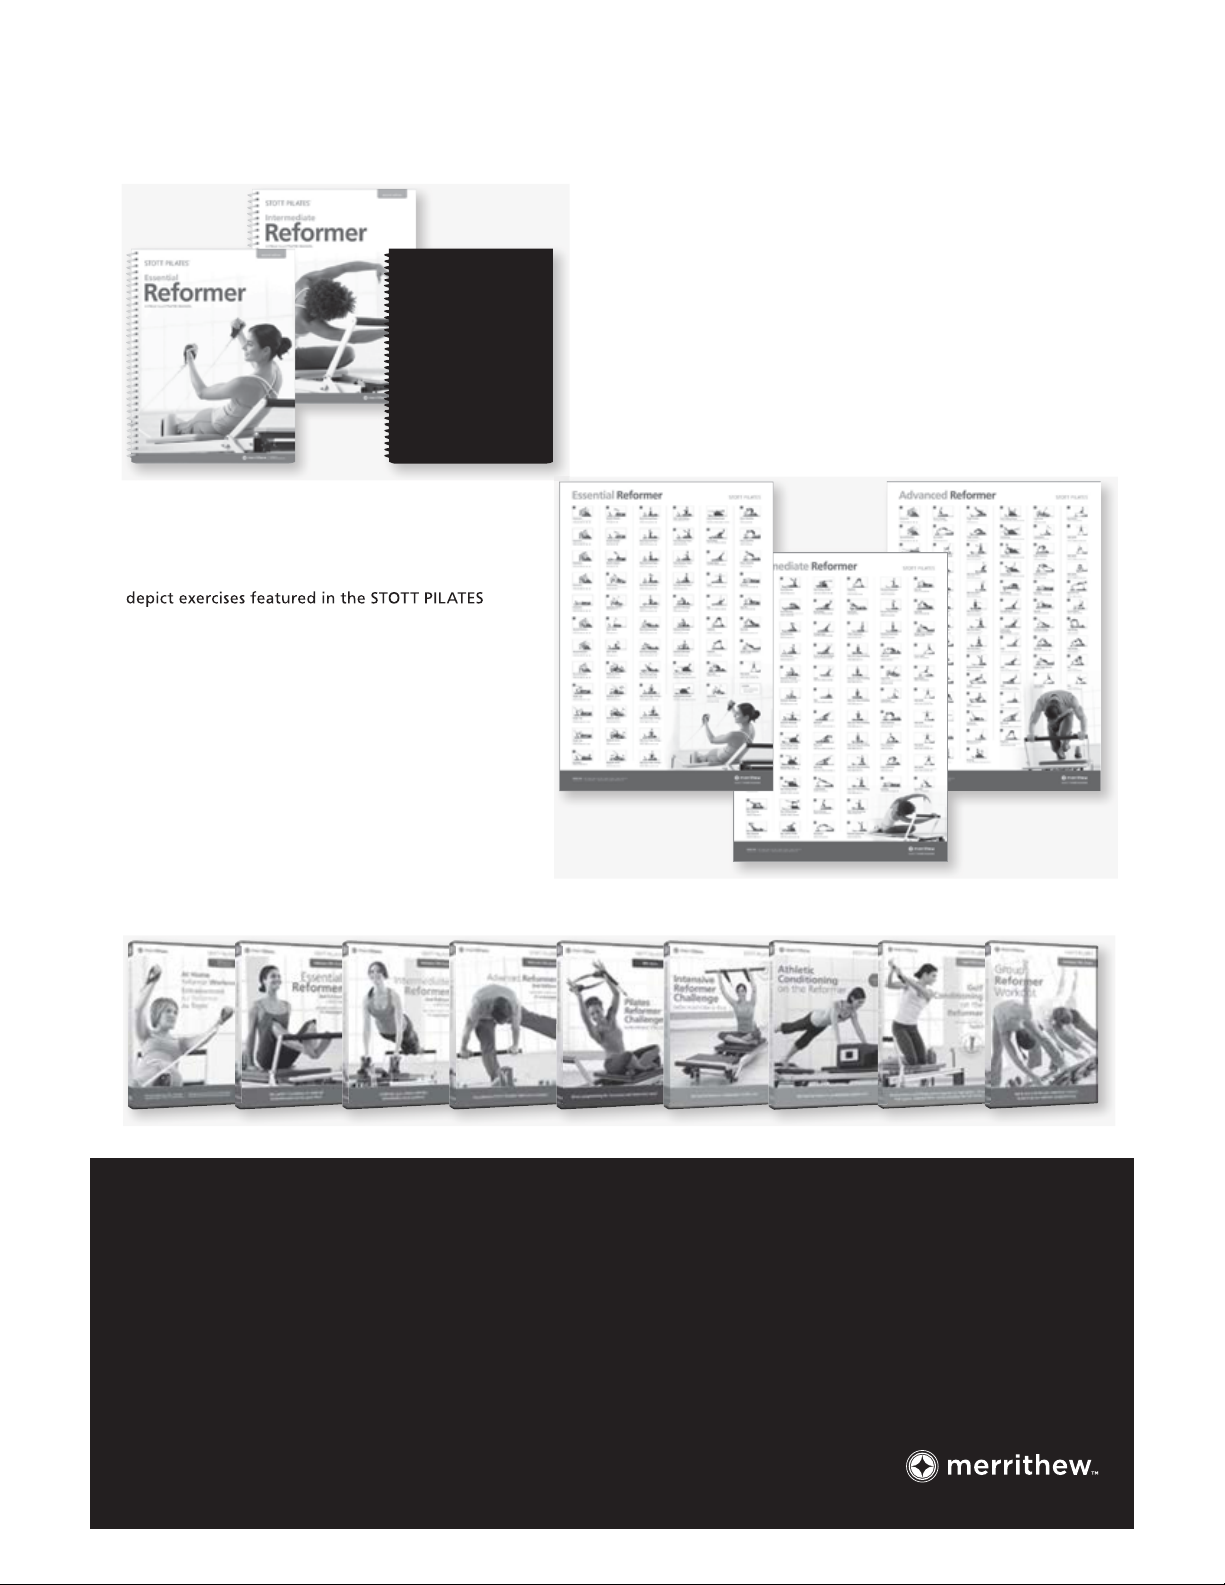
Training Manuals: Three fully illustrated manuals, developed
for our Instructor Training Program, offer step-by-step
instruction to the complete Reformer repertoire.
Wall Charts: Full-size posters, measuring 27"x 39",
®
Reformer repertoire. Each exercise is described with
name, equipment accessories, one photo, and
suggested repetitions.
Instructional DVDs: We offer almost limitless exercise challenges
in our clear and detailed repertoire of cutting edge titles.
For a full listing visit merrithew.com/shop/dvds
Take Advantage of our Training Tools
This manual suits for next models
1
Table of contents
Languages:
Other Merrithew Home Gym manuals


