MESA ENGINEERING Triple Crown TC-100 User manual

Owner’s Manual


Hello from the Tone Farm
Congratulations on your choice of the TRIPLE CROWN™ and welcome to the MESA/Boogie®
Family! e instrument you’ve selected has a deep heritage that combines the best attributes
of vintage tube amplication with pioneering innovation that brings high-gain channel
switching performance to a new frontier. One look at the thoroughness of the feature set of
this amplier tells you it’s loaded with inspiring tools, but underneath the hood, the au-
thenticity of these groundbreaking circuits and features (beware imitators) dates back to
our MARK I™ and the very beginning of Modern guitar amplication. So congratulations
on your choice… you should feel a sense of pride that you’re playing an amp like no other,
an original in every way! Just like you!
Our 45+ year commitment to excellence along with our solemn promise to musicians - to
treat each of them as we ourselves would wish to be treated - guarantees you an experience
that will make you feel truly justied in your choice. We’re condent your new amplier
will have you smiling and inspired within minutes of plugging in for the rst time...but
what’s really gratifying is that you will be nding new and inspiring sounds years after the
price of admission has faded from memory and the TRIPLE CROWN continues to unveil
it’s true worth.
It’s with our sincere thanks for trusting us with your TONE and our best wishes for all your
musical endeavors that we welcome you home. Should you ever need assistance or guidance
we’re here to help. You now have in your hands an instrument of limitless expression. Our
hope is that it takes you and your playing to new and unimagined places throughout your
musical journey. From all of us here at MESA®...Enjoy!

Table of Contents
PRECAUTIONS
OVERVIEW ____________________________________________________________________________________ 1-4
GETTING STARTED_____________________________________________________________________________ 4-5
HELPFUL HINTS _______________________________________________________________________________ 5-6
FRONT PANEL
GAIN _________________________________________________________________________________________ 6-7
MASTER _______________________________________________________________________________________ 7
PRESENCE_____________________________________________________________________________________ 7
TREBLE ______________________________________________________________________________________ 7-8
MID __________________________________________________________________________________________ 8-9
DRIVE/TIGHT ___________________________________________________________________________________ 9
BASS________________________________________________________________________________________ 9-10
MULTI-SOAK™ ATTENUATOR ____________________________________________________________________ 10
OUTPUT & SOLO_____________________________________________________________________________ 10-11
POWER________________________________________________________________________________________11
STANDBY ___________________________________________________________________________________ 11-12
REAR PANEL
AC MAINS SOCKET_____________________________________________________________________________ 12
FUSE_________________________________________________________________________________________ 12
REVERB ____________________________________________________________________________________ 12-13
SOLO SWITCH _________________________________________________________________________________ 13
EFX LOOP (SERIES) __________________________________________________________________________ 13-14
SPEAKERS__________________________________________________________________________________ 14-15
SPKR ON/SPKR OFF____________________________________________________________________________ 15
HEADPHONE ________________________________________________________________________________ 15-16
LINE OUT _____________________________________________________________________________________ 16
CABCLONE™ D.I. ____________________________________________________________________________ 16-18
• CLOSED BACK/OPEN BACK/VINTAGE ___________________________________________________ 17-18
• CABCLONE D.I. (XLR OUTPUT)____________________________________________________________ 18
• LIFT/GROUND __________________________________________________________________________ 18
MESA FTSW _________________________________________________________________________________ 18-19
MIDI THRU/OUT ________________________________________________________________________________ 19
MIDI IN _______________________________________________________________________________________ 19
MIDI CHANNEL ________________________________________________________________________________ 19

Table of Contents
MIDI OPERATING INSTRUCTIONS
FEATURES ____________________________________________________________________________________ 20
POWER-UP____________________________________________________________________________________ 20
MESA FTSW ___________________________________________________________________________________ 20
MIDI INPUT ____________________________________________________________________________________ 20
MIDI THRU/OUT ________________________________________________________________________________ 20
MIDI CHANNEL ______________________________________________________________________________ 20-21
USER PRESET _______________________________________________________________________________ 21-22
USER PRESET DUMP & LOAD____________________________________________________________________ 23
MIDI CONTROL CHANGE NUMBERS ______________________________________________________________ 23
SOFTWARE UPDATES __________________________________________________________________________ 24
SOFTWARE VERSION SysEx MESSAGE ___________________________________________________________ 25
TRIPLE CROWN FACTORY PRESETS ______________________________________________________________ 25
FACTORY SAMPLE SETTINGS__________________________________________________________________ 26-27
USER SETTINGS _______________________________________________________________________________ 28
TUBE TROUBLESHOOTING GUIDE______________________________________________________________ 30-31
SPEAKER HOOKUP GUIDE ____________________________________________________________________ 32-37
TUBE TASK CHART_____________________________________________________________________________ 38
PARTS LIST ___________________________________________________________________________________ 39

READ AND FOLLOW INSTRUCTIONS OF PROPER USAGE.
IMPORTANT SAFETY INSTRUCTIONS
Read these instructions.
Keep these instructions.
Heed all warnings.
Follow all instructions.
Do not use this apparatus near water.
Clean only with dry cloth.
Do not block any ventilation openings. Install in accordance with the manufacturer’s instructions.
Do not install near any heat sources such as radiators, heat registers, stoves, or other apparatus (including amplifiers) that produce heat.
Do not defeat the safety purpose of the polarized or grounding-type plug. A polarized plug has two blades with one wider than the other. A grounding type plug
has two blades and a third grounding prong. The wide blade or the third prong are provided for your safety. If the provided plug does not fit into your outlet,
consult an electrician for replacement of the obsolete outlet.
Protect the power cord from being walked on or pinched particularly at plugs, convenience receptacles, and the point where they exit from the apparatus.
Only use attachments/accessories specified by the manufacturer.
Unplug this apparatus during lightning storms or when unused for long periods of time.
Refer all servicing to qualified service personnel. Servicing is required when the apparatus has been damaged in any way, such as power-supply cord or plug
is damaged, liquid has been spilled or objects have fallen into the apparatus, the apparatus has been exposed to rain or moisture, does not operate normally,
or has been dropped.
To insure proper ventilation always make sure there is at minimum four inches (101.6mm) of space behind the rear of the apparatus. The ventilation should not
be impeded by covering the ventilation openings with items, such as newspapers, tablecloths, curtains, etc. Do not impede ventilation by placing objects on top
of the apparatus which extend past the rear edge of its cabinet.
No naked flame sources, such as lighted candles, should be placed on the apparatus.
The apparatus shall not be exposed to dripping or splashing and no objects filled with liquids, such as vases, shall be placed on the apparatus.
WARNING: To reduce the risk of fire or electric shock, do not expose this apparatus to rain or moisture.
The AC plug is the mains disconnect. The plug should remain accessible after installation.
WARNING: EU: permission from the Supply Authority is needed before connection.
WARNING: Always make sure proper load is connected before operating the amplifier. Failure to do so could pose a shock hazard and may result in damage
to the amplifier.
Do not expose amplifier to direct sunlight or extremely high temperatures.
Always insure the amplifier is properly grounded. Always unplug AC power cord before changing fuse, tubes or removing chassis. Use only same type and
rating when replacing fuse.
Avoid direct contact with heated tubes. Keep amplifier away from children.
To avoid damaging your speakers and other playback equipment, turn off the power of all related equipment before making the connections.
Do not use excessive force when handling buttons, switches and controls. Do not use solvents such as benzene or paint thinner to clean the unit.
Always connect to an AC power supply that meets the power supply specifications listed on the rear of the unit. Export models: always insure unit is wired for
proper voltage. Make certain grounding conforms with local standards.
YOUR AMPLIFIER IS LOUD! EXPOSURE TO HIGH SOUND VOLUMES MAY CAUSE PERMANENT HEARING DAMAGE!
Your Mesa/Boogie Amplifier is a professional instrument. Please treat it with respect and operate it properly.

Operating Instructions
Overview:
Introducing the Triple Crown™ TC-100™, arguably the most fully evolved amplifier to date emanating from the “other side of MESA”
which has spawned such Rock classics as the Dual Rectifier® Heads, the TransAtlantics®, the Royal Atlantic™ and the Electra-Dyne™.
This 3 Channel platform covers all sounds and styles ranging from sweet, bouncy Cleans with a fat bottom end to mid gain Crunch
with attitude, through singing late 70s Lead sounds and all the way up to grinding walls of modern high gain, all containing gorgeous
harmonic content and touch sensitive dynamics.
Like the popular TC-50, the TC-100’s got a Clean Channel reminiscent of a MARK amp in Channel 1, the Classic Rock Crunch and
beyond in Channel 2, and in Channel 3, the most gain of any MESA to date with Dual Rectifier-esque top-end, but a higher “EL34”
harmonic spread and higher frequency, tighter Bass response blended with a MARK amp’s soaring, vocal sustain and effortless,
inviting feel. And all this versatility is delivered with an immediacy of attack and gut-punch midrange all its own in our line.
This immediacy of attack and hard-hitting midrange in the Triple Crown is further amplified and sonically enhanced by the TC-100’s
massive power and output Transformers and 2 additional power tubes and a quiet cooling fan to keep this bigger “engine” running
cool and reliable. Many players may prefer the lighter weight and convenience of lower power amplifiers, but anyone that has played
100-watt amps for any period in their musical journey knows there is nothing like the authority and punch, girth and 3-Dimensionality
of big iron pushing a quartet of octal tubes. Nothing touches the headroom, control and feel, or compares with the mighty sound of
these “big-bore” amps.
The bonus here in the TC-100 is that the overall size is identical and the 11 additional pounds is little to carry for the heavyweight
Tone it delivers, especially for Rock styles. Clean headroom is also enhanced by the extra power and this makes the big Triple Crown
the king of loud, clean, rhythm playing for virtually any style. From Jazz to R&B, Reggae to Country, if clean chording is a large part
of your repertoire, the 100-watt model is the obvious choice. The benefits you reap there will be similarly welcomed in the two Gain
Channels as well with warmer, fuller, thicker overdrive sounds that have more vocal characteristics for single note work being ad-
ditional characteristics of this more powerful output section.
In addition to the extra power tubes and larger Transformers, the TC-100 is fitted with our Multi-Soak™ (Channel-specific) Power
Attenuator that allows selection of the perfect power and headroom for each of the preamp Channels. This enables you to select the
amount of power, headroom and/or saturation, depending on the style you wish to play and the venue you are performing in, as well
as match the power characteristics and response to the style of sound you have each of the Channels dedicated to.
The choices in all Channels Range from the full 100 Watts, to Half Power at 50 Watts, and then incrementally down in usable steps
from 20 to 7 to 3 Watts, with a simple flick of the rotary switch. The sonic enhancement and flexibility Multi-Soak™ adds to the already
super versatile 3-Channel Preamp creates a limitless palette from which to craft your Footswitchable sounds, with the perfect power
response always available for your different preamp Channel applications.
PAGE 1

Overview: Front Panel
CHANNEL SELECT
This 3-position mini toggle switch determines which Channel is called up when the Footswitch is not
connected. It triggers an LED indicator in the Channel that’s active to assist you on stage.
NOTE: The MESA Footswitch can be used to access the channels regardless of what position the Channel Select mini toggle is in. If
you unplug the MESA footswitch while on, you will need to reset the footswitch circuit by selecting any Channel with this mini toggle.
CHANNEL 1 (CLEAN)
Channel 1 focuses on the Clean response and delivers a bouncy, bubbly rhythm sound that is also very
capable of great single note solo sounds when run in the highest region on the GAIN Control. Add the midrange boost and compression
of the DRIVE feature and Channel 1 becomes a hard driving Blues machine capable of driving Rhythm parts and howling solo potential.
CHANNEL 2 (LO)
Channel 2 starts out in the lower saturation GAIN ranges and offers a very expressive, furry, clipped, edge
of clean response up until the halfway point. Then it gives way to a more complete saturation that’s right at home for either heavier
crunch rhythm or soloing in the middle to higher range of the GAIN Control.
CHANNEL 3 (HI)
Channel 3 delivers full-blown, yet controlled, mayhem with even more saturation and harmonic layering
than Channel 2. This makes it great for the Heaviest Crunch Rhythm below 12:30 on the GAIN control and singing liquid sustain
reminiscent, but perhaps even more of the high gain voice MARK Series amplifiers showcased above 12:30. The highest range on
Channel 3’s GAIN control offers surely the most saturation and sustain available from any MESA amplifier, past or present.
CHANNEL-ASSIGNABLE MULTI-SOAK™ ATTENUATOR
These three 5-position rotary controls adjust the amount of
reactive power soak available, independently, for each channel. Power attenuation greatly expands the range of tonal possibilities,
with reactive attenuation providing the best response and feel, while allowing you to scale the amp’s power tube saturation and overall
loudness to better suit you’re specific enviroment and playing application.
DRIVE/TIGHT
In addition to their gain differences, all three Channels in the Triple Crown feature a Voicing switch. In Channel
1 it is DRIVE and in Channels 2 and 3 it is called TIGHT, but the circuit is basically the same. The difference in names refers to the
sonic changes that occur in relation to the gain region of the Channel. This voicing switch tightens low end response and adds a
little bump in the tighter, more focused midrange frequencies. In effect, this alternate EQ shape adds a second voice to each of the
PAGE 2
FRONT VIEW: TRIPLE CROWN™ TC-100™
REAR VIEW: TRIPLE CROWN™ TC-100™
INPUT
GAIN
TREBLE
GAIN
TREBLE
GAIN
TREBLE
MASTER
MID
MASTER
MID
MASTER
MID
PRES
CLEANLOHI
BASS
PRES
BASS
PRES
BASS
SOLO
OUTPUT
POWER
ON
ON
STANDBY
CLEANHI
LO
TIGHT
NORM
TIGHT
NORM
TIGHT
NORM
REV
EFX
SOLO
20
7 7 7
3
50
100
20
3
50
100
20
3
50
100
TC-100
MULTI
SOAK™
MULTI
SOAK™
MULTI
SOAK™
HI
REVERB
LEVELS
FUSE
LO
CLEAN
EFX
LOOP
SENDSPEAKERSLINE OUT
HEADPHONE RETURN
6L6
EL34/6V6
OFF/FTSW
REVERB ON
OFF/FTSW
SOLO ON
OFF/FTSW
EFX ON
8 OHM
4 OHM
GROUND
LIFT
SPKR
ON
SPKR
OFF
CLOSED
BACK
CAB. SIM.
VINTAGE
BIAS
CabClone™
D.I.
MESA
FT.SW.
MIDI
THRU/OUT
MIDI
IN
MIDI
CHANNEL STORE
OPEN
WARNING:
Replace fuse with same type/rating only.
Do not expose to rain or moisture.
CAUTION:
Risk of Electric Shock. Do Not Open.
No user serviceable parts inside.
®
ON
EL34
SWITCH MUST MATCH
TUBES IN USE
120 V~
60 Hz
4 A
4 A
SLO
BLO
0
1
2
3
4
5
6
7
8
9
A
B
C
D
E
F
AMPLIFIER
44YV

three Channel’s already great sounds. In Channel 1 DRIVE shines for howling Blues single note Soloing and edge-of-clip chording
by pushing the sound into the threshold of saturation and adding midrange attack. In Channel 2 TIGHT brings the low end into focus
and creates a more articulate response that’s perfect for Blues soloing in the lowest gain range and amazing Nu-Metal Chording in
the higher ranges. In Channel 3 TIGHT can add articulation and focus to even the highest gain soloing, adding definition to levels
of saturation that might otherwise be indistinct and mushy. While DRIVE/TIGHT imparts something different and useful to each of
the three Channels, it also changes the “feel” on the strings and allows more aggressive picking techniques to be both more easily
accommodated input-wise and more expressive in terms of impact and punch.
OUTPUT
The TRIPLE CROWN features a global OUTPUT control enabling you to raise and lower the overall playing volume
with just one control once you have setup your preamp sounds and balanced the Channels with each other using the individual
Channel MASTER controls. The OUTPUT is located just before the power section’s DRIVER stage and acts as an EFFECTS Return.
SOLO
This footswitchable/MIDI programmable feature enables a pre-settable boost in volume to be engaged by either the SOLO
button on the included Footswitch or by storing it “ON” under a MIDI program number. It is essentially an additional OUTPUT control
that is wired in series and can achieve levels above that of the setting on the OUTPUT.
Overview: Rear Panel
REVERB
Lush all-tube Reverb drenches the TC-100’s three Channels with a beautiful 3-D halo and provides you with assignable choices
on where to use it for the best footswitchable results. And if you still need more control than this sophisticated approach to applying REVERB
offers… we’ve provided a “hidden Reverb kill” jack on the tube side of the chassis giving those who “don’t mind the dance” total control.
BIAS SWITCH
An old favorite, we’ve included our handy BIAS SWITCH that allows you to swap the stock compliment of EL34
with the fatter, rounder sounding 6L6… for those who want a warmer, rounder response.
6V6s can be used safely in the EL34 Setting with just a direct swap over, creating a “Half-Power” scenario that exudes a more bubbly,
vintage voice and creamier top end harmonic content.
NOTE: Make Sure Bias Switch Setting Matches The Tubes In Use!
REVERB, EFX, SOLO SWITCHES
These three mini toggles control the activation of the REVERB, EFX LOOP and the SOLO
feature. These functions can be activated by either the mini toggles or the MESA footswitch. These mini toggles are also used when
creating a MIDI preset as explained later in this manual.
SPEAKERS
The TRIPLE CROWN handles the interfacing of speakers with a slightly different set-up from other MESA amplifiers.
The dual ¼” jack setup can handle most of the common speaker impedances from 4 to 16 Ohms. 2 Ohm Loads are not supported
and are not recommended and this will likely be no inconvenience as 2 Ohm ratings are very rare in the world of guitar cabinetry
anyway. A mini toggle flips you between the 4 Ohm and 8 Ohm taps on the output Transformer and between these two positions, most
popular cabinet configurations and load requirements can be accommodated.
SPKR ON/OFF
The CABCLONE™ features a SPEAKER ON/OFF feature that allows silent recording or live Direct to Console
applications for “In Ear” monitoring in stage performance scenarios. While on the TRIPLE CROWN this switch is located in the
SPEAKER SECTION of the Rear Panel, it is part of the CABCLONE™ DI circuit.
Be sure to check this switch if you get no signal (Live using Cabinets/ internal speakers) when all other Controls and Switches are
at settings that should produce sound. It is common for this switch to be accidentally turned off during setup or connecting speaker
cabinets, or even when programming MIDI information. This is especially true when demo-ing the amplifier in music stores where the
previous party to audition the amplifier may have switched it on and off.
PAGE 3

HEADPHONE JACK
The TRIPLE CROWN features a HEADPHONE Output for personal enjoyment of the amplifier when it
is not possible — or you don’t want to — play through a speaker. This stereo ¼” jack derives its “speaker simulated” signal from the
on-board CABCLONE™ D.I. feature circuitry and delivers a surprisingly good rendering of the TRIPLE CROWN’s sound and feel to
your headphone set of choice.
CABCLONE™ D.I.
Here in the TRIPLE CROWN we’ve included our popular CABCLONE™D.I. Recording Interface for con-
venient Direct recording without the need for mic-ing, although you can do that as well for a blend of live speaker and Direct sounds.
The full compliment of Voicing options from our stand-alone CABCLONE™ has been included here; CLOSED BACK, OPEN BACK
and VINTAGE, and this greatly increases the versatility of this feature for different sound styles. Other features aboard in addition to
the balanced XLR Output include SPEAKER MUTE (located near SPEAKER Outputs), GROUND/LIFT options and an uncompen-
sated LINE OUT.
NOTE: When using the SPKR ON position, make SURE you have a working speaker connected to one of the SPEAKER OUTPUTS.
Failure to do so may result in damage to your amplifier that is not covered under Warranty. Using the amplifier in the SPKR ON posi-
tion without a speaker or external load (resistor, soak, etc) connected will likely cause damage to your output transformer and render
your amplifier inoperative. Damage caused in this manner will not be covered under warranty.
FTSW and MIDI
Three DIN jacks, one 6-Pin for the TRIPLE CROWN Footswitch, and two standard 5-pin DIN jacks for MIDI IN
and THRU/OUT are included for true connectivity and a number of ways to access the amazing sounds and pro features in the TRIPLE
CROWN. A STORE toggle switch allows simple one-touch writing of your desired sounds in all the Channels to any of 256 MIDI Program
Numbers. There is also a MIDI Channel mini Rotary Selector for syncing of the MIDI Channel to be used by your Controller of choice.
GETTING STARTED
1. After unpacking the amplifier, check to make sure all the tubes are firmly seated in their sockets as some may have loosened
a bit during shipping.
2. Connect the A.C. Cord to a grounded (3 pin) A.C. outlet.
3. Unpack the TRIPLE CROWN Footswitch and connect the 6 pin DIN Footswitch cable to the FOOTSWITCH DIN jack on the
left side of the Rear Panel. If you intend to use a MIDI Controller to access the Channels and Features, connect your Control-
ler (or Computer) to the MIDI IN jack on the TRIPLE CROWN Rear Panel.
4. Connect your speaker enclosure to the proper matching impedance SPEAKER OUTPUT at the center of the TRIPLE CROWN
Rear Panel. An 8 Ohm load is preferable for your first experience with an amp this dynamic and explosive as you will hear the
full power potential and best Tonal balance. .
5. Flip the POWER Switch to the ON position while leaving the STANDBY Switch in the STANDBY position for at least 30 sec-
onds. This allows the filaments to warm up in the tubes before being put to use. Following this cold-start procedure every time
you power up will increase the toneful life of your tubes.
6. If you intend to connect processing devices to your loop, do so now and look up EFX LOOP in this manual for proper connec-
tion and operation, although we recommend auditioning the TRIPLE CROWN without processing for the first time. If the Loop
is to be in, check the INPUT levels on your processor to make sure they are in the medium to lower range so you can increase
the level slowly once you have lifted STANDBY on the TRIPLE CROWN and run through the Channels to view the SEND level
coming from the amp.
7. Follow the Sample Settings examples below and set the Controls at these approximate settings for a tour through your new
world of TONE. Remember these are just a glimpse at the vast possibilities and are meant to give you a taste of one possible
way to set up your Channels. Feel free to fine tune the sound as you go...you can’t hurt a thing and you will be learning by
feel...the best way.
PAGE 4

8. Flip the STANDBY to the ON position and enjoy the ride!
INSTANT GRATIFICATION
In case you haven’t yet played your new amplifier, below is just one example of the many ways
to set up the Channels. This example demonstrates a pristine Clean sound in Channel 1, a heavy Crunch Rhythm in Channel 2, and
a burning high gain lead tone in Channel 3.
HELPFUL HINTS
NOTE: REDUNDANT INFORMATION: Throughout this Operating Guide you will encounter redundant information and sections that
are repeated for your continued awareness and as reminders. This is done so a person can read only the sections they are interested
in, and yet still get the important points they should know or NEED to know about the TRIPLE CROWN. We apologize if this gets
annoying for the cover-to-cover reader, but even they may appreciate it some time in the future when referencing this Guide quickly
for a specific topic.
• Beware of high settings on the BASS control in Channels 2 and 3, especially when the GAIN is set high. Too much BASS will pro-
duce a flubby, indistinct attack and “slow” the response time. A basic rule regarding the BASS control might be this; As the GAIN
goes up...the BASS should come down.
• The GAIN and TREBLE Controls are the most powerful tone shaping controls in each Channel and should be used with taste.
They determine much about the attack characteristic and the overall personality of the sound in all the Channels. Many of the great
sounds in all the Channels will find these two Controls in their middle ranges.
NOTE: Avoid setting the TREBLE high (above 2:00) when the GAIN is to be set high as this brings about the tendency for a slightly
microphonic tube to ring or squeal.
• Your TRIPLE CROWN will sound better and feel better to play if you have at least one speaker cabinet touching the floor you are
standing on while you play. The coupling effect and especially the transmission of bass frequencies will cause the amp to sound
fatter and the strings to feel more substantial and tangible when the amp (or cab) sits on the floor. Wood floors (like stages) are
really great! Let’s face it... the guitar can be one of those weird instruments that rarely feels the same way two days in a row, night
to night, from room to room... and we can use all the help we can get. This usually helps... with the only exception being a stage
filled with too many live mics...sometimes then you are forced to lift the amp to avoid the coupling effect.
• Use the STANDBY switch every time you power-up (from cold or hot), during set breaks, cable hook-ups and anytime you are not
playing for a few minutes. Doing so will increase the toneful life of your tubes.
• Be sure to check the SPKR ON/OFF switch if you get no signal (Live using Cabinets or the internal Combo speaker) when all other
Controls and Switches are at settings that should produce sound. It is common for this switch to be accidentally turned off during
setup or connecting speaker cabinets, or even when programming MIDI information. This is especially true when demo-ing the
amplifier in music stores where the previous party to audition the amplifier may have switched it on and off.
• Circuits emanating from this “other side” of the MESA Line and sharing that DNA tend to favor TREBLE and PRESENCE control
settings on the lower side for sounds in the warmer domain. Depending on guitar woods, pickups and technique, don’t be sur-
prised if you find great sounds below 12:00, or even all the way off on the TREBLE and PRESENCE, with the MID’s broad Q that
carries substantial top end providing all the top end cut you need.
PAGE 5
Instant Gratication Settings
INPUT
GAIN
TREBLE
GAIN
TREBLE
GAIN
TREBLE
MASTER
MID
MASTER
MID
MASTER
MID
PRES
CLEANLOHI
BASS
PRES
BASS
PRES
BASS
SOLO
OUTPUT
POWER
ON
ON
STANDBY
CLEANHI
LO
TIGHT
NORM
TIGHT
NORM
TIGHT
NORM
REV
EFX
SOLO
20
7 7 7
3
50
100
20
3
50
100
20
3
50
100
TC-100
MULTI
SOAK™
MULTI
SOAK™
MULTI
SOAK™

• In both Channel 1 and either of the two Gain Channels, (we recommend Channel 2 as its not quite as saturated), dial up sounds
you like and then use the Multi-Soak™ rotary to explore the different wattage selections. Work with the MASTER control to experi-
ment with both the playing volume and also what the MASTER does in terms of allowing additional “power drive” to be added to
both clean and overdriven sounds. Of special note is some of the cool pushed/overdriven sounds that are possible in Channel 1
with the GAIN maxed and the lower wattage options on the Multi-Soak™ rotary. This can be a really great way to find thick chord-
ing and solo sounds that are overdriven but still retain the inherent dynamic content of a “traditional clean amp pushed to clip”.
FRONT PANEL
GAIN
This is, by far, the most powerful control in the TC-100 and its setting determines the style and personality of the Chan-
nels. It meters the gain in different tube stages depending on the Channel called up – and it sets Input Stage headroom - which
determines whether the sound will be clean or overdriven. It also acts as a subtle Tone control as the tube stages’ gain is increased
and decreased and imparts its own “color” on the sound.
In all the Channels, there are three regions of the GAIN control – a low gain zone between 8:00 - 11:30, a warmer, more saturated
zone from 11:00 - 2:00 and a higher gain zone from 2:30 – 5:00. Each of these zones can be used for many different applications
and all can be used for both chording and single note solo work. As the GAIN control is swept throughout its range it imparts differ-
ent textures and tonal characteristics.
Generally speaking, the lower end of the control (8:30 – 11:30) in both Channels and Modes produces a brighter, more open char-
acter that has more dynamic content available. This region is great for clean, sparkling chording in Channel 1, where the maximum
headroom is available, the top end harmonics are bubbly and the attack is lightning fast. Channel’s 2 and 3 are tuned to deliver
threshold sounds in this zone where the gain is warm and furry, but there is still plenty of the guitar’s personality intact. This zone
is great for all the Channel 2 sounds when used for clipped chording, as there is plenty of dynamics intact that have not yet been
compressed by too much saturation.
The middle region of the GAIN control (11:00 – 2:00) is where the most balanced sounds live and you will find this region delivers
warm, full sound, detailed attack and good dynamics and the Tone controls still have a powerful effect on the signal. Channel 1 CLEAN
delivers great chording response, sounds richer and has more body here. Depending on pickup style and strength you will have to
watch for clipping as you are nearing the crossover point - gain-wise. Some of Channel 2’s best sounds are to be found here as things
start smearing nicely as they start getting into tube overdrive. As you approach 12:00 in Channel 3 there will be plenty of saturation to
keep chords grinding and single notes hanging – but not too much to start compressing the life out of the sound. If you aren’t getting
great results in this region for your gain sounds in Channel 3, you may want to look at trying some pickups with a bit hotter output.
The highest region of the GAIN control (2:00 – 5:00) is all about saturation, especially in Channel 3. Up here the signal gets much
fatter in the low end and the top end begins to recede to create a round, compressed sound. Dynamics become slower with lower
peaks and a more legato, creamier feel is produced. In Channel 1 the high end of the GAIN control produces some great “clipped
clean” sounds as the Input stage gives it up and starts to saturate.
Channel 3 gets truly wild at the top end of the GAIN control and both gain Channels unveil their true potential for soloing. There is
ample gain up here to rip into any style you wish with the Channel 3 pumping out ridiculous levels of thick creamy overdrive for single
notes. With the GAIN maxed you can achieve virtually infinite sustain… if you can keep your guitar stable and from feeding back.
At the highest GAIN settings you will notice the Tone controls have a diminished effect on the sound. The notes are so saturated and
their character has been pre-determined by the way each Channel is voiced and how it reacts to this level of gain. May we humbly
suggest using the GAIN control in its middle range whenever possible to achieve the best balance of overdrive and still retain the
full shaping power of the Tone Controls. Also, your attack will remain definitive and focused in the middle range and not get over
saturated and “slowed down” as it can in the highest region of GAIN settings.
Remember that on the TC-100, the MASTER control can also be a “gain” control of sorts when the Multi-Soak™ rotary is used to
drop the power output and the MASTER is then increased to saturate the power section more. While we don’t recommend running
PAGE 6

the MASTER in it’s highest range (above say 1:30 – 2:00), it is possible to blend in power overdrive and consequently reduce preamp
GAIN to arrive at some really nice blends of the two types of saturation. This approach can be especially effective for more traditional
single note solo sounds from an era where preamp drive had not yet been discovered (by MESA in the first MARK I Boogie®).
MASTER
This control determines the overall output level of each Channel and is located at the very end of the preamp. By
using it in combination with the GAIN control, any amount of preamp signal strength – gain – (Within a Channel’s parameters) can be
achieved at any playing volume. Once you have dedicated the Channels to their respective sounds, you can then balance the volume
levels of the Channels using the MASTER controls.
In addition to adjusting the playing loudness of the Channels, the MASTER functions as an EFFECTS SEND control for the EFX
LOOP when the LOOP is activated (by connecting plugs to the LOOP SEND and RETURN jacks).
For general applications and to get the best performance out of all the Channels we recommend MASTER settings in the 9:00 – 12:00
range with most people settling in around 10:00 – 11:00 for average playing volumes.
Some purists like to run the MASTER all the way up and raise the GAIN until they reach their desired sound–the thinking there is that
this achieves the purest sound. In theory, they believe this resembles removing the control altogether from the signal path, and in a
way it does. However, most all the “vintage non-master” amplifiers they are seeking to emulate have discrete resistors in that place
in the circuit anyway to adjust or “tune” the output of the preamp to the power section sensitivity.
The MASTER is nothing more than a variable resistor(s) that offers an infinite range of settings possibilities and makes the amplifier
many times more versatile with no sonic penalty. If you prescribe to this old school approach, then by all means, use the Triple Crown
this way… it won’t hurt the amplifier. However you will be severely limiting the potential sounds you can achieve by removing the
limitless great sounding combinations of GAIN and MASTER settings.
PRESENCE
This control adjusts high frequencies - above those of the TREBLE - and is farther downstream in the signal path
than the Tone Controls at the end of the preamp. Unlike a PRESENCE circuit located in the power section, the TC-100 utilizes a
preamp roll-off type PRESENCE to maintain a level of urgency and simplicity in the power section for tonal reasons. This is part of
its urgent character and ability to hit so hard in the midrange frequencies.
You can think of the PRESENCE as a control that allows you to either clamp the highs down, compressing and darkening things - or
open it up and let the full spectrum of upper harmonics come blazing through. It also has a great deal to do with how dynamic the
signal is and how a sound will cut through the mix in an ensemble environment.
At low settings (7:30 – 10:30) the sound will be warm and round with a more compressed feel and dynamic fluctuation will be limited.
As the PRESENCE is increased (11:00 – 2:30), the top end starts to become more dominant and that compression gives way to “cut”
and dynamic peaks jump out with startling speed and accuracy. At the top end of the control (2:30 – 5:30), a super aggressive blend
of upper harmonics dominate the sound and this region can be somewhat dangerous if it’s not applied in small measures. Higher
notes will slice and dice even the bravest set of ears and we suggest using this region mostly in the studio for recording heavy crunch
rhythm parts and even then – mostly on parts that feature the lower strings. This region – especially when coupled with the inherent
curve of many of the microphones typically used in P.A. (sound reinforcement) applications can be truly punishing.
Clean sounds in Channel 1 can generally benefit from a bit higher settings (10:30 – 12:30) than sounds in this or any Channel that
has overdrive involved in its makeup. Once saturation begins the frequencies carried in the PRESENCE control can make things
edgy or brittle… even buzzy, real fast if you aren’t careful. Overdriven chording sounds can tolerate higher settings (10:30 – 12:30)
better than can single note sounds, which usually want to roam the zone below 11:00 to stay round, focused and vocal.
TREBLE
While the GAIN is the most powerful control in the TC-100, the TREBLE comes in a close second. The TREBLE is
responsible for shaping the character of the entire Channel. It can overpower the rest of the Tone controls easily and therefore its
setting is crucial to a rich and balanced sound in all three Channels. Setting the TREBLE with care and taste in mind is critical for
the Tone control string to work in harmony.
PAGE 7

In all three Channels the middle region of the TREBLE delivers the best balance and creates sounds that are plenty bright enough
but still rich and warm. We suggest that you start with the TREBLE at 12:00 and adjust up or down slightly until the desired blend
is achieved. However, circuits emanating from this “other side” of the MESA Line and sharing that DNA tend to favor TREBLE and
PRESENCE control settings on the lower side for sounds in the warmer domain. Depending on guitar woods, pickups and technique,
don’t be surprised if you find great sounds below 12:00, or even all the way off on the TREBLE and PRESENCE, with the MID’s broad
Q that carries substantial top end providing all the top end cut you need.
In Channels 2 and 3, the MID control carries frequencies that are somewhat close to the TREBLE along with the upper mid and lower
mid frequencies it is centered around. Use this idiosyncrasy to your advantage and experiment with setting the TREBLE lower than
“normal” and running the MID up a bit and vice versa. Some very cool sounds can be found with the TREBLE lower, even very low
or “off” and the MID higher. Be sure to check this interaction between these two powerful controls, as it will be critical in achieving
the sounds you hear in your head.
MID
The MID control in the TC-100, while very powerful, acts a little more like a standard tone control and doesn’t have quite
the massive global shaping power of the GAIN and TREBLE controls. However, its setting does impart a strong character on the
sound of all three Channels. It brings in and out a broad band of midrange frequencies and – as we have mentioned earlier in the
TREBLE section – along with these rides a fair amount of higher “low treble” range frequencies. These highs are lower than that of
the TREBLE, but they are important for the punch and cut of the amplifier in a mix.
For rhythm playing in the CLEAN Channel, but really globally in all the Channels, a lower MID setting (7:30–10:00) scoops some of
this midrange attack and makes the bottom end breathe more. This range will also make things more resilient and create an easier
to play, more elastic feel on the strings. Single coil guitars work very well here for the slinky, rubber band attack and bouncy bass
character associated with Blues, R&B and Country clean styles.
The middle region (10:00–1:00) is where the punch and attack begin to come on with more urgency and this is where mahogany
guitars really like to see the MID set for adding the cut and definition. Here the top end begins to show itself in the mix of the MID
controls’ spectrum and chording sounds start to chime and slash with a more forward and very present character.
From here on up (1:00–5:30) the MID introduces an aggressive range of sounds that are still full, but quite forward as the dominant
frequencies become those present under control of the MID. In this range you will likely have to increase the BASS to add back in the
richness and warmth that gets overshadowed when the MID control is set high. If you like the attack and urgency found in this range
of the MID, all the other controls (except maybe the MASTER, which you may have to back down as the sound gets more forward)
may have to be set higher to keep up with the MID dominant curve. This is fine, although there will reach a point of diminishing return
as the headroom in the preamp gets eaten up by this tonal arms race and you begin to clip the preamp with the high signal from the
Tone control string.
For gain sounds in Channels 2 and 3, a similar story unfolds as the MID is increased. Lower settings (7:30 – 10:30) will produce
wider sounding, more elastic feeling chording sounds and the single notes will have a creamier, smoother character. High harmonics
created by the gain and controlled largely with the TREBLE, will put a patina of three-dimensional haze on things that smears nicely
with vintage soul.
As the MID is increased past the 10:00 range, cut and bite begins to creep in along with the chesty midrange punch. This is where
some classic Crunch is found in the middle range of the GAIN control. This MID kick is an integral part of the impact and tight-tracking
accuracy of this iconic mid-gain sound that has been a Rock staple for the last four decades. In Channel 3, the single notes leap
forward with greater authority, speed and the warmer, juicier sound begins to give way to a fire-breathing blow torch … especially at
high GAIN settings.
Passing the 1:00 mark unleashes the brash attitude pent up in the MID frequencies and top end joins the party in a big way. Here is
where you look for the most forward and aggressive attack over a wider range than that of TREBLE control. The feel on the strings
will become less forgiving and your playing will be put under a microscope in the time domain. This region is great for pushing Rock
rhythm sounds to the forefront of a mix in Channel 2, no matter how much gain you thicken it up with on the GAIN control. Single
PAGE 8

note solo sounds in Channel 3 will be lightning fast and deadly accurate and certainly will be heard by all, as they will have a definite
point of origin in the bar line.
One suggestion, or maybe more of a word of caution… the MID control contains frequencies that can be a little tough on the ears if
not used with some discretion. Be sure to put your head down by the cabinet at some point and sample what you are dealing out
to the audience and/or the microphone. You might be surprised how much impact – and possibly even pain – can be dialed in with
higher settings of the MID. Unless you are out to hurt people, which is never a good idea, you may find the middle to lower range
of the MID gives you plenty of attack and definition but still sounds balanced and warm and lets others enjoy your playing without
wincing at every note.
DRIVE/TIGHT
This switch re-voices the midrange, adding a boost in the medium to upper midrange frequencies usually associ-
ated with punch and attack. It also compresses the top end a bit and tightens the low end and all these characteristics in combination
have the effect of tightening the sound, thus its name. In Channel 1, the effect is experienced as a slight overdrive effect. To avoid
confusion and unnecessary phone calls to our Customer Service Department, this feature is labeled DRIVE.
In Channel 1, the DRIVE is effective at adding the extra push and subtle saturation for Blues or Roots sounds when the GAIN control
is run in the top of its range. It provides the little bit of extra gain needed to push this threshold sound into a more viable clip for driven
rhythm work or jabbing solo phrases.
For gain sounds in Channel 2, the TIGHT feature tightens the low end and adds percussive midrange gain. This can also be useful for
Blues sounds in the lower range of the GAIN (below 12:30) or when the Gain is above 1:00, adding aggressive attack and controlling
the low end for Crunch Rhythm sounds. Channel 3 high gain sounds benefit from the enhancements found in the TIGHT voicing as
the low end control and mid bump can add articulation to really high GAIN settings (extreme saturation in the higher range) that can
otherwise be too slow, are oversaturated or are just in need of some added focus.
No matter where you apply it, the enhancements found in this voicing add another dimension to the sound and a valuable additional
voice to each of the three Channels.
BASS
Much like the MID, the BASS control responds like a typical Tone control and blends in a fairly wide slice of rich bottom
end to round out the sound. Internal switching that occurs when the different Modes are selected re-voices the frequency and amount
of bass present for each circuit. This difference is crucial to the sounds and a big part of their character.
Channel 1 incorporates a much lower bass frequency that adds depth, dimension and air to the sound. Both Channels 2 and 3
utilize a higher frequency of bass that produces a more resonant, thumping quality and keeps things tighter and more bouncy. This
frequency can be used in greater proportions as compared with the lower – and possibly more tone-hampering – frequency used in
Channel 1. Therefore the need to be able to have different amounts of these two different frequencies is critical to both great sound
and great footswitching compatibility between the Channels.
In Channel 1 we like the balance of the BASS control when it is blending in warmth and body, but not overpowering the attack and
sparkle in the mix. Depending on the setting of the GAIN control this can be different, as the lower GAIN settings can handle a little
higher BASS settings. You will have to experiment with the exact spots and below is a rough guideline example, but basically, as
GAIN goes up - BASS should come down;
Example;
• With the GAIN at 12:00 – BASS at 1:00
• With the GAIN at 1:00 – BASS at 12:00
• With the GAIN at 2:00 – BASS at 11:00
The higher frequencies found on the BASS control in the Channels 2 and 3 are much more forgiving and can be used in higher
amounts than the lower frequencies present in Channel 1. BASS settings between 12:00 and 3:00 will be commonplace - with lower
GAIN settings needing higher BASS settings and higher GAIN settings calling for a more careful use of the BASS. As the gain goes
PAGE 9

down (GAIN 9:30 – 12:00) and things get tighter, there is a need for the rich low-end air that is created by the BASS control. When
the gain saturates things as it’s cranked up (GAIN 12:00 – 5:30), the notes thicken up and less bass is needed to create girth until - at
a certain point - the bass frequencies start to slow things down and can even get in the way for some styles.
NOTE: Remember that the guideline suggestions above similarly apply when the Multi-Soak™ Power Attenuator is being used to
add additional “gain” from the power section. You will likely find that the higher you run the MASTER in search of power overdrive,
the more likely lower BASS settings will be optimal for a balanced Tone and the best attack characteristics.
CHANNEL-ASSIGNABLE MULTI-SOAK™ ATTENUATOR
These three 5-position rotary controls adjust the amount of
reactive power soak available, independently, for each channel. Power attenuation greatly expands the range of tonal possibilities
from the already versatile TC-100 channels, with reactive attenuation providing the best response and feel, while allowing you to scale
the amp’s power tube saturation and overall loudness to better suit the room you’re playing in or specific recording applications. Or,
just reducing loudness to achieve maximum power saturation at ‘bedroom’ volumes.
The four attenuated options scale the TC-100’s power from its full 100 watts, down to 50, 20, 7 and 3 watts. The 3 and 7 watt settings
represent extreme attenuation and maximum power section distortion, producing a thick, compressed, forgiving feel on the strings
of your guitar. These lower power settings can still be surprisingly loud with higher Master settings, and both the Master and Output
controls virtually transform into additional tone controls, further dialing in the subtleties of compression and power tube clipping as
you experiement. The 20 and 50 watt settings of the attenuator provide more realistic attenuation for live applications, while still
delivering a comparable ‘thickening’ of the saturation, tone and feel of the amp due to the relative higher volumes you’re likely to play
in live performance situations.
From adding saturation and harmonic layering in high gain distortion sounds, to exploring the added clip & drive potential in the CLEAN
channel (or lower gain settings in Ch. 2 LO), the Multi-Soak™ Attenuator expands the tonal potential of the Triple Crown dramatically.
Experimentation is key with this feature and the integration of reactive Multi-Soak™ Attenuation in the TC-100 is our best version yet.
Exploration of just this one feature across the three unique channels allows you to dial the amp to your playing environment, your
preferred feel, and will provide years of power scaling inspiration and great Tone.
NOTE: The MULTI-SOAK™ ATTENUATOR feature allows you to run the power amp and it’s tubes hotter and more ‘cranked’ than
would otherwise be possible. The use of the more extreme attenuation settings (3 watts and 7 watts) in combination with high MASTER
settings creates additional heat and stress that leads to accelerated power tube wear and reduced tube lifespan. While a normal set
of power tubes should easily last 1-2 years with 10-15 hours a week of unattenuated playing time, high Master settings and extended
use of the Multi-Soak™ attenuation can result in power tube replacement up to 50% sooner. Extreme attenuation should not cause
damage to the amplifier and can be satisfying and toneful, but may be best used in moderation only when situations call for it.
OUTPUT
The TRIPLE CROWN features a global OUTPUT control enabling you to raise and lower the overall playing volume
with just one control once you have setup your preamp sounds and balanced the Channels with each other using the individual
Channel MASTER controls. The OUTPUT is located just before the power section’s DRIVER stage and acts as an EFFECTS Return.
Be sure to zero out the OUTPUT control before each session and after hitting STANDBY, raise the level slowly so that you avoid ac-
cidental high volume surprises, especially at gigs or in the studio where sudden spikes in signal could cause damage to speakers,
engineers or an audience.
Some traditionalists like to effectively “remove” the Channel MASTER controls from the circuit and use the OUTPUT control as the
MASTER by cranking the Channel MASTER(s) all the way up. Others feel the opposite approach (turning the OUTPUT all the way
up and using the Channel MASTER controls as the OUTPUT) produces a better response. Either approach is fine and each will
produce a slightly different response, but both those scenarios may make it more difficult to get a uniform signal level at the Effects
Loop depending on dynamics and saturation levels in the Channels.
We find that using both the Channel MASTER and the OUTPUT in their middle range produces great response and offers both the
maximum flexibility in balancing the Channels and your playing volume as well as more uniform levels at the Effects Loop.
PAGE 10

SOLO
The SOLO feature enables a pre-settable boost in volume to be engaged by either the SOLO button on the included
Footswitch or by storing it “ON” under a MIDI program number. It is essentially an additional OUTPUT control that is wired in series
and can achieve levels above that of the setting on the OUTPUT.
This footswitchable/MIDI programmable feature allows “on the fly” showcasing of parts at the click of a switch or allows you to have
to different levels of the same preamp sound, thus adding flexibility and even more footswitchable sounds.
NOTE: When using the MESA Footswitch to control all the Channels and features, set the Rear Panel SOLO switch to the OFF posi-
tion. This allows activation of the SOLO from the included MESA Footswitch.
Programming it to be active under MIDI programs is easy and is achieved in this manner:
1. Select a MIDI Program number on your MIDI Controller where you wish the SOLO to be active.
2. Toggle the SOLO mini toggle on the Rear Panel (in the row of switches near the BIAS switch) OFF, then ON once to trigger the
SOLO Feature.
3. Press the STORE Key.
The SOLO will be active under that (just Stored) program number along with the Channel, REVERB and LOOP configuration you
chose before pressing STORE.
NOTE: When the SOLO is active (switch set to SOLO ON) but the MESA Footswitch is NOT connected, both the SOLO and the
OUTPUT will have an effect on the signal with the OUTPUT being the determining factor of what is possible, as in, if the OUTPUT is
either on zero or all the way up, the SOLO will have no effect on the signal. With the OUTPUT in the usable range of its sweep, the
SOLO will allow an increase in volume.
POWER
This switch controls the AC power Mains in your amplifier. Always make sure the (supplied) IEC Power Cable is connected
to a grounded Outlet delivering the proper AC voltage –117v USA. Never alter the Power Cable as doing so may cause damage to
the amplifier, increase the risk of electric shock for you, and will void your Warranty. Always follow the Cold Start Procedure below and
allow the tubes to warm up before turning the STANDBY on (switch up) as this will help the tubes and all other components in your
amplifier to provide years of reliable service.
STANDBY
This large toggle controls the high voltage to the power tubes and from cold start, helps minimize the inrush of cur-
rent and reduces the “shock” on them, which ultimately helps increase their useful life. Just like a light bulb, much of the wear on
tubes happens at the instant of power up. Minimizing this shock and allowing them to warm up more slowly ensures they will give
you the longest life possible. Before Power is switched on, make sure the amp is in STANDBY. Wait at least 30 seconds and then
flip the STANDBY switch to the ON position. STANDBY is also very useful as a MUTE for either short interruptions–like changing
instruments or patching cables–as well as longer intervals such as Set Breaks or other extended periods. While you can leave the
amplifier in STANDBY mode for hours with no harm, it is probably wise to power down if you know you won’t be playing for an hour
or two. Why waste the electricity? Just remember to follow the Cold Start procedure mentioned above when you power back up,
even if the amp is still “warm”. The filaments in the tubes cool much more quickly than even the glass they are encased in, and they
return to their “cold” state even after a short time with the power off. This procedure, when followed religiously, will help prevent tube
problems and extend their useful life substantially.
COLD START PROCEDURE:
(Use every time amplifier has been switched off for more than 3 minutes)
1. Switch to STANDBY
2. Turn POWER to ON.
PAGE 11

3. Wait AT LEAST 30 Seconds, preferably longer, for tubes to warm up.
4. Flip STANDBY to ON
NOTE: This Cold Start Procedure is an important part of ensuring maximum tube life and reliability. Like a light bulb, the most wear
occurs in the instant (short period, first few seconds) voltage is first applied. Like a light bulb, if a dimmer is used to reduce the volt
-age for the first few seconds or so of use, increased longevity is the result. The STANDBY is the amp’s equivalent to a dimmer and
using it in the above described method will ensure the longest life and best performance from a set of tubes (especially Output tubes).
REAR PANEL (Head Version)
AC MAINS SOCKET: Underneath Rear Panel (Quick Disconnect Style)
This is the AC MAINS Power Cord Socket. The
standardized removable power cable supplied with your amp can only be plugged in one way. Always connect the male end to a
grounded (3-Hole) wall socket with the proper voltage present (117 Volts on U.S.A. Models). To Avoid The Risk Of Shock, Never
Alter The Power Cable in any way. Altering the Power Cable will void your warranty and put you at risk while leaving your amplifier
open to the possibility of damage.
FUSE
This is the A.C.’s (Alternating Current) main fuse and provides protection from outside A.C. fluctuations as well as power
tube failure damage. Should the FUSE blow, replace it with the same rating in a Slo-Blo type package. The Domestic 117V and
Japanese 100V versions requires a 2 Amp Slo-Blo fuse. A power tube short or failure is often the cause of a blown fuse. Follow the
cold start procedure mentioned in the STANDBY switch section and watch the power tubes as you flip the STANDBY to the ON
position. If a power tube is going bad or is arcing, you will see it! Flip the STANDBY switch down immediately and replace the faulty
power tube and the FUSE if necessary.
If you see nothing abnormal as you move the STANDBY switch to ON, it is possible that a power tube shorted ‘temporarily’ and caused
the blown Fuse. Occasionally, whether from just luck or from cooling down, a short in a power tube ‘reconnects’ itself temporarily
and can operate normally again for a time… but this tube should be considered faulty and replaced as soon as possible to ensure
uninterrupted performance. If you can identify a tube that is arcing or shorting by the method mentioned above and the tubes have
minimal use, consider replacing the obviously faulty or failed tube and leaving the others installed.
If you haven’t changed tubes for a while after heavier use, a failure may be telling you it’s time to change all your power tubes. Save
any working but used tubes as spares.
Spare fuses (of the proper type and rating) are a must for the fabled cord bag along with at least one set of spare tubes. Always have
both on hand—at the gig or at home—since tubes decide, not you, when it’s time to stop working. Spare tubes and fuses can be
worth their weight in gold should you ever experience a tube failure, especially on a gig. We STRONGLY recommend making them
a permanent fixture in your gig bag.
REVERB
Lush all-tube Reverb drenches the TC-100’s three Channels with a beautiful 3-D halo and provides you with individual
control of the REVERB mix in each of the three Channels. It can be controlled via the included Footswitch or via MIDI messages
once the circuit is active.
HI
REVERB
LEVELS
FUSE
LO
CLEAN
EFX
LOOP
SENDSPEAKERSLINE OUT
HEADPHONE RETURN
6L6
EL34/6V6
OFF/FTSW
REVERB ON
OFF/FTSW
SOLO ON
OFF/FTSW
EFX ON
8 OHM
4 OHM
GROUND
LIFT
SPKR
ON
SPKR
OFF
CLOSED
BACK
CAB. SIM.
VINTAGE
BIAS
CabClone™
D.I.
MESA
FT.SW.
MIDI
THRU/OUT
MIDI
IN
MIDI
CHANNEL STORE
OPEN
WARNING:
Replace fuse with same type/rating only.
Do not expose to rain or moisture.
CAUTION:
Risk of Electric Shock. Do Not Open.
No user serviceable parts inside.
®
ON
EL34
SWITCH MUST MATCH
TUBES IN USE
120 V~
60 Hz
4 A
4 A
SLO
BLO
0
1
2
3
4
5
6
7
8
9
A
B
C
D
E
F
AMPLIFIER
44YV
PAGE 12

You can utilize the REVERB in three ways, “on” all the time, manually activated using the included Footswitch and engaged automati-
cally under MIDI Programs.
In the REV ON position the circuit is active all the time and the REVERB controls determine the dry/wet blend of each Channel. In
the OFF/FTSW Position, the REVERB circuit is off until triggered on with the REVERB Button on the included Footswitch or via a
previously written MIDI program.
Programming the REVERB under a MIDI Program number is quick and easy with the following simple procedure:
1. Select a MIDI Program Number with your MIDI Controller.
2. Select the Channel, and Feature combination you wish to include in the MIDI Program at that Program Number location using the
Front Panel Channel Select and these Rear Panel MIDI Control switches by turning them OFF and then ON once.
3. Press The Rear Panel STORE Key.
The REVERB will now be called up under the MIDI Program location you have just stored it in.
NOTE: See the MIDI section of this manual to control the REVERB with MIDI commands.
SOLO SWITCH
The SOLO feature enables a pre-settable boost in volume to be engaged by either the SOLO button on the
included Footswitch or by storing it “ON” under a MIDI program number. It is essentially an additional OUTPUT control that is wired
in series and can achieve levels above that of the setting on the OUTPUT.
This footswitchable/MIDI programmable feature allows “on the fly” showcasing of parts at the click of a switch or allows you to have
to different levels of the same preamp sound, thus adding flexibility and even more footswitchable sounds.
NOTE: When using the MESA Footswitch to control all the Channels and features, set the Rear Panel SOLO switch to the OFF posi-
tion. This allows activation of the SOLO from the included MESA Footswitch.
Programming it to be active under MIDI programs is easy and is achieved in this manner:
1. Select a MIDI Program number on your MIDI Controller where you wish the SOLO to be active.
2. Toggle the SOLO mini toggle on the Rear Panel (in the row of switches near the BIAS switch) OFF, then ON once to trigger the
SOLO Feature.
3. Press the STORE Key.
The SOLO will be active under that (just Stored) program number along with the Channel, REVERB and LOOP configuration you
chose before pressing STORE.
NOTE: When the SOLO is active (switch set to SOLO ON) but the MESA Footswitch is NOT connected, both the SOLO and the
OUTPUT will have an effect on the signal with the OUTPUT being the determining factor of what is possible, as in, if the OUTPUT is
either on zero or all the way up, the SOLO will have no effect on the signal. With the OUTPUT in the usable range of its sweep, the
SOLO will allow an increase in volume.
EFX LOOP (SERIES)
These two ¼” jacks provide the interfacing patch points for your processing needs. The Effects Loop is
basically a circuit bridge from the end of the preamp to the Driver stage, with the SEND interrupting the signal at the preamp’s end
and the RETURN feeding the power section just before the Driver tube.
Using this patch point usually ensures the best sonic performance as well as signal to noise ratio with your outboard processors.
That said, it is important to point out that this is a critical junction in the TRIPLE CROWN’s circuit path and whatever is inserted here
PAGE 13

can have an effect on the overall performance of the amplifier.
The Effects Loop is a Series Loop, meaning that the entire signal goes through it, unlike a Parallel Loop where a percentage of the
unaffected pure signal is taken around the Loop. Therefore, the quality of the devices used in the Loop and their performance is criti-
cal to achieving the best sound and performance from your amplifier. We recommend auditioning any processor with your TRIPLE
CROWN BEFORE buying it to ensure it delivers a good match in performance. One clue is price. Like in any segment of the mar-
ketplace, you get what you pay for most times and there is a wide range of quality in regards to both build and sonic performance.
While technology has raced ahead at a frightening pace and features are at an all time pinnacle, it is sound and feel you’ve likely
chosen your amplifier for, and therefore we recommend a similar degree of discretion when it comes to choosing your processing
devices and ultimately,… what you will insert in the middle of your pure analog tube amplifier.
When using MIDI to control the TRIPLE CROWN, the EFX (Loop) status will be determined by either the Factory-burned settings in
the TRIPLE CROWN’s processor or whatever was last stored at a given MIDI Program Number location (as is possible as a result of
a prior demo at a MESA Dealership).
NOTE: Always use quality (low capacitance) cables of the shortest possible length in the Effects Loop when connecting your processors.
Doing so will help avoid any sonic degradation due to capacitance and help maintain optimum performance when the Loop is in use.
To Store the Effects Loop status in a Channel under a MIDI Program location, as with all the other features, you must first “reset” its
location in the TRIPLE CROWN’s switching buss.
Follow these steps to store the EFX (Loop) Status in a Channel under a MIDI Program location;
1. Go to the desired MIDI Program number on your MIDI controller of choice.
2. Call up the desired TRIPLE CROWN Channel with the Front Panel Channel Select mini toggle located near the input jack.
3. Set the EFX mini toggle located on the rear panel to OFF/FTSW.
4. Move the EFX mini toggle to “EFX ON” (switch up).
5. Toggle the STORE switch in the MIDI section of the Rear Panel of the TRIPLE CROWN one time. The current Channel and FX
(Loop) status has been written to the currently displayed MIDI Program Number location in the TRIPLE CROWN’s processor.
The Channel and EFX (Loop) status is now saved under the current MIDI Program Number displayed on your MIDI controller and
should be called up again when next you return to that Program Number. If it is not, repeat steps 1–5 and check again.
SPEAKERS
The TRIPLE CROWN handles the interfacing of speakers with a slightly different set-up from other MESA amplifiers.
The dual ¼” jack setup can handle most of the common speaker impedances from 4 to 16 Ohms. 2 Ohm Loads are not supported and
are not recommended and this will likely be no inconvenience as 2 Ohm ratings are very rare in the world of guitar cabinetry anyway.
A mini toggle flips you between the 4 Ohm and 8 Ohm taps on the output Transformer and between these two positions, most popular
cabinet configurations and load requirements can be accommodated.
When using the TRIPLE CROWN Combo by itself or the TRIPLE CROWN Head through a standard MESA 8 Ohm 4x12 or 1x12 Exten-
sion cabinet, use the IMPEDANCE SWITCH set to the 8 OHM setting. Most MESA 2x12 Cabinets are also wired to 8 Ohms and they
can be used in this setting as well.
Adding a second 8 Ohm speaker or Cabinet to the other SPEAKER Output, we suggest setting the IMPEDANCE SWITCH to the 4 OHM
setting. This will provide a better impedance match and ensure the full power and headroom is available.
A single 4 Ohm Cabinet should be used with the IMPEDANCE SWITCH to the 4 OHM setting. A 16 Ohm 4x12 Cabinet or 2x12 Cabinet
should be used in the 8 OHM setting and will see a slight reduction in maximum power, though it will likely be unnoticeable with the
additional coverage four or even two speakers provides. Two 16 Ohm Cabinets connected in the 8 OHM setting will produce a better
impedance match and will offer the full power and headroom.
PAGE 14
Table of contents
Popular Amplifier manuals by other brands
JL Audio
JL Audio Fathom SA-600W owner's manual
Texas Instruments
Texas Instruments MSP430F2274 user guide

Fender
Fender Rumble 25 operating instructions
B&K
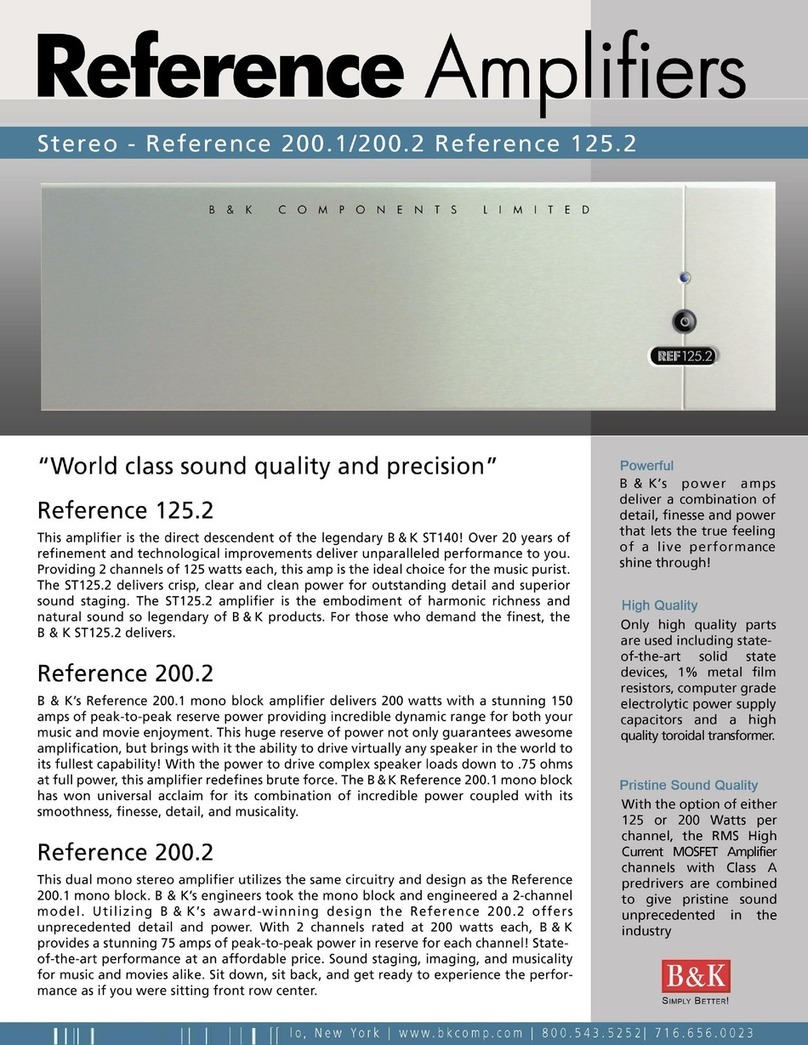
B&K Reference 125.2 Specification sheet
Evh
Evh 5150 ICONIC Series owner's manual

Sony
Sony TA-E1 Operating Instructions (primary... operating instructions

Marshall Amplification
Marshall Amplification 1959SLP owner's manual

National Instruments
National Instruments nuDrive 4SX-411 user guide
Harley Benton
Harley Benton GT-10 owner's manual

HumanTechnik
HumanTechnik Crescendo 50 operating instructions
Pico Macom
Pico Macom PIDA-1000 Installation and operation manual
Quartzlock
Quartzlock E5000 User handbook
