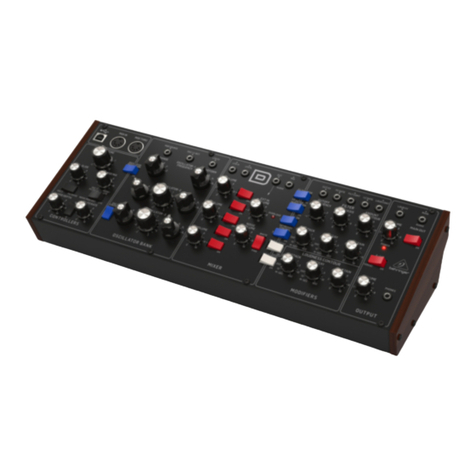
MFB DOMINION 1 User manual

Operating Manual

2
IMPRINT
MFB – Ingenieurbüro Manfred Fricke (Engineering office)
Neue Str. 3
4 63 Berlin - Germany
www.mfberlin.de

3
DISCLAIMER
MFB will not assume any responsibility for errors which
may occur in this manual. The content of these
instructions is subject to change without prior notice.
When this manual was created, good care was taken to
exclude any mistakes and contradictions. MFB will not
accept any guarantees for this manual except those
provided by commercial law.
No part of this user manual is allowed to be reproduced
without the expressly written consent of the
manufacturer.
GENERAL SAFETY INSTRUCTIONS
Please carefully read these safety instructions, before
start using the device. They comprise basic rules for the
use of electronic devices. Please read all the notes.
Suitable location
• Only operate the device in closed rooms.
• Never operate the device in humid environments
• Do not operate the device in dusty or dirty
environments.
• Ensure unhindered air supply to all sides of the device.
• Do not place the device in proximity of heat sources.
• Do not expose the device to direct sunlight.
• Do not expose the unit to heavy vibration.
Mains connection
• Only use the supplied connection cable.
• If the supplied mains connector does not fit into your
socket you should consult a qualified electrician.
• Disconnect the mains connector from the socket if
you do not use the device for a longer period of time.
• Never touch the mains connector with wet hands.
• When disconnecting, always pull the connector and
never the cable.

4
Operation
• Never place any vessels containing liquids on top of
the device.
• Ensure that the device cannot move during
operation.
• Ensure that no objects can get inside the device.
Should this happen, switch the device off and
disconnect it from the mains. Then, contact a
qualified technician.
Maintenance
• Do not open the device. Any repair or maintenance
should only be done by qualified tech personnel.
There are no parts inside the device that could be
maintained by the user. You will also lose your right to
claim warranty if you open the device.
• Only use a dry, smooth cloth or brush for cleaning the
device. Do not use any alcohol, solvents or similar
chemicals. These will damage the surfaces.
Proper use
This device is exclusively intended for creating audio
signals and creating and processing control signals
according to the MIDI and CV/Gate ( V/Oct.)
standards. Any other use is not permitted and will
exclude any warranty claims towards MFB.
Disposal
This device has been manufactured RoHS-conforming in
compliance with the requirements of the European
parliament and council and thus is free from lead,
mercury, cadmium and chromium.
Nevertheless, this product is special waste and must not
be disposed in ordinary household waste.
For disposal, please contact your local dealer, MFB's
local distributor or www.mfberlin.de.

5
Table o Contents
General 6
Setup 6
OSCILLATORS 7
VCO - Modulation 8
VCO - Synchronization 9
VCO - Frequency Modulation (FM) 0
MIXER
FILTER 2
VCF - Modulation 3
ENVELOPES 4
LFOs 5
MODULATION / LFO3 6
PITCH 7
Key Functions - Aftertouch 8
Single-/Multi-Trigger 9
Glide 9
VCA 9
VELOCITY/PROGRAMMING 20
VELOCITY - Routing 20
SYSTEM SETTINGS 22
Preset Selection 24
Saving Presets 24
Program Changes 24
SHIFT - Functions 24
ARPEGGIATOR 26
SEQUENCER 28
Playing Sequences 28
Creating Sequences 28
Editing Sequences 29
PATCH PANEL CONNECTIONS 30
REAR PANEL CONNECTIONS 33
MIDI IMPLEMENTATION 34
Note: We have included schematic views of the
described sections for better understanding. All names of
controls, switches and jacks are printed bold and exactly
spelled as labeled on the unit.

6
General
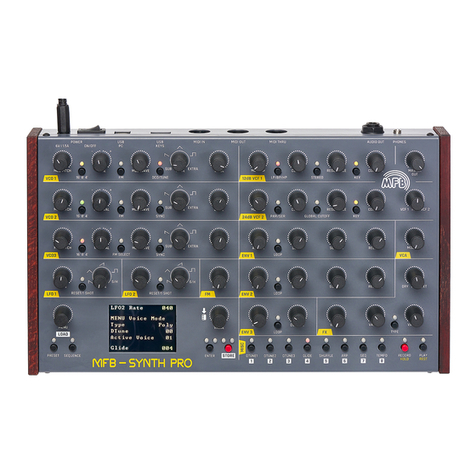
Dominion I is a monophonic analogue synthesizer.
Among its most important characteristics are a threefold
oscillator section that can be played paraphonically with
up to three voices, a new designed multimode filter with
twelve operational modes, 28 memory locations, step
sequencer and arpeggiator, versatile MIDI and
CV/Gate-control as well as a three octave keyboard
with two ribbon elements for pitch and modulation.
Setup
Dominion I is powered by an internal power supply.
Connect the provided power chord to the
corresponding socket on the unit's rear panel. Find the
corresponding on/off switch alongside.
Make sure to connect the unit's AUDIO OUT to a mixing
console, an audio-interface or an amplifier before
switching on. Toggle the aforementioned switch to turn
Dominion I on and off.
In case Dominion I is not played using its keyboard, the
unit is addressed via its MIDI or CV/Gate connectors.
Connect the Midi IN input to the MIDI output of a
keyboard or a computer MIDI-interface. Alternatively,
use inputs CV VCO1 (as well as VCO2 and VCO3) and
GATE to connect to an analogue sequencer or CV/Gate
keyboard.
Note: Dominion I uses analogue circuits. It is therefore
recommended to "warm up" the unit for 5 to 0 minutes
to ensure solid tuning.

7
OSCILLATORS
Dominion I utilizes three voltage controlled oscillators
(VCO) with almost equal functions. Differences are to be
found for the Tune controls and ring modulation. All
described functions are valid likewise for VCO1, VCO2
and VCO3.
Use the four-stage selector Wave to choose the
waveform. Available choices are triangle, saw tooth,
square and ring modulation resp. XOR. When set to
Ring/XOR, the oscillators modulate each other as follows:
VCO1 – VCO <> VCO2 (resp. external signals RM X/Y In)
VCO2 – VCO2 <> VCO3
VCO3 – VCO3 <> VCO
Oscillator offers an analogue ring modulator, while
oscillators 2 and 3 each utilize a digital ring modulator
with so called XOR wiring which offers a rough sounding
character.
To be able to hear the ring modulation of VCO1, you
have to turn up RM Y In in the mixer section. In alternative
to VCO2 and/or VCO1, external audio signals can be fed
into the connectors RM X In and RM Y In on the unit's top
panel (see page 32).
The Tune control for VCO1 sets the general tuning for all
three oscillators. The available range is approx. ±6 semi
tones.
The Tune controls for VCO2 and VCO3 set the tuning for
the respective oscillators. The range is approx. ± 3 semi

8
tones, allowing detuning by a little more than a full
additional octave.
Use the four-stage selector Octave to adjust the octave
range for each oscillator. Select between 32’, 16’, 8’, 4’,
2’ and 1’.
VCO – Modulation
Each VCO can individually be modulated. The
Modulation control adjusts the respective modulation
intensity whereas the modulation target depends on the
setting of the Mod Select selector.
The six-stage selector Mod Select allows choosing a
specific modulation path for the corresponding oscillator.
The choices available are:
Level – pre-mixer level modulation by LFO1
Pitch1 – pitch modulation by LFO1 (up to ± 2 octaves)
Pitch2 – pitch modulation by LFO2 (up to ± 2 octaves)
AD– pitch modulation by envelope AD
PWM – modulation of waveform symmetry by LFO1
PW – manual modulation of waveform symmetry by
Modulation control
Note: With Mod Select being switched to a new position
from PW, the former Modulation setting (waveform
symmetry) is being preserved. This allows to modulate a
narrow square wave (e.g.) in volume and pitch. Even
with a pitch modulation being selected, e.g. by a LFO,
the symmetry can still be manually altered or modulated.
However, with Mod Select being set to PWM the pulse
width will always be modulated starting from a 50%
position.

9
Note: When switching Mod Select, the new function will
be activated after having moved the Modulation
control.
Note: Although this function has been labeled PW resp.
PWM, meaning pulse width (modulation), the parameter
modifies the symmetry of all VCO waveforms. Using the
Modulation control, the curves change as follows when
turned from left to right:
Wave Triangle – triangle to sine
Wave Saw tooth – saw tooth to triangle
Wave Square – 50 to 95% pulse width (center ≈ 75%)
VCO – Synchronization
All three oscillators of
Dominion I can be hard-
synced. Here, the main
oscillator will dictate its
pitch to the synced
partner. Changing the
tuning of the synced
oscillator using Tune or Modulation will lead to drastic
timbral changes.
The best settings for typical sync-sounds are Pitch1 resp. 2
and AD selected for the modulation path (using Mod
Select). VCO1 always acts as main oscillator. However,
an external signal fed into input Sync In may replace its
signal (see page 3 ).
Use the two Sync buttons for oscillators 2 and 3 to
individually enable the sync function. The corresponding
red LEDs will then be lit.

0
VCO – Frequency Modulation (FM)
Use the frequency modulation section to modulate
VCO1 and VCO2 in pitch by VCO3. Depending on the
settings and intervals, this leads to metallic and atonal
sounds. Use the four-stage selector FM Source to set the
modulation target:
OFF – no frequency modulation
VCO1 – is being modulated by VCO3
VCO2 – is being modulated by VCO3
VCO1+2 – are being modulated commonly by VCO3
FM Mod sets the amount resp. intensity of the frequency
modulation.
Use the six-stage selector FM Mod Select to set a
modulator for the FM-intensity. When set to Manual, the
FM-intensity is being manually controlled by the FM Mod
control.
With LFO1, LFO2, ADSR1, ADSR2 or AD being selected, FM
Mod will adjust the modulation amount of the selected
modulation source.
In lieu of VCO3, an external signal being fed into the FM
In jack (see page 3 ) can be used as modulator.

MIXER
Controls VCO1, VCO2 and
VCO3 set the oscillators'
output level, prior entering
the filter stage. With all
controls set to full level, the
filter input will be slightly
overdriven.
Noise/Ext adjusts the level of
the internal noise generator
(white noise).
With the input labeled Ext In
being used, the noise
generator will be replaced
by an audio signal being fed
in here.
The corresponding Noise/Ext
control will then set the level
for the external audio signal.
The RM Y In control adjusts the level of the ring
modulated signal of VCO2 resp. an audio signal being
fed into the RM Y In jack.
Note: In order to hear any ring modulation results, the
VCO1 mixer control needs to be turned on. RM Y In will
be inactive without having selected VCO1 for RM (see
page 7).

2
FILTER
The filter section has been greatly expanded compared
to the MFB Dominion X. It now offers twelve different filter
modes based upon the SED circuit (Single Ended &
Discrete).
Use Filter Select to choose between the filter modes:
LP1 – 24 dB low pass
LP2 – 8 dB low pass
LP3 – 2 dB low pass
LP4 – 6 dB low pass
BP1 – band pass with 8 dB low pass and 6 dB high pass
BP2 – band pass with 2 dB low pass and 2 dB high pass
BP3 – band pass with 6 dB low pass and 6 dB high pass
BP4 – band pass with 6 dB low pass and 2 dB high pass
NO1 – notch combining 6 dB low pass and 6 dB high pass
NO2 – notch combining 6 dB low pass and 6 dB high pass
and additional 6 dB low pass
HP1 – 6 dB high pass
HP2 – 2 dB high pass
Cuto controls the filter's cutoff frequency.
Resonance adjusts the filter's resonance which can
reach self-oscillation in all modes.

3
Pressing Key will activate the key-follow-function where
the cutoff frequency will follow the played notes' pitch:
LED off – key-follow amount 0%
LED lit slightly– key-follow set to 50%
LED fully lit– key-follow amount 00%
Press Inverse to apply negative envelope modulation.
The LED is lit is in this mode (see note on page 4).
The Contour control sets the modulations intensity of
ADSR 1 towards the cutoff frequency.
The filter's resonance can either be modulated by LFO2
or envelope AD. Use the Reso Sel switch to toggle
between both modulation sources. With the LED being lit,
LFO2 is used as modulation source.
VCF – Modulation
In parallel to the manual control of the
cutoff frequency using the Cuto control
and envelope ADSR1 modulation, up to
four other sources may also be used to
modulate the cutoff parameter.
Use the four-stage selector Mod Select to
set the modulation source for Cuto .
Available sources are LFO1, LFO2, VCO2
or VCO3.
The Modulation control located
underneath sets the amount of
modulation.

4
ENVELOPES
Dominion I offers two ADSR envelopes and one AD
envelope. ADSR1 is permanently connected to control
the filter's cutoff frequency with its modulation intensity
being controlled by the Contour knob. In addition, this
envelope can also be used to modulate oscillators and
2 by setting the VCO > Mod Select switch respectively.
Note: With Inverse being activated (located next to the
Contour control), the inversion of the envelope also
applies to the oscillators' modulation.
Envelope ADSR2 mainly controls the VCA and therefore
sets the output volume of Dominion I. However, it may
also serve to support FM Mod (see page 0).
Envelope AD can modulate oscillator 3 and the filter's
resonance (see page 3).
Note: The envelopes’ speed can be switched between a
normal and slower mode that reduces all times by a
factor of four (see page 25).
Note: The three envelopes' control signals can
additionally be tapped from the respective PATCH
PANEL jacks and used for parallel modulation of external
equipment (see page 32).

5
LFOs
LFO1 and LFO2 offer
equal functions. The Rate
control sets the speed
within a range of approx.
0. Hz to 00 Hz.
Note: Just as for the envelopes, the LFOs can be
switched to a slower mode (see page 25). Here, the
speed approx. ranges from 40 seconds to 25 Hz.
Use the six-stage selector Wave to choose the
modulation waveform. Available are sine, triangle,
descending saw tooth, ascending saw tooth, square as
well as sample & hold.
Press Reset to determine whether the LFO-waveform is
restarted by every incoming MIDI-note:
LED off – free running LFO
LED green – free running LFO (LED pulses in sync)
LED red/green – the LFO waveform cycle starts with each
incoming MIDI-note (LED changes color for each beat)
LED red – LFO works in one shot mode
Note: In one shot mode, the selected waveform is only
being completed once for each note played. This mode
is indicated by a green LED that lights up upon triggering.
The Key button will change the LFO speed in
dependency of the incoming pitch. Higher notes will
produce higher LFO speeds.
LED off – no key follow
LED slightly lit – 50% key follow
LED fully lit– 00% key follow

6
Note: At 00% key follow, the LFO speed doubles with
each octave. Hence, the maximum speed increases to
approx. .2 kHz.
MODULATION / LFO3
The third LFO in Dominion I utilizes a triangle waveform
and works in dependence of the ribbon MODULATION
control respectively MIDI controller CC# (of an external
MIDI source). The more the ribbon is being used on its
vertical axis, the higher the modulation intensity.
This ribbon works equally to a common modulation
wheel, meaning it will remain at a certain position when
the finger is being removed from the ribbon. Activity is
displayed by a corresponding LED. This LED extinguishes
with the modulation being moved down to zero.
Use the six-stage selector Select to set the modulation
target for MODULATION / LFO3:
VCO – pitch of all three oscillators
VCO2 – pitch of VCO2 (e.g. for sync)
VCO3 – pitch of VCO3 (e.g. for XOR)
VCO2+3 – pitch of both VCO2 and VCO3
VCF – filter cutoff frequency
VCA – output volume

7
The Mod Rate control sets the LFO speed which is
visualized by a rhythmic blinking LED. When set fully left,
no LFO modulation is applied. However, the ribbon can
still be used to manually control the targeted parameter.
The LED is lit red in this case.
Note: The settings for MODULATION / LFO3 are not being
saved with the presets. They are meant as performance
tools only.
PITCH
This ribbon works equally to a common pitch wheel,
meaning it will "jump" back to its original position as soon
as the finger is being removed from the ribbon.
Use the six-stage selector Select to set the target for the
PITCH modulation:
VCO – pitch of all three oscillators
VCO2 – pitch of VCO2
VCO3 – pitch of VCO3
VCO2+3 – pitch of both VCO2 and VCO3
VCF – filter cutoff frequency
VCA – output volume
The Pitch Range control adjusts the ribbon range. The
maximum range is one octave.

8
Key Functions - A tertouch
The keyboard's channel-
aftertouch function can
be used to add punctual
control to different
parameters.
The bipolar AT Mod control sets the amount of
modulation. When turned right from its center position,
the modulation is positive. When turned left from center,
the modulation is inverted. There is no aftertouch
modulation with this control in center position.
The modulation target is selected by AT Select and the
program section. Press the AT Select button and the
corresponding LED will be lit red while the display
changes.
Use the Value control to select a modulation target that
is enabled by pressing Enter. The display will now read O
OO
On
nn
n
while the AT Select LED will turn off. Available choices are
pitch, VCO-Modulation and the filter's cutoff frequency.
OAP
OAPOAP
OAP – pitch of all three oscillators
O1P
O1PO1P
O1P / O2P
O2PO2P
O2P / O3P
O3PO3P
O3P – pitch of oscillator , 2 or 3
OAA
OAAOAA
OAA – common modulation of all three oscillators,
according to Mod Select and Modulation settings
O1A
O1AO1A
O1A / O2A
O2AO2A
O2A / O3A
O3AO3A
O3A – modulation of oscillator , 2 or 3,
according to Mod Select and
Modulation settings
Note: With all oscillators' Modulation controls being set to
null, this modulation is being virtually activated by using
aftertouch. Here, the modulation depth for AT Mod is the
decisive factor. With any modulation depth being preset
for the oscillators, the AT Mod modulation will be added.

9
CUt
CUtCUt
CUt – modulation of the filter's cutoff frequency
C
CC
CU
UU
UA
AA
A – amount of Modulation for the parameter selected
by the filter's Mod Select
Exit this menu without any changes applied by pressing
the AT Select button.
Single-/Multi-Trigger
The Trig button toggles between single- and multi-
triggering. When using multi-triggers (LED lit red), the
envelopes will be retriggered by every new note, even
when played legato (i.e. while the first key is still being
held).
In normal mode (LED off), single trigger mode is active.
Glide
The Glide control sets the duration for the portamento
effect. This value is valid for all three oscillators commonly
(also see Glide Settings on pages 22 and 23).
VCA
The Master control
sets the overall
output level of
Dominion I.
The Mod LFO2
control introduces a
variable amplitude
modulation (Tremolo) by
LFO2 that can be inverted by pressing the Inverse button.

20
VELOCITY/PROGRAMMING
The Vel/Prg section fulfills several tasks. Here, system
settings as well as the routing of the keyboard's velocity
towards one or several parameters can be set.
The procedure is as follows: Select a modulation target
resp. a system function using the Select selector. Choose
between possible sub functions by pressing Enter. These
are visualized by three dots at the lower display border.
Enter the desired values using the Value control.
VELOCITY – Routing
The keyboard's velocity can address up to seven
modulation targets. These are the selector's positions
VCA to ADSR. All modulations are available
simultaneously but with individual modulation amounts.
With a value of 00
0000
00 being displayed, no modulation is
applied. Positive values add to the modulation targets'
parameter control settings, while negative values
subtract from these. All settings are being stored with a
preset. When changing the target parameter using
Select, the current value is being displayed.
Consequently, the use of the Value control may result in
parameter value jumps.
By pressing SHIFT and Enter (Rst) commonly, all velocity
routings will be set to 00
0000
00.
Note: With velocity curve 0
00
0 being selected (see page
23), the routing settings will not apply to the modulation
targets.
Table of contents
Other MFB Synthesizer manuals
