MGI PhotoSuite III SE User manual

for the MGI PhotoSuite III SE®, MGI PhotoVista®,
PhotoBank Video Capture, AVI Creator, Driver Installation
Visit our website at www.spypen.com
Dear Customer,
Thank You for purchasing our product.
“You will find the Installation Manual on the CD
(PDF-file)”
“Sie finden die bedeinungsanleitng auf der CD
in einer PDF date.”
User’s Manual
English

Caution
Please note that this is a dual mode product that supports both video (PC-Camera) and DSC (Digital
Still Image Camera) modes.
General Maintenance and Safety
To keep from damaging your SPYPEN, avoid exposing it to moisture and extreme temperatures.
(below 5ºC or above 40ºC)
Do not use or store your SPYPEN in a place where strong electrostatic or electrical noise may be
generated.
Do not drop or give excessive shock to the SPYPEN.
Do not disassemble or touch the inside of the SPYPEN. This may result in malfunctions of the
camera.
Do not use organic solvents, such as thinner or benzene, on to the SPYPEN.
Notes
Picture quality protection function will be automatically activated when taking pictures in a dark
place. The camera will not work while warning signal is beeping.
Digital Camera
1
English
The video mode (PC-Camera) will erase all the pictures taken in DSC mode
because the same buffer (memory) is used for both modes. Be sure to
upload all the pictures stored in the SPYPEN to the PC before activate
video mode.
English

When used in low light, the screen may be blinking to warn that the image is not clearly visible. If
possible, please use the camera under sufficient lighting conditions.
You may take up to 107 pictures in low-resolution mode. Please note that the counting of
remaining number of pictures starts from 99 instead of 107. While the first 8 (from 107 to 99)
pictures are being taken, the display will indicate 99 icon.
If no picture is taken for 5 seconds after switching the mode, the remaining number of pictures will
automatically change according to the selected mode.
2 Digital Camera
English
When changing batteries in sleeping mode, new batteries must be inserted
within 2 minutes. Never press the POWER ON/MODE SWITCH button while
changing batteries. This will erase all the pictures stored in the camera.
(If the LCD is blinking, wait until the camera switches to sleeping mode and
then change batteries.)
Camera Setup
After inserting 3 AAA batteries, connect the SPYPEN to the PC using a USB cable.
Slide the battery
door away from
the camera and
insert the batteries
as indicated
below.
Installing Batteries Connecting to the PC
Fold down the camera
to 90when using it as
a PC-Camera.
USB Port

Digital Camera 3
Slide the battery door
away from the camera
and insert the batteries
as indicated below.
Installing Batteries
USB Port
Connecting to the PC
English
After inserting 2 AAA batteries, connect the SPYPEN to the PC using a USB cable.
Slide the battery
door away from
the camera and
insert the
batteries as
indicated below.
Installing Batteries
Connecting to the PC
USB Port

4 Digital Camera
English
Viewfinder
LED lamp
Shutter
Lens
LCD
window
(2-digit)
POWER
ON
MODE
SWITCH
Your SPYPEN Camera : CLEO
Your SPYPEN Camera : AXYS
POWER ON
MODE SWITCH
Viewfinder
LED lamp
Lens
LCD window
(2-digit)
SHUTTER
Using Camera Switches
When the LCD screen is turned off, press the POWER ON/ MODE SWITCH button. Then the LED
lamp will be turned on, and icons will appear on the LCD window. If not used for 30 seconds, the
camera will be turned off automatically (sleeping mode).
Available functions will appear on the LCD screen as shown below when the POWER ON/ MODE
SWITCH button is pressed.

Digital Camera 5
English
MODE Display
When this mode is selected, you
will have a 10 seconds delay
after pressing the Shutter button.
When this mode is selected,
you can switch your SPYPEN
to the high-resolution mode by
pressing the button once.
When this mode is selected,
you can switch your SPYPEN
to the low-resolution mode by
pressing the button once.
When this mode is selected,
you can erase the entire images
by pressing the button twice.
26 consecutive exposures in
high-resolution mode.
107 consecutive exposures in
low-resolution mode.
When this mode is selected, you
can take continuous shots by
holding the shutter button down.
Pictures Remaining Number.
Starts from 99 in low-resolution
mode.
LED lamp
Viewfinder
Shutter
Lens
LCD
window
(2-digit)
POWER
ON
MODE
SWITCH
Your SPYPEN Camera : XION

Standard Photographing (AXYS, CLEO, XION)
Center your subject in the Standard photo frame to take a picture.
Images outside the frame will not appear in the picture. Please note, however, that the actual
picture will be slightly larger than the image shown in the frame.
When photo frame is not clearly visible due to surrounding lighting conditions, use your best
judgment to place the object in the frame.
6 Digital Camera
English
Using Viewfinder Frame & Photographing
Macro photo frame:
10cm ~15cm
Macro photo for business
card size picture
Standard photo frame:
50cm ~
You can see the subject through the viewfinder. After centering the subject in the viewfinder, press
the shutter button to take a picture. Set your SPYPEN focus distance to ( when the subject is
located in 50cm ~ range. When the subject is within 10cm ~15cm (Macro) range, set the camera
focus distance to ( for close up picture. If you hear a high pitch beep sound when pressing the
shutter button, you can successfully take the picture. The pictures remaining icon changes
automatically to indicate the remaining number of pictures.
Photographing

Macro Photographing
AXYS: Center your subject in the close up photo frame of the viewfinder and take a
picture within 10~15 cm range.
CLEO: Center(Focus) your subject to take a picture in the Standard photo frame within the
distance of 10~15cm. Please take a picture after moving the photo frame 10~15mm to the left
and the lower part from the center of the subject.
XION: Aim the lower part of the Standard photo frame at the subject picture’s lower bottom
end, and then shoot.
Macro photo for business card size picture (AXYS)
Center your object in frame of a business card size.
Digital Camera 7
English

8 Digital Camera
English
Place the Installation CD into your CD-ROM drive.
First, install MGI PhotoSuite III SE from the Auto Run screen.
After choosing the language you want to install, click theOK,
Next, orYesbutton following the instructions.
If you do not want to register now, click theRegister Later
button.
Click theFinishbutton on the Setup Complete screen.
Install MGI PhotoVista from the Auto Run screen.
ClickPhotoBank Video Captureon the Auto Run screen. Click theNextorOKbutton
following the instructions.
After clicking on “AVI Creator” on the Auto Run screen, install it by following the instructions
given on the screen.
At last, clickDriver Installationon the Auto Run screen.
Choose the language you want to install from the Select Language screen.
If a message of Digital signature appears, clickYesbutton and continue to installation.
Restart your computer by clicking on theOKbutton from the Installation screen.
Install the Installation CD according to the following Instructions.
After installing the S/W and the driver, restart your computer and connect
the camera to the USB port on your computer.
Installation of the Software and Driver

MGI PhotoSuite III is the ideal S/W for editing, enhancing, organizing, and
sharing your pictures. MGI PhotoSuite III contains over 1,500 Templates and
backgrounds as well as image libraries for variety of applications, such as
collages, cards (i.e., bookmarks, gift messages, postcards, and etc.), photo
layouts (i.e., comics, group photos, posters, photo albums, and etc.),
calendars, magazine covers, business uses (i.e., business cards, certificates,
labels, advertisements, letterhead, and etc.). You can easily create fun slide
shows or digital greeting cards and send them to your on-line friends!
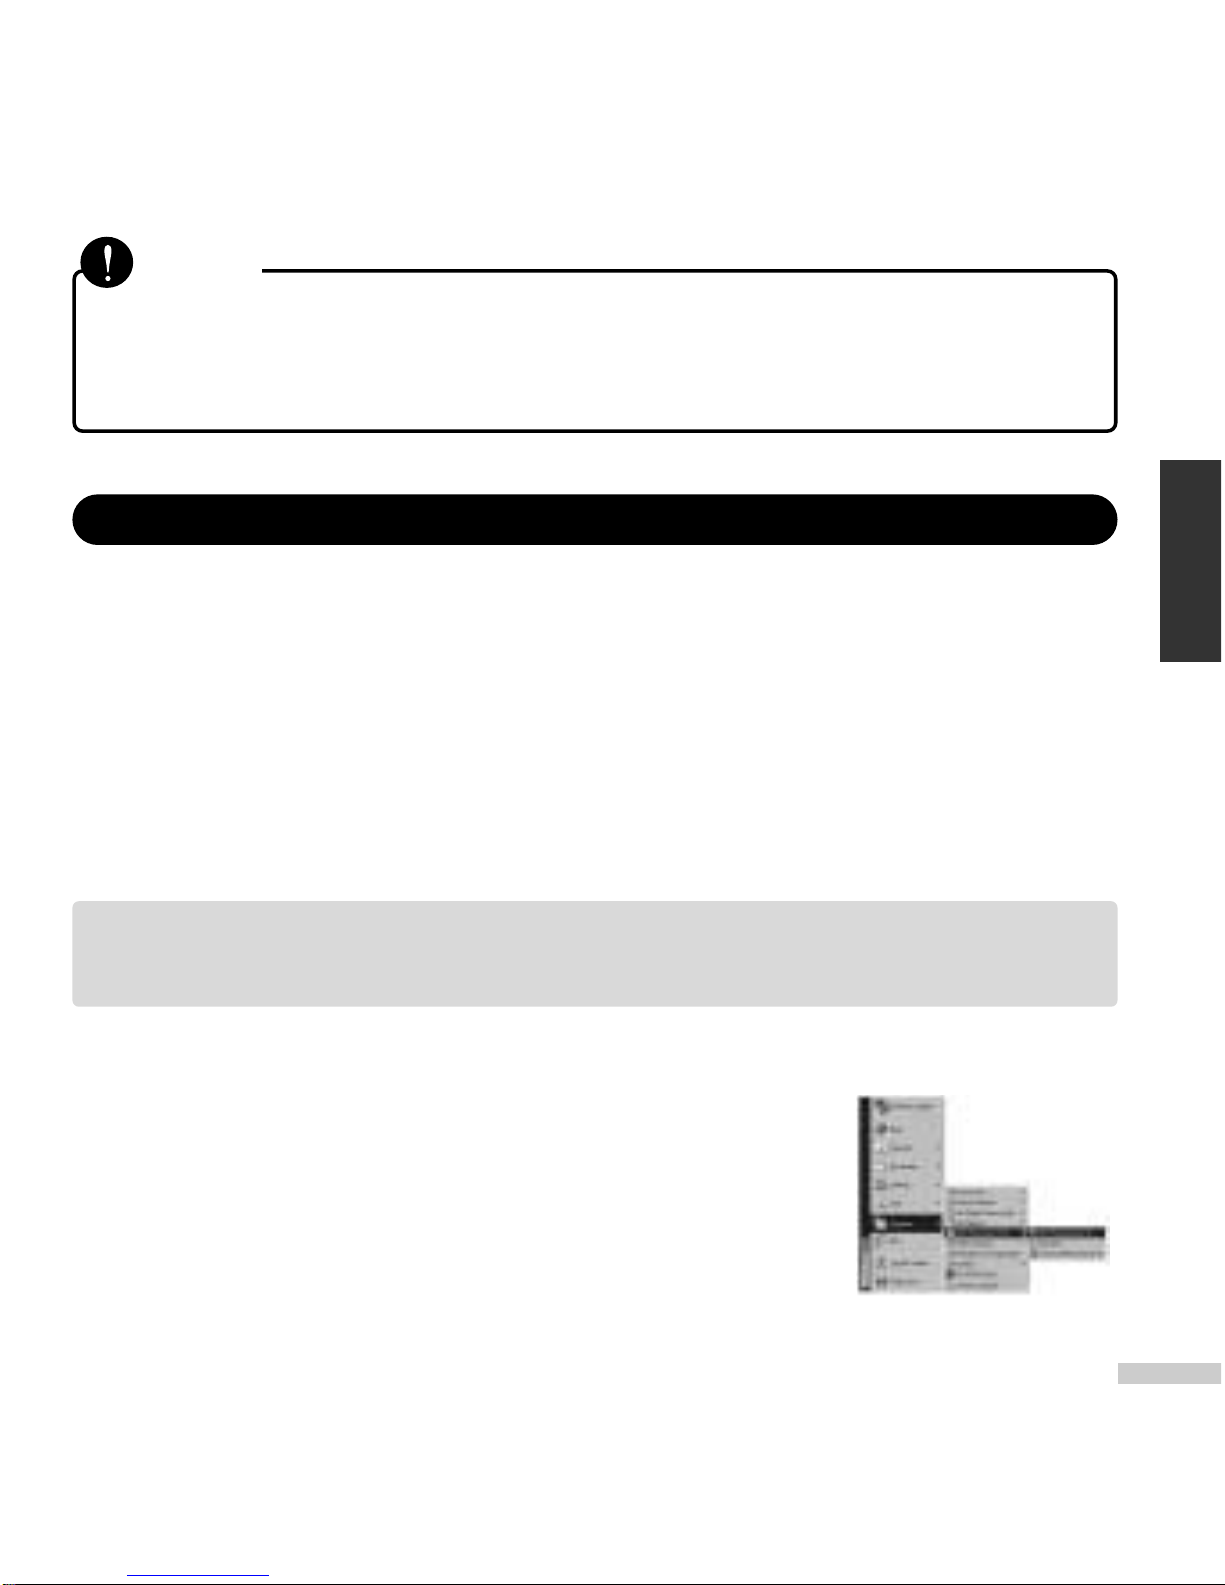
Quick Start:
Choose Start > Program > MGI PhotoSuite III SE
Digital Camera 9
For more information on further applications, go to Help > Welcome >
Introduction.
MGI PhotoSuite III SE (Image Uploading and Editing)
English
If Auto Run screen does not appear, clicksetup.exein the CD-ROM.
Installation instruction for Macintosh is located at the end of this manual.
Note

10 Digital Camera
English
Click theDownloadbutton.
The TWAIN dialog box will appear. You may selectStillsorVideofrom the Dialog Controls
function. SelectStillsto download pictures or selectVideoto view video clips.
The acquired pictures as thumbnails will be displayed.
Select a thumbnail image, and then click theCapturebutton. To select multiple
pictures, hold down the Control key and click the pictures. Images will be saved in
No images will appear if you did not take any picture. Take a picture by
pressing the shutter button and then click theGet Picturesbutton on
the TWAIN dialog box.
If you select "Video", all the pictures stored in your SPYPEN will be
deleted. Be sure to select "Stills" and save the data before selecting the
format size you want.
Click theGettab on the
navigation bar.
Click theDigital Camera
(TWAIN)button.
SelectUSB Dual-Mode
Camerafrom theChoose a
cameramenu. Checkthe
Albums...box and then create
an album. Type a name for the
new album and click theOK
button.

Digital Camera 11
C:\My Documents\My Pictures. You may view them in a newly created album folder.
Click theOrganizetab on the navigation bar.
ClickPhotoson the right side of your screen, and then captured images will appear. To
move an image to the work area, click on a thumbnail image with right mouse button and
selectAddbutton from the pull-down menu. Or you can simply drag an image to the work
area. Point the cursor to an image in the work area and press the right button. Shortcut
menu, such asOpen,Cut, andCopywill appear.
If you double-click an image, you will be connected toPreparemenu in which you can edit
the picture by rotating, cutting, changing size, or transforming using special effects.
Click theComposetab on the navigation bar, and you can make fun and creative collages,
cards, calendars, and many more using edited pictures.
Click theSharetab on the navigation bar, and then click theSend E-mailbutton to
automatically attach selected images.
Click thePrinttab on the navigation bar to print out your work.
You can obtain detailed information about functions and applications by clicking on theHelp
button on the Navigation bar located at the top of your screen.
Online Help system gives explanations of major parts of MGI PhotoSuite III and provides
information about tools, templates, functions, and the self-learning program.
File Formats
JPEG is an excellent choice if you plan to upload photos onto the Internet. For editing purposes,
English
If you need help, hit theF1key on your keyboard at any time, and the
Online Help system will pop up.
Note

12 Digital Camera
English
save the image in a format like TIFF or BMP as you work, and then save the final image in JPG
format. If you need more information about file formats, please refer MGI PhotoSuite III Help >
Supported File Formats > File Formats.
Image capture and save functions are also available in Imaging, which is a default Windows image
application program.
Photovista lets Web designers build highly interactive Web sites that visitors
can experience -- not just look at. Create real estate, travel, art or
entertainment Web sites, complete with zoomable 360º images, by turning a
series of snapshots into a seamless panorama in minutes.
Quick Start:
Shoot your pictures using any 35mm digital, or video camera.
Open your images in PhotoVista.
MGI PhotoVista (Creating immersive 360ºpanoramas)

Digital Camera 13
With a single click, PhotoVista automatically stitches your images
together into a seamless, high-quality 360 degree panorama.
Type a file name for saving, then press enter key.
PhotoBank Video Capture is a program used for saving video clip files, creating
and sending video emails, capturing still image, and making stickers. Send
messages to your friends and relatives with attached video clips or image files!
English
English
PhotoBank Video Capture (Video Uploading and Video Mail)
Search captured images
Video capture
Still image capture
ReplayRec Pause
ReplayRec Stop
Edit a captured image and
print out a sticker photo
Delete captured images Delete all the images
Save File
Send Mail
Open/Play Video Clip Files
Option

14 Digital Camera
English
Quick Start:
Choose Start > Program > PhotoBank Video Capture.
Pull down theOptionmenu and selectSetup Device, select click USB
Dual-Mode Camera .
Click theOptionicon to selectVideo Formatfrom the pull-down
menu. It is recommended to display images in QCIF(low-resolution).
To photograph a close-up object, you can click the checkbox in theScaled Full Field of View
Pull down theOptionmenu and SelectCapture Audio(For video-audio record). To
use this function, you need to have a built-in sound card installed in your computer and an
external microphone.
TheCaptureicon will activate the File Saving (AVI format) function and the Video
Recording function.
Click theStopicon to stop recording.
ClickSend Mailin theEmailicon. Type in the Sender Mail field
(senders address) inSetupbox on the Send Mail screen, and then click
theOKbutton.Type email address in theReceiverbox on the Send Mail screen and write a
message. Click theSendbutton to send an email.
You can capture a video and send an email in MPEG or ZIP file at the same time by using the
Capture & Mailfunction in theOptiondialog box.

Digital Camera 15
AVI Creator is a program used for
converting still images shot in
continuous mode to video clip files (AVI
file format). Using the AVI creator's
function fantastic animation as
animation in GIF file can be created.
After consecutive shooting of the picture at the low or high resolution mode connect your digital
camera to the USB port of the PC.
Run the AVI Creator.
Click the "Create" button.
Type a file name for saving, then press enter key.
After completing the converting process the saved AVI file will run.
English
AVI Creator (Clip Motion)
To capture still images by single frame, click theGrap Frame (Enter)button.
Manipulate and edit a captured image and print it out as a sticker.
Click on a captured still image with right mouse button. The pop-up menu such asSavewill
appear.
You can play any video clip file (AVI format) using your default media application.
Note

You can enjoy the web conferencing by using a Windows
default application, NetMeeting. NetMeeting's audio and video
conferencing features let you communicate with your business
partners or enjoy chatting with your friends and relatives on the
Internet all over the world without extra cost. Also, you can
work with as many people as you like by conducting real-time
conversation and sharing information via text or sending files.
16 Digital Camera
English
�For more detailed information about NetMeeting, select“Help”from the
menu bar and click the“Help Topics”or“Read Me”.
�NetMeeting is included in Microsoft Windows 98/ 2000.
�To obtain the most recent version and information, visit http://
www.microsoft.com / windows / netmeeting.
�You may enjoy various web conferencing features using other web
conferencing programs and on-line chatting sites.
NetMeeting ® (Video and Audio Conferencing)
When taking the picture several times at intervals in continuous mode you
can make an individual AVI file using the "Use Flags".

Digital Camera 17
Insert S/W CD into your CD-ROM drive.
Double-clickMAC\plawa Installer.HQX(Driver Installation File) in the CD-ROM.
If you run the file, an error message will appear. Ignore this message and clickOK.
If you click theNewbutton, a temporarily folder will be created. Enter folder name and click
theCreatebutton.
If you select the newly created folder, the installer will appear in Macintosh HD.
Double-clickplawa Camera Installer v1.4b3file in the newly created folder.
Use Adobe Photoshop>Plug-Ins> Import> Export to choose the folder location and click the
Installbutton. (When Adobe Photoshop is installed on the Macintosh)
To install plawa Camera Import in the same location, click theSelectbutton.
Click theQuitbutton to end the installation.
Driver Installation for Macintosh
*** Caution ***
Install the driver first, and then connect the SPYPEN to the USB port of your
Macintosh.
Quicktime Player must be installed in your Macintosh. If you have not
installed Quicktime Player, you can download the program from
http://www.apple.com.
English

18 Digital Camera
English
Saving and Editing Still Images (Using Adobe®Photoshop®)
After photographing still images, connect your SPYPEN to the USB port of the Macintosh.
Stored images will be automatically saved in theplawa Camera Snapshotsfolder, which is
automatically created in the hard drive. (Plug-N-Save function).
You can save and edit images using Adobe Photoshop. (Adobe Photoshop > File > Import
> plawa Camera Import)
Saving and Playing Video (Shoot in continuous mode )
Take pictures in continuous mode.
Video Clip files will be automatically saved in theplawa Camera Snapshotsfolder via Plug-
N-Save function as soon as you connect your camera to the computer.
If you double-click on a saved movie file, QuickTime Player will play the movie.
Application

Minimum S ystem S pecification
Camera Specifications
※
This specification may be changed without notice for quality improvement.
VGA 1/3″CMOS 318,000 pixels
Focal Length f=6.0mm, Aperture fixed Iris F2.6, View Angle 56°
Normal: 1.6 ft. (50cm) ~ Infinity
Macro : 4in (10cm) ~ 6in (15cm)
+18dB
57dB
USB Interface
Digital Camera 640×480(VGA), 320×240(SIF)
PC Camera 640×480(VGA), 352×288(CIF),
320×240(SIF),176×144(QCIF),
160×120(SQCIF)
High Resolution Mode (VGA,640×480) 26 frames
Low Resolution Mode (SIF,320×240) 107 frames
Internal SDRAM 8MB (64Mbit)
Auto White Balance
Digital Camera �AXYS : DC 4.5V(AAA 1.5V×3) �CLEO, XION: DC 3V (AAA 1.5V×2)
PC Camera powered by PC USB port(5V)
VGA, QVGA, QCIF, SQCIF: 5~30fps
Temperature : 5
℃
~40
℃(34.8℉~54.3℉)
Humidity : below 80%
Image Sensor
Lens
Focus Distance
AGC
S/N Ratio
Interface
Picture
Resolution
Picture Storage
Memory
White Balance
Power
Frame Rate
Usage conditions
◆Windows ®98, 98SE, ME, 2000 or XP
∙Pentium ®166MHz or more
(Pentium ® II 350MHz recommended)
∙32 MB RAM or better
plawa-feinwerktechnik GmbH & Co.KG Bleichereistr. 18 D-73066 Uhingen - Germany
∙Available USB Port
∙800x600/16-bit display
∙4x CD-ROM drive or better
◆Mac O.S 8.5 or more
This manual suits for next models
1
Table of contents