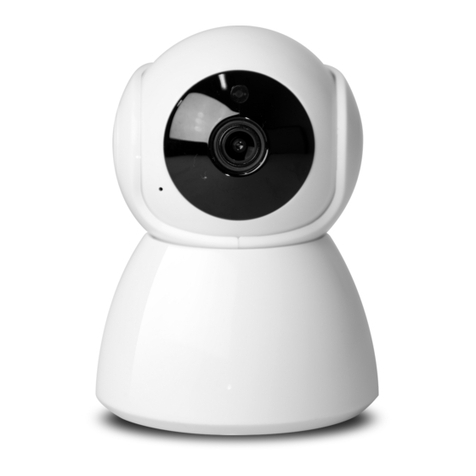
Micon 300 Series User manual

iGuard
IP/Network Camera
User’s Manual
300 Series

LIMITED HARDWARE WARRANTY
Warranty Coverage
Micon Technology Inc. (“MICON”) warrants to the original purchaser that the iGuard IP
camera product line enclosed with this limited hardware warranty will in respect of the
hardware be free from defects in design, workmanship and materials under normal use for a
period of one (1) year from the date of the original purchase (“Warranty Period”).
The original purchaser shall without undue delay notify MICON of any defect which appears
according to MICON’s RMA Procedure, failure to which shall mean that the purchaser
surrenders its right to have the defect remedied. A valid form of a bill of sale or receipt from an
authorized retailer/distributor with the date of the original purchase must be presented to
obtain warranty service. If a valid claim is received within the Warranty Period, the sole remedy
of the original purchaser and MICON’s sole and exclusive liability shall be limited to, at
MICON’s sole discretion, either repair of the hardware defect using new or refurbished
replacement parts, or replacement of the product. Repaired or replacement hardware will be
warranted for the remainder of the original Warranty Period or thirty (30) days, whichever is
longer. When a product or part is exchanged the replacement hardware becomes the property
of the original purchaser and all hardware or part thereof that is replaced shall become the
property of MICON.
Exclusions and Limitations
This warranty does not apply (a) to faulty and improper installation, maintenance, service, repair and/or
alteration in any way that is not contemplated in the documentation for the product or carried out with
MICON’s consent in writing, operational adjustments covered in the operating manual for the product or
normal maintenance, (b) to cosmetic damages, (c) if the product is modified or tampered with, (d) if the
product is damaged by acts of God, misuse, abuse, negligence, accident, normal wear and tear and
deterioration, improper environmental conditions (including, but not limited to, electrical surges, water
damage and heat exposure) or lack of responsible care, (e) if the product has had the model or serial
number altered, defaced or removed, (f) to consumables (such as batteries) (g) to products that have
been purchased “as is” and MICON, the seller or the liquidator expressly disclaim their warranty
obligation pertaining to the product, (h) to any non-MICON hardware product or any software
(irrespective of packaged or sold with an MICON hardware product) and MICON products purchased
from an unauthorized distributor/reseller,(i) to damage that occurs in shipment or (j) to damages by any
other causes not related to defective design, workmanship and/or materials.
NOTE:
• If the product is to be used outdoors or in dusty, humid, or other hostile environments, it must be
suitably protected.
• Further, camera products specifically, must be protected, whether in use or not, from exposure to
direct sunlight or halogen light – which may damage the camera image sensor. This applies to both
indoor and outdoor use of the cameras.
• For camera products supplied without a lens, extreme care should be used when mounting a lens
on these products. Damage to the product due to incorrectly mounted lenses will invalidate this
limited hardware warranty.
• Failure to comply with any of the aforementioned requirements will invalidate this Limited
Hardware Warranty.
THE WARRANTY AND REMEDIES PROVIDED ABOVE ARE EXCLUSIVE AND IN LIEU OF ALL OTHER
EXPRESS OR IMPLIED WARRANTIES INCLUDING, BUT NOT LIMITED TO, THE IMPLIED WARRANTIES
OF MERCHANTABILITY OR FITNESS FOR A PARTICULAR PURPOSE. CERTAIN JURISDICTIONS DO
NOT ALLOW THE EXCLUSION OF IMPLIED WARRANTIES. IF LAWS UNDER SUCH JURISDICTIONS
APPLY, THEN ALL EXPRESS AND IMPLIED WARRANTIES ARE LIMITED TO THE WARRANTY PERIOD
IDENTIFIED ABOVE. UNLESS PROVIDED HEREIN, ANY STATEMENTS OR REPRESENTATIONS MADE
BY ANY OTHER PERSON OR FIRM ARE VOID. EXCEPT AS PROVIDED IN THIS WRITTEN WARRANTY
AND TO THE EXTENT PERMITTED BY LAW, NEITHER MICON NOR ANY AFFILIATES SHALL BE LIABLE
FOR ANY LOSS, (INCLUDING LOSS OF DATA AND INFORMATION), INCONVENIENCE, OR DAMAGE,
INCLUDING, BUT NOT LIMITED TO, DIRECT, SPECIAL, INCIDENTAL OR CONSEQUENTIAL DAMAGES,
RESULTING FROM THE USE OR INABILITY TO USE THE MICON PRODUCT, WHETHER RESULTING
FROM BREACH OF WARRANTY OR ANY OTHER LEGAL THEORY. NOTWITHSTANDING THE
FOREGOING, MICON’ TOTAL LIABILITY FOR ALL CLAIMS UNDER THIS WARRANTY SHALL NOT
EXCEED THE PRICE PAID FOR THE PRODUCT. THESE LIMITATIONS ON POTENTIAL LIABILITIES HAVE
BEEN AN ESSENTIAL CONDITION IN SETTING THE PRODUCT PRICE.
i

DISCLAIMERS
SOFTWARES INCLUDED WITH ALL IGUARD IP CAMERAS AND MICON DDNS SERVICE ARE
PROVIDED BY MICON “AS IS” AND MICON , ITS DISTRIBUTORS AND SUPPLIERS EXPRESSLY
DISCLAIM ALL EXPRESS, IMPLIED, AND STATUTORY WARRANTIES AND CONDITIONS,
INCLUDING, WITHOUT LIMITATION, THE WARRANTIES OF MERCHANTABILITY, FITNESS FOR A
PARTICULAR PURPOSE AND NON-INFRINGEMENT. WITHOUT LIMITING THE FOREGOING:
(i) MICON MAKES NO WARRANTY THAT THE SOFTWARE AND SERVICE WILL BE EFFECTIVE,
RELIABLE OR SECURE;
(ii) MICON MAKES NO REPRESENTATIONS OR WARRANTIES WHATSOVER ABOUT ANY THIRD
PARTY CONTENT, PRODUCTS OR SERVICE THAT MAY BE OFFERED OR PURCHASED WITH
ITS PRODUCTS;
(iii) MICON MAKES NO REPRESENTATION OR WARRANTY THAT YOUR PREMISES OR PERSONS
OR PROPERTY ON YOUR PREMISES WILL BE SAFE OR SECURE; AND
(iv) MICON DOES NOT WARRANT THAT THE SOFTWARE AND DDNS SERVICE WILL BE
UNINTERRUPTED OR ERROR-FREE, THAT DEFECTS WILL BE CORRECTED, OR THAT THE
SERVICE OR THE SERVER THAT MAKES IT AVAILABLE ARE FREE OF VIRUSES OR OTHER
HARMFUL COMPONENTS.
LIMITATION OF LIABILITY
TO THE FULLEST EXTENT ALLOWED BY LAW, MICON AND ITS DISTRIBUTORS AND SUPPLIERS
WILL NOT BE LIABLE FOR ANY LOST PROFITS, LOSS OF USE, COST OF COVER OR OTHER,
INDIRECT, INCIDENTAL, PUNITIVE, SPECIAL OR CONSEQUENTIAL DAMAGES ARISING OUT OF
OR IN CONNECTION WITH THE SERVICE, THE SOFTWARE OR THE SITE, INCLUDING, WITHOUT
LIMITATION, ANY LIABILITY FOR:
(i) DAMAGES TO PREMISES, PERSONS OR PROPERTY ARISING OUT OF OR RELATING TO THE
USE OF THE SOFTWARE OR INABILITY TO USE THE SOFTWARE,
(ii) DAMAGES ARISING OUT OF SERVICE UNAVAILABILITY, AND
(iii) DAMAGES CAUSED BY THIRD PARTY PRODUCTS OR SERVICES,
THE FOREGOING LIMITATIONS OF LIABILITY WILL APPLY WHETHER IN AN ACTION FOR
BREACH OF CONTRACT, NEGLIGENCE, OTHER TORT, OR ANY OTHER THEORY, EVEN IF AN
AUTHORIZED REPRESENTATIVE OF MICON HAS BEEN ADVISED OR SHOULD HAVE
KNOWLEDGE OF THE POSSIBILITY OF SUCH DAMAGES.
OUR LIABILITY, AND THE LIABILITY OF OUR AFFILIATES, AND SUPPLIERS, TO YOU OR ANY
THIRD PARTIES IN ANY CIRCUMSTANCE IS LIMITED TO THE AMOUNT PAID FOR THE PRODUCT
OR SERVICE. THE FOREGOING DISCLAIMERS, WAIVERS AND LIMITATIONS WILL APPLY
NOTWITHSTANDING ANY FAILURE OF THE ESSENTIAL PURPOSE OF ANY LIMITED REMEDY.
SOME JURISDICTIONS DO NOT ALLOW THE LIMITATION OR EXCLUSION OF LIABILITY FOR
INCIDENTAL OF CONSEQUENTIAL DAMAGES, SO THE ABOVE LIMITATION OR EXCLUSION MAY
NOT APPLY TO YOU AND YOU MAY ALSO HAVE OTHER LEGAL RIGHTS THAT VARY FROM
JURISDICTION TO JURISDICTION.
ii

CONTENTS
Chapter 1 Introduction_________________________________________ 1
1.1 Features ________________________________________________ 1
1.2 Application ______________________________________________ 1
1.3 iGuard IP Camera Line_____________________________________ 2
Chapter 2 Hardware Installation _________________________________ 4
Chapter 3 Software Installation__________________________________ 7
Chapter 4: iGuard Utility _______________________________________ 8
4.1 Setup Wizard ____________________________________________ 9
4.2 Launch iGuard __________________________________________ 12
4.3 IP Configuration _________________________________________ 13
4.4 Upgrade Firmware _______________________________________ 15
Chapter 5 iGuard Web Manager ________________________________ 17
5.1 Introduction_____________________________________________ 17
5.2 iGuard Web Manager Interface______________________________ 17
5.2.1.1 Video Streaming ______________________________________ 18
5.2.2 Information____________________________________________ 21
5.2.2.1 System Status________________________________________ 21
5.2.2.2 Current Connections___________________________________ 21
5.2.2.3 Event Log ___________________________________________ 22
5.2.3 Basic Settings _________________________________________ 23
5.2.3.1 Camera Settings______________________________________ 23
5.2.3.2 Network_____________________________________________ 24
5.2.3.3 Wireless Setting ______________________________________ 29
5.2.3.4 Account Settings______________________________________ 30
5.2.4 Advanced Settings______________________________________ 32
5.2.4.1 Event Notification _____________________________________ 32
5.2.4.2 Motion Detection______________________________________ 36
5.2.4.3 Scheduled Recording __________________________________ 39
5.2.4.4 E-mail / FTP _________________________________________ 40
5.2.4.5 System Settings ______________________________________ 43
5. 2.4.6 About ______________________________________________ 45
5.2.5 USB Disk _____________________________________________ 46
Chapter 6: iGuardView________________________________________ 48
iii

6.1 Adding Cameras _________________________________________ 49
6.2 Camera Setting__________________________________________ 52
6.3 Motion Detection Setting___________________________________ 53
6.4 Email Notification Setting __________________________________ 55
6.5 SNMP Setting ___________________________________________ 56
6.6 Schedule Recording ______________________________________ 57
6.7 Camera Monitor _________________________________________ 57
6.8 MuiltiView ______________________________________________ 61
6.9 System ________________________________________________ 61
6.10 Help__________________________________________________ 62
Chapter 7: iGuard Mobile______________________________________ 63
Appendix A: Network Configuration /Router Programming__________ 66
Appendix B: IP Address, Subnet and Gateway____________________ 86
Appendix C: Glossary ________________________________________ 88
Appendix D: Q&A ____________________________________________ 89
iv

Chapter 1. Introduction
Chapter 1 Introduction
1.1 Features
iGuard is a series of affordable, versatile and flexible IP based remote monitoring
solutions for small business, retail store, and residential applications. iGuard features
a built-in web server (iGuard IP-101S and 301S module) with a range of USB
cameras to choose from, eliminating the need to have a computer to stream video
images to the internet. Each system can simultaneously support any two
combinations of digital cameras be it embedded or standalone, regular or infrared,
fixed or pan-tilt. With its upgraded web-video-server, the new 300 series iGuard IP
cameras allows the user to stream video to the internet through a wired or wireless
network and record images directly on to an attached USB drive or to the hard-drive
on a remote PC. The included iGuardView PC based client software allows the user to
monitor and record multiple cameras on one PC.
Features:
•Built-in Web-Video-Server
•10/100Mbps Fast Ethernet Network Access
•WiFi Ready (through optional USB wireless dongle)
•Support Any Java-Enabled Web Browser
•Built-in LCD display (on selected models)
•Built-in RS232 Port
•32-Bit ARM9 Processor
•4MB Flash Memory
•16MB Dynamic Memory
•Support Up to 30 Remote Viewers for each camera
•Allow Up to 8 User Accounts and Passwords
•5.3VDC 1A Maximum
•Operating Temperature: 0°C ~ 60°C
•Operating Humidity: 10% ~ 90%
•Network Protocol: HTTP, TCP/IP, UDP, SMTP, PPPoE, Dynamic DNS, DNS
Client, SNTP, BOOTP, DHCP, FTP, SNMP
•Support All USB PC Camera with VIMICRO ZC0301+DSP processor
•Resolution: 640 x 480, 320 x 240, 160 x 120.
•Frame Rate: Up to 30 @ 320 x 240
•Motion JPEG streaming video, MPEG-4 recording
•2 USB Ports for USB Cameras (One available for embedded cameras)
•USB 1.1 & 2.0 compliant
•USB DVR Function (with optional USB drive)
•Support Pan/Tilt and Infrared USB PC Camera
1.2 Application
The most important function of iGuard is for remote surveillance. Once iGuard is
installed, the user can monitor any of the connected iGuard cameras via any web
1

Chapter 1. Introduction
browser. The user can monitor and control these cameras simply by entering the IP
address of the iGuard from anywhere in the world as long as there is an Internet
connection. For instance, the user can be in the United States but he or she can
monitor the production facility in China, and if he or she likes, also check on the
branch office in Singapore at the same time.
Fig.1. iGuard Network Diagram
1.3 iGuard IP Camera Line
Following is a list iGuard IP/Network cameras that is avail be for purchase. All
cameras within the series share the same network and imaging technology, whether
embedded or stand alone. The 300 series adds the wireless and USB DVR
capability as well as a RS232 expansion port to the 200 series. Please check
www.iguard.com for latest list of iGuard offerings, following is a list of current models.
2

Chapter 1. Introduction
1.3.1 iGuard 200 series IP Cameras
IP-280E
IP-103K
IP-220E
IP-250E
IP-101K
IP-210E
1.3.2 iGuard 300 Series IP cameras
IP-380E
I
P-310E
IP-320E
1.3.3 iCam Add-on cameras
iCAM-04
iCam-01
iCam-03
3

Chapter. 2 Hardware Installation
Chapter 2 Hardware Installation
Installation of iGuard hardware is fairly straightforward. The procedures are pretty much
the same for all iGuard IP cameras. Please refer to the “Quick Installation Guide” in the
package for your specific model. As an example, shown below are the steps to set up
iGuard IP-310E IP camera.
Make sure a network connection and AC power are readily available at the location where
the camera will be installed. We suggest you program the camera first before you
physically installed the camera. It is assumed you have basic knowledge about networking
and you have access (login) to the router on the network.
A. Package Content.
Your iGuard package should contain the
following items;
1. iGuard IP/Network Camera,
2. 10-100 Ethernet Cable
3. iGuard Utility CD/Software
4. Quick Installation Guide.
5. 5.3V DC Adapter
6. Mounting Hardware (for selected models
only)
Contact your dealer immediately if any of these
items are missing.
B. Camera Installation
First familiarize yourself with the physical layout
of the camera. For IP-310E there are 4 jacks as
shown on the right picture
•Power-In (5.3V DC)
•Ethernet (RJ-45)
•USB Expansion
•IO (RS232)
1. Prepare for the Installation
You need to provide power and LAN access (if
you choose to install the camera via its lan
port) near the location where the camera will
be installed. Do not cut and extend the AC
adapter. Use a proper extension cord if
necessary instead.
2. Mount the Camera
Mount the bracket first (You may wish to use
the included anchors to secure the bracket).
Attach the camera to the bracket’s universal
panning head.
3. Adjust the Camera Angle
Loosen the knob on the bracket’s universal
panning head and adjust the camera to the
desirable angle. Hand-tighten the knob.
4

Chapter. 2 Hardware Installation
C. Expansion Installation (Optional)
iGuard 300 series IP cameras have a built-in USB
expansion port, to which a second USB camera,
a wireless dongle, or a USB storage device can
be attached.
1. USB Add-on Camera
A large selection of USB cameras can be used
as a second camera. Once attached the
second camera icon will lid and will be
designated as camera B.
2. Wireless Dongle
You can attach a USB WiFi dongle to connect
the camera to wireless network. Awireless icon
will lid if a compatible WiFi dongle is attached.
For wireless network setup please refer to
section 5.2.3.3 in Chapter 5
3. External Storage
You can attach a USB storage device including
flash drives and iPods to the camera to store
video and images locally on the camera. A
disk icon will lid if a compatible USB drive is
attached. For USB DVR recording please see
Section 5.2.4.2 and 5.2.4.2 in Chapter 5.
4. USB Hub
If you wish to use two or more of the above
options simultaneously, you can attach a
compatible USB Hub (we recommend using
self-power hubs)
D. Internet Connection
1. Cable/DSL Modem Connection
You can connect the IP-310E to a cable/DSL
modem directly if you have dedicated internet
connection.
2
. Router/Switch Connection
If you use a router to share internet connection
then your camera has to be connected to the
router which in turn is connected to the
cable/DSLmodem.
3. IP Configuration
By default IP-310E will obtain an IP address
assigned by a DHCP-enabled router, and
display that IP on the LCD screen. You can
skip directly to Chapter 5 to configure and
monitor the camera via its web manager
E. Power On
Connect DC power output into iGuard DC-in
socket, and plug the DC power adapter into
the wall socket.
Warning:
Do not cut and extend the DC cord, use
a proper extension cable if necessary!
5

Chapter. 2 Hardware Installation
F. LCD Display*
The built-in LCD screen on the iGuard (iGuard
IP-310E, 210E, 250E, and 103K), will display the
IP address assigned by a DHCP server on the
network, as well as other host of information. You
can skip directly to the iGuard web manger
(Chapter 5) by launching the Internet explorer
and enter the IP address on the LCD.
Note:
* For iGuard models without the built-in LCD,
the easiest way to set up the camera is
through iGuardUtility which will be discussed
in next chapter.
6

Chapter.3 Software Installation
Chapter 3 Software Installation
On the utility CD there is a collection of two programs: iGuard Utility and iGuardview,
collectively called as iGuardware You can use the iGuard Utility to quickly setup any
iGuard cameras on the network, whether it has a built-in LCD or not. You can use
iGuardview to monitor and record multiple cameras.
Insert the software CD (or download the latest version from www.iguard.com) and click on
setup.exe if autorun does not start.
An installation menu will be displayed on you screen:
Fig.2. iGuardware Installation
"iGuard Utility - This is a program that helps the user perform quick installation. It
will detect the current configuration and take the user through the necessary
network setup.
"iGuardView - This is a windows based program designed to allow user to control
a large number of iGuard cameras located either in a LAN or on a WAN.
"Read User’s Manual - Click to read iGuard’s User Manual. You will need
Adobe Acrobat Reader v5.0 or higher.
"Adobe Acrobat Reader v5.0 - This will install Acrobat Reader v5.0 on your local
hard drive.
"Sun Java / ActiveX - Install Sun Java for viewing the video image by Java, or
install the OCX for viewing by ActiveX
7

Chapter 4: iGuard Utility
Chapter 4: iGuard Utility
iGuard Utility is a setup program for iGuard cameras, whether the camera has a
built-in LCD or not. You can launch iGuard Utility by clicking on “Start/Programs/
iGuard/iGuard Utility/”
The main menu is shown below. The selection menu is located on the left. The Serial
Number, current Firmware and IP Address of every iGuard connected to the LAN will
be displayed in the table to the right. All buttons except “about” and “Refresh” will be
disabled if there are no iGuard camera detected on the network.
Fig.3. iGuard Utility Main Menu
If the password on your unit is not enabled and you are on the same LAN (same
subnet) then you can launch the web manager to configure the iGuard camera simply
by double click on the “Launch iGuard” button or the highlighted iGuard displayed in
the window. Everything discussed in this chapter can be repeated in Chap.5
8

Chapter 4: iGuard Utility
4.1 Setup Wizard
“Setup Wizard” will take you through the basic configurations step by step.
1. Click to highlight the iGuard that you want to configure.
2. Click on “Setup Wizard”. Enter the administer login ID and Password if promoted
Fig.4 iGuard Setup Wizard
Note: By default the administer login ID and Password is not defined, therefore the
login screen will not be displayed
3. The camera setup window.
Fig.5 iGuard Setup Wizard
9

Chapter 4: iGuard Utility
Choose the appropriate light source (Indoor 60 Hz, Indoor 50 Hz or Outdoor) to
prevent flickering or whiteout on the video streaming. Enter a name for the camera
in the “Location” box to easily identify it.
4. Click “Next >” to configure the IP property.
Fig.6 iGuard Network Setup
“Obtain an IP address by DHCP”
Choose this if you are installing the iGuard on a network with a DHCP server.
Make sure to set the IP lease time to “Permanent” in your router so that the IP
address assigned to the camera will not change.
“Use the following IP Address”
Enter an appropriate IP Address, Subnet Mask and Gateway for iGuard if have a
static IP to assign to the iGuard.
“Obtain an IP address by Bootp”
Allow iGuard to obtain an IP address using Bootp protocol.
5. Click “Next >” to proceed to xDSL/Cable modem setup.
10

Chapter 4: iGuard Utility
Fig7 iGuard a/DSL Setup
If iGuard is the only device on your DSL network and your ISP supports PPPoE,
Select “Enable PPPoE connection” and enter your account and password
details as provided by your internet service provider (“ISP”).
Note: You may need to subscribe to a DDNS service If you have a DLS account
with a dynamic IP.
Otherwise, leave it at the default “Disable PPPoE connection”
6. Click “Next >” to change your administrator account and password for the iGuard
web manager. (chapter 5)
Fig.8 iGuard a/DSL Account Setup
11

Chapter 4: iGuard Utility
By default the administrator account is defined. It is recommended to define at
this stage. Be advised all iGuard Passwords are case-sensitive.
WARNING:
Do not lose the administrator account and password. Once set, you will not be
able to configure iGuard via its web manager without the administrator account
and password. To reset the iGuard account password, you will have to refresh
the firmware or use the master password to retrieve it.
7. Click “Next >” to upload these configuration to iGuard.
Fig.9 iGuard Account Setup
8. Click “Finish” to restart iGuard with the new configurations.
4.2 Launch iGuard
Once you have finished with the above Setup Wizard, either click “Launch iGuard” or
double click on the iGuard listed on the table, You will be bring to the iGuard Web
Manager (Chapter.5).
Click either one to
Launch iGuard.
Fig.10 Launching iGuard
12

Chapter 4: iGuard Utility
Type in the account name and password entered earlier (if you did not configure one,
just press ENTER or click on the “Apply” button)
Fig.11 iGuard Web Login
Please refer to Chapter 5 for more details.
Fig.12 iGuard Web Manager
4.3 IP Configuration
This section allows advanced configuration of IP property.
Select the iGuard on the right display screen, and then click “IP Configuration”. This
will bring up the IP Configuration window. There are two tabs;
•IP Address
You can set the camera to “Obtain an IP address by DHCP or alternatively “Using
Static IP address”, where the user will have to enter an IP Address, Subnet Mask
and Gateway of their choice (refer to Appendix C for IP address explanation). Please
refer to Set Wizard.
13

Chapter 4: iGuard Utility
Fig.13 IP Configuration: Set an IP Address for iGuard
•Advanced (for port setting configuration)
Fig.14 IP Configuration: Port Setting
HTTP Port: You have to enable the HTTP port for the web interface to function.
The default values are set to port number 80 for HTTP. Some ISP may block
in-bound traffic on port 80 to save bandwidth; or it may have been used by other
applications such as website or your router’s remote manager, you will have to
set a different port for iGuard web manager.
14

Chapter 4: iGuard Utility
You can disable this port if you wish to deny access to the camera through the
web interface and use the iGuardView to view the camera.
Note:
)Once the HTTP port number is set to a port other than 80, the full IP Address
must be entered in order to access the web manger. For example if you
change the HTTP port to 81, then you must enter
http://192.168.0.177:81
in the address bar in the browser in order to access iGuard web interface.
)Each iGuard on the local area network (LAN) must have a unique HTTP and
UDP port and you have to program your router to forward inbound traffic to
these two ports if you wish to access the iGuard from the internet.
UDP Port (image port):.This is the port for the video streaming (uploading).
You can change this setting if the default port (9001) is not available (blocked by
firewall or used by another device).
4.4 Upgrade Firmware
iGuard Utility offers a convenient method to upgrade iGuard firmware.
1
. Click “Upgrade Firmware” to bring up the Wizard.
Fig.15 Upgrade Firmware: Updates iGuard firmware
If you have downloaded the latest firmware to your local hard drive, check
“Upgrade the iGuard firmware with file saved on the local hard drive” and browse
to the file location.
15
This manual suits for next models
3
Table of contents
