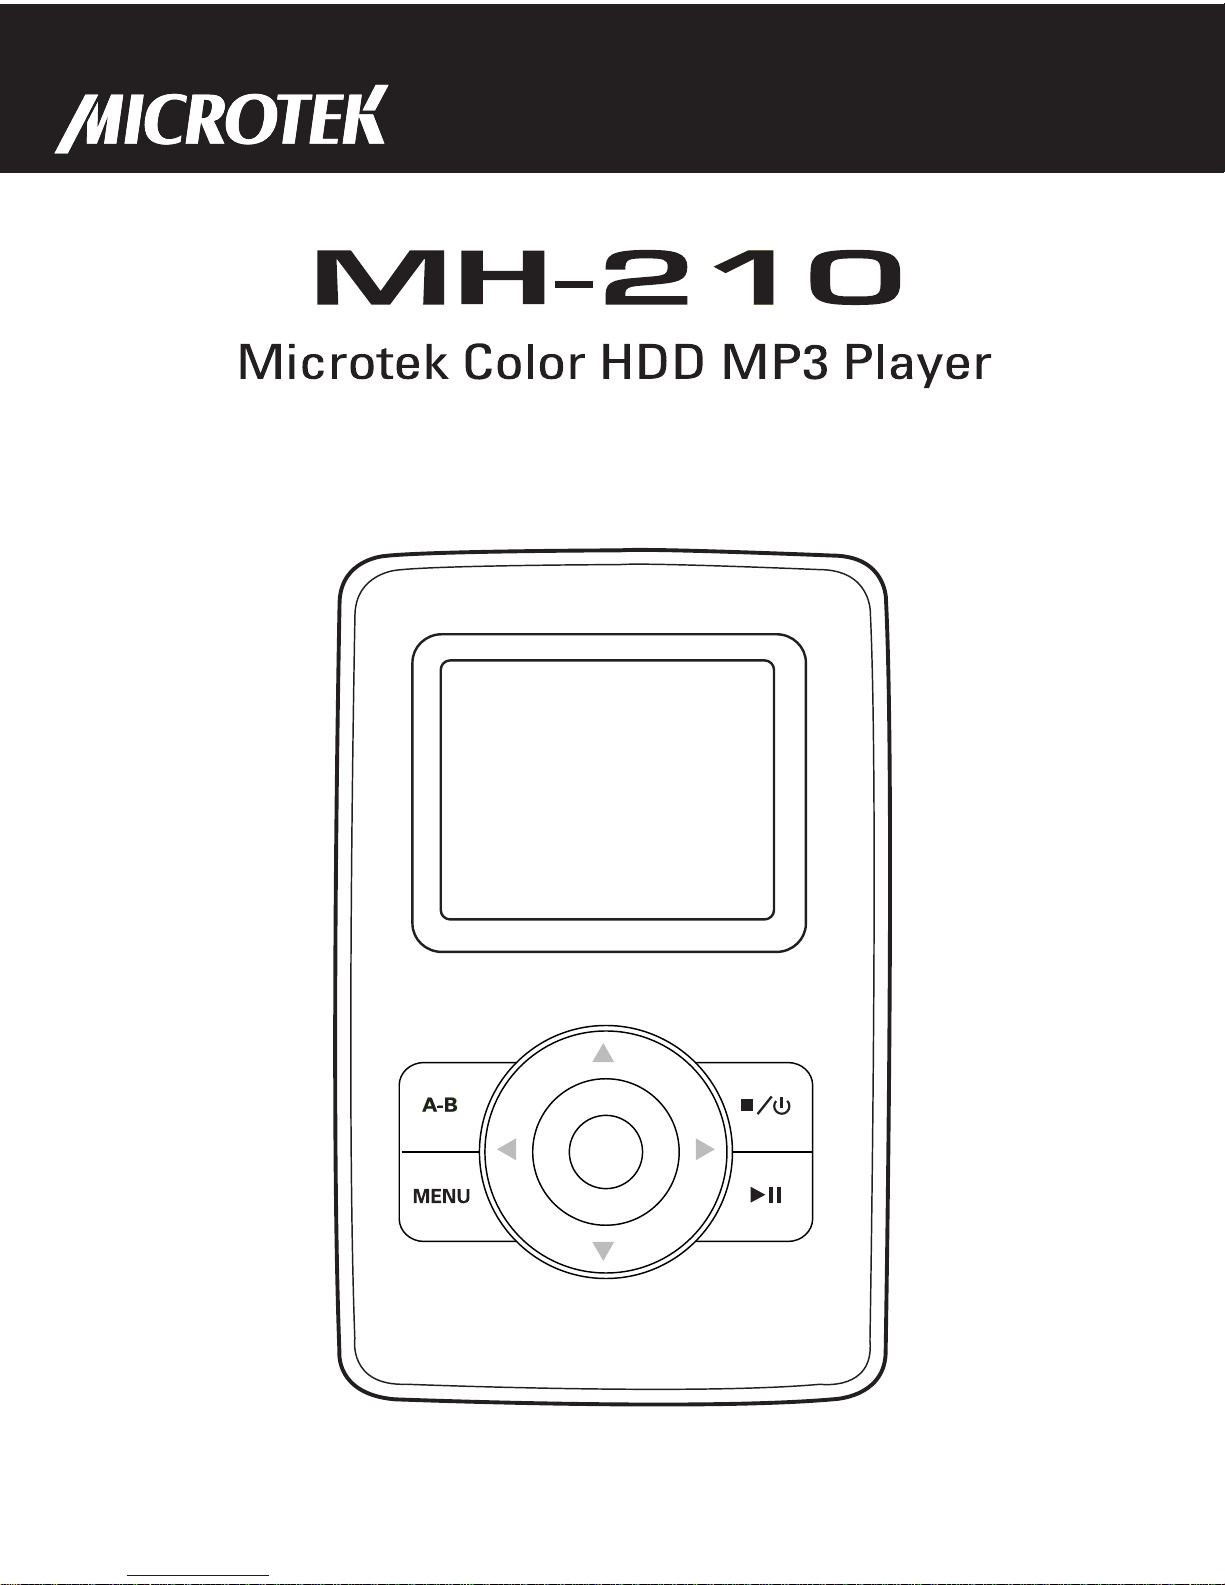
Microtek MH-210 User manual

2
Copyright © 2005 Microtek International,Inc.
Microtek® is a registered trademark of Microtek International, Inc. All
other trademarks or registered trademarks are the property of their
respective holders. Specifications, software and hardware bundles
are subject to change without notice. Delivery of technical support
services subject to change without notice. Not responsible for
typographical errors.
219-20-990419 A

3
Thank you for your purchase. Please read this manual carefully
before using your new player.
Unique Features
The Microtek MH-210 Media Player is a highly-portable storage
device & multi-CODEC color juke box that delivers crystal clear music
playback, and includes many other exciting functions:
• Portable storage disk
This player can be used as a 20/30/40/60GB portable storage
device to transfer files to any PC. No driver is necessary on
Win2000/XP or up. *Capacity depends on the version of the
player purchased.
• USB2.0 High speed transfer
The player suppors the USB 2.0 interface with maximum transfer
speed of 13Mb/s, backwards compatible with USB1.1.
• TFT color LCD
The player boasts a 65,536 colors 1.8 inches TFT LCD, and
supports a wide array of colorful icons and menus, bringing added
convenience.
• Movie player
• Music player
• Music playback background.
• Supports multiple music formats, including MP3 (MP3 of VBR
format supported), WMA.
• Graphical 10-band equalizer with 8 presets.
• Supports PlayList Function

4
• Supports lyric synchronization
• Music encoding
The player provides easy recording via the FM tuner, line-in from
external audio devices as well as a mic for voice recording.
Various quality settings are available.
• e-Book
The player provides an e-Book Viewer for browsing text and e-
Book files. A Convenient bookmark function is supported as well.
The color screen can display 26 letters horizontal and 10 rows
vertical.
• e-Album
An image viewer for viewing photos stored downloaded from a
PC or Mac in JPEG, GIF or BMP format.
• Convenient firmware upgrade
New formats will be supported through a simple firmware
upgrade, while other functionality will remain the same.
• FM radio (76.0MHz~108.0MHz)
FM radio with auto-scan and station presets. FM channel list
editor provided.
• Multiple language support

5
Caution
1. Do not expose the device to extreme temperatures (range from
5OC to 35OC).
2. Do not expose to moisture.
3. Do not apply excessive pressure to the device.
4. Do not place heavy objects on top of the device.
5. Do not expose the device to chemicals such as benzene or
thinners.
6. Do not expose the device to direct sunlight or heat sources.
7. Do not store in dusty areas.
8. Do not try to disassemble and repair the device yourself.
9. Release the hold button before operating the device.
10.Do not drop the device. This may cause internal damage or
scratches to the surface.
11.Do not turn up the volume too high.
12.Battery Life
This device is equipped with a high capacity lithium polymer
battery. With a full charge, continuous audio playback can be
sustained for over 12 hours under normal operating conditions.
The device can also record for over 12 hours. (Note: this is
limited by internal storage space) The battery can be charged
over 500 times. To prolong battery life, completely exhaust the
battery before recharging. Battery life differs from device to
device depending on operating conditions, state and time of
production.

6
13. Stop using the device or turn the volume down if you experience
ringing in your ears.
14. Do not use wet or rough cleaning cloths. This may scratch or
even damage the device.
15. Some earphone plugs may not fit the remote properly. Use the
included earphone extension if your headphones will not plug in.

7
Contents
1 - Getting Started 9
Turning on the player ..................................................... 9
Turning off the player .................................................... 9
Playing Music ............................................................... 9
Voice Recording ........................................................... 9
FM Radio................................................................... 10
Charging the Battery .................................................... 10
2 - Advanced Features 11
2-1 Desktop ............................................................. 11
Selecting Functions ............................................. 12
Menus ............................................................... 12
2-2 MP3 Player ........................................................ 14
Playback Mode ................................................... 14
Playing Music ..................................................... 15
Loop repeat ....................................................... 15
MP3 Player Menu Operation .................................. 16
Setting UserMode EQ: .......................................... 17
PlayList ............................................................. 18
PlayList Menu Operation ....................................... 19
Add Songs ......................................................... 19
2-3 Voice Recording .................................................. 20
Performing a recording ......................................... 21
Recording from External Devices ............................ 22
Record Quality Settings ........................................ 22
2-4 FM Radio ........................................................... 23
Listening to the Radio .......................................... 23
Automatic Tuning ............................................... 24
Manual Tuning .................................................... 25

8
FM Radio Recording ............................................ 26
FM Channel editor ............................................... 26
2-5 Games .............................................................. 27
Russia Block ...................................................... 27
Box Game ......................................................... 29
Gobang ............................................................. 30
Black White Chess .............................................. 30
2-6 Disk Explorer ...................................................... 32
Exploring Files .................................................... 32
Managing Files .................................................... 33
Managing Directories ........................................... 34
2-7 e-Albums ........................................................... 35
2-8 e-Books ............................................................. 37
2-9 Movie Player ...................................................... 37
3 - Connecting to a Computer 38
3-1 System Requirements .......................................... 38
3-2 Connecting to a PC .............................................. 39
3-3 Installing the USB Driver ....................................... 39
3-4 Disconnecting the USB Cable ................................ 40
3-5 Using as Removable Storage ................................. 41
3-6 Disk Formatting ................................................... 42
4 - Troubleshooting 43
5 - Appendix 46
I Package Accessoies .................................................. 46
II Specifications .......................................................... 47

9
1 - Getting Started
Turning on the player
Press and hold the POWER button until the player turns on.
Turning off the player
Press and hold the POWER button until the player turns off.
Playing Music
1. Press and hold the POWER button to power on the unit.
2. Press the PLAY button again to enter the music playback mode.
3. Press the LEFT and RIGHT and LEFT keys to select tracks.
4. Press the PLAY button to play the selected track.
5. Press the UP and DOWN keys to adjust the volume.
6. Press the PLAY button to pause playback.
7. If no buttons are pressed within 1 minute, the player
automatically powers off.
Pressing and holding the PLAY button for a few seconds will
switch to music playback mode directly.
Voice Recording
1. Press and hold the A-B button to enter the voice record mode.
2. Press the A-B button to begin voice recording.
3. Press the STOP button to stop recording, a new voice file will be
created.
4. Press the PLAY button to play the current voice file.

10
FM Radio
1. Press the Stop/Power button to enter the mode selection screen.
Use the navigational pad to select the FM radio mode.
2. Press the PLAY button to enter the FM Radio mode.
3. Press and hold LEFT or RIGHT on the navigational pad to auto-
search for FM channels
4. Press LEFT or RIGHT on the navigational pad to cycle through FM
channels.
Charging the Battery
• The player will charge automatically when the AC adapter is
connected to the device.
• Use only the AC power adapter supplied with the device.
• Connect the adapter to the player and to an AC outlet.
• While recharging, the Charge LED turns on.
When fully charged, the Charge LED turns off.
• Playback time is measured while playing a 128Kbps MP3 file
with a full charge.
• AC operating voltage: 100~240V, 50~60Hz.
• Charge time: ~ 3 hours (At full discharge)
• Playback time: over 12 hours (At full charge)
• You can also charge the player by connecting the player to a PC
via the USB cable.
Hold the MENU button, and then connect the player to PC, would
switch to charge mode directly.
Table of contents
Other Microtek MP3 Player manuals


