Midland H360 FULL HD User manual

FULL HD
360°
Video&Photo 1.5h - 1500mAh
battery pack
H360
Virtual reality
ready
USER MANUAL

2

3
ENGLISH
Cautions
• Do not drop your camera.
• Do not place heavy objects on the camera.
• Keep the camera away from water and liquids. This may cause the
camera to malfunction.
• Recharge the battery via the USB cable.
• The camera should not be in heat over 65ºC.
• When the camera cannot work well, please don’t disassemble it
by yourself, if your behavior cause damage, the original factory
will not undertake responsibility.
The package contains:
• Action camera
• Tripod mount
• USB cable

4
Starting steps
• Make sure that the battery is full
• Format the Micro SD memory card
Now you can proceed and set H360 upon your needs.
Appearance and buttons
1. LCD display screen
2. Power/Mode button
3. Wifi/Menu button
4. Power led (Red)/Charging led (Blue)
5. WIFI led (red)
6. REC led (red)
7. Start/Stop REC/Shutter button
8. Mount screw
9. Camera Lens x 2 (220°)
10.Connectors lid (USB, microSD)
11. Lanyard hole
12. Microphone
13. Speaker
14.Reset Button

5
05:12:39
1080P
2015/01/01 01: 01
★★★★★★★★
★★★★★★★★
15298
2015/01/01 01: 01
P5m
H360
FULL HD
H360
FULL HD
14
2
3
5
8
7
6
9
9
10
11
14
13
12

6
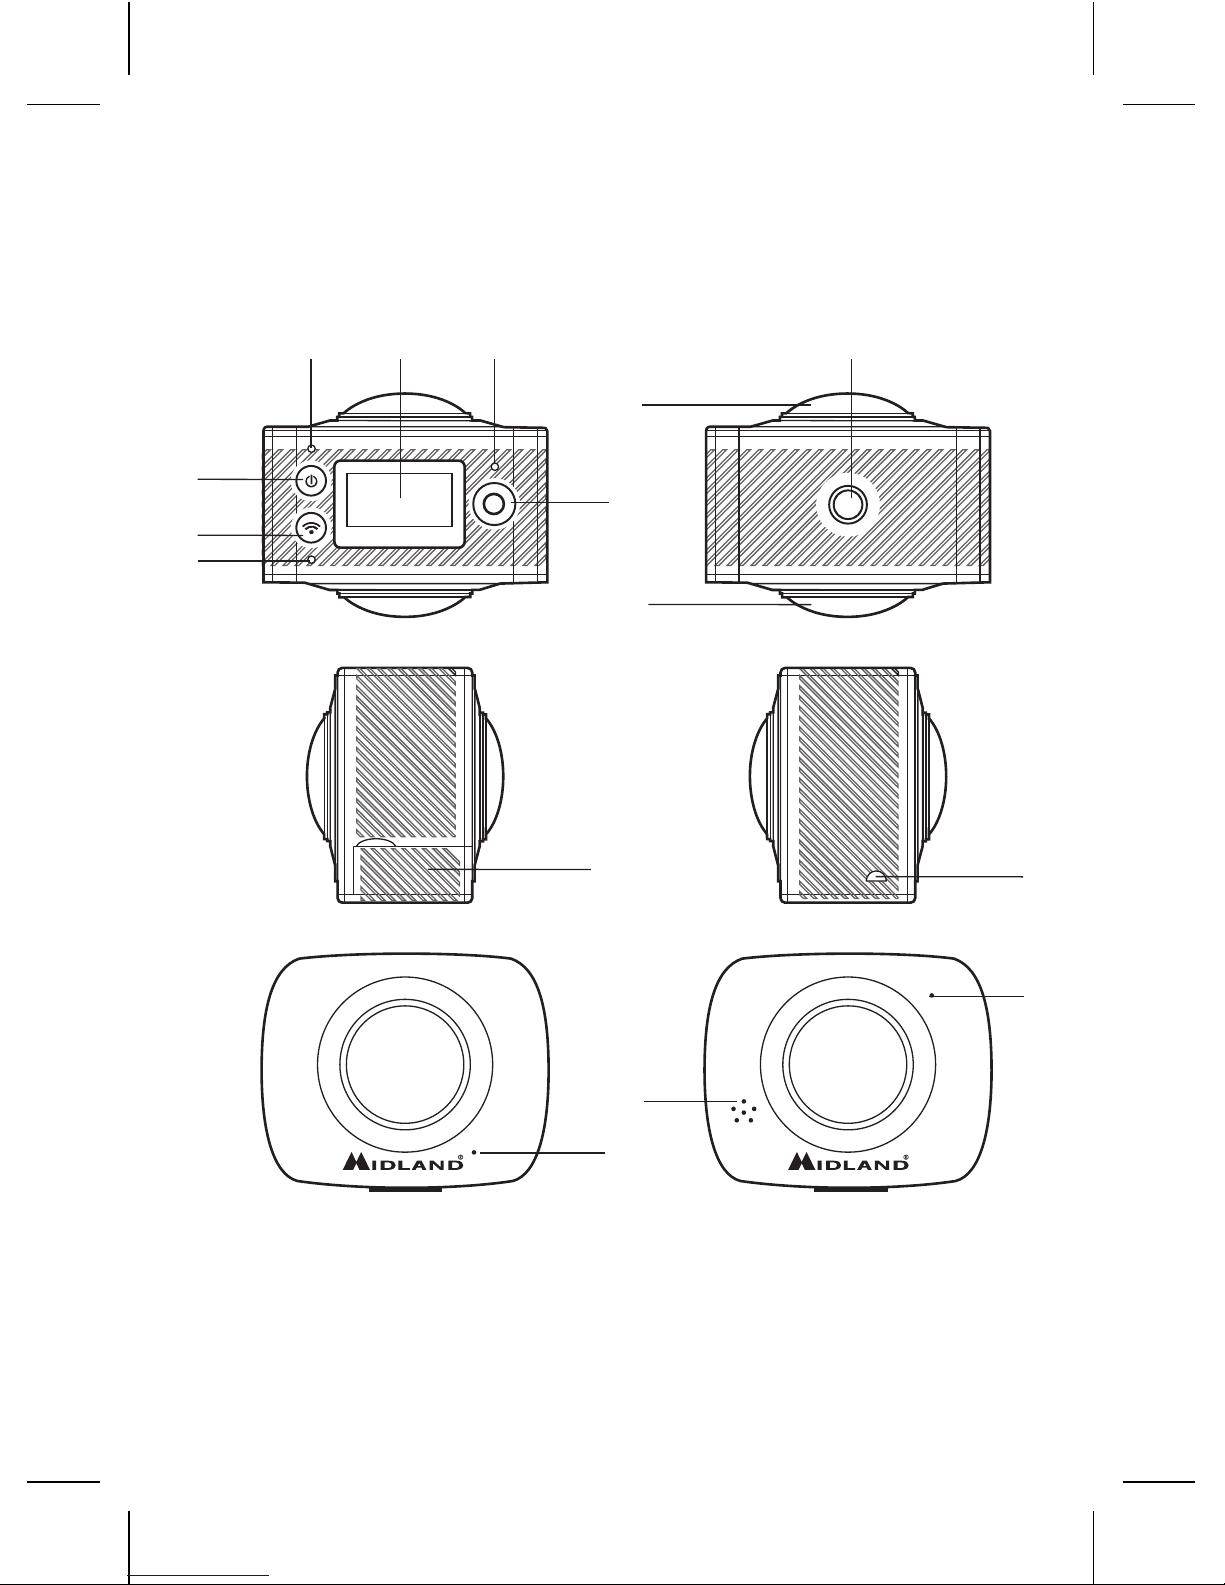
How to use your Wifi camera?
1. Insert a micro SD or micro SDHC card
(see the picture on the right).
SDHC Class 10 is recommended for use.
Please turn o the camera when plug-in
or pull-out the memory card.
2. Turn-on & Turn-o.
• Turn-on: Press and hold the button for about 2 seconds.
With a sound of “Beep” from the buzzer, LCD display screen
will be on (default mode: video recording).
• Power saving mode: When the camera is not under operation
for the selected time (system default 1 minute), it will turn o
automatically.
• Turn-o: Press and hold the button for about 3 seconds.
“GOODBYE” will be displayed while it is turning o.
3. Charge the camera.
Camera has built-in rechargeable lithium battery.
The battery can be charged by the micro USB cable. The char-
ging led will be blue while it is charging. It shall take 4 hours. The
blue light will be o when charging is completed.
4. Working mode selection.
The camera has two modes: video recording and photograph
shooting. They can be switched by pressing the button or
through APP.
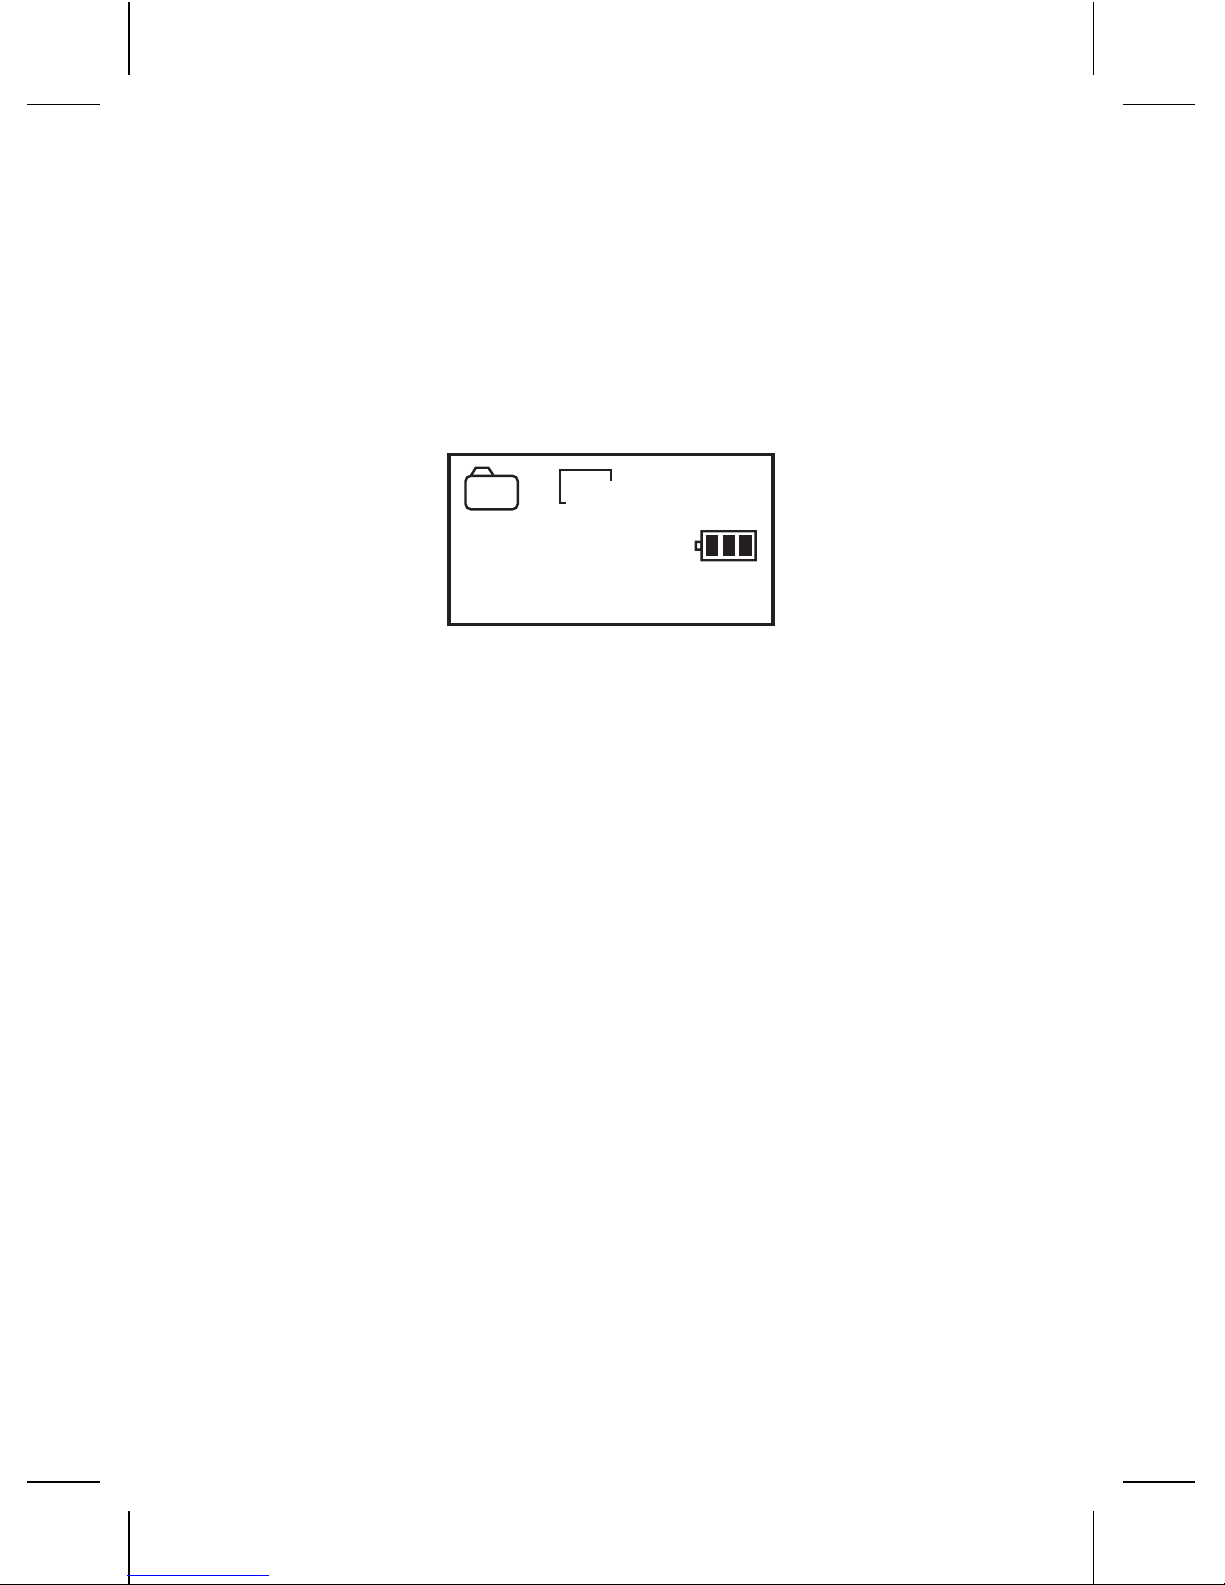
• Video recording (see the following pictures): the LCD dis-
plays the available REC time (as in below example image).
Press the start/stop REC button to start recording. The REC
led (red) will be twinkling during the video recording process.
05:12:39
1080P
2015/01/01 01:01
★★★★★★★★
★★★★★★★★
15298
2015/01/01 01:01
P5m
H360
FULL HD
H360
FULL HD
14
2
3
5
8
7
6
9
9
10 11
14
13
12
05:12:39
1080P
2015/01/01 01:01
★★★★★★★★
★★★★★★★★
15298
2015/01/01 01:01
P5m
H360
FULL HD
H360
FULL HD
14
2
3
5
8
7
6
9
9
10 11
14
13
12

7
LCD timer starts timing. Press the start/stop REC button
again to stop video recording.
• Photo shooting: The LCD displays the available number of
photos (as in below example image). Short press the Shutter
button to shoot photographs after it is switched to the pho-
to-shooting mode. The buzzer will send out “beep” sound. The
counter will countdown the remaining photos.
5. Menu operation.
Press the WIFI button for 2 seconds to enter the menu.
Short press the WIFI button to move the cursor for selection;
press the shutter button for confirmation; long press the WIFI
button to cancel the setting or exit.
•Power Save. OFF / 1min / 3min / 5min - If the camera is inac-
tive for the set time, the camera will enter power saving mode
and turnso.
•Date & Time. System time setting.
•Language. Language setting, English is by default.
•Factory Reset. Yes / No - Restore the settings to factory de-
fault
•System. System Info / Card Info - “System Info” will display
the firmware version. “Card Info” will display the memory
card information (Class, capacity and available space).
•Format. Yes / No - Format the memory card
05:12:39
1080P
2015/01/01 01:01
★★★★★★★★
★★★★★★★★
15298
2015/01/01 01:01
P5m
H360
FULL HD
H360
FULL HD
14
2
3
5
8
7
6
9
9
10 11
14
13
12

8
APP (for Android and iOS)
To view your videos you can download the APP “SYVR360”
available on Play Store (for Android users) or Apple Store (for iOS
users).
After installing “SYVR360” APP, the icon will be shown on the
screen.
APP Application
1. After installing SYVR360 on the mobile phone or tablet,the
icon
1. After installing SYVR360 on the mobile phone or tablet,the
will be shown on the screen;
2. Insert a card and turn the camera on, press the Wi-Fi but-
ton to turn on Wi-Fi. On the LCD will be displayed the SSID
name (P3600_xxxxxx) and the password (1234567890) to
connect to the Wi-Fi.
3. Turn on Wi-Fi on the mobile phone or tablet PC, search for
APP with the signal name P3600_xxxxxx (theSSID you read
on the LCD), then connect it till the connection is successful.
When your device will be connected you will see the Wi-Fi
icon on the LCD display.
4. Launch the App. From App you will be able to do:
• see the real timepreview
• start and stop Recording
• takephotos
• change settings (AWBand Wi-Fipassword)
• download videos from camera memory to your device
• play the video stored in camera memory or downloaded in
your device
When applied to the PC:
The video camera has the plug and play function. When connect-
ed to a PC by the USB cable, it will automatically switch to the
mobile HDD mode.
The removable disc icon will appear on “My Computer”. Your
photos are stored in the “\jpg” folder of the removable disc and

9
your videos are stored in the “\video” folder.
Notice: No need to install drivers to run its mobile HDD function if
your operating system is windows 2000 or above.
PC player (for Windows and MAC)
With this software you can play the downloaded video file. During
play is possible to choose between dierent kind of view.
You can even edit the video file rotating, trimming and converting it.
PC converter (for Windows only)
With this software is possible to convert video files recorded with
your camera before uploading them on social media (as YouTube or
other), so it can be recognized as 360° video.
Notice: immediately after the upload your video will not be played
as 360° video, but you have to wait until your social media’s server
process the video.

10
Technical parameters
Image sensor 5 MP (CMOS) x2
Function Mode Video recording; photograph shooting
Camera lens F2.0 - f=1.1mm
Video resolution 1920*960P (30fps)
Photograph resolution 3008*1504
File format video H.264 (MOV)
photo JPG
Memory Micro SD card(maximum:32GB)
USB port Hi-speed USB 2.0 port
Power Built-in lithium battery 1500 mAh
WARNING: Direct plug-in AC/DC power supply must be used for
disconnecting the device from the mains; the deskotp charger must be
positioned close to the unit and easily accessibly.
To download further updatings and for information about the warranty
please visit www.midlandeurope.com

FULL HD
360°
Video&Photo 1.5h - 1500mAh
battery pack
H360
Virtual reality
ready
Prodotto o importato da:
CTE INTERNATIONAL s.r.l.
Via. R.Sevardi 7- 42124 Reggio Emilia Italia
www.midlandeurope.com
Prima dell’uso leggere attentamente le istruzioni. Se il prodotto contiene
batterie: non gettare nel fuoco, non disperdere nell’ambiente dopo l’uso,
usare gli appositi contenitori per la raccolta.
Produced or imported by:
CTE INTERNATIONAL s.r.l.
Via. R.Sevardi 7 42124 Mancasale Reggio Emilia Italy
Other manuals for H360 FULL HD
1
This manual suits for next models
1
Table of contents
Other Midland Digital Camera manuals