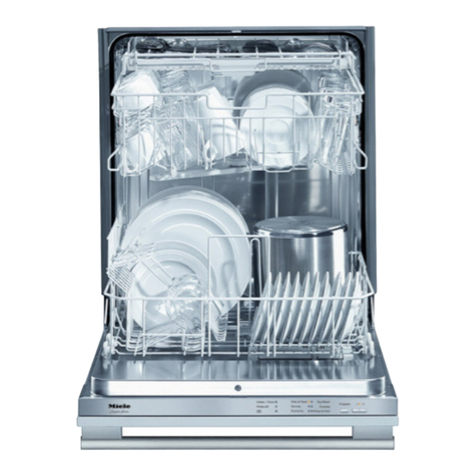
Miele G 851 SC Plus User manual

Operating instructions
Novotronic
G 851 SC Plus
To prevent accidents
and machine damage,
read these instructions
before
installation or use, M-Nr, 05 431 311

Contents
iMPORTANT SAFETY iNSTRUCTiONS ....... 4

Contents
Operation ....................................................... 32
Adding detergent .................................................. 32
Running the dishwasher ............................................ 33
Program sequence indicator (14) ..................................... 33
At the end of a program ............................................. 34
interrupting a program .............................................. 34
Changing a program ............................................... 34
Program guide .................................................... 35
Additional features ................................................. 36
"Top Solo" (15) .................................................. 36
Extended drying ................................................ 37
Frequently asked questions ........................................ 38
After sales service ................................................ 43
Transport ....................................................... 44
User Maintenance Instructions ...................................... 45
Cleaning the filter in the wash cabinet .................................. 46
Cleaning the spray arms ............................................ 48
Cleaning the wash cabinet .......................................... 49
Cleaning the door and door seal ...................................... 49
Cleaning the exterior ............................................... 49
Cleaning the water inlet filter ......................................... 50
Cleaning the drain pump and non-return valve ........................... 51

iMPORTANT SAFETY iNSTRUCTiONS
WARNING -
When using your dishwasher, follow
basic precautions, including the
following:
Read aH instructions before installa-
tion or use of the dishwasher to pre-
vent injury and machine damage.
i The manufacturer cannot be held re-
sponsible for damage or injury
caused by improper use of this ap-
pliance.
i Use the dishwasher only for its in-
tended purpose. This appliance is
intended for residential use only.
Electrical safety
Before installation make sure that
i: thevo,tageandfrequency,,stedon
the data plate correspond with the
household electrical supply. This data
must correspond to prevent iniury and
machine damage. Consult a qualified
electrician if in doubt.
,_,,,,,,,_,_,,_Beforeinstal,ationorservice,dis-
connect the power supply to the
work area by unplugging the unit, "trip-
ping" the circuit breaker or removing
the fuse.
Do not use an extension cord to
:}
i connect this appliance to electric-
ity. Extension cords do not guarantee
the required safety of the appliance
(e.g. danger of overheating).
Be certain your appliance is prop-
erly installed and grounded by a
qualified technician. To guarantee the
electrical safety of this appliance, conti-
nuity must exist between the appliance
and an effective grounding system. It is
imperative that this basic safety require-
ment be met. If there is any doubt, have
the electrical system of the house
checked by a qualified electrician. The
manufacturer cannot be held responsi-
ble for damages caused by the lack, or
inadequacy of, an effective grounding
system.
hstaHation
Installation and repair work should
bebyaMieleauthorizedservice
technician. Work by unqualified per-
sons could be dangerous and could
void the warranty.
WARNING - Fire hazard
oonotcoverorcrushthep,ugof
an electric appliance. Ensure that the
cabinet opening for the dishwasher
provides ample space for the plug.
Insta!ling the dishwasher in a tight
space may crimp the power cord or put
pressure on the plug which may cause
overheating.

iMPORTANT SAFETY iNSTRUCTiONS
Th,sequ,pment,snotdos,gnedfor
maritime use or for use in mobile
installations such as caravans or air-
craft. However, under certain conditions
it may be possible for an installation in
these applications. Please contact the
nearest Miele dealer or the Miele Tech-
nical Service Department with specific
requirements.
Inspect the dishwasher for ship-
ipingdamage.Donotinstal,orop-
eratea damaged unit. Contact the
place of purchase.
Ensure that any plastic wrappings,
ibagsetc.aredisposedofsafely
and kept out of the reach of babies and
young children. Danger of suffocation!
This dishwasher should only be in-
stalled under a continuous
countertop secured to adiacent
cabinetry.
Donot,nsta,,thisdishwasherbe-
neath a cooking surface, oven or
any appliance that radiates heat.
High temperatures from these units may
damage the dishwasher.
Donot,underanycircumstances
cut the intake hose or submerge in
liquid. This hose contains electrical
components that could cause iniury or
property damage if cut or submerged.
Use
Only use the dishwasher if all pan-
e,sareproper,yinplace.
_,,,,,_,,,,,_,iii_Donottamperw,ththecontrols.
iHli_i!iJtToreducetheriskofinjury,donot
allow children to play in, on, or
near the dishwasher.
Do not abuse, sit, or stand on the
doororbasketsofthedishwasher.
Undercertainconditions,hydrogen
gas may be produced in a hot
water system that has not been used
for two weeks or more. HYDROGEN
GAS IS EXPLOSIVE. If the hot water
system has not been used for such a
period, turn on all hot water faucets and
let water flow from each for several min-
utes before using the dishwasher, This
will release any accumulated hydrogen
gas. Do not smoke or use an open
flame during this time.
Donotwashplasticitemsunless
they are labeled "dishwasher safe"
or the equivalent. For items not labeled,
check the manufacturer's recommenda-
tions.
iMPORTANT SAFETY iNSTRUCTiONS
When loading tableware, place
isharp,ternsawayfromthedoor
seal to prevent damage to the seal.
Load knives pointing downwards to
prevent injuries.
Only use detergents and rinse aids
recommended for residential dish-
washers. Keep all detergents and rinse
aids out of the reach of children.
iiliii_iiiiiiiiJfDonotdrinkwaterfromthed,sh-
washer! Harmful residues could be
present.
For dishwashers with visible heating
eJement
iiliii_iiiiii!iDonottouchtheheatinge,ement
during or immediately after use.
DisposaJ of an appJiance
, ,ftheapp,,aneeisremovedfrom,ts
installation and will not be used,
the door to the wash cabinet should be
removed to prevent children from being
locked in the machine. When discard-
ing an old dishwasher, unplug it from
the power outlet, remove the door to the
wash cabinet and cut off the power
cord.
SAVE THESE

CONSIGNES DE S¢:CUF:iIT¢:
AVERTISSEMENT- S6curiteemectrique
Au moment d'utiliser votre
Jave-vaisseJJe, prenez des
precautions essentieJles, dont :
Lisez attentivement J'ensemble des
consignes avant d'instaHer ou
d'utHiser Jelave-vaisseHe afin de
prevenir Jes blessures et eviter
d'endommager J'appareH.
i responsable de dommages ou
blessures caus6s par I'usage
inappropri6 de I'appareil.
Tout usage inapproprie est
d6conseill6. Cet appareil est
destin6 a un usage domestique
uniquemenL
Conservez ces consignes dans un
lieu s0r et transmettez-les a tout
utilisateur futur.
Avant I'insta!lation, assurez-vous
que_atens_ooet_afr6queoce_od_-
qu6es sur la plaque signaletique cor-
respondent bien a celles de I'alimenta-
tion electrique de la r6sidence afin de
prevenir les blessures et eviter d'en-
dommager I'appareil. Dans le doute,
consultez un electricien qualifi6.
Avant I'insta!lation ou I'utilisation,
coupez I'alimentation 61ectrique,
soit en debranchant I'appareil, soit en
faisant basculer le disioncteur ou en
enlevant le fusible.
N'utilisez pas de rallonge pour
bra_oher,'appare_a_asource
d'alimentation 61ectrique. Les rallonges
ne garantissent pas la securit6 requise
pour I'appareil - si vous utilisez une ra!-
Ionge, cela peut causer la surchauffe.
Assurez-vous que votre appareil
es_,ns_a,,ecorrec_eme_etmisa,a
terre par un technicien quatifie. Pour
garantir la s6curite 61ectrique de I'ap-
pareil, il faut le raccorder a un dispositif
........................................................................................................................................................................................................................................................................................................de mise a la terre appropri6_ II est es-
sentiel de respecter cette exigence de
base en matiere de s6curit6. Dans le
doute, fakes v6rifier I'installation elec-
trique de la r6sidence par un 61ectricien
qualifi6. Le fabricant ne peut 6tre tenu
responsable de dommages caus6s par
I'absence d'un dispositif de mise b,la
terre ou par un dispositif inadapt6.

CONSIGNES OE SECURITE
Installation
L'installation et les reparations de-
vraient 6tre effectu6es uniquement
par un technicien de service autoris6
Miele, Les travaux effectu6s par des
personnes non qualifi6es peuvent
s'av@er dangereux et rendre nulle la
garantie,
ATTENTION-Risque d'incendie
Ne recouvrez et n'6crasez iamais
la fiche d'un appareil 61ectrique, Assu-
V@ifiez si votre lave-vaisselle n'a
pas subi de dommage Iors du
transporL N'installez pas et n'utilisez
pas un appareil endommag6. Oommu-
niquez avec le point de vente cO vous
I'avez achet&
Assurez-vousque,esemba,,ages,
les sacs, mati@es plastiques et au-
tres sont correctement elimin6s et tenus
hors la port6e de b6b6s et d'enfants,
Risque de suffocation!
rez-vous que dans I'espaoe occup6 par Le lave-vaisselle dolt @treinstall6
le lave-vaisselle il y a suffisamment de uniquement sous un cornptoir
volume libre pour la fiche, Si vous ins-
tallez le lave-vaisselle dons un espace
trop petit, le cordon d'alimentation
pourrrait 6tre comprim6 ou une pres-
sion pourrait 6tre exerc6e sur la fiche,
ce qui risque de causer la surchauffe,
Cet appareil n'est pas congu pour
usage sur un bateau ou dons des
engins mobiles, tels les avions ou les
v6hicules r6cr6atifs, Toutefois, son ins-
tallation est possible dons certaines cir-
constances, Veuillez communiquer vos
exlgences particulieres au d6taillant
Miele le plus pres de chez vous ou au
service du soutien technique,
continu fix6 & des armoires adjacentes,
N'instatlez pas ce modele de
lave-vaisselle sous une plaque de
cuisson, un four ou tout autre appareil
qul diffuse de la chaleun
Les hautes temp@atures que diffusent
ces appareils pourraient endommager
le lave-vaisselle,
Enaucuncas,vousnedevezco.-
per le tuyau d'arrivee d'eau ou I'im-
merger, car il contient des composants
61ectriques qui pourraient causer des
blessures ou endommager la r6si-
dence,

CONSIGNES OE SECURITE
Utitisation
H'utU_sez_e_a,,e-vaisse,eque
Iorsque tousles panneaux sont
bienen place.
Ne jouez pas avec les
commandes_
Afin de dblinuer le risque de bles-
sures, ne laissez pas les enfants
jouer pres de I'appareil ni monter de-
dans ou dessus.
Evitez de malmener la porte ou les
pan_ersdu_ave-va_sse,eoude
vous y appuyer ou asseoin
Dons certaines circonstances, tout
systeme d'eau chaude qui n'a pas
servi durant deux semaines ou davan-
tage peut produire de I'hydrogene.
L'HYDROGENE EST UN GAZ
INFLAMMABLE. Si le systeme d'eau
chaude n'a pas servi durant une te!le
p@iode, ouvrez bus les robinets d'eau
chaude et laissez I'eau couler plusieurs
minutes avant d'utiliser le lave-vaisselle.
Cette action lib@era I'hydrogene qui
aura pu s'y accumuler. Entre-temps,
abstenez-vous de ruiner et n'utilisez
pas de fiamme nue.
Ne lavez pas des articles en plas-
tique non etiquet6s "resiste au
lave-vaisse!le" ou une formulation 6qui-
valente. Consultez les recommanda-
tions du fabficant pour les articles non
etiquet6s.
Au moment de charger la vaisse!le,
ne disposez pas les articles cou-
pants a proximit6 du ioint d'6tanch6it6
de la porte afin d'eviter de I'endomma-
get. Placez les couteaux avec la pointe
vers le bas afin d'6viter les blessures,
Utilisez seulement les d6tergents
et_esproduitsderin_agerecom-
mand6s pour les lave-vaisselle a usage
domestique. Conservez bus ces pro-
duits hors de la port6e d'enfants.
Heconsommezpas_'eaudu
lave-vaisse!le! Elle peut contenir
des r6sidus dangereux.
Lave-vaisseJJe munis d'un @J_ment
chauffant visibJe
Ne touchez pas 1'61ementchauffant
pendant ou imm6diatement apres
I'utilisation.
Mise au rebut de Fappareil
Si vous d6sinstallez I'appareil et
comptez ne plus vous en servir,
d6tachez-en la porte pour eviter que
des enfants se retrouvent enferm6s
dons le tambour. Lorsque vous mettez
un lave-vaisselle au rebut, d6bran-
chezde de la source d'alimentation
electrique, d6tachez-en la porte et cou-
pez le cordon d'alimentation.
CES CONSlGNES

Caring for the environment
Energy saving washing
This dishwasher is exceptionally eco-
nomical in the use of water and electric-
ity, For best results follow these tips:
[] For lowest energy consumption and
the gentlest washing of china and
crystal, connect the dishwasher to a
cold water source,
[] For fastest possible wash times, yet
higher energy consumption, connect
the dishwasher to a hot water source,
[] Make full use of the baskets without
overloading for the most economical
washing,
[] Choose a program that best suits the
degree of soiling and the type of
dishes being washed,
[] For small loads:
Select the "Top Solo" feature (see
"Additional features"),
[] If baskets are only half full, select the
"Economy" program,
[] Use the correct amounts of detergent
and rinse aid,
10

Wash cabinet
Guide to the dishwasher
1
3
4
5
7 8 9
1 Upper spray arm (not visible)
2 Cutlery tray
3 Upper basket
4 Water feed for middle spray arm
5 Middle spray arm
6 Lower spray arm
10 11 12
7 Four height adjustable feet
8 Triple Filter System
9 Salt reservoir
10 Detergent dispenser
11 Rinse aid reservoir
12 Data plate
11

Guide to the dishwasher
Control panel
21
13 "On/Off" button
14 Program sequence display
15 "Top solo" button
16 Program selector
17 "Start" button
13 14 15
L{7
20 19 18 17 16
18 Check/Refill indicators
19 Child Safety Lock
20 Door release
21 Drying vent
12

Before using for the first time
To open the door
[] Press the release catch inside the
door grip.
If the door is opened during operation,
the dishwasher will stop running. Once
the door is closed the program will re-
starL
To dose the door
[] Push the baskets in.
[] Lift the door and push until it clicks
into position.
Ch(ld Safety Lock
[ [tt
The yellow key for the Child Safety !
Lock is shipped on one of the spikes
at the front of the upper basket. Re-
move the key before using the dish-
washer.
The Child Safety Lock is designed to
prevent children from opening the dish-
washer.
[] Use the provided key to lock or un-
lock the dishwasher.
_ Horizonta!:the door is locked
I_ Vertical:
the door can be opened
13

Before using for the first time
Water softener
To achieve good cleaning results, the
dishwasher needs soft water, Hard
water results in calcium deposits on
dishware and in the dishwasher,
If your tap water hardness is above
8 gr/gal (values are in US gallons)
(!40 ppm), the water should be soft-
ened, This takes place automatically in
the unit's integrated water softener.
- Your local water authority wil! be able
to advise you of the water hardness
level in your area,
- The dishwasher must be pro-
grammed to correspond to the water
hardness in your area,
- The water softener must be filled with
dishwasher salt for reactivation,
If your water hardness is consistently
lower than 8 gr/gal (!40 ppm), you do
not need to add dishwasher salt, How-
ever, the dishwasher must still be pro-
grammed to correspond to the local
water hardness,
Where the water hardness fluctuates
e,g, between 9- 17 gr/gal (!60- 3!0
ppm), always program the machine to
the higher value, 17 gr/ga! (310 ppm)in
this example,
If there is a fault, it will help the service
technician to know the hardness of your
local water supply,
[] Please note the water hardness:
gr/gal
14

Before using for the first time
Programming the water softener
Your water hardness level must be pro-
grammed into the dishwasher using the
program selector and buttons on the
control panel,
[] Make sure the dishwasher is turned
off,
[] Turn the program selector to "Stop",
[] Press and hold the "Top Solo" button
and at the same time turn on the
dishwasher with the "On/Off" button,
Release the "Top Solo" button within
two seconds,
The "Salt" indicator will flash,
If the "Rinse aid" indicator comes on,
the rinse aid dispenser needs to be
filled,
If any other indicator is lit or flashing,
the above steps must be repeated,
Pots & Pans Stop Normal Plus
Sani Wash Normal
China &
Economy Y Crystal
Energy
Saver Rinse & Hold
[] Turn the program selector to the posi-
tion which corresponds to the water
hardness in your area (see table),
gdgaB* ppm Selector setting
1 = 4** 20= 70 Normal Plus
,_}- 7 90- 130 Normal
8 - 10 140 - 180 China & Crystal
11-13 200- 230 Rinse&Hold
14 - 16 250 - 290 5 o'clock position
17 - 22 310 - 400 6 o'clock position
23 - 35 410 - 630 7 o'clock position
36 - 70 650 - 1260 Energy Saver
* US gallons
** factory preset
Example:
Water hardness is 20 gr/gal,
Turn the program selector to the
"6o'clock" position,
15

Before using for the first time
[] Press the "Top Solo" button,
The "Top Solo" indicator will lighL
[] Turn the program selector to "Stop",
[] Turn off the dishwasher,
The programmed water hardness is
stored,
Check(rig the programmed water
hardness
[] Make sure the dishwasher is turned
off,
[]
[]
Turn the program selector to "Stop",
Press and hold the "Top Solo" button
and at the same time turn on the
dishwasher with the "On/Off" button,
Release the "Top Solo" button within
two seconds,
The "Salt" indicator will flash,
If the "Rinse aid" indicator comes on,
the rinse aid dispenser needs to be
filled,
If any other indicator is lit or flashing,
the above steps must be repeated,
[] Turn the program selector clockwise
until the "Top Solo" indicator comes
on,
The position where the "Top Solo" indi-
cator comes on corresponds to the pro-
grammed water hardness (see table in
"Programming the water softener"),
[] Turn the program selector to "Stop",
[] Turn off the dishwasher,
16

Before using for the first time
FitHng the salt reservoir
If your water hardness level is greater
than 8 gr/gal, the salt reservoir should
be filled before the first use and when
the "Salt" indicator lights.
Only use water softener salt specially
formulated for dishwashers. Other salts
may contain insoluble additives which
can impair the water softener.
The proper salt can be purchased from
your Miele dealer or Miele's Technical
Service Department.
To fill the satt reservoir:
[] Remove the lower basket.
[] Unscrew and remove the salt reser-
voir cap located on the floor of the
wash cabinet.
[] Place the provided funnel over the
salt reservoir.
Carefully fil! with salt. The salt reser-
voir holds approximately 4.5 Ibs
(2 kg) of salt. As it is filled, water will
run out,
[] Clean any excess salt from the
threads of the reservoir opening.
[] Screw the cap on firmly.
[] If the dishwasher will not be used im-
mediately, run the "Rinse & Hold" pro-
gram. This will remove any traces of
salt from inside the wash cabinet.
17

Before using for the first time
Salt indicator
When the salt reservoir is empty, the
"Salt-PC" indicator will light, indicating
that it should be refilled with reactiva-
tion sail
Top Solo
Start
Untake!Drain O
Salt
Rinse aid O
After the reservoir has been filled, the
water softener is automatically reacti-
vated the next time the dishwasher is
started. The "Salt" indicator will be lit
during this process.
Bypassing the saJt indicator
If your water is soft (below 8 gdgal) the
salt reservoir should not be filled with
salt. The indicator will remain lit and
should be disregarded or bypassed.
[] Remove the salt reservoir cap.
Looking into the salt reservoir, you will
see the top of the float chamber on the
right hand side, '_.
[] Using a screwdriver, carefully pivot
the float chamber towards the center
of the reservoir.
[] Using needle nose pliers, pull the
cap, _, off of the float chamber, and
remove the float, ._.
Replace the float chamber cap, push
the chamber back into its upright posi-
tion, and replace the salt reservoir cap.
The "Salt" indicator should no longer be
lit.
18

Before using for the first time
Rinse aid
Rinse aid is recommended to prevent
spotting on dishes and glassware,
reservoir.
Adding rinse aid
[] Pour liquid rinse aid into the reservoir
until it is visible on the surface of the
screen,
[] Press on the flap until you hear it
click shut, Failure to close it all the
way will allow water to enter the res-
ervoir during the wash program,
[] Wipe up any spilled rinse aid. The
flap will remain closed during normal
operation,
[] Add rinse aid before the first use and
whenever the "Rise aid" indicator
lights,
[] Press the button in the direction of
the arrow until the flap springs open,
19

Before using for the first time
The dosage selector is preset to 3, This
dispenses approximately 3 ml of rinse
aid per program, It can be adiusted
from 1 to 6,
[] Use a higher setting if spots appear
on dry glassware,
[] Use a lower setting if streaking ap-
pears on dishes or glasses,
Rinse aid indicator
The rinse aid indicator on the control
panel will light when the rinse aid reser-
voir needs refilling,
Top Solo
Start
Untake/Drain 0
SaRt _ 0
Rinse aid
When the indicator first comes on, there
will be enough rinse aid left for 2 - 3
washes,
2O
This manual suits for next models
1
Table of contents
Other Miele Dishwasher manuals

Miele
Miele G 685 User manual

Miele
Miele G 601 User manual

Miele
Miele HG07-W User manual

Miele
Miele PG 8080i User manual

Miele
Miele G4930SCU User manual

Miele
Miele INSPIRA G 2140 User manual

Miele
Miele Platinum G 892 User manual

Miele
Miele G 15640-45 SCi SL Guide

Miele
Miele PG 8133 SCVi User manual

Miele
Miele G 7969 User manual

Miele
Miele G 1833 User manual

Miele
Miele G 665 User manual

Miele
Miele G 5481 User manual

Miele
Miele INSPIRA G 2140 User manual

Miele
Miele Novotronic G 841 Plus User manual

Miele
Miele G 1173 Vi User manual

Miele
Miele G 2432 User manual

Miele
Miele G 572 User manual

Miele
Miele G 5266 SCVi SF User manual

Miele
Miele PTD 701 User manual