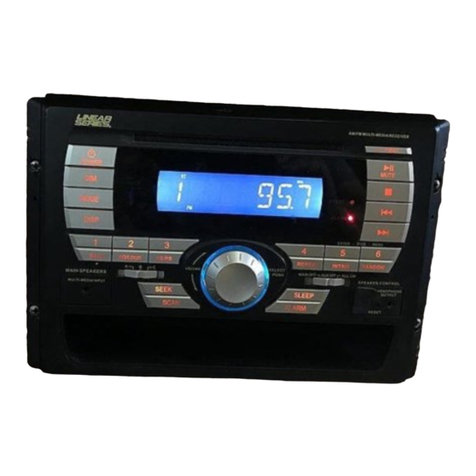
Milennia MIL-MR380 User manual

MIL-MR380
CD/MP3/SD/MMC/USB PLAYER WITH FM/AM TUNER
OPERATING INSTRUCTION
MILENNIA

2
Safety Information
PRECAUTIONS
Use only in a 12-volt DC negative-ground
electrical system.
Disconnect the vehicle's negative battery
terminal while mounting and connecting
the unit.
When replacing the fuse, be sure to use
one with an identical amperage rating.
Using a fuse with a higher amperage rating
may cause serious damage to the unit.
DO NOT attempt to disassemble the unit.
Laser beams from the optical pickup are
dangerous to the eyes.
Make sure that pins or other foreign
objects do not get inside the unit, they
may cause malfunctions, or create safety
hazards such as electrical shock or laser
beam exposure.
If you have parked the car for a long
time in hot or cold weather, wait until the
temperature in the car becomes normal
before operating the unit.
Keep the volume at a level at which you
can hear outside warning sounds (horns
sirens, etc.).
CD Notes
Playing a defective or dusty CD
can cause dropouts in sound.
Hold CDs as illustrated.
Do not touch the unlabeled side.
Do not attach any seal, label or
data protection sheet to either side of a
disc.
Do not expose a CD to direct sunlight or
excessive heat.
Wipe a dirty CD from the center outward
with a cleaning cloth.
Never use solvents such as benzine or
alcohol.
This unit cannot play 3-inch ( 8cm ) CDs.
NEVER insert a 3-inch CD contained in the
adapter or an irregularly shaped CD. The
unit may not be able to eject it, resulting in
a malfunction.
Before Operation
Do not raise the volume level too much,
as this will block outside sounds, making
driving dangerous.
Stop the car before performing any
complicated operation.
CAUTION
DO NOT open covers and do not repair
yourself. Consult the dealer or an
experienced technician for help.
* In addition to ordinary CDs, this unit can
playback a CD-R or CD-RW, MP3.
Contents
Safety Information ........................................ 2
Panel Controls .............................................. 3
Button Tips ................................................... 4
USB/SD/MMC MP3 Playback....................... 4
MP3 Overview .............................................. 5
MP3 Playback............................................ 5-6
Menu Function.............................................. 6
Electrical Connections .................................. 7
Installation Guide.......................................... 8
Anti-Theft System ......................................... 9
Troubleshooting....................................... 9-10
Specications ............................................. 10

3
Panel Controls
Power on : Press button to turn on the unit.
1. - Disc eject
2. SRC
- Radio
- Disc play (when disc inserted)
- USB (when USB connected)
- Card (when SD/MMC card inserted)
- Aux-in
3. - Radio tune
- Track seek
4. - Radio local/distant
5. - Panel release
6. - FM stereo/mono
7. - Aux-in jack
8. - Band switch:
FM1,FM2,FM3,AM1(MW1),AM2(MW2)
9. Disc playback
- Button 1: Play/Pause
Top play (press more than 2 sec.)
- Button 2: Intro play (10 sec.)
- Button 3: Track repeat play
- Button 4: Track random play
- Button 5: - MP3 folder down (If there are more
than 1 folders)
- MP3 track -10 down (long press)
- Button 6: - MP3 folder up (If there are more
than 1 folders)
- MP3 track +10 up (long press)
Radio preset 1~6
- Press to tune in a preset station.
- Hold for more than 2 seconds to store station.
10. - Time display/adjust
11. - USB connector
12. - SD/MMC card slot
13. - Power on / off (long press)
- Mute
14. - Disc slot
15. - Loudness
16. - Remote sensor
17. - AMS: Radio preset scan/Radio auto preset
-SEARCH:MP3track/le/charactersearch
18. - Rotate the knob to adjust volume level.
- Push to select VOL/BAS/TRE/BAL/FAD,
rotate the knob to adjust level.
- Press more than 2 seconds to enter menu
mode.

4
Button Tips
AMS : Auto Memory Store
Pressbrieytoscanthepresetstation1-6 for
5 seconds each. Hold more than 2 seconds,
the 6 strongest available station will be
automatically saved in the memory of preset
button 1-6.
BUTTON SKIP
Radio: Press |<< / >>| button to tune in the
station that you have known its frequency.
Hold |<< / >>| more than 2 seconds, tuning
will automatically activate and stop when
signals of the next station are received.
Disc playback: Press |<< / >>| button to go to
the next or previous track. Hold |<< / >>| to
reverse back or fast forward the track.
SET CLOCK
Press DISP button, time displays. Press again
more than 2 seconds, time display blinks.
Rotate the knob to set time. Press DISP to
conrm.
1. Loading SD/MMC Card
Insert the SD/MMC card into the slot, with the front side at right.
The unit will play the music automatically and the LCD will show
CARD.
2. Take out SD/MMC Card
Push SRC button and switch to non CARD mode, slight press
SD/MMC card, take out the card when it was pop out.
3. Loading USB equipment
Open the rubber cap, insert the USB into the connector and the
unit play the music in the USB storer automatically, and the LCD
will show USB.
4. Take out USB equipment
Push the SRC button and switch to non USB mode, then take off
the USB storer, close the rubber cap.
USB/SD/MMC Notes
USBfunctions(ashmemorytype)MP3musicplay
1. SD/ MMC card support.
2. USBashmemory2in1(SD/MMC)support.
3. Fat 12/fat 16/fat 32 is possible.
4. File name : 32 byte/dir name : 32 byte/tag name : 32 byte
5. Tag (ID3 tag ver 2.0)
- title/artist/album : 32 byte support.
6. Multi card reader not support.
7. USB 1.1 support, USB 2.0 support (It can not support USB 2.0
speed. Just, get the same speed with USB 1.1).
Not all kinds of USB devices are compatible with the unit.
USB/SD/MMC MP3 Playback

5
MP3 Overview
MP3 Overview
MP3 is short for MPEG Audio Layer 3 and
refers to an audio compression technology
standard.
Thisproductallowsplayback ofMP3les
on CD-ROM CD-R or CD-RW discs.
Theunit canreadMP3leswrittenin the
format compliant with ISO 9660. However
it does not support the MP3 data written by
the method of packet write.
TheunitcannotreadanMP3lethathas
aleextensionotherthan".mp3".
If you play a non-MP3 file that has the
".mp3"extension,youmay hearsome
noise.
In this manual, we refer to what are called
"MP3file"and"folder"in PCterminology
as"Track"and"Album",respectively.
Maximum number of directory level is 8,
including the root directory. Maximum
number of files and folders per disc is
1000.
The unit may not play tracks in the order of
track numbers.
The unit plays only the audio tracks if a
disc contains both audio tracks and MP3
les.
When playing a disc of 8kbps or VBR*, the
elapsed playing time in the display window
will not be correct and also the intro play
may not function properly. *VBR: Variable
Bit Rate.
Note on creating your own CD-Rs or
CD-RWs containing MP3 les
To enjoy high quality sound, we
recommend converting to MP3 files with
a sampling frequency of 44.1 kHz and a
xedbitrateof128kbps.
DONOTstoremorethan 1000MP3les
per disc.
For ISO 9660-compliant format, the
maximum allowable depth of nested folders
is 8, including the root directory(folder).
When CD-R disc is used, playback is
possible only for discs which have been
nalized.
Make sure that when MP3 CD-R is burned
that it is formatted as a data disc and NOT
as an audio disc.
You should not write non-MP3 files or
unneededfoldersalongwith MP3leson
the CD-R otherwise it takes a long time
until the unit starts
toplayMP3les.
With some CD-R media, data may not
be properly written depending on their
manufacturing quality. In this case, data
may not be reproduced correctly. High
quality CD-R disc is recommended.
Up to 16 characters are displayed for the
name of an Album or a Track. ID3 TAG
version 1.x is required.
Note that the unit may not play tracks in
the order that you wrote them to the disc.
MP3 Playback
Display Information
During playback, ID3 tag information display
scrolling on the screen: FOLDER, FILE,
ALBUM, TITLE, ARTIST and Track Number/
Elapsed Time.
Folder Up/Down
Press the 5/DN button to go to the previous
folder. Press the 6/UP button to go to the next
folder.
Direct Song/File Access
1. Press the AMS button once and press the
knob to enable direct track searching.
2. Rotate the VOL/MENU control to select a
digit.
3. Press the VOL/MENU control to confirm
entryandthetensdigitwillash.
4. Rotate the VOL/MENU control to select
digit.
5. Repeat above steps to enter the hundreds
and thousands digit, if necessary.
NOTE: The unit will only allow the
selection of digits that correspond with
the numberoflesonthemediayouare
searching.
6. Once the track number appears on the
screen, long press the VOL/MENU control
toplaytheselectedsong/le.
Table of contents
Other Milennia Car Receiver manuals


