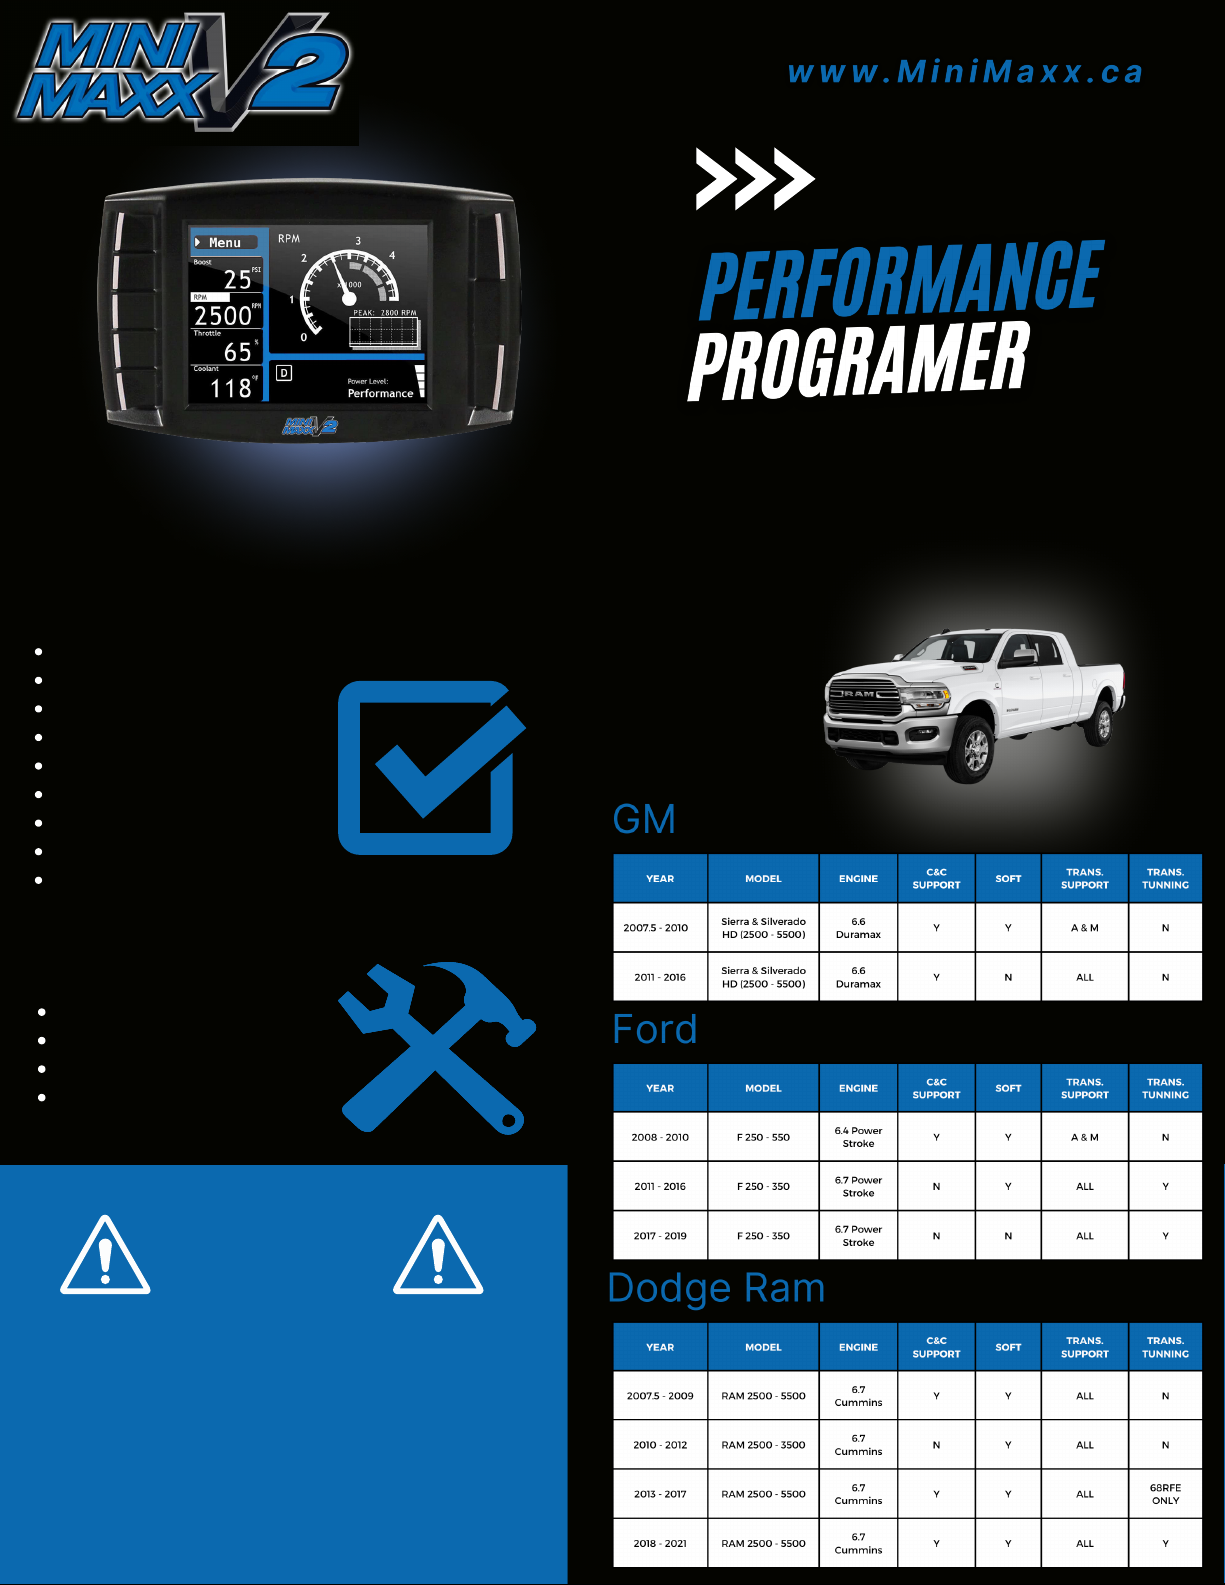
SECTION 5:
BEFORE INSTALLATION
CHECK FUSES (GM VEHICLES ONLY)
Check the included check fuse card and remove the appropriate fuses before installing the tune.
CHECK YOUR BATTERY
ALWAYS, ensure that you car is connected to a battery charger before starting the installation.
TURN ELECTRONICS OFF
Leaving electronics on (stereo included) may prevent a
successful download.
THE DOWNLOAD
Do not interrupt or disconnect the Mini Maxx at any point during the download. Leave electronics off during the
entire process.
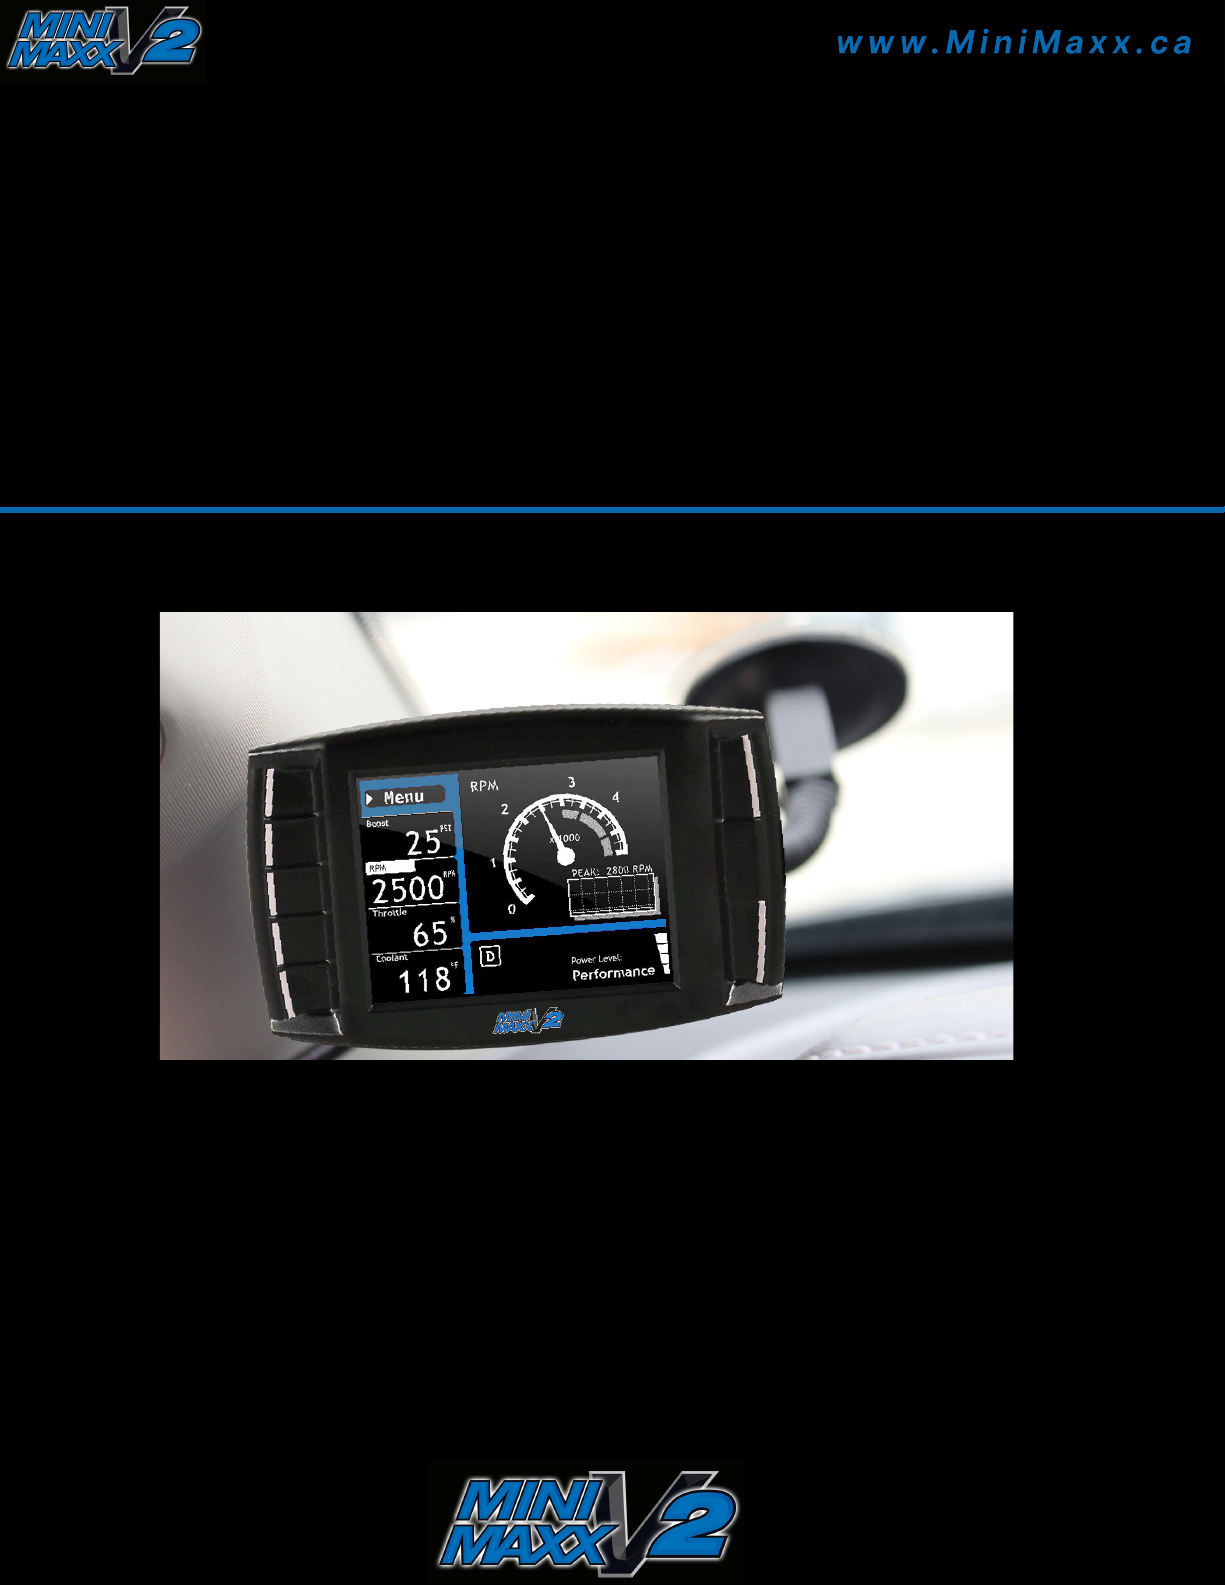
SECTION 6:
MINI MAAX INSTALLATION
1 Turn the key to the “on” position. Do NOT start the engine.
2 Go to the Main Menu (top left button).
3 Choose "Install Download".
4 Folow the instructions on the screen.
5 You will be prompted to turn your key to the “off” or “on” position and then press Continue.
6 Do NOT start the engine when turning the key to the “run” (or “on”) position at any time during the download. You
may be prompted to make choices about vehicle-specific settings such as the speed limiter.
7 After the installation replace any removed fuses.
Steps below will enable the vehicle key position to control the power state (on/off) of the Mini Maxx; if you do not
want the Mini Maxx to automatically power on and off according to the key position, skip these steps.
SECTION 7: FINALIZING THE INSTALLATION
THE KEY-ON FUSE.
1 Use a 12 volt test light or your vehicle owner’s manual to locate the fuse. Note, the fuse only has power when the
key is in the “on” (or “run”) position.
2 Remove the fuse and locate the unpowered (accessory) side of the fuse socket.
3 With the key on the “run” (or “on”) position, insert the probe of a 12 volt test light into each side of the fuse socket.
Mark the side that does not light up. (The key-on fuse should be either a 10 or 15 amp fuse)