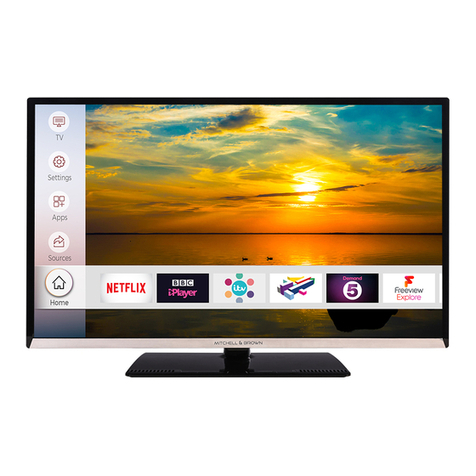
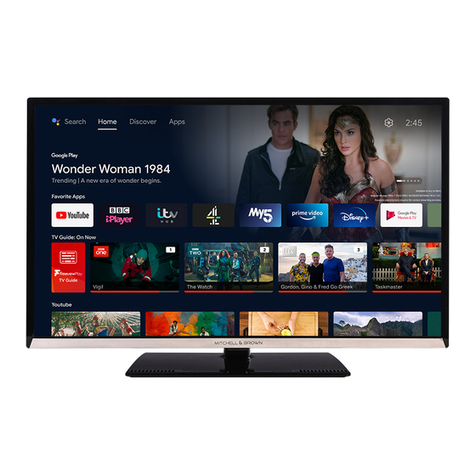
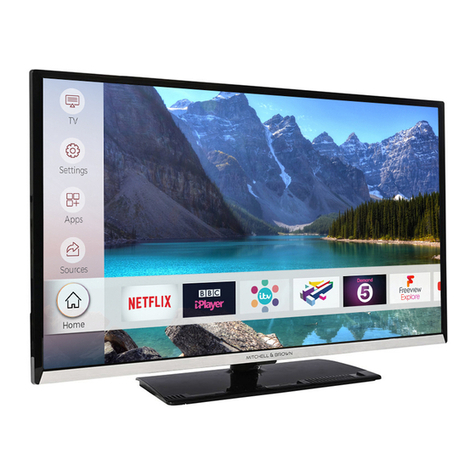
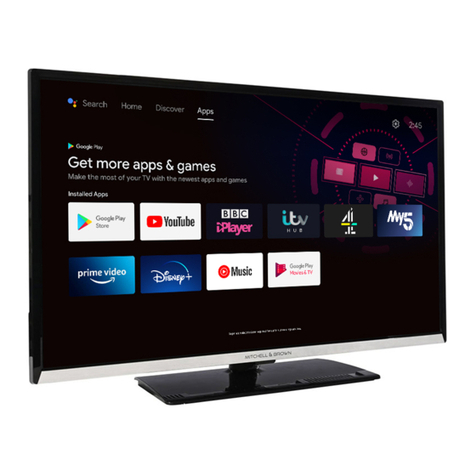
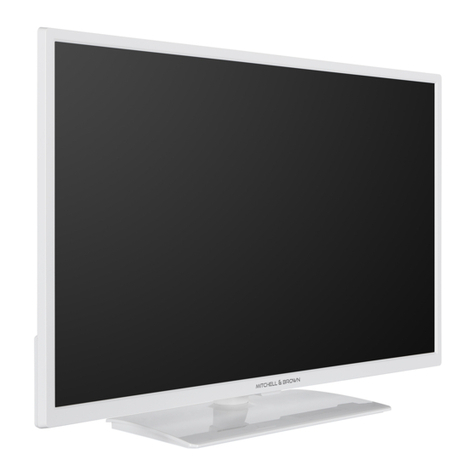
Mitchell & Brown JB-50QLED1811 User manual


English
Table of Contents
English
Safety Information
CAUTION
RISK OF ELECTRIC SHOCK
DO NOT OPEN
CAUTION:
Note: Follow the on screen instructions for operating the
related features.
IMPORTANT - Please read these
instructions fully before installing or
operating
WARNING: This device is intended to be
used by persons (including children) who are
capable / experienced of operating such a device
unsupervised, unless they have been given
supervision or instruction concerning the use of
the device by a person responsible for their safety.
WARNING
ABOVE ALL - NEVER let anyone, especially
children, push or hit the screen, push anything
into holes, slots or any other openings in the TV.
Mains Supply
Markings on the Product
Class II Equipment:
Hazardous Live Terminal:
Caution, See Operating Instructions:
Class 1 Laser Product:

English
WARNING
– – – – – – – – – – – –
– – – – – – – – – – – –
WALL MOUNTING WARNINGS
English
Introduction
Accessories Included
Features
Ultra HD (UHD)
High Dynamic Range (HDR) / Hybrid Log-
Gamma (HLG)
Menu
HDMI EDID Version
TV Options>Settings>Device Preferences>Inputs
EDID 2.0Auto EDID
Dolby Vision
MenuHDMI EDID
VersionTV Options>Settings>Device
Preferences>Inputs EDID 2.0Auto EDID
Dolby VisionDolby
Vision
Picture Mode
Dolby Vision Bright
Dolby Vision Dark
Picture ModeMenu
Picture
Picture
Picture Mode

English
WARNING
– – – – – – – – – – – –
– – – – – – – – – – – –
WALL MOUNTING WARNINGS
English
Introduction
Accessories Included
Features
Ultra HD (UHD)
High Dynamic Range (HDR) / Hybrid Log-
Gamma (HLG)
Menu
HDMI EDID Version
TV Options>Settings>Device Preferences>Inputs
EDID 2.0 Auto EDID
Dolby Vision
MenuHDMI EDID
VersionTV Options>Settings>Device
Preferences>Inputs EDID 2.0Auto EDID
Dolby VisionDolby
Vision
Picture Mode
Dolby Vision Bright
Dolby Vision Dark
Picture ModeMenu
Picture
Picture
Picture Mode

English
Stand Installation &
Wall Mounting
Assembling / Removing the stand(s)
Preparations
Assembling the stand(s)
1.
2.
Removing the stand(s) from the TV
When using the wall mount bracket
VESA WALL MOUNT MEASUREMENTS
min. (mm)
max. (mm)
Antenna Connection
Left side of the TV
$17
English
Other Connections
Connector Type Cables Device
HDMI
Connection
(back&side)
SPDIF SPDIF
(Optical Out)
Connection
(back)
HEADPHONE Headphone
Connection
(back)
USB
Connection
(side)
CI
Connection
(side)
CAM
module
LAN Ethernet
Connection
(back)
When using the wall mounting kit
(contact your dealer to purchase one,
if not supplied), we recommend that
you plug all your cables into the back
of the TV before mounting on the
wall. Insert or remove the CI module
only when the TV is SWITCHED
OFF. You should refer to the module
instruction manual for details of the
settings. The USB inputs on the
TV support devices up to 500mA.
Connecting devices that have current
value above 500mA may damage
your TV. When connecting equip-
ment using a HDMI cable to your
TV, to guarantee sucient immunity
against parasitic frequency radiation
and trouble-free transmission of high
de¿nition signals, such as . con-
tent, you have to use a high speed
shielded (high grade) HDMI cable
with ferrites.

English
Stand Installation &
Wall Mounting
Assembling / Removing the stand(s)
Preparations
Assembling the stand(s)
1.
2.
Removing the stand(s) from the TV
When using the wall mount bracket
VESA WALL MOUNT MEASUREMENTS
min. (mm)
max. (mm)
Antenna Connection
Left side of the TV
$17
English
Other Connections
Connector Type Cables Device
HDMI
Connection
(back&side)
SPDIF SPDIF
(Optical Out)
Connection
(back)
HEADPHONE Headphone
Connection
(back)
USB
Connection
(side)
CI
Connection
(side)
CAM
module
LAN Ethernet
Connection
(back)
When using the wall mounting kit
(contact your dealer to purchase one,
if not supplied), we recommend that
you plug all your cables into the back
of the TV before mounting on the
wall. Insert or remove the CI module
only when the TV is SWITCHED
OFF. You should refer to the module
instruction manual for details of the
settings. The USB inputs on the
TV support devices up to 500mA.
Connecting devices that have current
value above 500mA may damage
your TV. When connecting equip-
ment using a HDMI cable to your
TV, to guarantee sucient immunity
against parasitic frequency radiation
and trouble-free transmission of high
de¿nition signals, such as . con-
tent, you have to use a high speed
shielded (high grade) HDMI cable
with ferrites.

Note: The position of the control button may di௺er depending
on the model.
Note: Live TV settings menu OSD in Live TV mode cannot be
displayed via the control button.

Note: The position of the control button may di௺er depending
on the model.
Note: Live TV settings menu OSD in Live TV mode cannot be
displayed via the control button.

Note: Follow the on-screen instructions to complete the initial
setup process. Use the directional buttons and the OK button
on the remote to select, set, con¿rm and proceed.
Note: If you don’t want to perform a tuner scan, select one of
the available options anyway. You can skip the scan at some
later stage of the installation wizard. If you skip this step you
can perform a channel search later using the related Channels
menu options.
English
Speakers
Settings>Device Preferences>Sound
Live TV Mode Menu Content
Menu
ExitLive TV
AppsOK
Channels
Add to My Favorites:
Program Guide:
Programme Guide
New Channels Available:
Channel
Channel
Done
OK
TV Options
Source:
OK
Picture Mode:
User Standard, Vivid,
SportMovieGameUser
Settings>Device
Preferences>Picture
Display Mode:
Speakers:
External Audio
SystemTV Speakers
Power
Sleep Timer:
Picture o�: OK
Volume +/-
Mute Standby
No Signal Auto Power O�:
O�
CI Card:
Advanced Options
Audio Language:
Blue Mute:
Default Channel:
Select Mode
User SelectShow Channels
OK
OK
Select ModeLast Status
Interaction Channel:
MHEG PIN Protection:
HBBTV Settings
HBBTV Support:
Do Not Track:
Cookie Settings:
Persistent Storage:
On
Block Tracking Sites:
Device ID:
Reset Device ID:
OKBack
FreeviewPlay Settings:OK
Freeview Play
Platform
English
Subtitle
Digital Subtitle:
Subtitle Tracks:
Digital Subtitle Language:
Second Digital Subtitle Language:
Digital Subtitle Language
Subtitle Type: Normal
Hearing Impaired Hearing Impaired
Teletext
Digital Teletext Language:
Decoding Page Language:
Auto Sleep:
4
Hours6 Hours8 Hours
Never
System Information:
Signal
LevelSignal QualityFrequency
Version Info:
Model Name Version
Settings: Settings
Settings
Settings
TV options
Network & Internet
OK
Wi-Fi:
Available networks
See all
OKOK
Other options
Add new network:
Scanning always available:
OK
Wow:
Wol:
Ethernet
Connected/Not connected:
Proxy settings:
IP settings:
Channel
Channels
Channel Installation Mode
Channel Installation Mode - Antenna
Automatic Channel Search:
Back
Update Scan:
Single RF Scan: RF Channel
Signal Level
Signal Quality
OKRF channel
Manual Service Update:
LCN:
Channel Scan Type:
Channel Store Type:
Favorite Network Select:

English
Speakers
Settings>Device Preferences>Sound
Live TV Mode Menu Content
Menu
ExitLive TV
AppsOK
Channels
Add to My Favorites:
Program Guide:
Programme Guide
New Channels Available:
Channel
Channel
Done
OK
TV Options
Source:
OK
Picture Mode:
User Standard, Vivid,
SportMovieGameUser
Settings>Device
Preferences>Picture
Display Mode:
Speakers:
External Audio
SystemTV Speakers
Power
Sleep Timer:
Picture o�: OK
Volume +/-
Mute Standby
No Signal Auto Power O�:
O�
CI Card:
Advanced Options
Audio Language:
Blue Mute:
Default Channel:
Select Mode
User SelectShow Channels
OK
OK
Select ModeLast Status
Interaction Channel:
MHEG PIN Protection:
HBBTV Settings
HBBTV Support:
Do Not Track:
Cookie Settings:
Persistent Storage:
On
Block Tracking Sites:
Device ID:
Reset Device ID:
OKBack
FreeviewPlay Settings:OK
Freeview Play
Platform
English
Subtitle
Digital Subtitle:
Subtitle Tracks:
Digital Subtitle Language:
Second Digital Subtitle Language:
Digital Subtitle Language
Subtitle Type: Normal
Hearing Impaired Hearing Impaired
Teletext
Digital Teletext Language:
Decoding Page Language:
Auto Sleep:
4
Hours6 Hours8 Hours
Never
System Information:
Signal
LevelSignal QualityFrequency
Version Info:
Model Name Version
Settings: Settings
Settings
Settings
TV options
Network & Internet
OK
Wi-Fi:
Available networks
See all
OKOK
Other options
Add new network:
Scanning always available:
OK
Wow:
Wol:
Ethernet
Connected/Not connected:
Proxy settings:
IP settings:
Channel
Channels
Channel Installation Mode
Channel Installation Mode - Antenna
Automatic Channel Search:
Back
Update Scan:
Single RF Scan: RF Channel
Signal Level
Signal Quality
OKRF channel
Manual Service Update:
LCN:
Channel Scan Type:
Channel Store Type:
Favorite Network Select:

Note: Some options may not be available and appear as
greyed out depending on the operator selection and operator
related settings.
() To enter this menu 3I1should be entered ¿rst. Default
PIN is set to 1234. If you have de¿ned a new PIN after the
initial setup process use the PIN that you have de¿ned. Some
options may not be available or vary depending on the country
selection during the initial setup.
Dolby Vision Modes:If Dolby Vision content is detected
Dolby Vision Darkand Dolby Vision Bright picture mode
options will be available instead of other picture modes.

English
Colour Temperature:
UserCoolStandardWarm
Colour Temperature
UserUser
Display Mode:
HDR:
Advanced Video
DNR:
LowMediumStrong
Auto O�
MPEG NR:
Low
MediumStrongO�
Adaptive Luma Control:
Low Medium
StrongO�
Local Contrast Control:
Low
MediumHighO�
DI Film Mode:
AutoO�
Blue Stretch:
Game Mode:
HDMI RGB Range:
AutoFullLimit
Colour Tuner:
Hue
Colour Brightness Offset Gain
EnableOK
11 Point White Balance Correction:
RedGreenBlueGain
EnableOK
Reset to Default:
Note: Depending on the currently set input source some menu
options may not be available.
Sound
System Sounds:
OK
Sound Style:
UserStandardViv-
idSportMovieMusicNews
Balance:
Sound Surround:
OK
Equaliser Detail:
Speakers:
External Audio
SystemTV Speakers
Digital Output:
AutoBypass, PCM, Dolby Digital Plus
Dolby Digital
OK
SPDIF Delay:
Auto Volume Control:
English
OK
Downmix Mode:
OKStereo
Surround
OK
Dolby Audio Processing:
OK
Dolby Audio Processing:
OK
Sound Mode: Dolby Audio Processing
Sound Mode
Sound Mode
OK
SmartMovieMusicNews
OK
Reset to Default:
Storage:
OK
Home screen:
Set upOK
Discover
Store mode:Store mode OK
ContinueOK
On
O�OK
Store messaging
Google Assistant:
Screen saver:
Location:
Usage & Diagnostics:
Manufacturer Usage & Diagnostics:
Accessibility: Visually Impaired AC4
Dialogue EnhancementCaptionsText to speech
Accessibility shortcut Audio
DescriptionHearing ImpairedHigh contrast text
Visually Impaired:
Speaker:
Headphone:
Volume:
Pan and Fade:
Audio for the Visually Impaired:
Fader Control:
Main
AD
Reset:
ResetOK
Erase everything
Cancel

English
Colour Temperature:
UserCoolStandardWarm
Colour Temperature
UserUser
Display Mode:
HDR:
Advanced Video
DNR:
LowMediumStrong
Auto O�
MPEG NR:
Low
MediumStrongO�
Adaptive Luma Control:
Low Medium
StrongO�
Local Contrast Control:
Low
MediumHighO�
DI Film Mode:
AutoO�
Blue Stretch:
Game Mode:
HDMI RGB Range:
AutoFullLimit
Colour Tuner:
Hue
Colour Brightness Offset Gain
EnableOK
11 Point White Balance Correction:
RedGreenBlueGain
EnableOK
Reset to Default:
Note: Depending on the currently set input source some menu
options may not be available.
Sound
System Sounds:
OK
Sound Style:
UserStandardViv-
idSportMovieMusicNews
Balance:
Sound Surround:
OK
Equaliser Detail:
Speakers:
External Audio
SystemTV Speakers
Digital Output:
AutoBypass, PCM, Dolby Digital Plus
Dolby Digital
OK
SPDIF Delay:
Auto Volume Control:
English
OK
Downmix Mode:
OKStereo
Surround
OK
Dolby Audio Processing:
OK
Dolby Audio Processing:
OK
Sound Mode: Dolby Audio Processing
Sound Mode
Sound Mode
OK
SmartMovieMusicNews
OK
Reset to Default:
Storage:
OK
Home screen:
Set upOK
Discover
Store mode:Store mode OK
ContinueOK
On
O�OK
Store messaging
Google Assistant:
Screen saver:
Location:
Usage & Diagnostics:
Manufacturer Usage & Diagnostics:
Accessibility: Visually Impaired AC4
Dialogue EnhancementCaptionsText to speech
Accessibility shortcut Audio
DescriptionHearing ImpairedHigh contrast text
Visually Impaired:
Speaker:
Headphone:
Volume:
Pan and Fade:
Audio for the Visually Impaired:
Fader Control:
Main
AD
Reset:
ResetOK
Erase everything
Cancel

English - 17 -
Note: You may be asked to enter a PIN to proceed with the
reset operation. Enter the PIN you have de¿ned during the ¿rst
time installation. If you didnt set a PIN during the ¿rst time in-
stallation, you can use the default PIN. The default PIN is 1234.
Remote & Accessories
You can use wireless accessories, such as your remote
control (depends on the model of the remote control),
headphones, keyboards or game controllers with your
Android TV. Add devices to use them with your TV.
Select this option and press OK to start searching
available devices in order to pair them with your TV. If
available highlight Add accessory option and press
OK to start the search. Set your device to pairing
mode. Available devices will be recognised and listed
or pairing request will be displayed. Select your device
from the list and press OK or highlight OK and press
OK to start pairing.
Connected devices will also be listed here. To unpair
a device, highlight it and press OK. Then highlight
Unpair option and press OK. Then select OK and
press OK again to unpair the device from the TV. You
can also change the name of an connected device.
Highlight the device and press OK, then highlight
Change name and press OK again. Press OK again
use the virtual keyboard to change the name of the
device.
Channel List
The TV sorts all stored channels in the Channel List.
Press the OK button to open the Channel List in Live
TV mode. You can press the Red button to scroll up
the list page by page, or press the Green button to
scroll down.
Several channel list options will be available. Press the
Right and Left directional buttons to switch from one
list to another. Favourites, HD channels, Interactive
channels, IP app channels, Radio channels and
All channels options can be selected. Switch to All
channels option to see all installed channels in the
channel list.
Note: If any option except All channels is selected in
the channel list, you can only switch to the channels
that are currently listed in the channel list.
If you press the Yellow button the Freeview Play’s mini
guide will be opened and the integrated on demand
applications will be displayed. Now you can press
Blue button to search events, Green button to see
the recommendations and Red button to see what is
on TV now. The functions of the coloured buttons will
change depending on the selected option. Follow the
instructions on the screen for current button functions.
Editing the Channels and the Channel List
You can edit the channels and the channel list using
the Channel Skip, Channel Swap, Channel Move
and Channel Edit options under the Settings>Chan-
nel>Channels menu. You can access the Settings
menu from the Home Screen or from the TV options
menu in Live TV mode.
Note: The options Channel Swap,Channel Move and Chan-
nel Edit may not be available and appear as greyed out de-
pending on the operator selection and operator related settings.
You can turn o௺the LCN setting in the Settings>Channel
menu, as it prevents channel editing. This option might be set
to On by default depending on the selected country during the
initial setup process.
Managing Favourite Channel Lists
You can create a list of your favourite channels. This
list will include only the channels that are speci�ed by
you. To add a channel to your favourite list highlight
the desired channel in the channel list and press the
Blue button on the remote. The channel will be added
to your favourite list. To remove that channel from the
list, highlight the channel and press Blue button.
If you want to list only your favourite channels, press
the Left or Right directional button to switch to
Favourites channel list option while channel list is
displayed.
To add the currently watched channel to your favourite
channels press the Menu button on the remote.
Then enter the Channels menu, highlight Add to
My Favorites option and press OK. The channel will
be added to your favourite channels. To remove that
channel from your favourite channels, repeat the above
steps. In this way only the currently watched channel
can be added or removed.
Programme Guide
By means of Electronic Programme Guide (EPG)
function of your TV you can browse the event schedule
of the currently installed channels on your channel
list. It depends on the related broadcast whether this
feature is supported or not.
In order to access the Electronic Programme Guide you
can launch the TV Guide application in the Freeview
Play’s TV Guide row on the Home Screen or press
the EPG button on the remote. Electronic Programme
Guide is also available in Live TV mode. You can
switch to Live TV mode by either launching the Live TV
application on the Home Screen or selecting Freeview
Live TV input source from the Inputs menu on the
Home Screen. To access the programme guide while
in Live TV mode, press the EPG button on your remote.
Use the directional buttons to navigate through
the programme guide. You can use the Up/Down
directional buttons to switch to previous/next channel
on the list, Programme +/- buttons to scroll up or down
the list page by page and Right/Left directional buttons
to select a desired event of the currently highlighted
channel. If available, the full name, start-end time
and duration of the highlighted event and a brief
information about it will be displayed on the screen.
English - 18 -
Press Info button to see additional information on the
highlighted event. Press Back/Return button to go
back to guide screen.
Press Blue button to search events. Press Yellow
button to see Players options. Press Green button to
see the recommendations. You can also press Red
button to open the schedule. Using the schedule you
can see events of the current day, previous or next 7
days. Highlight the day and then the time and press OK
to see the available events. New functions may also be
assigned to the coloured buttons on the remote when
they are available. Follow the on-screen information
for accurate button functions.
Integrated Catch-Up Services
You can enjoy Freeview Play catch-up TV services that
work directly through the electronic programme guide.
Whilst you are on a channel press Red button to open
the schedule and then use the directional buttons to
select day and time and press OK. You will see content
of the selected time on the guide. Available catch-up
content may change according to broadcasters and will
be marked with a play icon. Highlight the content you
want to play back and press the OK button.
Make sure that your TV is connected to your home
network in order to use the catch-up services. For
further information regarding this matter and other
requirements for Freeview Play services refer to the
Connectivity and Freeview Play Platform sections.
Connecting to the Internet
You can access the Internet via your TV, by connecting
it to a broadband system. It is necessary to con�gure
the network settings in order to enjoy a variety of
streaming content and internet applications. These
settings can be con�gured from Settings>Network &
Internet menu. You can also highlight the Connected/
Not Connected icon on the Home screen and press
OK to access this menu. For further information refer
to Network & Internet section under the title of Home
Screen.
Wired Connection
Connect your TV to your modem/router via an Ethernet
cable. There is a LAN port on the rear side of your TV.
The status of the connection under the Ethernet
section in the Network & Internet menu will changed
from Not connected to Connected.
1. Broadband ISP connection
2. LAN (Ethernet) cable
3. LAN input on the rear side of the TV
You might be able to connect your TV to a network
wall socket depending on your network’s con�guration.
In that case, you can connect your TV directly to the
network using an Ethernet cable.
1. Network wall socket
2. LAN input on the rear side of the TV
Wireless Connection
A wireless LAN modem/router is required to connect
the TV to the Internet via wireless LAN.
Highlight Wi-Fi option in the Network & Internet menu
and press OK to enable wireless connection. Available
networks will be listed. For more information refer to
Network & Internet>Wi-Fi section under the title of
Home Screen.

English - 17 -
Note: You may be asked to enter a PIN to proceed with the
reset operation. Enter the PIN you have de¿ned during the ¿rst
time installation. If you didnt set a PIN during the ¿rst time in-
stallation, you can use the default PIN. The default PIN is 1234.
Remote & Accessories
You can use wireless accessories, such as your remote
control (depends on the model of the remote control),
headphones, keyboards or game controllers with your
Android TV. Add devices to use them with your TV.
Select this option and press OK to start searching
available devices in order to pair them with your TV. If
available highlight Add accessory option and press
OK to start the search. Set your device to pairing
mode. Available devices will be recognised and listed
or pairing request will be displayed. Select your device
from the list and press OK or highlight OK and press
OK to start pairing.
Connected devices will also be listed here. To unpair
a device, highlight it and press OK. Then highlight
Unpair option and press OK. Then select OK and
press OK again to unpair the device from the TV. You
can also change the name of an connected device.
Highlight the device and press OK, then highlight
Change name and press OK again. Press OK again
use the virtual keyboard to change the name of the
device.
Channel List
The TV sorts all stored channels in the Channel List.
Press the OK button to open the Channel List in Live
TV mode. You can press the Red button to scroll up
the list page by page, or press the Green button to
scroll down.
Several channel list options will be available. Press the
Right and Left directional buttons to switch from one
list to another. Favourites, HD channels, Interactive
channels, IP app channels, Radio channels and
All channels options can be selected. Switch to All
channels option to see all installed channels in the
channel list.
Note: If any option except All channels is selected in
the channel list, you can only switch to the channels
that are currently listed in the channel list.
If you press the Yellow button the Freeview Play’s mini
guide will be opened and the integrated on demand
applications will be displayed. Now you can press
Blue button to search events, Green button to see
the recommendations and Red button to see what is
on TV now. The functions of the coloured buttons will
change depending on the selected option. Follow the
instructions on the screen for current button functions.
Editing the Channels and the Channel List
You can edit the channels and the channel list using
the Channel Skip, Channel Swap, Channel Move
and Channel Edit options under the Settings>Chan-
nel>Channels menu. You can access the Settings
menu from the Home Screen or from the TV options
menu in Live TV mode.
Note: The options Channel Swap,Channel Move and Chan-
nel Edit may not be available and appear as greyed out de-
pending on the operator selection and operator related settings.
You can turn o௺the LCN setting in the Settings>Channel
menu, as it prevents channel editing. This option might be set
to On by default depending on the selected country during the
initial setup process.
Managing Favourite Channel Lists
You can create a list of your favourite channels. This
list will include only the channels that are speci�ed by
you. To add a channel to your favourite list highlight
the desired channel in the channel list and press the
Blue button on the remote. The channel will be added
to your favourite list. To remove that channel from the
list, highlight the channel and press Blue button.
If you want to list only your favourite channels, press
the Left or Right directional button to switch to
Favourites channel list option while channel list is
displayed.
To add the currently watched channel to your favourite
channels press the Menu button on the remote.
Then enter the Channels menu, highlight Add to
My Favorites option and press OK. The channel will
be added to your favourite channels. To remove that
channel from your favourite channels, repeat the above
steps. In this way only the currently watched channel
can be added or removed.
Programme Guide
By means of Electronic Programme Guide (EPG)
function of your TV you can browse the event schedule
of the currently installed channels on your channel
list. It depends on the related broadcast whether this
feature is supported or not.
In order to access the Electronic Programme Guide you
can launch the TV Guide application in the Freeview
Play’s TV Guide row on the Home Screen or press
the EPG button on the remote. Electronic Programme
Guide is also available in Live TV mode. You can
switch to Live TV mode by either launching the Live TV
application on the Home Screen or selecting Freeview
Live TV input source from the Inputs menu on the
Home Screen. To access the programme guide while
in Live TV mode, press the EPG button on your remote.
Use the directional buttons to navigate through
the programme guide. You can use the Up/Down
directional buttons to switch to previous/next channel
on the list, Programme +/- buttons to scroll up or down
the list page by page and Right/Left directional buttons
to select a desired event of the currently highlighted
channel. If available, the full name, start-end time
and duration of the highlighted event and a brief
information about it will be displayed on the screen.
English - 18 -
Press Info button to see additional information on the
highlighted event. Press Back/Return button to go
back to guide screen.
Press Blue button to search events. Press Yellow
button to see Players options. Press Green button to
see the recommendations. You can also press Red
button to open the schedule. Using the schedule you
can see events of the current day, previous or next 7
days. Highlight the day and then the time and press OK
to see the available events. New functions may also be
assigned to the coloured buttons on the remote when
they are available. Follow the on-screen information
for accurate button functions.
Integrated Catch-Up Services
You can enjoy Freeview Play catch-up TV services that
work directly through the electronic programme guide.
Whilst you are on a channel press Red button to open
the schedule and then use the directional buttons to
select day and time and press OK. You will see content
of the selected time on the guide. Available catch-up
content may change according to broadcasters and will
be marked with a play icon. Highlight the content you
want to play back and press the OK button.
Make sure that your TV is connected to your home
network in order to use the catch-up services. For
further information regarding this matter and other
requirements for Freeview Play services refer to the
Connectivity and Freeview Play Platform sections.
Connecting to the Internet
You can access the Internet via your TV, by connecting
it to a broadband system. It is necessary to con�gure
the network settings in order to enjoy a variety of
streaming content and internet applications. These
settings can be con�gured from Settings>Network &
Internet menu. You can also highlight the Connected/
Not Connected icon on the Home screen and press
OK to access this menu. For further information refer
to Network & Internet section under the title of Home
Screen.
Wired Connection
Connect your TV to your modem/router via an Ethernet
cable. There is a LAN port on the rear side of your TV.
The status of the connection under the Ethernet
section in the Network & Internet menu will changed
from Not connected to Connected.
1. Broadband ISP connection
2. LAN (Ethernet) cable
3. LAN input on the rear side of the TV
You might be able to connect your TV to a network
wall socket depending on your network’s con�guration.
In that case, you can connect your TV directly to the
network using an Ethernet cable.
1. Network wall socket
2. LAN input on the rear side of the TV
Wireless Connection
A wireless LAN modem/router is required to connect
the TV to the Internet via wireless LAN.
Highlight Wi-Fi option in the Network & Internet menu
and press OK to enable wireless connection. Available
networks will be listed. For more information refer to
Network & Internet>Wi-Fi section under the title of
Home Screen.

Table of contents
Other Mitchell & Brown TV manuals

Mitchell & Brown
Mitchell & Brown JB-24SM1811 User manual

Mitchell & Brown
Mitchell & Brown JB-43UHD18114KBL User manual

Mitchell & Brown
Mitchell & Brown JB-32FH1811DSMA User manual

Mitchell & Brown
Mitchell & Brown JB-24ST1811 User manual

Mitchell & Brown
Mitchell & Brown JB-24DVD1811 User manual

Mitchell & Brown
Mitchell & Brown JB-32DVD1811SMS User manual

Mitchell & Brown
Mitchell & Brown JB-55QLED1811 User manual

Mitchell & Brown
Mitchell & Brown JB-50UHD18114K User manual

Mitchell & Brown
Mitchell & Brown JB-32SM1811AW User manual

Mitchell & Brown
Mitchell & Brown JB-321811FDVD User manual