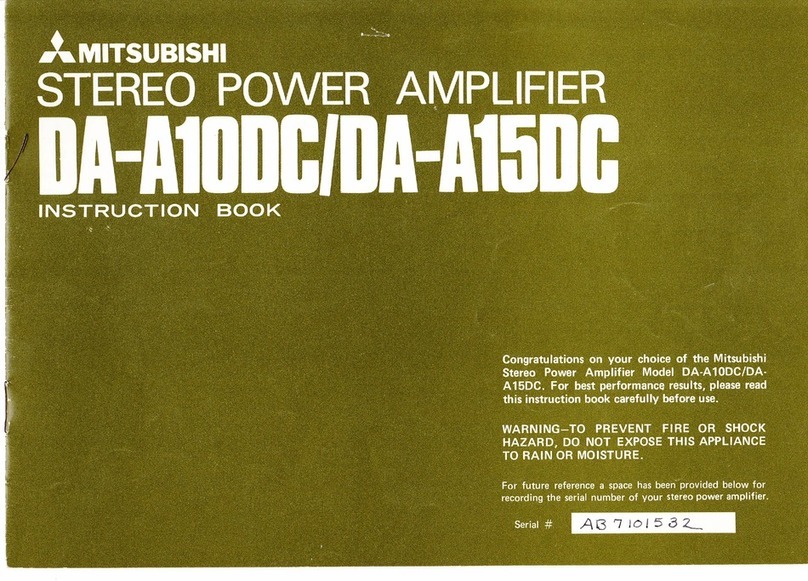
Mitsubishi DA-A15DC User manual

a’.
MITSUBISHI
STEREO
POWER
AMPLIFIER
A-AIODCIDA-AISDC
INSTRUCTION
BOOK
Congratulations
on
your
choice
of
the
Mitsubishi
Stereo
Power
Amplifier
Model
DA-A10DC/DA-
A15DC.
For
best
performance
results,
please
read
this
instruction
book
carefully
before
use.
WARNING—TO
PREVENT
FIRE
OR
SHOCK
HAZARD,
DO
NOT
EXPOSE
THIS
APPLIANCE
TO
RAIN
OR
MOISTURE.
For
future
reference
a
space
has
been
provided
below
for
recording
the
serial
number
of
your
stereo
power
amplifj

ENGLISH
2
PRECAUTIONS
1.
GENERAL
BE
SURE
TO
USE
YOUR
A.C.
POWER
SOURCE
Your
A.C.
power
is
marked
on
the
rear
panel
of
this
unit.
Connection
to
any
other
power
source
may
cause
damage
to
this
unit
and/or
severe
electrical
shock.
DO
NOT
PLUG
IN
OR
UNPLUG
THE
POWER
CORD
WITH
WET
HANDS
There
is
a
great
danger
of
severe
electrical
shock
if
the
power
cord
is
plugged
in
or
unplugged
with
wet
hands.
Do
not
attempt
to
unplug
the
cord
from
an
A.C.
outlet
by
pulling
the
cord.
Firmly
grasp
the
plug
to
remove
it
from
the
A.C.
outlet.
DO
NOT
ALLOW
WATER
OR
ANY
FOREIGN
MATTER
TO
GET
INSIDE
THIS
UNIT
Should
water
or
a
metailic
object
accidentally
fall
into
this
unit,
immediately
disconnect
the
power
cord
and
consult
your
authorized
service
dealer.
HANDLE
THE
POWER
CORD
WITH
CARE
Do
not
bend
sharply
or
twist
the
power
cord.
If
the
insulation
becomes
damaged,
the
conductor
breaks,
or
poor
contacts
occur,
request
service
from
your
authorized
service
dealer.
Continued
use
under
these
conditions,
may
cause
fire
or
electrical
shoek.
DO
NOT
TOUCH
THE
INSIDE
OF
THIS
UNIT
There
are
high
voltages
inside
this
unit.
Never
re-
move
the
top
or
bottom
cover.
All
inspections
and
repair
including
fuse
replacement,
should
be
carried
out
by
your
authorized
service
dealer.
DISCONNECT
THE
POWER
CORD
AT
THE
FIRST
SIGN
OF
TROUBLE
At
the
first
sign
of
unusual
noise,
odor,
or
malfunc-
tion,
disconnect
the
power
cord
and
consult
your
authorized
service
dealer.
Continued
use
under
these
conditions,
may
increase
damage
or
cause
additional
problems.
2.
LOCATION
AVOID
PLACEMENT
IN
DIRECT
SUNLIGHT,
NEAR
AIR
CONDITIONER
ETC.
This
unit
can
become
unstable
if
operated
in
ex-
tremely
high
or
low
temperatures.
Place
it
in
a
well
ventilated
area
for
proper
heat
dissipation.
Avoid
placement
in
direct
sunlight,
near
air
corditioners,
poorly
ventilated
areas
or
in
areas
of
excess
humidi-
ty
or
dust.
Do
not
block
the
ventilation
holes.
3.
CONNECTIONS
BE
SURE
TO
TURN
OFF
THE
POWER
BEFORE
MAKING
CONNECTIONS
This
is
to
prevent
damage
to
the
speakers
from
the
popping
noise
which
occurs
when
plugging
and
unplugging
cords.
USE
EXTREME
CARE
IN
MAKING
THE
COR-
RECT
CONNECTIONS
If
you
reverse
the
R
(right)
and
L
(left)
leads,
you
will
reverse
the
stereo
location
of
R
and
L
channels.
MAKE
CONNECTIONS
SECURELY
If
any
of
the
plugs
should
become
loose
or
discon-
nected,
a
hum
may
develop.
If
this
is
not
corrected,
deterioration
of
sound
quality
and
possible
damage
to
the
speakers
may
result.
USE
ONLY
SHIELDED
CORD
FOR
THE
LEADS
Use
only
shielded
cords
for
interconnecting
com-
ponents.
Do
not
use
cords
longer
than
2m
(6'),
Ex-
cessive
lead
lengths
can
deteriorate
high
frequency
response
and
are
subject
to
interference
that
can
result
in
hum
or
noise.
DO
NOT
SHORT
THE
OUTPUT
OF
THE
POWER
AMPLIFIER
This
unit
incorporates
a
protection
circuit
so
that
power
transistors
will
be
protected
in
case
of
a
short.
Shorts
can
reduce
the
life
of
the
transistors
and
should
be
avoided.
USE
SPEAKERS
WITH
NOMINAL
IMPEDANCE
OF
4-16
OHMS
If
you
use
speakers
with
a
load
impedance
of
less
than
4
ohms,
the
protection
circuit
may
be
triggered
and
the
amplifier
output
muted.
WHEN
CONTROLLING
TWO
PAIRS
OF
SPEAK-
ERS
SELECTION
FROM
THE
COMPANION
PREAMPLIFIER,
ENSURE
THAT
THE
COM.-
BINED
IMPEDANCE
(BOTH
PAIRS
OF
SPEAK-
ERS
OPERATING)
IS
4
OHMS
OR
ABOVE
If
the
combined
impedance
is
below
4
ohms,
the
load
impedance
detector
circuit
may
operate
and
mute
the
power
amplifier
output.
The
combined
impedance
is
determined
with
the
following
formula.
Ax
COMBINED
IMPEDANCE
=
peel
(OHMS)
U871B005H04

FRONT
PANEL
TERMINOLOGY
AND
FUNCTIONS
8x8
=
4
(ohm
3
(ohms)
eg.
A:
Nominal
impedance
of
speaker
A
B:
Nominal
impedance
of
speaker
B
Please
consult
your
audio
dealer
for
additional
information.
4,
OPERATIONS
BEFORE
PLACING
THE
POWER
SWITCH
IN
THE
ON
OR
OFF
POSITION
OR
OPERATING
SWITCHES,
ALWAYS
TURN
THE
PREAMPLI-
FIER’S
VOLUME
(ATTENUATOR)
CONTROL
ALL
THE
WAY
DOWN
This
is
to
protect
the
speakers
from
damage,
that
can
occur
if
the
volume
level
is
set
high
and
the
power
is
turned
on.
THERE
WILL
BE
NO
SOUND
FOR
A
FEW
SEC-
ONDS
AFTER
YOU
TURN
ON
THE
POWER.
THIS
IS
NOT
A
MALFUNCTON
This
unit
is
equipped
with
a
power
supply
muting
circuit
which
prevents
popping
noise
when
the
pow-
er
switch
is
turned
on
or
off.
5.
CARE
Wipe
the
cabinet
with
a
soft
cloth
when
it
becomes
dusty.
If
it
should
get
really
dirty,
dampen
a
soft
cloth
in
a
weak
solution
of
mild
soap
and
water,
wring
it
out
dry
and
wipe
off.
When
finished,
dry
completely
with
a
soft
dry
cloth.
Any
volatile
ma-
terials
such
as
alcohol,
thinner,
benzine,
insecticides,
etc,
may
remove
the
paint
or
damage
the
luster
and
should
not
be
used.
U871B005H04
1.
THERMAL
INDICATORS
lf
the
temperature
of
the
heat
sink
reaches
60°C
(140°F),
the
thermal
indicators
change
in
color
from
red
to
black.
If
the
indicators
turn
black,
turn
the
power
off
and
allow
time
for
the
amplifier
to
cool.
Resume
operation
when
the
amplifier
cools
to
nor-
mal
temperature.
1
2
2.
HEAT
SINKS
The
heat
given
off
by
the
transistors
is
radiated
into
the
air
by
the
heat
sinks.
3.
TRANSFORMERS

ENGLISH
4,
DUCTS
The
power
cord
and
connecting
cords
pass
through
this
ducts.
5.
HANDLE
MOUNTING
SCREW
HOLES
These
holes
are
provided
for
mounting
the
handles.
For
more
details,
see
page
5.
6.
ELECTROLYTIC
CAPACITORS
7.
POWER
INDICATOR
This
indicator
illuminates
when
the
POWER
switch
is
placed
in
the
ON
position.
8.
POWER
(Power
Switch)
This
switch
is
for
turning
this
unit
on
and
off.
When
in
the
ON
position,
the
power
indicator
is
illumi-
nated.
REAR
PANEL
TERMINOLOGY
AND
CONNECTIONS
INPUT
LEVEL
(input
Level
Controls)
The
input
level
from
the
preamplifier
can
be
adjust-
ed
by
these
screws.
To
increase
the
input
level,
turn
these
screws
clockwise.
These
screws
are
normally
turned
fully
clockwise.
INPUT
(Power
Amplifier
Inputs)
Connect
the
leads
from
the
preamplifier’s
outputs
to
these
inputs.
SPEAKERS
(Speaker
Terminals)
Two
pairs
of
speakers
may
be
connected
to
these
terminals.
Turn
the
screws
fully
counterclockwise,
insert
the
speaker
leads
and
tighten
the
screws
firmly.
SPEAKER
SELECTOR
(Speaker
Selection
Switch)
This
switch
controls
speaker
selection.
The
speaker
systems
can
be
selected
from
the
preamplifier
by
placing
this
switch
in
the
OFF
position
and
connect-
ing
the
supplied
SPEAKER
CONTROL
CABLE
to
the
preamplifier.
For
more
details,
see
Page
6.
REMOTE
(Remote
Terminal)
The
connection
for
one
end
of
the
SPEAKER
CONTROL
CABLE.
The
other
end
is
plugged
into
the
‘‘speaker
control’
terminal
of
a
companion
preamplifier
.
For
more
details,
see
page
6.
e
CONNECTING
THE
SPEAKERS
When
connecting
the
speaker
leads
to
the
SPEAK-
ERS
terminals,
there
is
danger
of
electrical
shock
or
fire
due
to
potentially
high
output
voltages.
To
avoid
this
danger,
connect
the
speaker
leads
as
follows.
@
Cut
back
the
outer
insulation
of
the
lead
to
a
distance
of
15mm
(5/8”’).
@
Twist
each
inner
conductor.
@
Turn
the
knob
of
the
SPEAKERS
terminal
fully
counterclockwise.
@
Insert
the
inner
conductor
into
the
hole
of
the
SPEAKERS
terminal.
Be
sure
that
the
end
of
the
insulation
is
inserted
into
the
hole
to
a
distance
of
3mm
(1/8’’).
@
Fasten
the
speaker
lead
to
the
SPEAKERS
terminal
by
tightening
the
knob
clockwise.
Inner
Conductor
Speaker
terminal
hole
Speaker
leads
Speaker
leads
CAUTION:
When
using
DA-A15DC,
use
more
than
18AWG,
SPT-2
cord
with
UL
label
for
speaker
leads.
‘
U871B005H04

U871BO05HO4
ra
r
Speakers
ight
a3
“i
e
I
left
(black)
Speakers
thlack)
6———
SPEAKER:
A
@RO
Qt
G©4~16FO@RO
O18
esisliule
olololo
[O;o|O}o
SPEAKER
SELECTOR
BA
off
ome
|
REMOTE.
=
Pe
UTPUT
5
SPEAKER
CONTROL
terminals
Preamplifier
when
using
companion
preamplifier,
connect
to
SPEAKER
CONTROL
terminals
—
HOW
TO
MOUNT
THE
HANDLES
@
Remove
the
screws
and
washers
that
are
fas-
tened
to
the
right
and
left
side
of
this
unit.
@
Mount
the
supplied
handles
to
both
side
of
this
unit
as
shown
in
the
diagram.
A.C.
POWER
CORD
This
cord
is
plugged
into
the
A.C.
outlet.

ENGLISH
OPERATIONS
BEFORE
OPERATING
Check
the
following
items
before
placing
the
POW-
ER
switch
in
the
ON
position.
e
All
other
components
are
properly
connected.
«The
position
of
the
SPEAKER
SELECTOR
switch
should
correspond
to
the
terminals
to
which
the
speakers
are
connected.
*
The
INPUT
LEVEL
control
screws
should
be
turned
fully
clockwise.
Then
place
the
POWER
switch
in
the
ON
position
1.
OPERATION
Select
the
tuner,
turntable
or
other
source
of
pro-
gram
material
and
advance
the
‘Volume
(Atten-
uator)"’
control
on
the
preamplifier.
You
should
now
be
receiving
the
program
from
the
speakers.
2.SPEAKER
SELECTION
FROM
THE
COMPANION
PREAMPLIFIER
if
you
are
using
the
companion
preamplifier,
speak-
er
selection
can
be
controlled
from
the
preamplifier.
@
Place
the
SPEAKER
SELECTOR
switch
to
the
OFF
position.
@
Connect
the
SPEAKER
CONTROL
CABLE
as
shown
in
the
diagram
(see
page
5).
@
Speaker
selection
may
now
be
controlled
from
the
preamplifier.
U871BO05HO4

BEFORE
TAKING
YOUR
POWER
AMPLIFIER
IN
FOR
SERVICING
.,...
First
check
to
ensure
that
all
other
components
are
properly
connected
to
this
unit
and
are
operating
normally.
Then
check
the
following
items.
SYMPTOM
CAUSE
REMEDY
©Power
does
not
come
on
when
the
POWER
switch
is
turned
on.
Power
cord
not
completely
plugged
in.
©
Fuse
has
blown,
©
Plug
in
completely.
©Consult
your
authorized
service
dealer.
me
©No
sound
©
Improper
SPEAKER
SELECTOR
switch
positioning.
Correct
the
switch
position.
oNominal
speaker
impedance
is
less
than
4
ohms
and
o
Use
speakers
with
nominal
impedance
of
4
ohms
protection
circuit
is
operating.
or
above.
©
Speaker
leads
or
plugs
not
completely
plugged
in.
Plug
in
completely.
©
Speaker
(+)
and
(—)
leads
are
touching.
o
Separate
the
leads.
©
Noise
©
Turntable
output
cord
too
close
to
power
cord.
©Plugs
not
completely
plugged
in.
©Put
the
turntable
output
cord
as
far
as
possible
from
the
power
cord.
©
Plug
in
completely.
nm
oouauFSFSFSFSFFSSFFFFeEeEeeee
©
Howling
©
Caused
by
feedback.
This
occurs
because
speaker
*
vibrations
are
being
transmitted
to
the
turntable.
©
Place
the
speakers
and
the
turntable
as
far
apart
as
possible.
It is
also
helpful
to
put
an
insulator
under
the
turntable.
©
Poor
sound
quality
©
Too
much
power
applied
to
speakers.
©No
stereo
effect
and
poor
bass
©
Speaker
leads
or
plugs
(+)
and
(—)
are
reversed.
©
Adjust
‘‘Volume
(Attenauator)‘’
on
your
preamplifier.
©Correct
the
speaker
leads
or
plugs
connection.
©No
sound
for
5
—
7
seconds
after
power
is
switched
on.
-
©Muting
circuit
is
operating
to
eliminate
the
popping
noise
when
power
is
turned
on,
©
This
is
not
a
malfunction.
U871B005H
04

ENGLISH
8.
DA-AlODC
/
DA-A15DC
SPECIFICATIONS
Power
output
Total
harmonic
distortion
intermodulation
distortion
(70Hz
and
7kHz
4
:
1)
Power
bandwidth
(IHF)
Frequency
response
Input
sensitivity/impedance
Damping
factor
Channel
separation
Hum
and
noise
Signal
to
noise
ratio
(at
rated
power)
Slew
rate
Power
consumption
Dimensions
(Wx
Hx
D)
Weight
DA-A10DC
100W
continuous
power
per
channel,
both
channels
driven
into
8
ohms
from
15Hz
to
30kHz,
with
0.01%
THD
0.005%
at
S50W
per
channel,
both
channels
driven
into
8
ohms
from
20Hz
to
20kHz
0.008%
at
rated
power,
8
ohms
0.01%
at
1W
per
channel,
8
ohms
10Hz
to
100kHz
at
0.1%
THD,
8
ohms
+0.1dB
from
20Hz
to
20kHz
at
rated
power,
8
ohms
+¢dB
from
DC
to
150kHz
at
0.5W
per
channel,
8
ohms
1V
(variable)
/50k
ohms
100
from
20Hz
to
20kHz,
8
ohms
100dB
at
1kHz
80dB
at
20kHz
0.12mV
(unweighted,
closed
circuit)
107dB
(unweighted,
closed
circuit)
122dB
(IHF,
A
network,
closed
circuit)
118dB
(DIN,
closed
circuit)
109dB
(DIN,
47k
ohms//250pF
terminated)
30V
/us
at
50V
peak
to
peak,
8
ohms
6OOW
(IEC
nominal)
390W
at
rated
power,
8
ohms
240W
(UL
nominal)
425
x
170
x
285mm
(16-3/4
x
6-3/4
x
11-1/4”)
16kg
(35-1/4
Ib)
DA-A15DC
150W
continuous
power
per
channel,
both
channels
driven
into
8
ohms
from
15Hz
to
30kHz,
with
0.01%
THD
0.005%
at
75W
per
channel,
both
channels
driven
into
8
ohms
from
20Hz
to
20kHz
0.008%
at
rated
power,
8
ohms
0.01%
at
1W
per
channel,
8
ohms
10Hz
to
100kHz
at
0.1%
THD,
8
ohms
+
0.1dB
from
20Hz
to
20kHz
at
rated
power,
8
ohms
+°dB
from
DC
to
150kHz
at
0.5W
per
channel,
8
ohms
1V
(variable}/50k
ohms
100
from
20Hz
to
20kHz,
8
ohms
100dB
at
1kHz
80dB
at
20kHz
0.15mV
(unweighted,
closed
circuit)
107dB
(unweighted,
closed
circuit)
123dB
(IHF,
A
network,
closed
circuit)
119dB
(DIN,
closed
circuit)
109dB
(DIN,
47k
ohms//250pF
terminated)
30V/us
at
50V
peak
to
peak,
8
ohms
9OOW
(IEC
nominal)
550W
at
rated
power,
8
ohms
320W
(UL
nominal)
425
x
170
x
285mm
(16-3/4
x
6-3/4
x
11-1/4")
17.7kg
(39
Ib)
Supplied.with:
pin
plug
cord
speaker
control
cable
Design
and
specifications
are
subject
to
change
without
notice
for
improvements.
0877
BOOSHO4
This manual suits for next models
1
Table of contents
Other Mitsubishi Amplifier manuals

Mitsubishi
Mitsubishi DA-U310 User manual

Mitsubishi
Mitsubishi Melservo-J2-SUPER series User manual

Mitsubishi
Mitsubishi melservo-j2 series User manual

Mitsubishi
Mitsubishi DA-P30 User manual

Mitsubishi
Mitsubishi MR-JE-10B User manual

Mitsubishi
Mitsubishi DA-A10DC User manual

Mitsubishi
Mitsubishi MR-J4-10A User manual
Mitsubishi
Mitsubishi CV-0MW7G21-2 User manual

Mitsubishi
Mitsubishi DA-C20 User manual
Mitsubishi
Mitsubishi DA-A10DC User manual