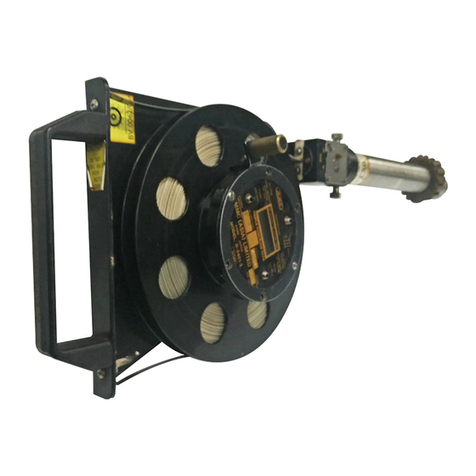
MMC D-2615-11 Manual

MMC INTERNATIONAL CORP.
OPERATING AND MAINTENANCE
INSTRUCTIONS
OXYGEN LEVEL SENSOR
GAUGING TAPE
CLOSEDAND RESTRICTED APPLICATIONS
MODEL D-2615-11
APPROVED BY:
BASEEFA AS
INTRINSICALLY SAFE
FOR USE IN
CLASS I, DIVISION I, GROUPS C & D
HAZARDOUS ENVIRONMENTS
MMC INTERNATIONAL CORP.
60 INIP DRIVE
INWOOD, NEW YORK 11096
DRAWING FILE NO A-2615-60
October 2018

TABLE OF CONTENTS
SECTION PAGE NO.
I. GENERAL ………………………………………………………………….. 1
1.0 Specifications………………………………………………………...
1
1.2 Special Features……………………………………………………… 2
II. INTRODUCTION…………………………………………………………….. 3,4
III. THEORY OF OPERATION…………………………………………………… 5,6,7
IV. REQUIRED CONDITION & RECOMMENDED USAGE………………………… 8
4.1 Required Condition…………………………………………………… 8
4.2 Recommended Safe Usage Conditions……………………………….. 8,9
4.3 Fluid Level (Ullage) of Tank or Other Vessel………………………… 9
V. OPERATION………………………………………………………………….. 10
5.1 Familiarization With Operating Controls And Feature Located
On The Tape Reel Hub Bezel Nameplate…………………………….. 10
5.2 Oxygen Level Measurement…………………………………………… 10,12
5.3 Oxygen Sensor Cell Life………………………………………………. 13
VI. CARE AND MAINTENANCE…………………………………………………... 14
6.1 Battery Replacement………………………………………………….. 14,15
6.2 Oxygen Cell Replacement………………………………………… 15
6.3 Gauging Tape Replacement………………………………………… 15,16
VII. CALIBRATION PROCEDURES……………………………………………… 17
7.1 Method Of Calibration …………………………………………………… 17
i
CONTINUED ON NEXT PAGE

CONTINUED
TABLE OF CONTENTS
VIII. FAULT FINDING……………………………………………………………… 18,19
IX. APPENDIX…………………………………………………….……………… 20
X. LIST OF APPLICABLE DRAWINGS………………………………………. 23
ii

SECTION I
I. GENERAL
1.0 SPECIFICATION:
Oxygen Sensor Measurement Range………………… 0% to 25 %
Accuracy over the 1% to 25% range ………………… ±0.2%
Batteries for intrinsically Safe Operation…………….. 9 Volt Eveready # 522
Only (supplied) or Mallory #MN1604
Battery life……………………………………………. Approximately 1000 Hours
(Depends on night light use)
Battery Drain (Display Night Light off)………………. 1.0 MA ( IN AIR)
0.7 ma with < 8% Oxygen
Night light Battery Drain……………………………… 9.0 ma/use
Storage Temperature………………………………….. -20°C to 40°C
Tape length (Standard)………………………………… 50FT. (15M),100FT(30M)
Hazardous Environments……………………………… Intrinsically Safe
Class I Division 1,
Groups C and D
Approval …………………………………………….. BASEEFA
Page 1

1.2 SPECIAL FEATURES
1.2.1 Simple automatic push button calibration in air.
1.2.2 Audible (Horn) and visual (Red LED) indication is provided to designate that the gaseous
mixture within a particular tank or vessel contains oxygen concentration greater than 8%.
Note: For the Intended application area of this device, oxygen content percentages of 8%
or less are considered non-explosive. Also See introductory text within this manual.
1.2.3 Tape reel position lock.
1.2.4 Watertight electronics housing with sealed switches.
1.2.5 Stainless Steel Fasteners.
1.2.6 Nylon coat aluminum frame, for lightweight portability.
1.2.7 Low battery indicator.
1.2.8 Liquid Crystal Display with extended operating temperature range.
1.2.9 Push button display night light.
1.2.10 Automatic turn-off. (Turn off disable during measurement).
1.2.11 Oxygen cells easily replaceable with plug in assembly.
1.2.12 Conductive tape surface to drain off any static charge.
1.2.13 Grounding lug and cable supplied.
1.2.14 Intrinsically Safe Equipment (BASEEFA) British Approval Service For Electrical
Equipment in Flammable Atmosphere, recognized member of CENELEC
Page 2

SECTION II
2.0 INTRODUCTION
2.0.1 The MMC portable oxygen sensor describe herein incorporates extremely accurate
instrumentation to provide measurements of oxygen percentage levels in inert gas
protected vessels, containing potentially explosive products. The primary field of
application includes petroleum carrying barges, and sea going tankers. Other
application area such as land based petroleum storage tanks can also use the extra
assurance of safety afforded by the use of this equipment.
2.0.2 The equipment incorporates the following novel and advantageous features:
2.0.2.1 Extremely low battery current drain (less than 1 milli-ampere) resulting in battery life of
over 1000 hours.
2.0.2.2 Automatic power turn-off in air, with turn-off disable during measurement use in
gaseous environments containing less than 18 percent oxygen.
2.0.2.3 Oxygen cell plugs in for simple replacement.1-year minimum lifetime.
2.0.2.4 Simple push button calibration procedure with no other operator adjustment required
even when replacing oxygen cells.
WARNING
This equipment is solely intended for use in determining the percent by volume of the
amount of oxygen that may be present in a protective blanket of inert gas. It is not
claimed, or intended for use in closed or confined space, or any other condition where
human safety is of concern.
2.0.3 The MMC system uses a sensor suspended at the end of a fluoropolymer covered gauging
tape, wound on a reel assembly. The plastic covered steel gauging tape contains two
isolated side conductors to carry the signal and ground from the electronic circuit within
the sensor barrel to conditioning electronics in the reel hub. The surface of the tape has
been treated to make it sufficiently conductive to prevent the build-up of static charges.
Percent oxygen indication is provided by a large digital liquid crystal display (LCD)
located on reel hub assembly.
Page 3

2.0.4 In addition to the LCD display described above, which provides accurate reading of
percent oxygen, the MMC tape also incorporates a pulsating horn and a light emitting
diode (LED), to provide a visual and audible alarm indications of unsafe conditions,
specifically, that oxygen content is above an 8% by volume level.
2.0.5 To minimize the danger of fire and explosive discharge within the tanks on petroleum
carrying vessels, the U.S. Coast Guard has specified that the gaseous environment above
the fluid levels in Petroleum Cargo tanks be maintained with sufficient inert gas to reduce
oxygen levels below an 8 percent level.
2.0.6 A single 9-volt battery contained within the hub assembly powers the oxygen sensor tape
and sensor assembly. Battery drain is extremely low, (approximately 0.75 milli-amperes),
and if the unit is left unattended in the air for more than approximately 5 minutes, power
is automatically shut-off. Low battery warning is provided at the upper left corner of the
LCD when the battery voltage has dropped to level that would, with further operation
cause erroneous oxygen readings.
Page 4

SECTION III
3.0 THEORY OF OPERATION
3.0.1 Drawing S-2615-OCX illustrates the main components of the oxygen sensor. A tape reel
accommodates the gauging tape when fully wound. A tape reel crank is used by the
operator to raise and lower the oxygen sensing head assembly, which is attached to the
reel via the tape. In the stored position, the reel lock prevents the sensor and tape from
unreeling due to weight. Before lowering or raising the tape, the reel lock must be
unlocked by turning locking screw counter-clockwise.
3.0.2 The sensor head assembly contains the oxygen cell, resistors, a platinum temperature
compensation sensor, and a cell holder terminated with a plug in socket connector. A
mating connector plug is part of the gauging tape. This connection is made within a barrel
housing adapter, connecting together the sensor and gauging tape assemblies.
3.0.3 The sensor assembly is connected electrically to the hub electronics by two wires encased
in a plastic jacket which covers and hermetically seals the wires and a center metallic
gauging tape. The metallic gauging tape is used to connect the sensor barrel housing to
hull ground, and provide sensor payout positions. The marking of gauging tape is
provided in a single marking system English or Metric.
3.0.4 The electronic circuits in the hub assembly are comprised of LCD display that provides
percent oxygen level readings, a night light switch; alarm horn and associated red LED
lamp. The above parts and ancillary electronics parts are all assembled on a printed
circuit board. A 9-volt battery power source and audio horn are located within the tape
reel hub assembly directly below the printed circuit board of the modular hub cover
assembly. The night switch in conjunction with the power on-off switch may be used to
give instant push button calibration of the system in air. (See Section 7.0).
3.0.5 When the oxygen sensor is powered in a normal ambient environment, the reading of the
digital will show an oxygen in air content of 20 .9% (±0.2%). This is the normally
accepted value of atmospheric air at sea level. Ordinary air is therefore used in this
system as a standard for calibration of the sensor. However, calibration is only necessary
when replacing the oxygen cell contained within the sensor housing assembly, or when
the battery is replaced. To perform a calibration, it is only necessary for the operator to
first press and hold down the night light push button; and then, without releasing the
night light push button, to press the power on-off button. The display will at first show a
low value, but then change quickly to the correct percent air oxygen reading, namely 20
.9% (±0.2%). Both are then released.
Page 5

3.0.6 It is important not to attempt calibration of the unit when the sensor is in a petroleum
tank, or in other than a normal air environment. It is also desirable to perform the
calibration at room temperature (70 to 80 degrees F). The later condition is not a
requirement, but will in general, results in greater accuracy. Although the sensor is
temperature compensated to provided minimum error for temperature change, sudden
large temperature shifts may cause errors of approx. 0.3% unless the sensor is given time
to recover and temperature stabilize.
3.0.7 In operation and as the oxygen sensor descends into a lower oxygen gaseous
environment, such as that contained in a petroleum tank with inert gas, the output current
from the sensor decreases causing the hub amplifier to linearly experience a lower input
voltage. Digital output to the display is then also decreased. This voltage after
conditioning will be proportionally displayed at the correct lower oxygen percent level
encountered.
3.0.8 Normally, and if left unattended in air after power is applied, timing circuits within the
hub assembly will permit the system to remain on for approx. 5 minutes and then will
automatically turn the power off. However when lowered into a gaseous environment
containing less than 18% oxygen, an internal voltage comparator senses this condition
and prevents the units from turning off until it is once again exposed to a normal air
environment. There after, approximately one minute of additional on power is permitted
before the unit automatically turn-off during a measurement cycle
3.0.9 The alarm circuit within the hub consists of 18% oxygen level comparator described
above, an 8% comparator, a red lamp (LED) and horn as visual and audible alarm
indicators, with other ancillary electronic circuits
3.0.10 When the sensor is powered in a normal air environment, the oxygen level is well above
the 8% level and the red LED lamp on the faceplate will slowly flash. The horn is silent.
If the sensor is now lowered into a tank which contains an oxygen level below 18% but
above 8%, the horn will now emit a pulsating audible tone and the red lamp will then to
flash, at a rapid rate. Below 8% the horn will be silent and the red LED will extinguish.
To Summarize:
Above 18%………………………Lamp slowly Flashes, Horn Silent(Power on indicator)
From 8% to 18%…………………Lamp Rapidly Flashes, Horn Sounds
Below 8%………………………...Lamp off, Horn Silent
3.0.11 As can be seen from the above table, during an above acceptable level of oxygen
contents, both red LED and horn are off. In addition, the action of the red Led is explained as
follows:
Page 6

3.0.12.0 The red LED lamp serves two purposes.
3.0.12.1 The first purpose is to act as a simple power on indicator in normal air during day
and night time use. This feature is important at night since an operator may not
be aware that automatic shut-off has occurred, and attempt a gauging procedure.
3.0.12.2 The second purpose is to provide an additional indication that an unsafe in –tank
oxygen level exists. In the event that an operator has difficulty in hearing the
alarm horn, the rapidly flashing red LED can be clearly seen.
Page 7

SECTION IV
4.0. REQUIRED CONDITION AND RECOMMENDATIONS FOR SAFE USAGE
4.0.1 The attention of the user of this apparatus is drawn to the possible hazards of oxygen
sensing within flammable environments normally found above confined petroleum
liquids, which are also known to be generators of the static electricity, and which are not
covered with an Inert gas blanket.
4.0.2. The following is a general guidance to safe usage, drawn from the advice and experience
of various industry sources.
4.0.3. The specific safety standards or directives of your company are to be strictly adhered to,
with the general guidance given here being regarded as only a supplement to existing and
established operating safety procedures.
4.1 REQUIRED CONDITION
4.1.2 The oxygen sensor frame and reel assembly is to be earthed (grounded) to the liquid tank
containment vessel or tank, before and during introduction of the gauging equipment into
the vessel. The earthing conductor must not be disconnected until the equipment is
completely withdrawn from the vessel being gauged. A coiled grounding cable with a
heavy alligator spring clamp is provided with the equipment. Proper grounding of this
cable is the responsibility of the user.
4.2 RECOMMENDED SAFE USAGE CONDITIONS (Non-Inert gas condition)
4.2.1 The apparatus’ sensor should preferably be entered into a tank or vessel within an earthed
sounding tube or pipe where such devices are provided and are normally used for
temperature and/or other fluid measurements.
4.2.2 For sea going vessels where gauging is normally accomplished through standard cargo
tank ullaging hatch ports or other approved means, the following precautions should be
observed:
4.2.2.1 Sensor entry into tanks or vessel immediately following a tank filling or loading
operation of known static accumulator type petroleum products or other flammable
liquids, should not be attempted until, at least a period of 30 minutes has elapsed
since the cessation of filling.
4.2.2.2 Clean oil distillates are in general, known to be accumulators of static electricity due to
their low conductivity (i.e., less than 1000 picosiemens/meter) and therefore may
required relaxation periods greater than 30 minutes before gauging is attempted. The
foregoing does not consider use of anti-static additives to clean oils, as generally easing
the need for proper precaution, unless actual and specific product testing has shown the
product to have conductivity levels which eliminate the danger of static charging.
4.2.2.3 The presence of an inert gas blanket above products of this type may generally relax the
above precautions. However, such determination is to be made by qualified authorities.
Page 8

4.3.0 FLUID LEVEL (ULLAGE) OF TANK OR OTHER VESSEL WHICH IS TO BE
GAUGED FOR OXYGEN PERCENT LEVEL
4.3.1 Before entering the free space above a liquid level, the level of the fluid contained within
the tank or vessel should be known. If the location of fluid level is not known, it should
be determined by suitable and reliable means.
4.3.2 With the fluid level known, the oxygen sensor can be entered into the tank and unreeled
to the mid-point position of free space above and between the liquid level and tank top.
4.3.3 CAUTION
Under no circumstance should the oxygen sensor be immersed into fluid.
Immersion into fluid will disable use of the sensor unit until a thorough cleaning
and drying of the sensor cell is performed. However, this procedure may not always
return the sensor to an undamaged state, and sensor replacement should be
performed.
Page 9

SECTION V
5.0 OPERATION (REFER TO FIG. 1, page 11)
5.1 FAMILIARIZATION WITH OPERATING CONTROLS AND FEATURES
LOCATED ON THE TAPE REEL HUB BEZEL NAMEPLATE
5.1.1 With the sensor in air, turn on power by momentarily depressing the “ON/OFF”
push button switch. The display should illuminate and should read the percent of oxygen
level of normal air, 20.9 (±0.2). With this figure displayed, the system is in correct
calibration. If the display is not equal to 20.9 ±0.2 after a 30 seconds warm up, see push
button calibration procedure described on the bezel nameplate. Also see Section 7.0 for
additional details. In addition to the above display of 20.9%, the red LED located above
the center of the display will slowly flash indicating power-on, and that oxygen level in
the air is above 18%. The alarm will not sound during this operation.
5.1.2 Looking at the top left hand corner of the LCD display, notice if the symbol “LO BAT
appears. If the symbol is displayed, the battery voltage is low and the battery should be
replaced (see section 6.0). Always replace the battery if “ LO BAT” appears even though
the digital display turns on and reads correctly, since any may lower the battery voltage to
a value, which result in erroneous readings. Again, momentarily depress the power
“ON/OFF” switch. Note that the display turns off. It is good practice to turn power off
when the system is not in use to prolong battery life, although automatic shut-off is a
feature of the system.
5.1.3 Note: With power on in normal air for approximately 5 minutes, the auto shut-off circuits
will turn power off. However, when in use to measure lower oxygen levels (below 18%),
the turn off circuits are disable until the sensor is removed to normal air conditions. To
re-activate after an automatic shut-off, depress the “ON/OFF” switch.
5.1.4 Depress and hold on the night light switch when light display reading becomes
difficult to see due to low ambient light level. The display background will illuminate
and the reading will be discernible.
5.2 OXYGEN LEVEL MEASUREMENTS
Before entering the tank and with sensor in normal air, depress power “ON/OFF” push
button switch. The system comes on after a slight delay and the display should read
should read 20.9 ±0.2%, the normal oxygen level in air at sea level. Note that the red
LED is slowly flashing and the horn is silent indicating that the oxygen, level is above
18% and power is on.
5.2.1 Make sure “ LO BAT” has not appeared at upper left corner of display.
5.2.3 CAUTION
Before entering a tank with the oxygen sensor it is important the ullage level of the
fluid within the tank be known by using a MMC ullage gauging tape or other
gauging device. The oxygen sensor should not be arbitrarily lowered into a tank
Page 10

1
Page 11

or immersed wholly or partially in fluid. Permanent damaged to the oxygen cell
may be result.
5.2.4 After grounding the assembly, (see section 3.0), position tape and sensor over the vapor
control valve or other tank entry port and insert the barrel of the hand gauging tape into
the port. In the case of use with an MMC vapor valve, secure the threaded barrel cap to
the vapor valve, then open the valve. Loosen the reel lock located below the handle on
backside of the tape reel frame. Place the tape wiper in the “OFF” position by rotating the
wiper knob, (located just above the barrel) clockwise, Grasp the knurled tape reel crank
handle and lower the sensor head assembly, which contains the oxygen sensor, into the
tank. If necessary, exert a restraining force to prevent the sensor from descending too
rapidly or free falling. Make sure the sensor is not lowered any further than a distance
equal to one half of the known tank ullage or “free space”. For example, a tank with a
maximum tank depth of fifty feet has a fluid ullage level of 20 feet. The oxygen sensor
should be lowered and locked in place at a 10 feet ullage position. If the fluid level in
terms of ullage distance (from tank top to the fluid level), is not the standard used, but
instead tank innage is used, the proper position to lower the sensor can be as easily
determined as follows.
5.2.5 In the foregoing example, maximum tank was given as 50 feet with a fluid level ullage of
20 feet, in terms of innage then, the innage would be 30 feet. By subtracting this innage
reading from the maximum tank depth, a free space of 20 feet to tank top is determined.
The mid-point of this free space is ten feet from tank top. Since the oxygen tape reads in
terms of ullage, simply lower the sensor and tape to a 10 feet tape ullage level reading.
5.2.6 CAUTION
Under no circumstances should the reel and tape be permitted to unwind without
restraint. Permanently damage may be incurred to the oxygen sensor head if the
head is permitted to free fall to tank fluid level.
5.2.7 As the sensor is lowered into the tank to the ullage level desired, note that the percent
oxygen level on the display lowered in value. At night or in low light conditions depress
the Display Light push button to provide better display visibility.
5.2.8 Allow the sensor to remain at the desired ullage level until the reading on the display
stabilizes. (Approx. 15 to 30 seconds). If the oxygen content at the sensor’s position is
below 8 %, the red LED, at the top center of the hub faceplate, will be extinguish
and the horn will be silent, indicating that, the oxygen content is 8% or less. Confirm this
condition by observing the digital display of the oxygen level is above 8%, the red LED
will be rapidly flashing and the alarm horn will emit a beeping tone.
5.2.9 Raise the sensor to next ullage to be measured, if desired. Repeat step 5.2.8. Continue
raising sensor to all levels at which readings are desired. Lower levels may also be
gauged, however great care should be taken to avoid immersing the sensor in product.
5.2.10 When the measurements are complete, push the “ON/OFF” button to turn off power and
conserve battery power. Rewind the tape into the carriage reel assembly. Wipe the tape
as it is being rewound by placing the wiper switch in the “ON” position, to remove any
dirt or fluid smears.
Page 12

5.2.11 CAUTION:
When the Oxygen sensor is withdrawn from a tank with a low oxygen gaseous
environment and subsequently rewound into its storage barrel, it usually takes at
least 10 minutes for the oxygen in normal air to replace the inert gas captured in
the sensor storage barrel. No attempt at recalibration should be made during this
time period, until the percent oxygen reading at the sensor within its storage
barrel, has recovered to a reading of at least 20%. The above caution is given to
avoid a false calibration, at other than normal air conditions. Also be re-minded,
that if during normal usage, the unit remains idle for more than 5 minutes, the unit
will automatically power off.
If such becomes the case, the units power button must be depressed for continued
operations. If a unit calibration has already been confirmed prior to the beginning
of the current session of tank gauging, there is no need to re-calibrate the unit in-
between a succession of gauging different tanks If however, a prior unit calibration
is in doubt, perform the re-calibration process in accordance with Section 7.0, Page
19, bearing in mind the above caution.
5.2.12 CAUTION
Do not allow the instrument to remain in direct sunlight for long periods of time, or
store in temperatures above 125°F, or in temperatures below freezing. Such
temperature may damage the liquid crystal display and/or the oxygen cell. High
temperature storage will shorten battery and oxygen cell life, while freezing
temperatures may disable both battery and cell. Short-term exposure of the liquid
crystal displays to either high or very low temperature is permissible. Longer
exposure to these temperature extremes will cause temporary blackening of the
display at the high temperature end, and loss of activity at low temperatures. In
most cases however, these effects are reversible when the display regains normal
operating temperature.
5.3 OXYGEN SENSOR CELL LIFE
The oxygen sensor cell used is an active type, chosen to provide maximum sensitivity in
a small package size. The cell has a life expectancy of at least six months and during its
life the output in normal air is very constant. Near end of life the cells output drops
rapidly until infield calibration is no longer possible. See section 7.0 for calibration
procedure.
Page 13
Actual Sensor cell life is directly related to frequency of usage.
however,usable life should be a mininum of time period a stated above.

SECTION VI
6.0 CARE AND MAINTENANCE
6.0.1 Proper care and maintenance should be practiced to maintain long trouble-free
and accurate service and to maximize battery life. As follows:
6.0.2 When not in use, make sure power is off as evidenced by display being
extinguished.
6.0.3 Stored sensor head assembly in fully wound position and store in a dry location.
Do not allow the instrument to remain for long periods in direct sunlight, or store
in temperature above 125°F, or in Temperature below freezing. Such temperature
may damage the liquid crystal.
6.0.4 Make sure before lowering the sensor into a tank, that the tank product level is
known, so that the sensor is not immersed in the product. Before lowering the
oxygen sensor, always obtain an accurate ullage reading by using an MMC
ullaging tape or similar device. (See Section 5.0).
6.0.5 Each time the sensor is raised from the tank, place the spring loaded tape wiper
switch in the “ON” position, to clean gauging tape of product smears.
6.0.6 Lubricate drum shaft and bearing with light machine oil to keep it free turning.
6.0.7 Never permit tape and sensor head to unwind freely (control speed of descent by
use of a retraining force on tape reel crank).
6.1 Battery Replacement (In Safe Area Only!)
6.1.1 The battery should be replaced whenever the “LO BAT” symbol appears at the
upper left corner of the display. If the sensor is used to obtain oxygen level
readings when the battery is low, errors may result.
6.1.2 Before replacing battery, turn power off by depressing “ON/OFF” switch. Always
replace battery in gas free atmosphere. To replace battery, remove the six machine
screw from the outside retaining ring on the hub cover. Put the retaining ring aside. Lift
the bezel faceplates cover and attached P.C. Board. The battery is retained within the reel
hub by a spring clip battery holder under the modular faceplate assembly. Remove the
battery from the battery cap connector. Replace the battery only with a fresh battery of
the type listed on the approval label. Make sure the battery is inserted with correct
polarity. Positive (+) of battery to positive (red) side of battery cap. Take care to align
the viton cover gasket, faceplate cover, retaining ring and machine screw fasteners, when
reassembling to tape reel hub.
6.1.3 IMPORTANT
After battery replace it is necessary to re-calibrate the oxygen sensor using the simple
push button procedure given in Section 7.0
Page 14

6.2 OXYGEN CELL REPLACEMENT
6.2.1 The oxygen cell, located within the sensor barrel, has a life expectancy of
at least one year. The cell is similar to battery except unlike a battery, it produces a
current which is directly proportional to level of oxygen it senses in a gaseous
environment. In normal air, the current generated by a live cell is approximately 0.8 mili-
amperes, which produces a conditioned reading on the display of 20.9% ±0.2. This
current output is very constant in normal air throughout the cell’s life. At end life the
output drops quickly and reading in the air will suddenly drop below 20.9. When the push
button calibration procedure given in Section 7.0 can no longer be performed, the cell
must be replaced.
6.2.2 To replace the cell, unscrew the retaining cap and screen at the lower extremity of the
sensor barrel housing assembly. The cell housing can now be extracted by holding it in a
vertical position. Unplug cell from its mating connector. Replace with fresh cell, making
sure to seat connector and mating plug securely before re-assembly into barrel housing.
Re-insert cell into the barrel, while slightly rotating the cell assembly. Replace screen and
retaining cap. Then follow procedure given for cell calibration Section 7.0.
6.3 Gauging Tape Replacement
6.3.1 In case of damage, the gauging tape may be replace by following the procedure below:
6.3.2 Remove the oxygen sensor assembly by unplugging it from the tape end.
6.3.3 Remove storage barrel by loosening cap nuts on the side of the tape wiper housing.
6.3.4 Remove the round vapor seal assembly on the top of the tape wipe housing by backing
off the Allen set screw which holds it in place.
6.3.5 Now place the tape wiper in the off position, and remove the tape wiper housing by
unfastening the (4) machine screws in the front of mounting plate. Pull the wiper
assembly out.
6.3.6 Completely unreel the old tape assembly.
6.3.7 Remove the six machines screws from the hub cover and lay it to the side.
6.3.8 Remove the battery from the battery holder and unplug the battery cap.
6.3.9 Note that the end of the metallic tape inside the hub is grounded by a machine screw and
washer. The tefzel tape cover at this point has been trimmed away to permit good ground
contact. Also note that the tape’s outer conductors are spliced to two of the wires that
originated at circuit board. (Notice the color of theses wires so that when re-assembling,
the correct wire will be connected to the top and bottom tape conductor.
6.3.10 Detach the tape at the hub removing the grounding machine screw and unsoldering the
spliced connections between gauging tape and PCB connection wires
6.3.11 Note on the tape reel that the tape scale is facing.
Page 15

6.3.12 Pull the tape away to the hub by reverting hub reel through the tape wiper housing, and
out through the slot in the side of the reel hub.
6.3.13 Attach a new tape to hub by reversing the above the procedure making sure that the tape
numerals face in the same direction as the previous tape numerals faced.
6.3.14 Make sure that the gauging tape to P.C. board wire splices are well insulated (used shrink
tubing) and the grounding machine screw and washer are fastened tightly to provide a
good metallic ground between center ground tape conductor and the reel hub.
6.3.15 Use a silicone rubber sealant to re-seal area around slotted tape entrance to reel hub. Re-
wind tape onto reel, replace round vapor seal assembly, and re-install wiper assembly.
6.3.16 Replace battery, battery cap and hub cover, after allowing silicone sealant at least two
hours curing time.
6.3.17 Re-connect oxygen sensor assembly to tape barrel housing end.
6.3.18 Since the battery is temporarily removed during the tape replacement procedure, re-
calibration is required. Follow method of calibration procedure in section 7.0.
Page 16

SECTION VII
7.0 CALIBRATION PROCEDURE
7.0.1 The Oxygen Sensor and associated electronic have been accurately calibrated at factory.
The oxygen cell used and the electronic circuits are extremely stable and in general
require calibration only when the 9-volt battery or the oxygen cell is replaced.
7.0.2 A simple way to perform push button calibration has been incorporated in the design
which permits the operator to quickly bring the system into calibration using the oxygen
content of normal air (20.9%),±0.2% as standard.
7.1 METHOD OF CALIBRATION
7.1.1 Calibration should be performed in a normal air environment and if possible at room
temperature (68 to 78°F).
7.1.2 Turn power on by depressing the power “ON/OFF” push button. Wait approximately 10
seconds for display to stabilize. Display should read 20.9 ±0.2. If proper reading is
obtained, there is no need to calibrate. If an incorrect reading is obtained, look at the
upper left corner of the display. If “LO BAT” appears, indicating a low battery
condition,
replace the 9-volt battery contained in the hub following the procedure given in Section
6.0.
7.1.1.2 Note: When a 9-volt battery is replaced or temporarily removed, the memory
circuits within the hub may lose their charge and cause the display to produce an
abnormally low reading. If all the charge has leaked off, the reading will be zero.
7.1.1.3 To perform the simple push button calibration; depress the “Display Light” push button
Labeled “1 and while holding it in; depress the “Power ON/OFF” push button labeled
“2”. Now release both. The display will jump to a low-value and quickly climb to
correct reading of 20.9 ±0.2. The order of button depression must followed in the order
described.
7.1.1.4 No further adjustment is required.
7.1.1.5 Note:If the oxygen cell has reached end life, calibration will not be possible. A lower
display reading of random value will be obtained each time calibration is
attempted. Cell replacement must be performed to re-establish normal usage. See
cell replacement details in this manual.
Page 17
Other manuals for D-2615-11
1
Table of contents
Other MMC Measuring Instrument manuals
Popular Measuring Instrument manuals by other brands

NOVOTEST
NOVOTEST NVS P1 operating manual

Anritsu
Anritsu MW9076 Series Operation manual

Bosch
Bosch UniversalDistance 30 Original instructions

SIGLENT TECHNOLOGIES
SIGLENT TECHNOLOGIES SSA5000 Series Service manual

Ecom
Ecom DP Operation manual

DMP Electronics
DMP Electronics DUALCOM Series Programming and installation guide